If you’ve been on the hunt for a dessert that low-key steals the show without making you sweat over a hot oven, these Strawberry Cheesecake Bars are about to be your new obsession.
It’s the perfect vibe for a summer BBQ, a Galentine’s hangout, or honestly, just a random Tuesday when you’re in your “treat yourself” era.
The way that tang from the cream cheese cuts through the sweet, sun-ripened berries? It totally slaps.
So, clear out some space in your freezer and grab a punnet of the best berries you can find, because you need these in your life immediately.
Check out the recipe below and let’s get to mixing. Go ahead and give ‘em a whirl!
Why You’ll Love This Recipe
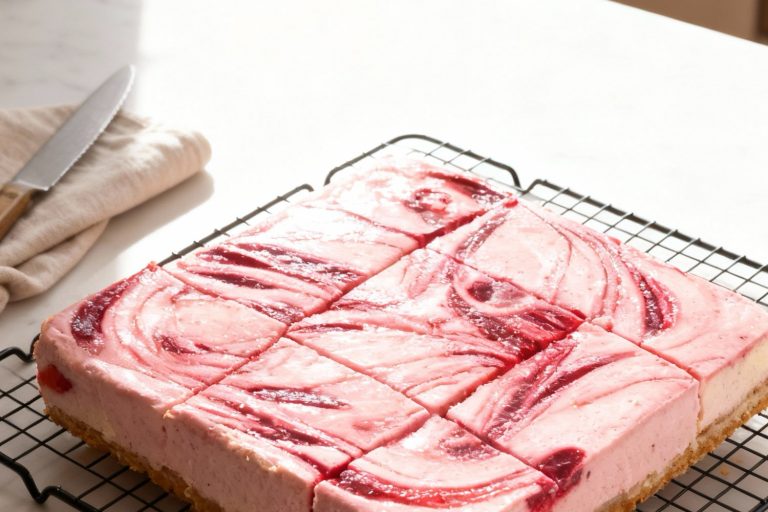
Strawberry cheesecake bars are rich, creamy, and visually stunning with a buttery crust and swirls of sweet strawberries.
They’re perfect for slicing into neat portions for gatherings or gifting. The combination of smooth cheesecake and juicy strawberries provides an indulgent flavor experience while being approachable for beginner bakers.
Key Reasons to Love Them:
- Smooth, creamy cheesecake paired with sweet strawberries.
- Buttery crust provides balance and texture contrast.
- Easy to slice into bars for sharing or gifting.
- Beginner-friendly steps make it approachable for all skill levels.
- Visually appealing with marbled fruit swirls.
🔥 These strawberry cheesecake bars are perfect if you also love strawberry cheesecake, bite-sized strawberry cheesecake truffles, or soft strawberry cheesecake cookies.
How to Get Your Strawberry Cheesecake Bars Just Right
No-bake desserts are a lifesaver, but because they don’t have the structure-building power of an oven, technique is everything.
These bars rely on the perfect balance of temperature and compression to keep them from falling apart.
1. The “Room Temperature” Law
This is the single most important rule for any cheesecake recipe.
Using cold cream cheese straight from the fridge. This results in “cheesecake freckles”—tiny, unmixed lumps of fat that ruin the silky texture.
Leave your cream cheese on the counter for at least 2 hours before mixing. If it’s soft enough to spread like room-temperature butter, it will incorporate the strawberry juice effortlessly.
2. Master the “Tight Pack” Crust
Since this crust isn’t baked to bind the butter and crumbs together, it needs physical force to stay intact.
When you transfer the crumbs to the pan, don’t just spread them out. Use the flat bottom of a heavy glass or a flat-bottomed measuring cup. Press down with significant pressure until the surface looks polished and solid.
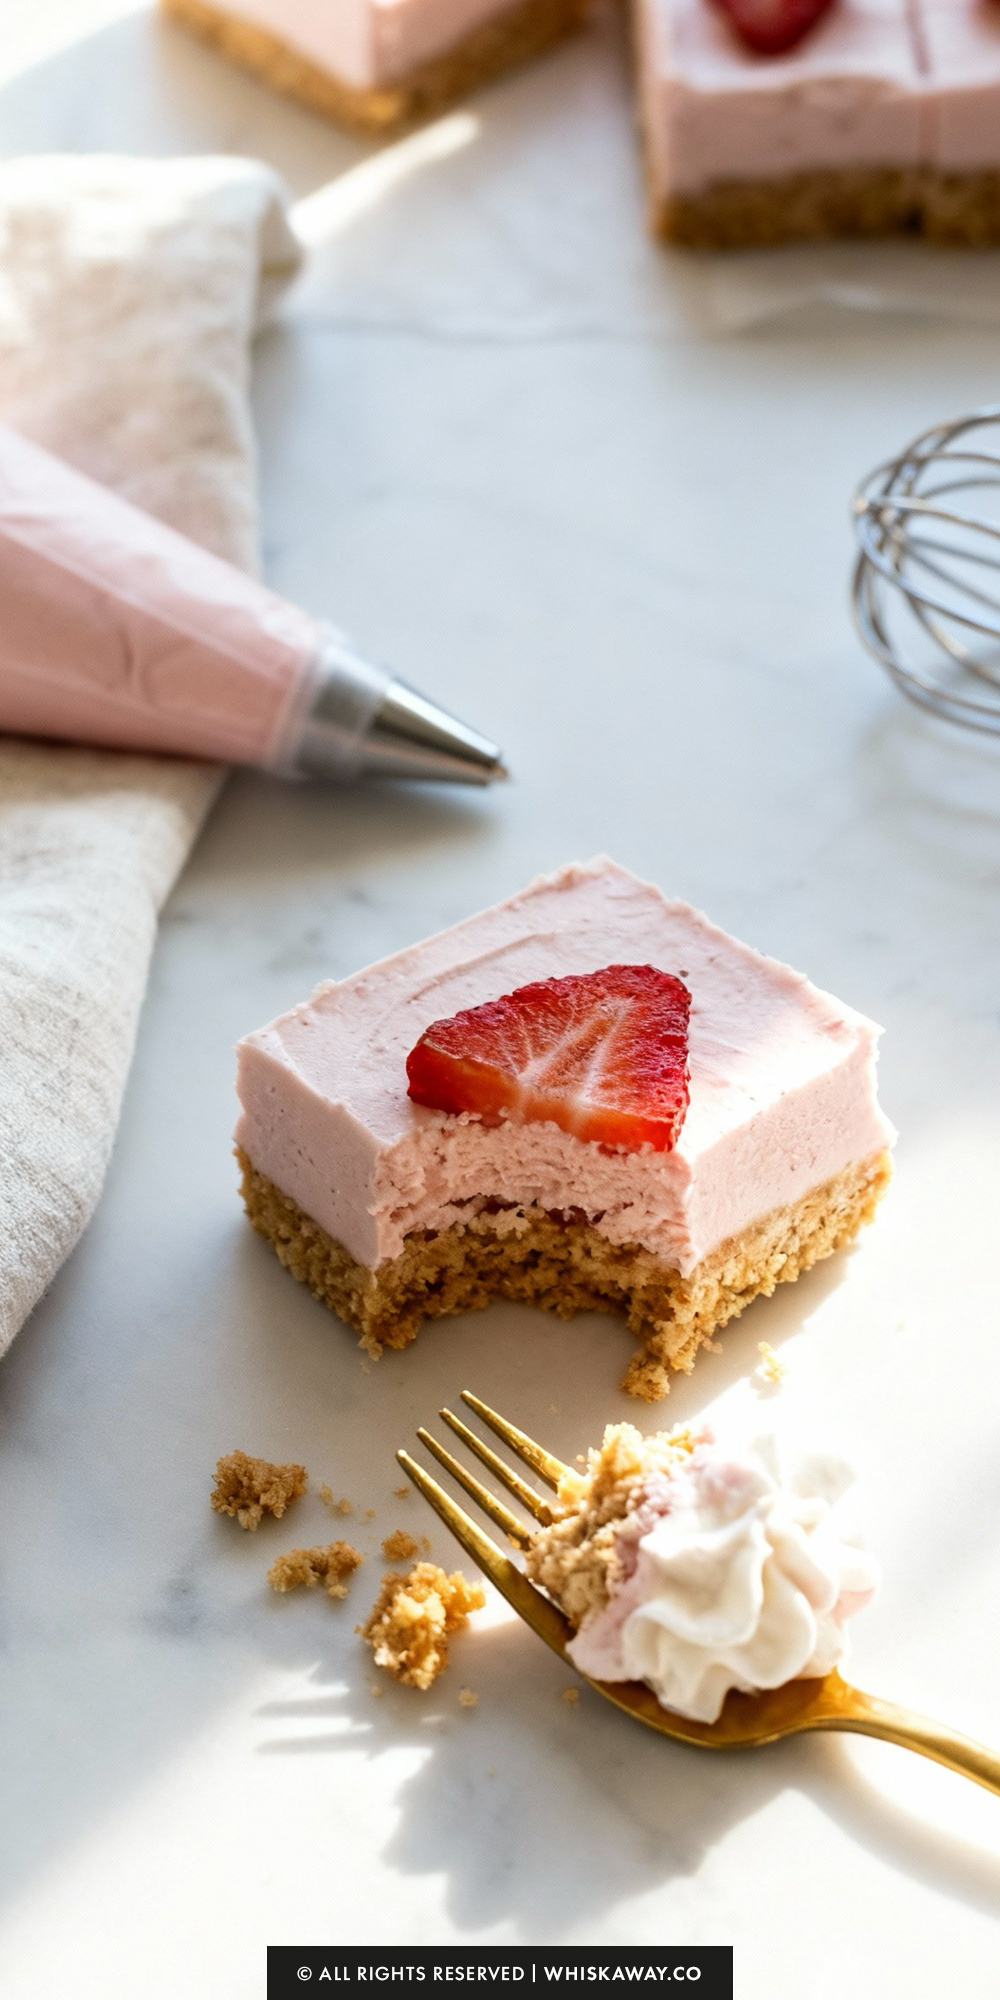
A crust that snaps cleanly rather than crumbling into a mess when you take a bite.
3. Why We Sieve the Berries
It might be tempting to just throw the mashed strawberries into the filling, but following the “juice only” instruction is vital.
Strawberry seeds and pulp contain a lot of fiber and varying levels of water. Adding the whole mash can make the bars “grainy” or prevent them from setting firmly.
By using only the concentrated juice, you get a punch of natural flavor and a beautiful pastel pink color without compromising the structural integrity of the cream cheese.
4. The “Hot Knife” Slicing Trick
To get those perfectly sharp, bakery-style edges on your squares, don’t just press the knife down.
Dip a long, sharp knife into a tall glass of very hot water, wipe it dry with a clean towel, and make one clean cut. Repeat the dipping and wiping for every single slice.
Perfectly clean 2-inch squares with no smearing or sticking.
5. Timing and Patience
Trying to cut the bars after only an hour.
While 2 hours is the minimum for freezing, these bars actually behave better if they stay in the freezer overnight. This allows the flavors to meld and ensures the center is just as firm as the edges.
6. Serving Temperature
Because these are high-fat, no-bake bars, they will soften quickly at room temperature. For the best eating experience, take them out of the freezer 5–10 minutes before serving.
They should be cold and firm, but soft enough for a fork to glide through.
Easy Baking Tips That Have Worked for Me
Swirling creamy cheesecake over a buttery crust is a hands-on experience that feels indulgent and elegant.
Baking causes the cheesecake to set gently while keeping it soft, and the strawberries create bright, juicy pockets throughout.
Cutting the bars reveals a marbled effect that is visually striking and enticing. The combination of smooth cheesecake, fruity sweetness, and crisp crust is delightful with every bite.
This dessert feels sophisticated but remains approachable for beginners to master
Variation Tips
The beauty of this no-bake base is its versatility. Once you’ve mastered the technique of extracting fruit juice for flavor, you can customize these bars to suit any occasion or dietary need.
1. The “Biscoff” or “Oreo” Crust Swap
Replace the 10 graham cracker sheets with an equal volume of crushed Biscoff (speculoos) cookies or Oreo cookies (remove the cream first).
Biscoff adds a warm, cinnamon-spice note that pairs beautifully with strawberries, while an Oreo crust creates a “strawberry milkshake” flavor profile.
2. Triple Berry Medley
Instead of 8 strawberries, use a mix of raspberries, blueberries, and blackberries.
Follow the same microwave and mesh strainer method. The combined juices will create a deep purple, multi-dimensional berry flavor.
3. Strawberry Lemonade Bars
Stir 1 tablespoon of fresh lemon zest into the cream cheese mixture and replace the vanilla extract with 1 tablespoon of fresh lemon juice.
The acidity of the lemon cuts through the richness of the cream cheese, making the bars taste incredibly refreshing.
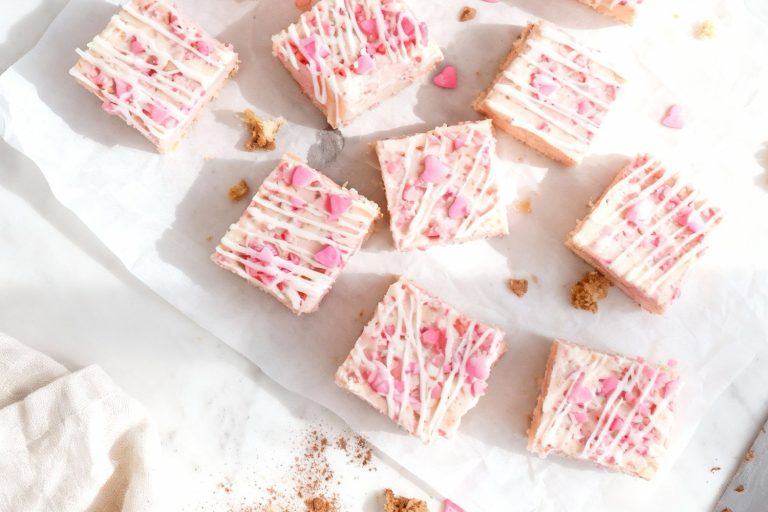
4. Chocolate Drizzled Hearts
Once the bars are sliced and frozen, drizzle them with melted white chocolate or dark chocolate.
Pro Tip: If you’re feeling extra festive, use a small heart-shaped cookie cutter to punch shapes out of the frozen slab instead of cutting them into squares.
5. Balsamic & Strawberry (Grown-Up Version)
The Trick: Cream Cheese.
Balsamic vinegar is a natural flavor enhancer for strawberries, deepening their sweetness and adding a sophisticated tang.
6. Dietary Adaptations
Gluten-Free: Simply use gluten-free graham crackers. Since this is a no-bake recipe, the texture remains virtually identical.
Keto/Low Carb: Swap the graham crackers for a mix of almond flour and crushed pecans (pre-toast them for better flavor). Replace the powdered sugar with a powdered erythritol or monk fruit sweetener.
Vegan: Use vegan cream cheese (brands like Violife or Kite Hill work well) and vegan butter for the crust. Ensure your powdered sugar is bone-char free.
Save for Later to Your Pinterest Board
How to Properly Store Your Strawberry Cheesecake Bars
Because these Strawberry Cheesecake Bars are a no-bake dessert featuring high-fat cream cheese and fresh fruit juice, they are sensitive to temperature.
To keep the crust crunchy and the filling silky, you’ll need to avoid the “warm-up.”
Here is the best way to handle your leftovers.
1. Refrigeration (Best for Daily Snacking)
If you plan on polishing these off within a few days, the fridge is your best friend.
Duration: Up to 5 days.
Store the bars in an airtight container. If you have to stack them, place a piece of parchment paper between the layers.
Without that barrier, the creamy tops will stick to the bottoms of the bars above them, making a mess when you try to pull them apart.
Keep them in the fridge until the very moment you are ready to eat. They soften quickly at room temperature.
2. Freezing (Best for Prep & Longevity)
These bars actually thrive in the freezer. In fact, that’s where they “set” during the recipe!
Duration: Up to 1 month.
For best results, “flash freeze” the individual squares on a tray for an hour until the filling is rock-hard. Then, wrap each bar tightly in plastic wrap and place them all in a freezer-safe gallon bag.
Wrapping them individually prevents freezer burn and allows you to grab just one bar at a time whenever the craving hits.
3. Serving and Reheating
From the Fridge: Serve immediately.
From the Freezer: If you prefer a softer bite, let the frozen bar sit on a plate for 10–15 minutes before eating. This gives it a “semi-freddo” texture—firm but creamy.
Note: Never use a microwave or oven to “soften” these. You will end up with a puddle of strawberry soup!
4. Storage Mistakes to Avoid
The “Fridge Smell” Trap: Cream cheese is a fat, and fat absorbs odors like a sponge. If you store these uncovered next to leftover onions or garlicky pasta, your strawberry bars will take on those flavors. Always use a sealed, airtight container.
Leaving Them Out: Never leave these on the counter for more than 2 hours. Not only is it a food safety risk with the dairy, but the structure will collapse, leaving the graham cracker crust soggy and the topping limp.
Garnishing Too Early: If you are storing these for a few days, wait to add the fresh strawberry garnish until right before serving. Fresh slices release moisture over time, which can create “weeping” on top of your beautiful cheesecake.
FAQs
Can I use frozen strawberries instead of fresh ones?
Yes, you definitely can! Just make sure to thaw them completely first. Once thawed, microwave and mash them exactly as you would with fresh berries. Be aware that frozen berries sometimes release more water, so ensure you are only measuring out the 3 to 4 tablespoons of juice requested to keep the filling from becoming too soft.
Why do I have to discard the strawberry pulp?
It might feel wasteful, but this is the secret to that “professional” texture. The pulp contains seeds and fibrous bits that can make the cheesecake feel grainy or “lumpy” rather than silky smooth. By using just the juice, you get all the concentrated flavor and natural pink color without compromising the velvety mouthfeel of the cream cheese.
Can I use low-fat or whipped cream cheese?
I wouldn’t recommend it. For no-bake cheesecake bars, you need the high fat content of full-fat brick cream cheese to provide structure. Low-fat versions have a higher water content and won’t firm up properly in the freezer, leading to bars that turn into a puddle shortly after you take them out. Also, avoid “tub” or whipped cream cheese, as they contain too much air.
My bars are too soft to cut; what went wrong?
The most likely culprit is either the temperature of the cream cheese during mixing or the chilling time. Ensure you aren’t over-mixing the juice into the cream cheese, which can break down the structure. If they are soft, simply leave them in the freezer for another hour or two. For the cleanest cuts, the bars should be completely frozen.
How do I prevent the graham cracker crust from falling apart?
The secret is in the compression. Since we aren’t baking the crust to “set” the butter, you have to pack those crumbs down as tightly as possible. Use the bottom of a heavy glass or a measuring cup to press until the surface looks flat and solid. Also, don’t skip the 15-minute freeze for the crust before adding the filling asthis helps the butter solidify and act as a glue.
Strawberry Cheesecake Bars
16
bars20
minutes2
hours15
minutesStrawberry cheesecake bars with a buttery crust and creamy filling make an easy, sliceable dessert everyone loves.
Ingredients
- For the Graham Cracker Crust
10 graham cracker sheets, finely crushed
1/2 cup unsalted butter (1 stick)
1/4 cup powdered sugar
1/8 teaspoon kosher salt
- For the Strawberry Cheesecake
16 ounces cream cheese, softened
1 cup powdered sugar
8 medium-sized strawberries
1 teaspoon vanilla extract
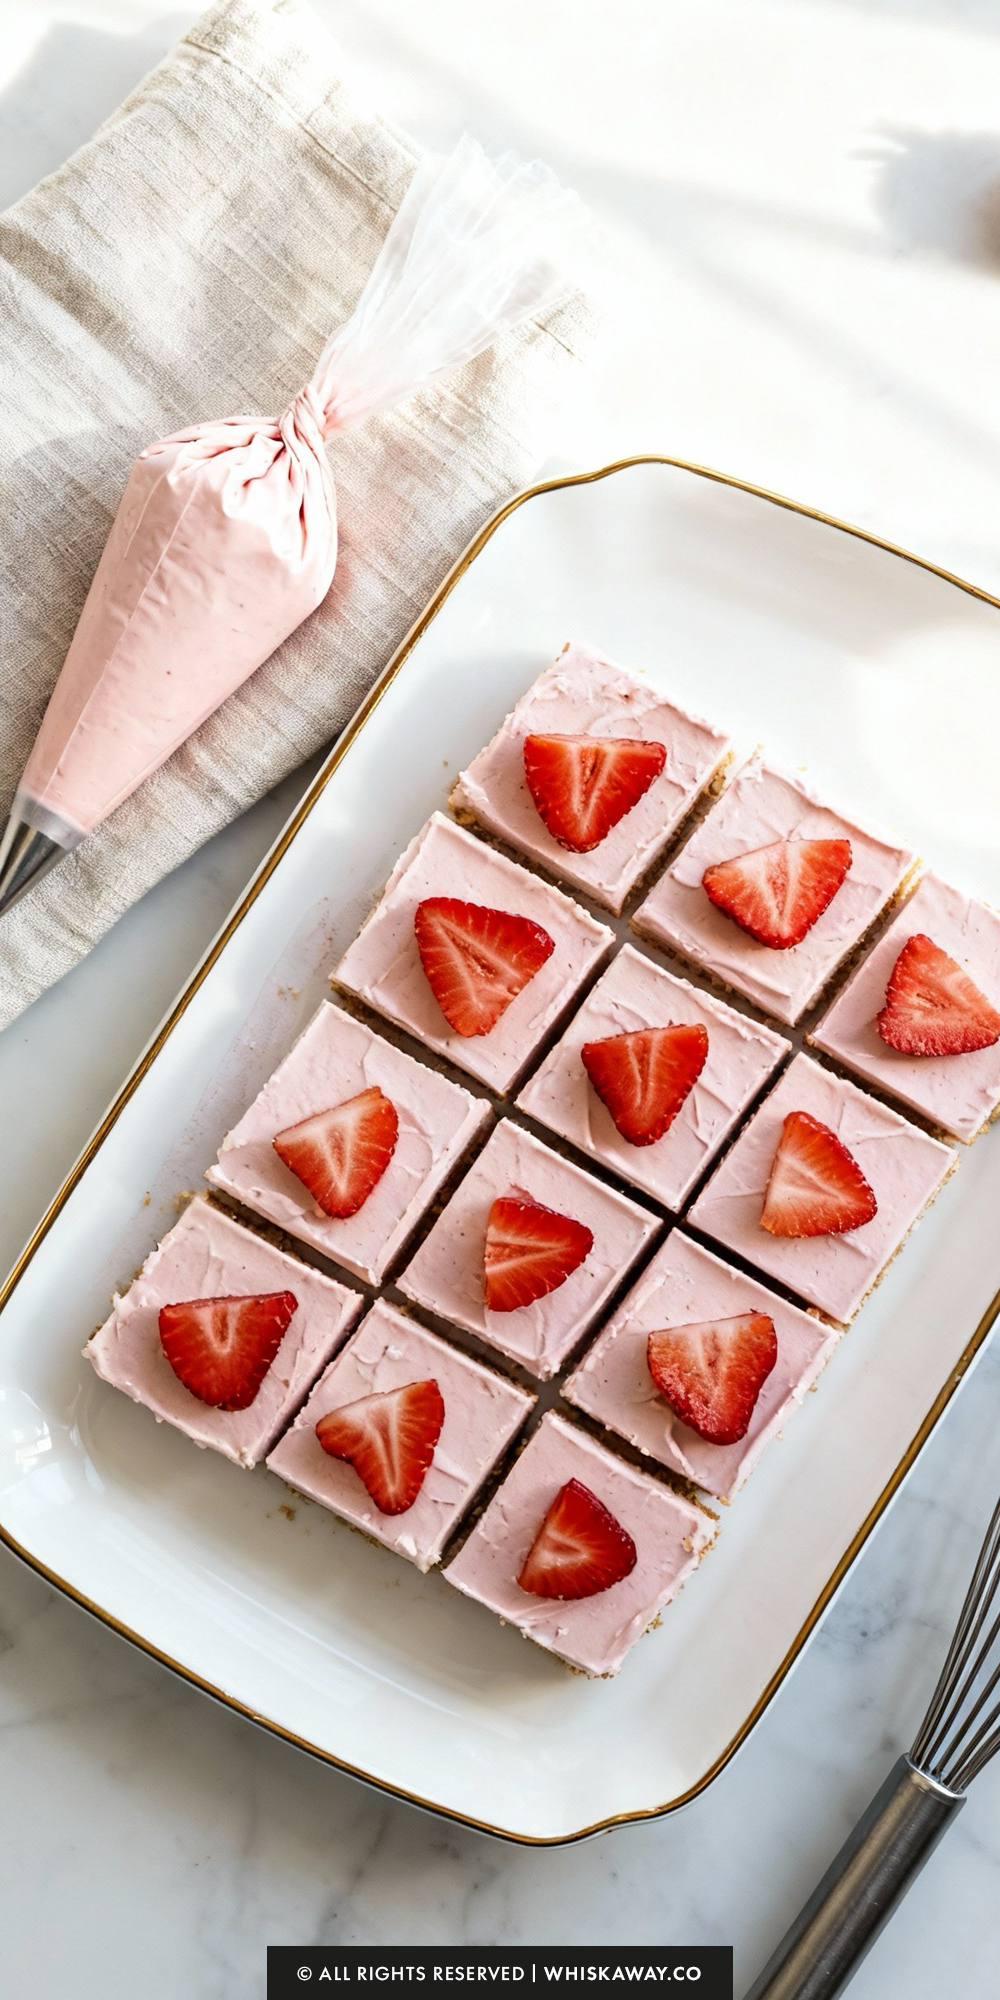
Additional strawberries for garnish (optional)
Directions
- Line a 9x9-inch square baking dish with parchment paper, leaving a little overhang on the sides for easy lifting later. Give it a light coating of nonstick cooking spray and set it aside.
- In a large mixing bowl, stir together your finely crushed graham crackers, 1/4 cup of powdered sugar, and a pinch of salt. Pour in the melted butter and mix until the crumbs are evenly moistened and look like wet sand.
- Dump the buttery crumbs into your prepared pan. Use the flat bottom of a glass or a measuring cup to pack the mixture down firmly into a solid, even layer. Pop the pan into the freezer for 15 minutes to let the crust set.
- Quarter your strawberries and place them in a microwave-safe bowl. Heat them for roughly 30 seconds until they are softened and warm. Use a fork to thoroughly mash them into a pulp.
- Set a fine-mesh sieve over a clean bowl. Pour the mashed berries into the sieve and use the back of a spoon or a spatula to press them firmly. You want to extract all that vibrant juice into the bowl while leaving the seeds and pulp behind. You should end up with 3 to 4 tablespoons of concentrated juice.
- Using either a stand mixer or a hand mixer, beat the softened cream cheese, 1 cup of powdered sugar, and the vanilla extract on medium speed. Continue until the mixture is completely silky and free of lumps.
- Pour in your fresh strawberry juice and mix just until the color is uniform and the juice is fully incorporated.
- Take your chilled crust out of the freezer and spread the strawberry cream cheese mixture over the top in a smooth, even layer.
- Place the pan back into the freezer for at least two hours to allow the bars to firm up completely.
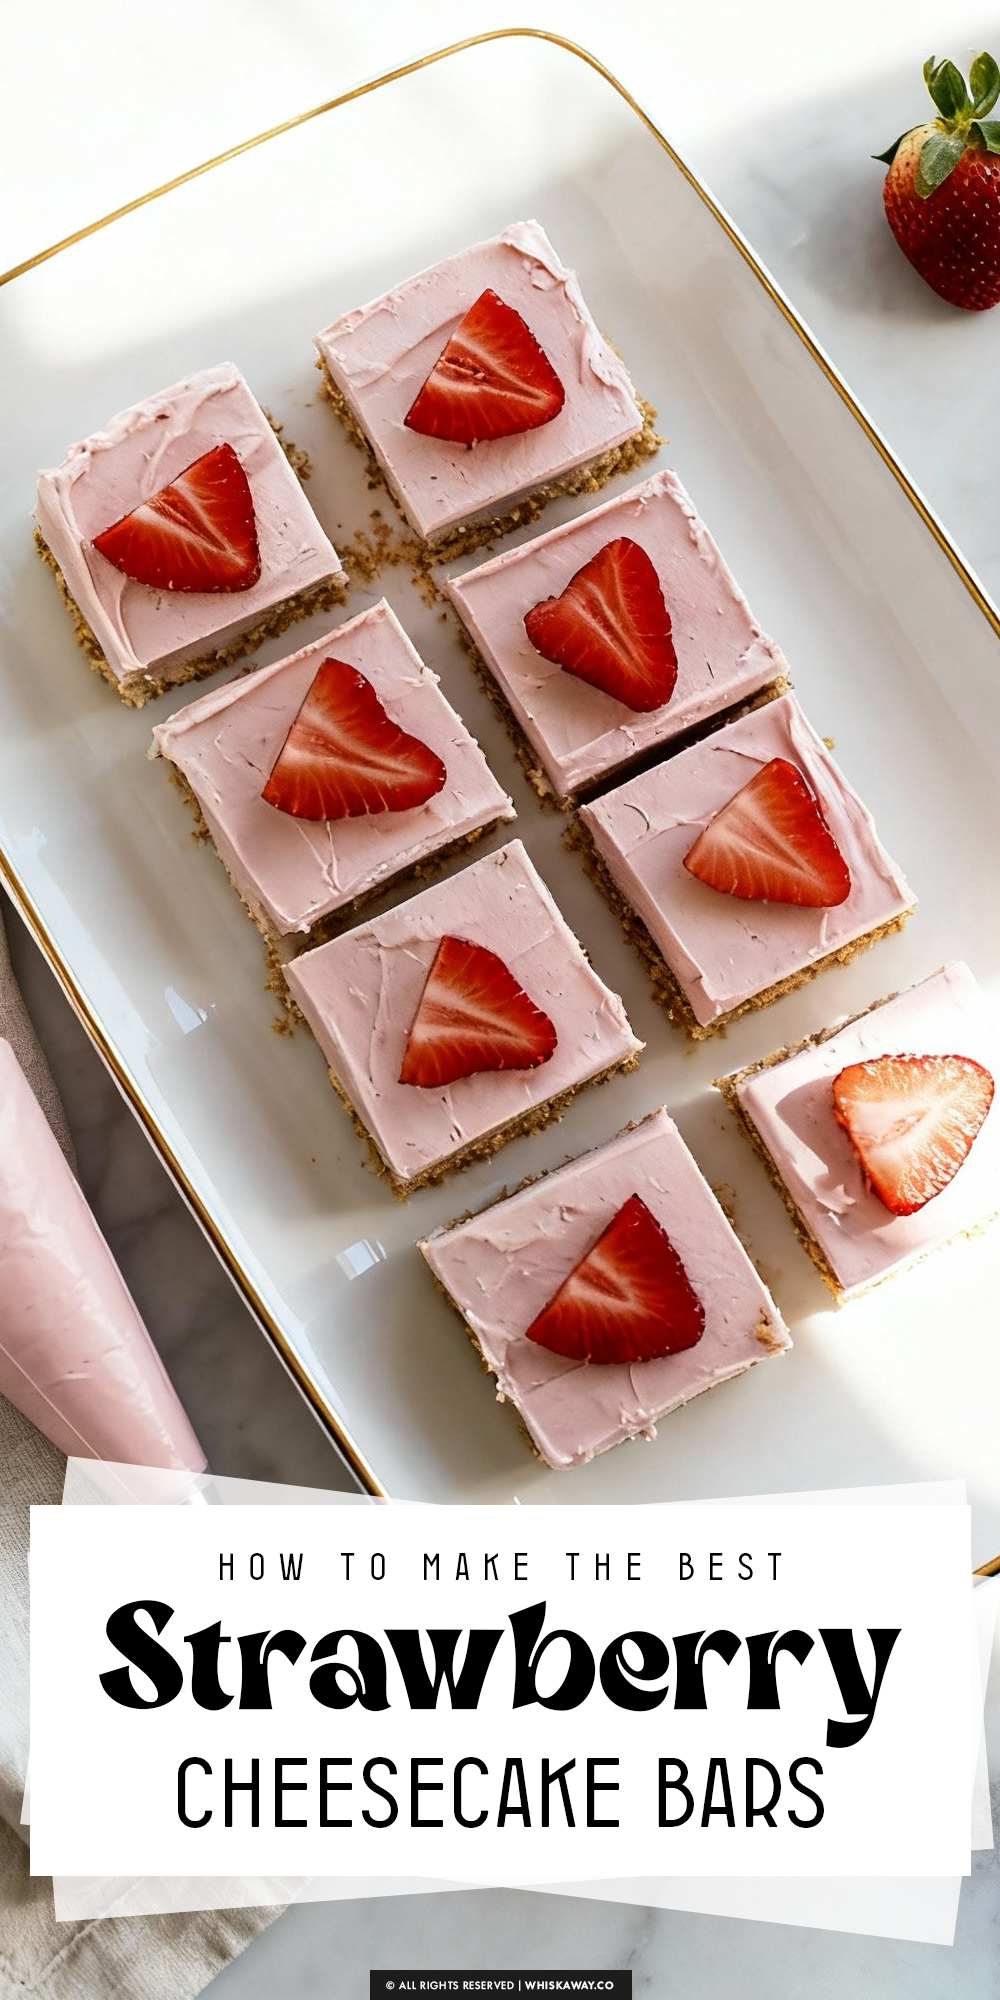
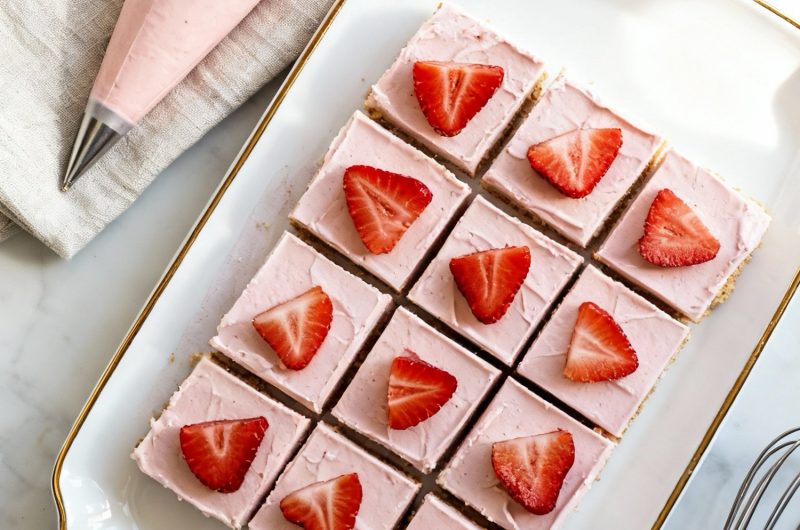
- Once frozen solid, lift the cheesecake out of the pan using the parchment paper edges. Place it on a cutting board and, with a sharp knife, slice it into 2-inch squares.
- If you want that extra "wow" factor, top each square with a fresh strawberry slice. These bars are at their best when served chilled right from the fridge or freezer!