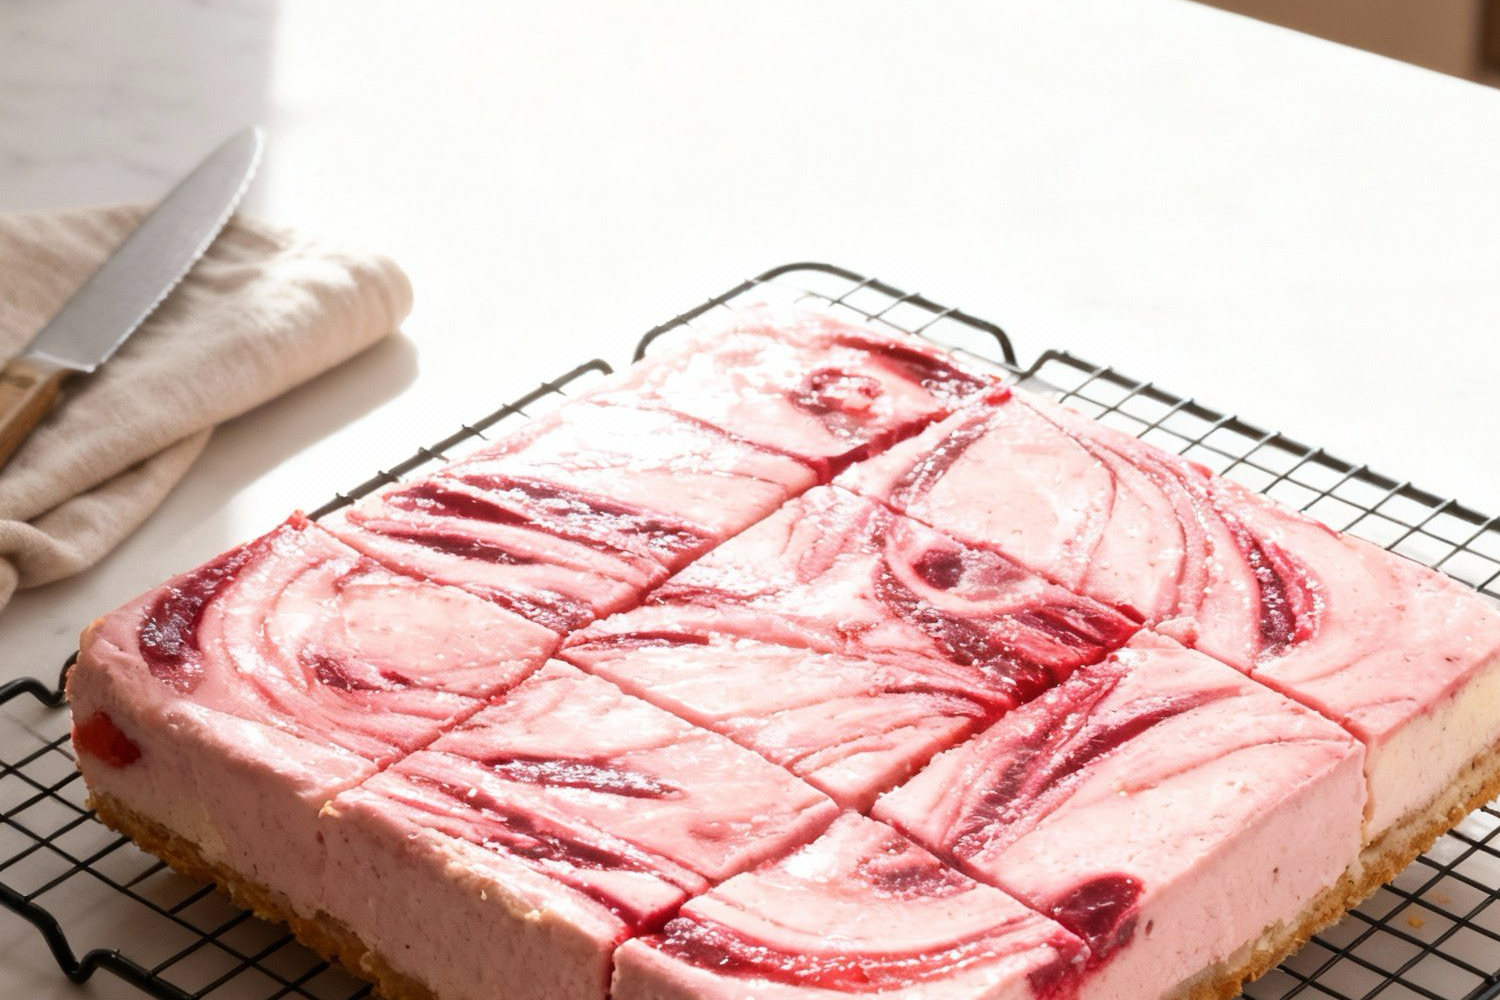
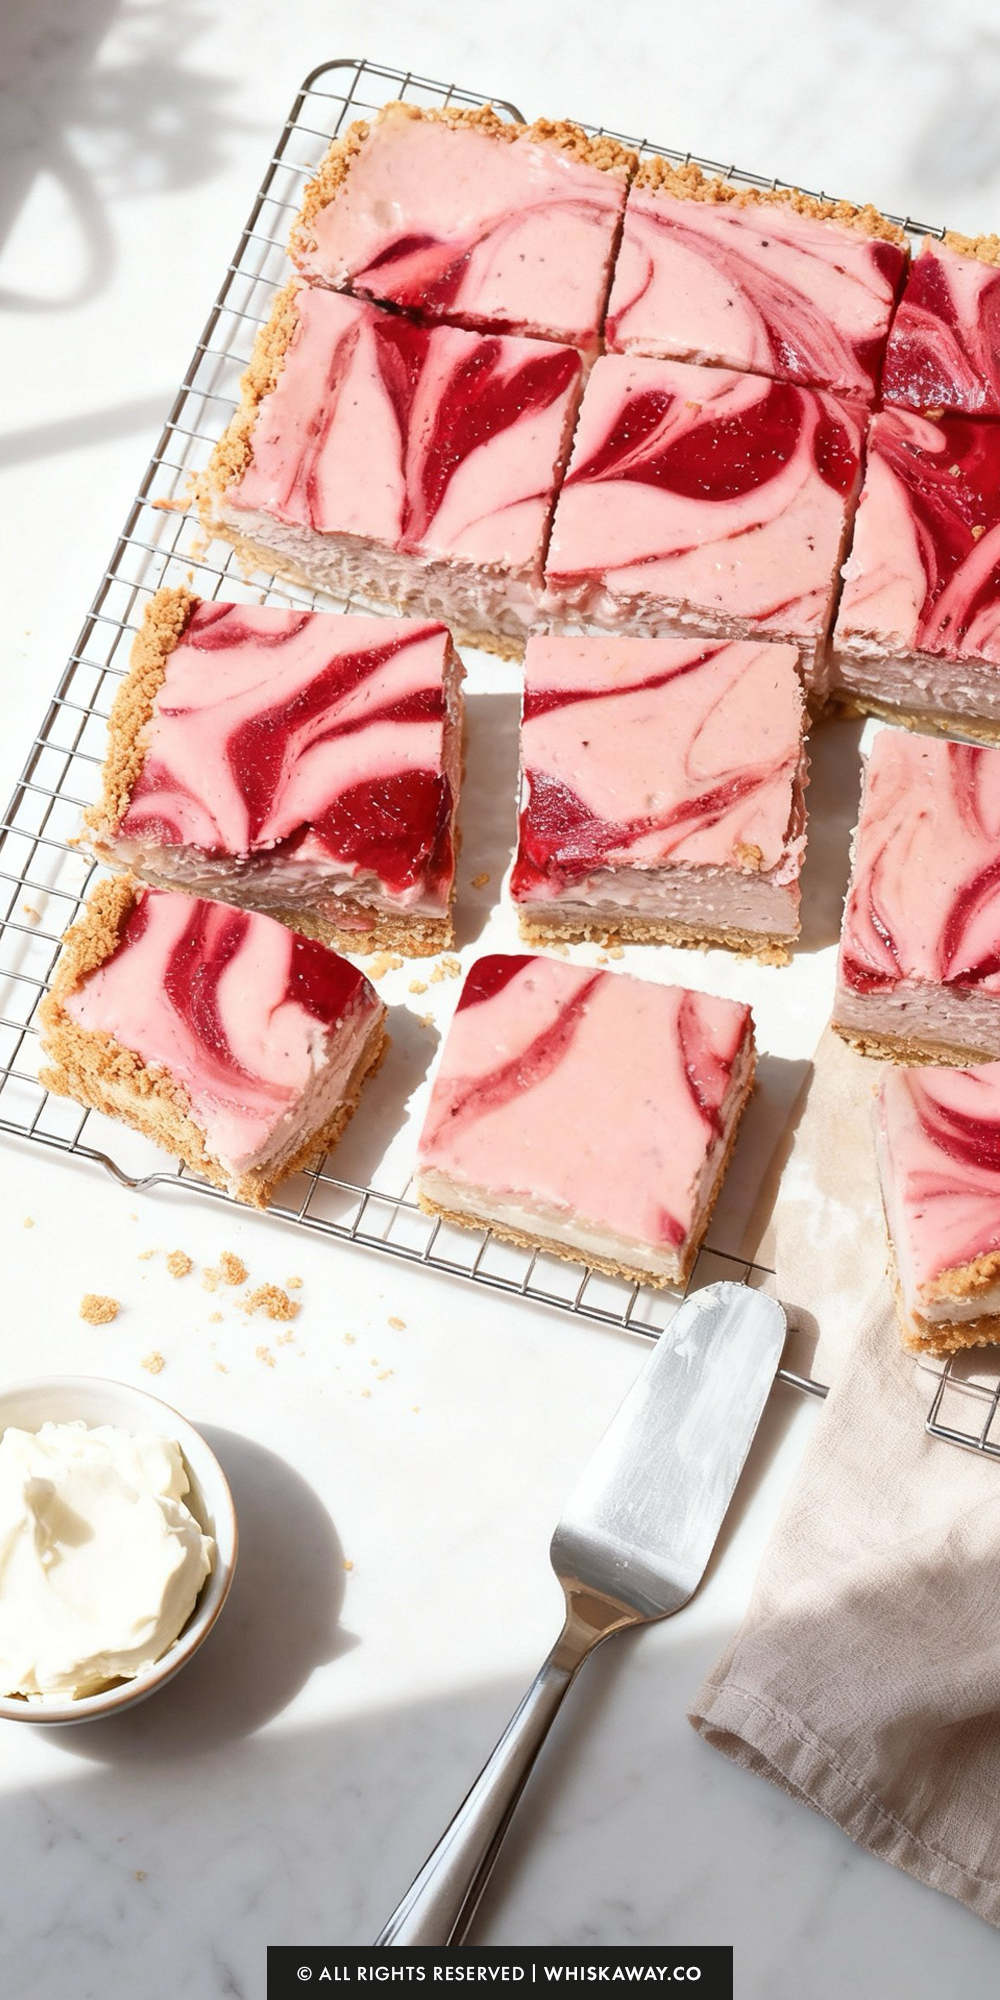
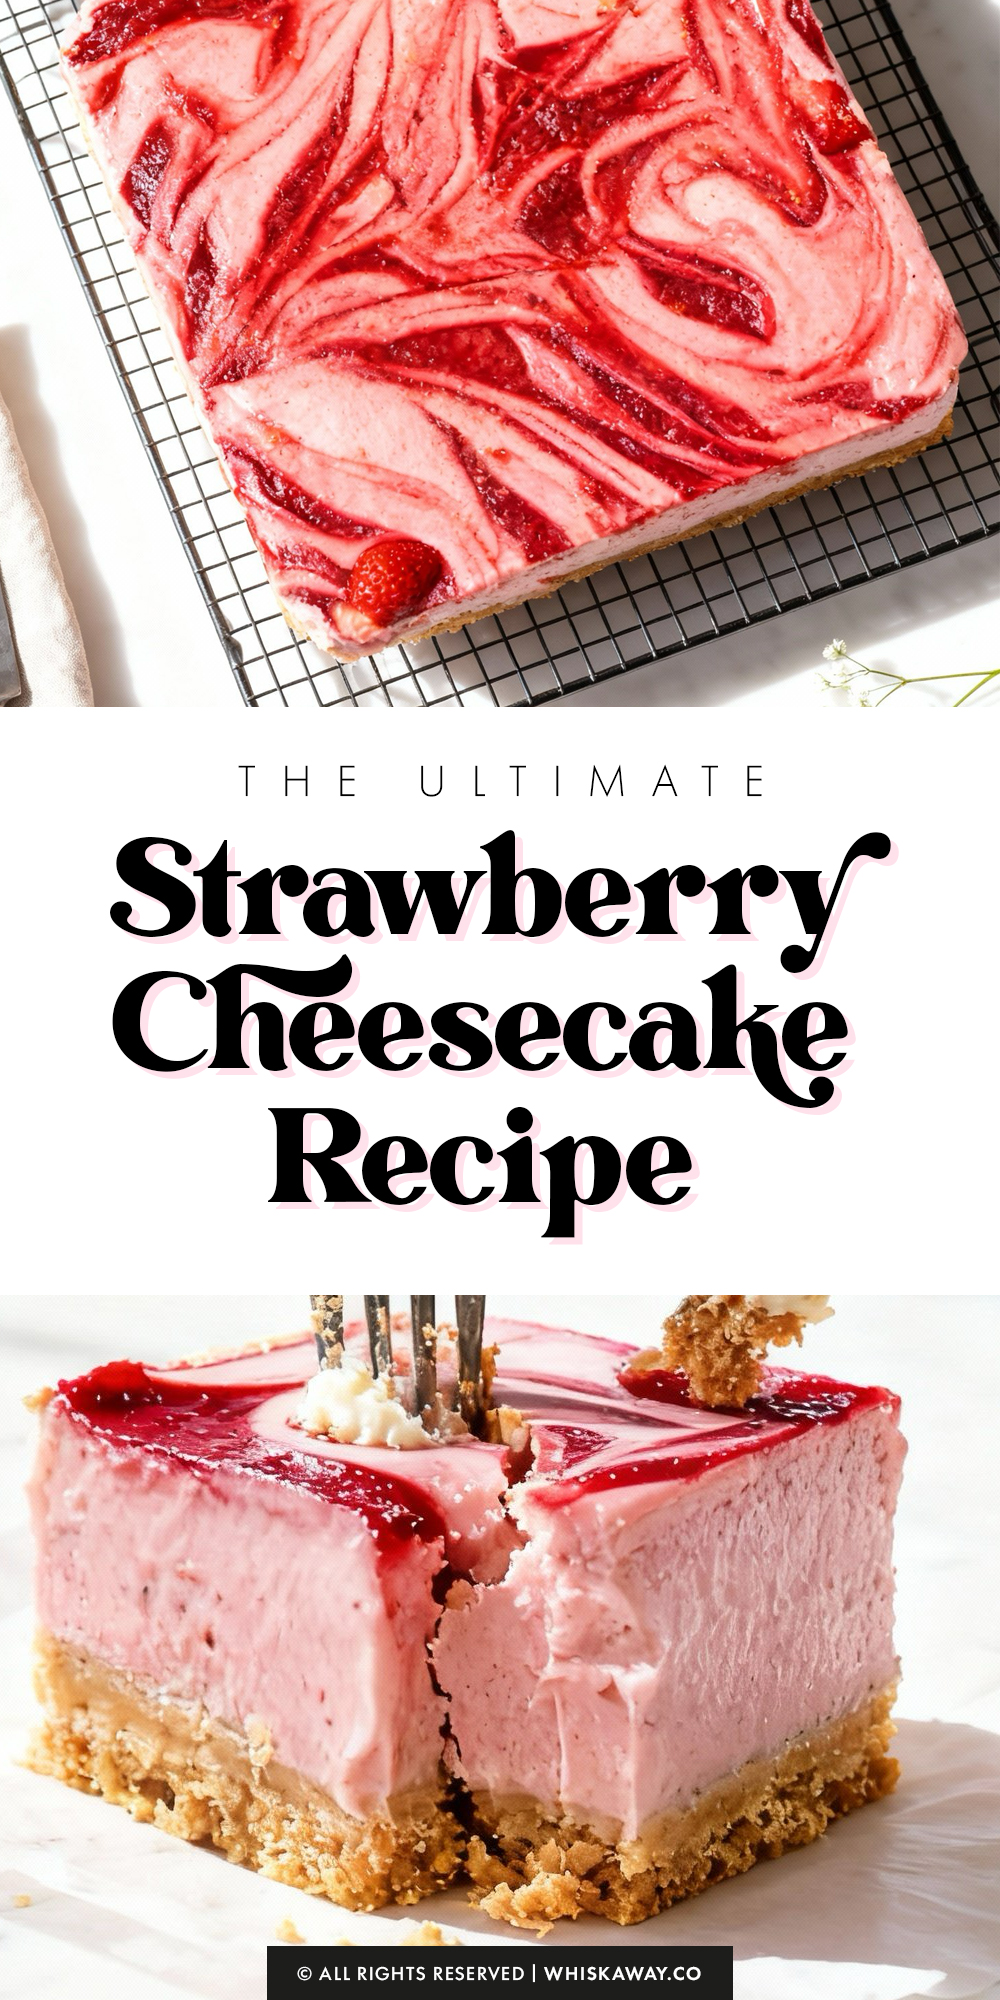
If you’ve been searching for the ultimate dessert that balances creamy richness with bright, fruity flavor, this Strawberry Cheesecake is the answer to your prayers.
Forget those sad, watery cheesecakes from the grocery store freezer aisle. We are leveling up by doing something a little different here: roasting the berries.
You are seriously going to be obsessed with this one. Let’s get baking!
Why You’ll Love This Recipe
Strawberry cheesecake is rich, creamy, and bursting with sweet, fresh strawberry flavor. The buttery crust and smooth cheesecake filling make it indulgent yet approachable.
The vibrant red strawberry topping adds both visual and flavor appeal, making it perfect for celebrations or personal indulgence.
Key Reasons to Love It:
- Smooth, creamy texture with balanced sweetness.
- Juicy strawberry topping adds freshness and color.
- Buttery crust provides satisfying structure and texture.
- Elegant dessert that looks impressive but is beginner-friendly.
- Perfect for slicing into portions for sharing or gifting.
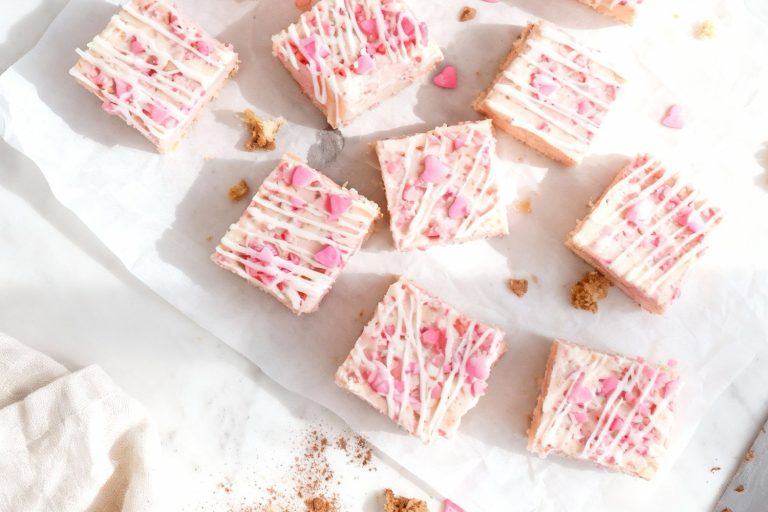
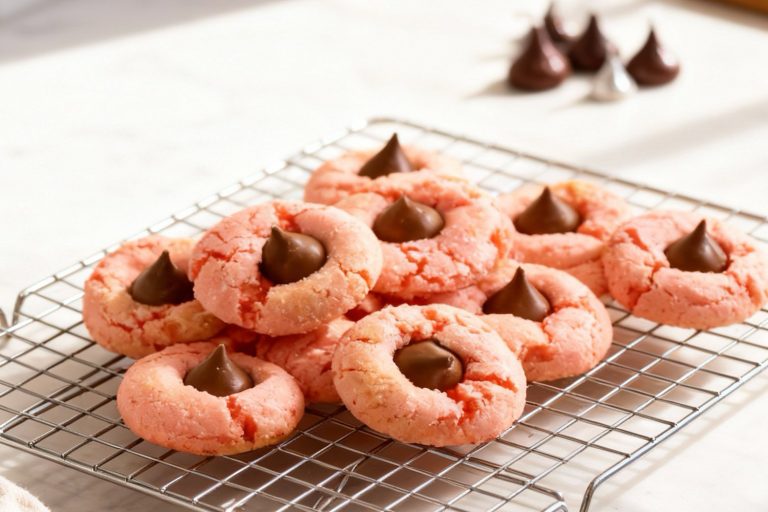
🔥 This classic strawberry cheesecake pairs well with strawberry cheesecake bars, bite-sized strawberry cheesecake truffles, or soft strawberry cheesecake cookies.
How to Get Your Strawberry Cheesecake Just Right
Making a cheesecake can feel like a high-stakes baking project, but it’s actually all about patience and temperature control.
Because this recipe uses a unique roasted strawberry puree and a specific water-bath method, these tips will help you avoid the dreaded “crack” and achieve that silky, professional finish.
1. The Magic of the Roast
Don’t be tempted to skip roasting the strawberries or swap them for raw fruit.
Fresh strawberries are full of water. If you blend them raw, that extra moisture will prevent the cheesecake from setting properly.
Roasting evaporates that water and concentrates the natural sugars, giving you a deep, “jammy” flavor that raw berries just can’t touch. Ensure you let the puree cool before adding it to the batter so it doesn’t melt the cream cheese.
2. The Room Temperature Rule (Non-Negotiable)
If you use cold cream cheese, your batter will have lumps. Once those lumps are there, no amount of mixing will get them out without overworking the eggs.
Pro Tip: Take your cream cheese, eggs, and sour cream out of the fridge at least 2 hours before you start. They should be soft to the touch. This ensures they emulsify into a velvet-smooth mixture.
3. Low and Slow Mixing
One of the biggest mistakes in cheesecake baking is “whipping” the batter.
Use the paddle attachment, not the whisk. Keep the mixer on a low-medium speed. You want to incorporate the ingredients, not beat in air.
Excess air bubbles will rise to the top during baking, causing the cheesecake to puff up like a soufflé and then collapse, which leads to cracks.
4. The “Pro” Strain
If you want that ultra-smooth, boutique-bakery texture, do not skip the mesh sieve step.
Even with perfect room-temp ingredients, tiny bits of cream cheese or egg can remain. Straining the batter into the pan ensures a flawlessly uniform texture and removes any stray air bubbles.
It’s all about the Slow Cool. Cheesecake is essentially a custard; it hates sudden temperature changes.
By propping the oven door open and letting it rest for 30 minutes before taking it out, you allow the structure to firm up gradually.
5. Why “No Springform”?
You might have noticed the instructions advise against a springform pan.
Even with foil wrapping, springform pans are notorious for leaking in a water bath. Using a solid metal cake pan (with your parchment “slings”) creates a 100% waterproof environment.
Metal pans conduct heat more evenly and quickly than glass or ceramic, which helps the crust set without getting soggy.
6. The “Jiggle” Test
Knowing when to stop baking is the hardest part.
When you gently shake the pan, the edges (about 2 inches from the side) should be set and firm. The very center should still wobble like Jell-O. It will continue to cook and firm up as it cools!
Easy Baking Tips That Have Worked for Me
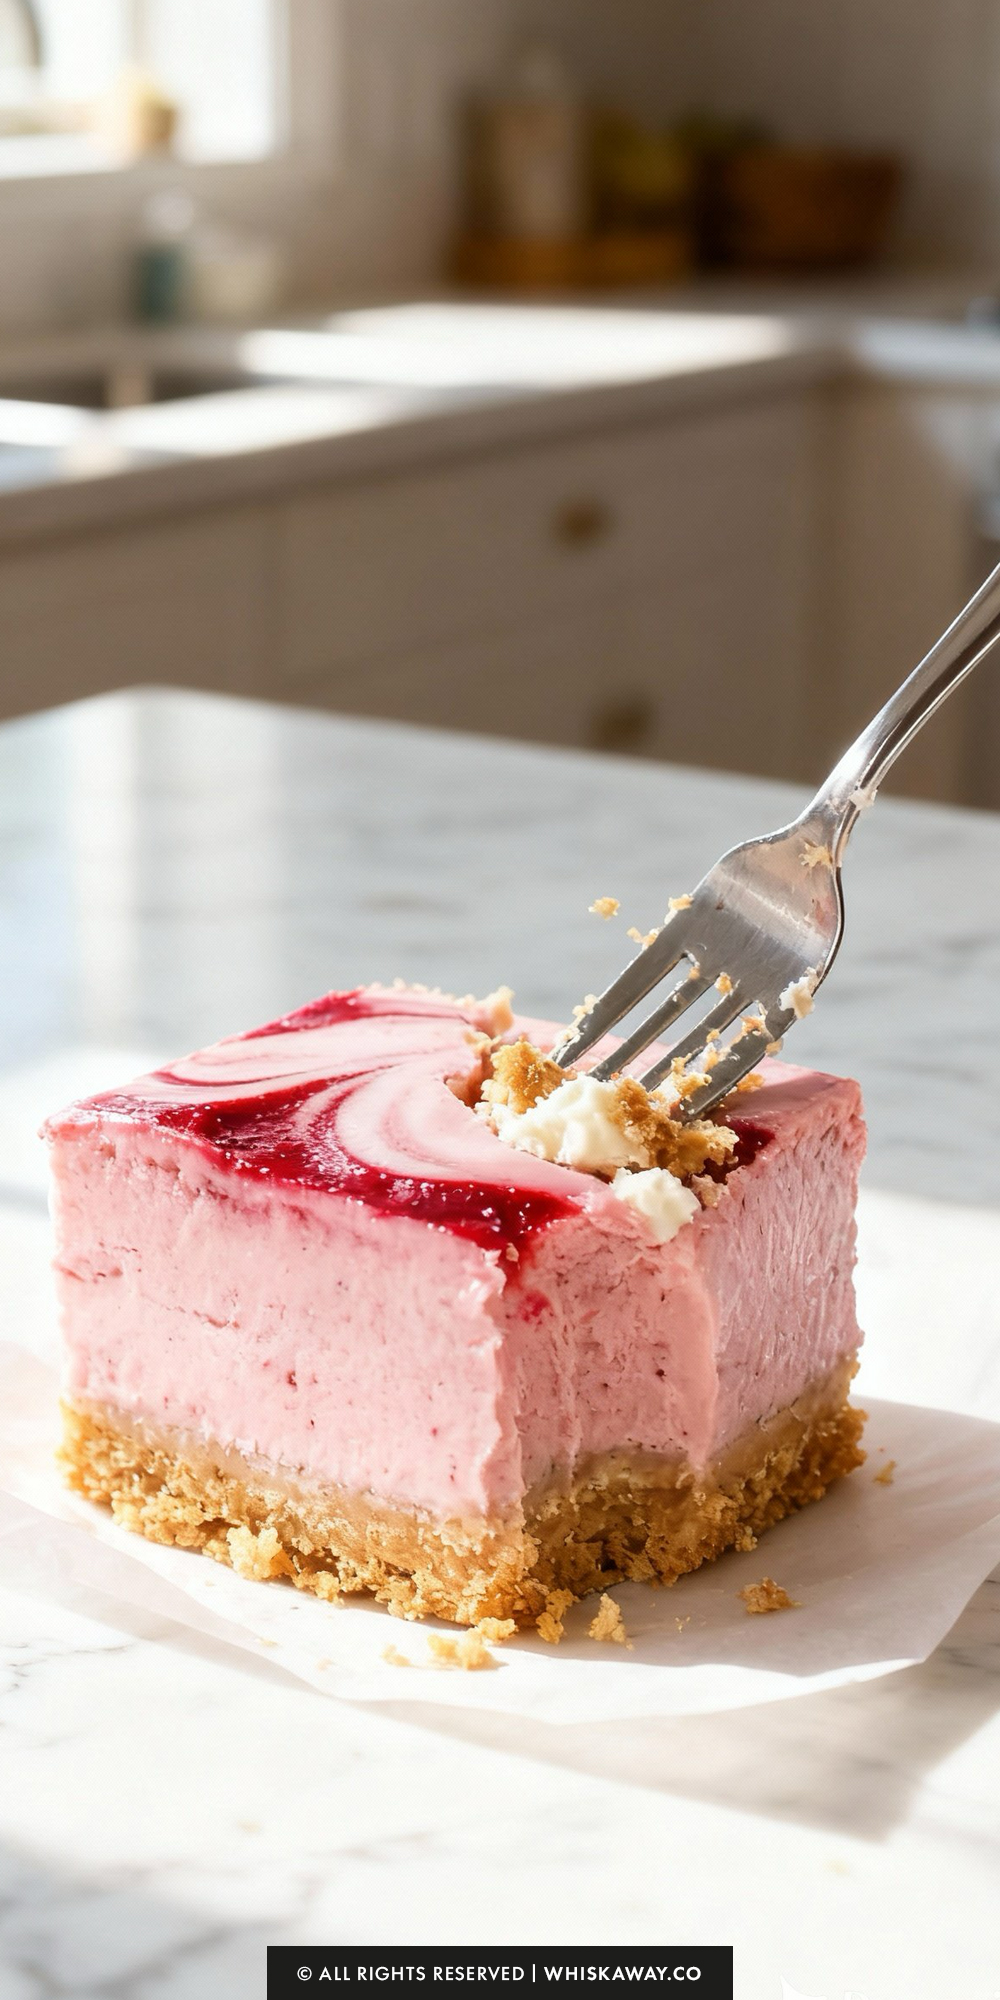
Layering creamy cheesecake over a buttery crust feels luxurious and hands-on. Adding strawberry compote on top creates an inviting swirl and a bright, fresh flavor.
Baking causes the cheesecake to set gently while maintaining a smooth, soft texture. Cutting reveals a visually stunning dessert with creamy layers and juicy strawberry ribbons.
Each bite is a balance of richness, sweetness, and fruitiness, giving beginners a satisfying and elegant result.
Variation Tips
This Roasted Strawberry Cheesecake is a sophisticated take on a classic, but the “roasted fruit” method opens the door to dozens of flavor profiles.
Here are a few ways to tweak the ingredients and textures to make the recipe your own.
1. The “Balsamic & Basil” Upgrade
For a gourmet, savory-sweet twist that highlights the strawberries:
Before roasting the berries, toss them with 1 tablespoon of high-quality balsamic glaze.
After pureeing, fold in 1 tablespoon of very finely minced fresh basil.
The acidity of the balsamic deepens the red color and cuts through the heavy cream cheese, while the basil adds a refreshing, aromatic finish.
2. Swap the Crust Flavor
The base of the cheesecake significantly changes the “mood” of the dessert.
Swap graham crumbs for crushed Biscoff cookies. The cinnamon and caramel notes pair beautifully with the roasted fruit.
Use crushed chocolate Oreos (cream removed). The dark chocolate contrast against the pink filling is stunning.
Use crushed shortbread cookies and add an extra pinch of flaky sea salt to the crust for a buttery, “high-tea” vibe.
3. Tropical Twist
The Swap: Replace the labneh or sour cream with full-fat coconut cream (the thick part from the top of the can).
Add the zest of two limes to the cream cheese mixture.
This “Strawberry-Lime-Coconut” version feels like a vacation in a pan and is extra creamy.
4. White Chocolate Swirl
Melt ¼ cup of white chocolate chips and stir them into the cheesecake batter just before adding the eggs.
If you do this, reduce the granulated sugar by 2 tablespoons to compensate for the sweetness of the white chocolate.
5. Dietary Adjustments
Gluten-Free: Simply replace the cookie crumbs with your favorite gluten-free graham-style cracker and swap the 2 tablespoons of all-purpose flour in the filling for cornstarch. Because the flour is only a stabilizer, cornstarch works as a perfect 1-to-1 substitute.
Refined Sugar-Free: You can replace the granulated sugar with monk fruit sweetener or coconut sugar. Keep in mind that coconut sugar will turn the pink filling a slightly more “terracotta” or brownish-pink color, though it will taste like delicious toasted caramel.
Lower Fat: While I recommend full-fat for the best texture, you can swap the sour cream for 0% Greek Yogurt. Avoid using “light” cream cheese (Neufchâtel), as it has a higher water content and may cause the cheesecake to collapse or weep.
Save for Later to Your Pinterest Board
How to Properly Store Your Strawberry Cheesecake
Cheesecake is essentially a delicate custard, meaning it thrives in cold, stable environments.
Because this recipe features a high-moisture roasted strawberry puree, proper storage is the difference between a silky dessert and a soggy crust.
1. Room Temperature (Service Only)
The Duration: 2 hours maximum.
Due to the high dairy content and the fresh fruit puree, this cheesecake should not sit out. If you are serving it at a party, keep it chilled until the last possible moment.
2. Refrigeration (The Best Method)
The Duration: 5 to 7 days.
Once the cheesecake has cooled completely at room temperature, wrap the pan tightly with plastic wrap or transfer slices to an airtight container.
Pro Tip: If you have already sliced the cheesecake, place a small piece of parchment paper against the exposed “cut” sides. This prevents the filling from drying out or absorbing other flavors from the fridge.
3. Freezing (For Long-Term Storage)
The Duration: 2 to 3 months.
- Whole: Freeze the cheesecake on the metal base (if using a removable bottom) until firm. Wrap it in two layers of plastic wrap followed by a layer of heavy-duty aluminum foil.
- Slices: Freeze individual slices on a tray for an hour, then wrap each one tightly and place them in a freezer-safe bag.
Thawing: Move the cheesecake to the refrigerator 24 hours before you plan to serve it. Never thaw cheesecake at room temperature, as it can cause the strawberry puree to “weep” and ruin the texture.
4. Reheating and Serving
Cheesecake should never be microwaved or put back in the oven. Heat will break the emulsion of the cream cheese and turn the strawberry puree into a watery mess.
For the best flavor, take the cheesecake out of the fridge 30 minutes before serving. This allows the fats in the cream cheese to soften slightly, making the flavor profile much more vivid than when it’s ice-cold.
5. Storage Mistakes to Avoid
Never wrap or refrigerate a warm cheesecake. The steam will condense on the inside of the plastic wrap, dripping back down onto the surface. This creates a “slimy” top and a soggy crust.
Cream cheese acts like a sponge for odors. If you store an uncovered cheesecake next to cut onions or leftovers, it will taste like them by the next morning.
Always use a silicone-sealed container or double-wrap with plastic.
If you plan on adding extra fresh strawberries or whipped cream as a garnish, wait until right before serving. These toppings do not freeze and thaw well.
Expert Slicing Tip: For those perfect, clean, bakery-style slices, dip a long thin knife into hot water and wipe it bone-dry between every single cut.
The heat slices through the cold fat of the cream cheese effortlessly.
FAQs
Can I use fresh, raw strawberry puree instead of roasting the berries?
I highly recommend sticking with the roasted puree. Fresh strawberries contain a significant amount of water; if added directly to the batter, that moisture can prevent the cheesecake from setting properly, leading to a grainy or “soupy” texture. Roasting evaporates the excess water and concentrates the natural sugars, giving you that deep, jammy flavor and a stable consistency.
Why did my cheesecake crack even though I used a water bath?
Cracks usually happen for two reasons: overmixing or cooling too quickly. When you beat the batter—especially after adding the eggs—try to keep the mixer on low. High speeds incorporate air bubbles that expand and then “pop” in the oven, causing cracks. Additionally, don’t skip the “oven rest” step; letting the cheesecake cool gradually in the propped-open oven prevents the structural shock that leads to surface splits.
What is the best substitute for labneh?
If you can’t find labneh, full-fat sour cream is the best 1:1 substitute. It provides the same necessary fat content and acidity to balance the richness of the cream cheese. If you want a slightly tangier, high-protein option, you can also use full-fat plain Greek yogurt, though the texture may be slightly less dense than with labneh or sour cream.
Can I make this in a springform pan instead of a solid cake pan?
You can, but it is risky with a water bath. Springform pans are notorious for leaking, even when wrapped in multiple layers of heavy-duty foil. If a leak occurs, your crust will become a soggy mess. Using a solid metal 8×8″ pan with parchment “slings” (as suggested in the instructions) is the only way to ensure a 100% waterproof bake.
How do I know exactly when to take it out of the oven?
The “jiggle test” is your best friend. Gently shake the pan; the outer 2-3 inches of the cheesecake should look set and matte. The very center (about the size of a silver dollar) should still wobble slightly like Jell-O. It might look underdone, but it will continue to firm up as it cools. If the center is firm or domed when you take it out, it is likely overbaked.

Strawberry Cheesecake
16
squares30
minutes1
hour8
hoursThis creamy strawberry cheesecake features a smooth filling, buttery crust, and fresh strawberry topping.
Ingredients
- For the Crust
240g or 2 cups cookie crumbs (digestives, graham, or Oreos with cream removed)
113g or 1 stick unsalted or salted butter
2 tablespoons powdered sugar
- For the Filling
454g or two bricks cream cheese
250g or 1 cup roasted strawberry puree
210g or 1 cup granulated sugar
2 large eggs
60g or ¼ cup labneh or sour cream
2 tablespoons all-purpose flour
2 teaspoons pure vanilla extract
½ teaspoon fine sea salt
Directions
- The Roasted Strawberry Puree
- Preheat your oven to 350°F. Spread roughly 24 oz of fresh strawberries into a 13x9-inch baking dish. Roast for 30 to 45 minutes, giving them a quick stir halfway through. You want the berries to break down and release their juices, but make sure a good amount of liquid remains and don't let them dry out or scorch.
- Blend: Once roasted, blitz the berries in a food processor until smooth. For a silky texture, press the puree through a fine-mesh sieve to remove the seeds.
- Measure: Scoop out 1 cup (250g) for the recipe. Pro Tip: This can be done a day or two in advance and kept in the fridge.
- Make the Crust
- Line an 8x8-inch metal baking pan with two strips of parchment paper crossing each other (forming a "sling"). Avoid glass or ceramic for this recipe. If using a round pan, clip the parchment in place. Note: Do not use a springform pan for this specific water-bath method.
- Combine your cookie crumbs, sugar, and melted butter in a bowl. Pour the mixture into the pan and use the flat bottom of a measuring cup to firmly pack the crumbs into the bottom and slightly up the sides.
- Bake the crust at 350°F for 10 minutes. Set it aside to cool completely before adding the batter.
- The Cheesecake Filling
- Lower the oven temperature to 325°F. In a stand mixer with the paddle attachment, beat the cream cheese and sugar on medium-low speed. Scrape down the sides frequently to ensure the mixture is 100% smooth and lump-free.
- Add the labneh (or sour cream), vanilla, and sea salt, mixing until fully incorporated.
- Mix in the roasted strawberry puree, but reserve a few tablespoons for the swirl. Finally, add the eggs and flour. Mix on low just until the eggs disappear—be careful not to over-beat at this stage, as extra air can cause cracks.
- For a professional finish, pour the batter through a fine-mesh sieve directly over the cooled crust to catch any remaining tiny lumps.
- Drop small teaspoons of your reserved strawberry puree onto the surface and use a butter knife to create a beautiful marbled pattern.
- Place your cheesecake pan inside a larger 13x9-inch pan. Fill the larger pan with hot water until it reaches the level of the cheesecake batter inside.
- Bake for 45 to 60 minutes. The cheesecake is done when the edges are set but the very center still has a slight, jelly-like jiggle.
- Turn off the heat and prop the oven door open slightly with a wooden spoon. Let the cheesecake sit in the cooling oven for 30 minutes. This prevents the temperature from dropping too fast, which helps avoid cracks.
- Remove from the water bath and refrigerate overnight. This long chill is essential for the texture to fully set. Serve cold and keep leftovers in the fridge.