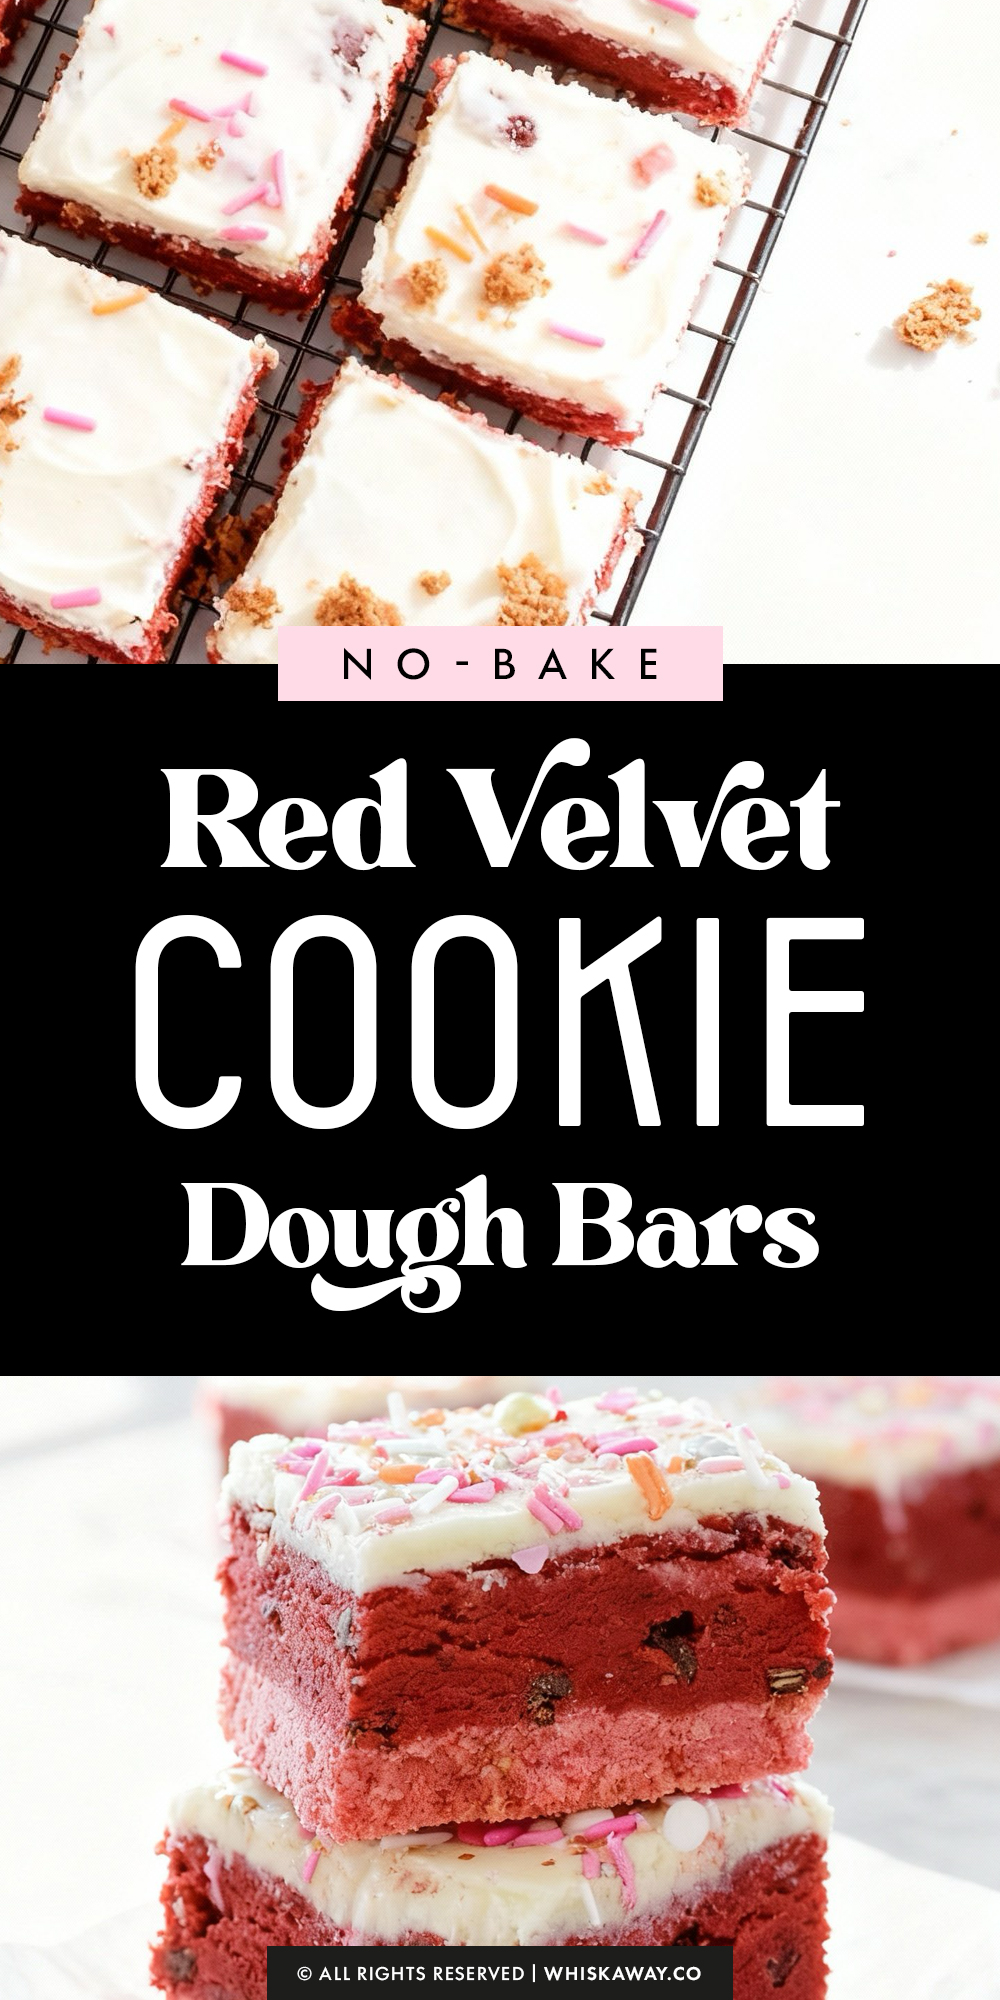
If you have been dreaming of a dessert that combines zero effort with maximum payoff, these Red Velvet Cookie Dough Bars are legally required to be in your fridge right now.
It is the perfect low-stress recipe for Valentine’s Day, a girls’ night in, or just because it’s Tuesday and you deserve a treat.
They look incredibly fancy, like something you’d pick up at a high-end bakery, but they come together in minutes.
Warning: these are rich, decadent, and impossible to eat just one of. So, clear some space in the fridge, grab your mixing bowl, and let’s get to “no-baking”! LOL
Why You’ll Love This Recipe
Red velvet cookie dough bars are soft, chewy, and indulgent, offering the classic red velvet flavor in a convenient bar form.
They’re easy to portion, visually appealing, and perfect for gifting or snacking. Each bite combines rich cocoa flavor with tender texture for ultimate satisfaction.
Key Reasons to Love Them:
- Soft, chewy texture with rich red velvet flavor.
- Easy to slice into bars for convenient serving.
- Visually vibrant and festive.
- Quick to bake with beginner-friendly steps.
- Perfect for sharing, gifting, or enjoying as a personal treat.
🔥 If you love no-bake red velvet desserts, try red velvet brownies, indulgent red velvet truffles, or creamy red velvet cheesecake bites.
How to Get Your Red Velvet Cookie Dough Bars Just Right
Since these bars are no-bake, you can’t rely on the oven to meld flavors or fix texture issues. Every step of the mixing process counts.
Here is how to ensure your bars are safe to eat, perfectly smooth, and structurally sound.
1. The “Raw Flour” Rule (Safety & Flavor)
Even though this recipe doesn’t use eggs, raw flour can still contain harmful bacteria. Plus, it has a distinct “chalky” taste.
Before starting, heat-treat your flour. Spread the 2 cups of flour on a baking sheet and bake at 350°F (175°C) for 5 minutes, or microwave it in a bowl for 60–90 seconds (stirring every 30 seconds) until it reaches 160°F.
This kills any potential bacteria and toasts the flour slightly, removing that raw, powdery aftertaste. Let it cool completely before adding it to the butter.
2. Don’t Skimp on Creaming
Because the sugar won’t melt in the oven, the “creaming” step is the only chance you have to dissolve the graininess.
Beat the butter and brown sugar for the full 3 to 4 minutes. You want the mixture to look pale and fluffy.
If you rush this, your cookie dough will feel gritty between your teeth rather than smooth and velvety.
3. Solidify the Foundation
The biggest structural issue with layered bars is the crust crumbling when you slice it.
When pressing the Oreo mixture into the pan, use the flat bottom of a measuring cup or a glass to pack it down hard.
Do not skip the 30-minute freeze. If the crust is soft when you try to spread the stiff cookie dough over it, the layers will mix together, and you’ll lose that clean definition.
4. Mastering White Chocolate Ganache
White chocolate is much more sensitive to heat than dark chocolate and can “seize” (turn into a grainy, oily clump) instantly if overheated.
Heat the cream only until it steams and do not let it boil vigorously. Pour it over the chocolate and let it sit untouched for a full minute.
his gentle heat softens the cocoa butter without shocking it. When you whisk, start small in the center and work your way out.
5. Getting the “Red Velvet” Look
Red food coloring can be tricky; too little and it looks brown (due to the cocoa), too much and it tastes bitter.
Gel food coloring is superior to liquid drops here. It provides a vibrant crimson hue without adding extra liquid that could make the dough sticky.
If using liquid drops, add them with the milk to ensure they disperse evenly throughout the dough.
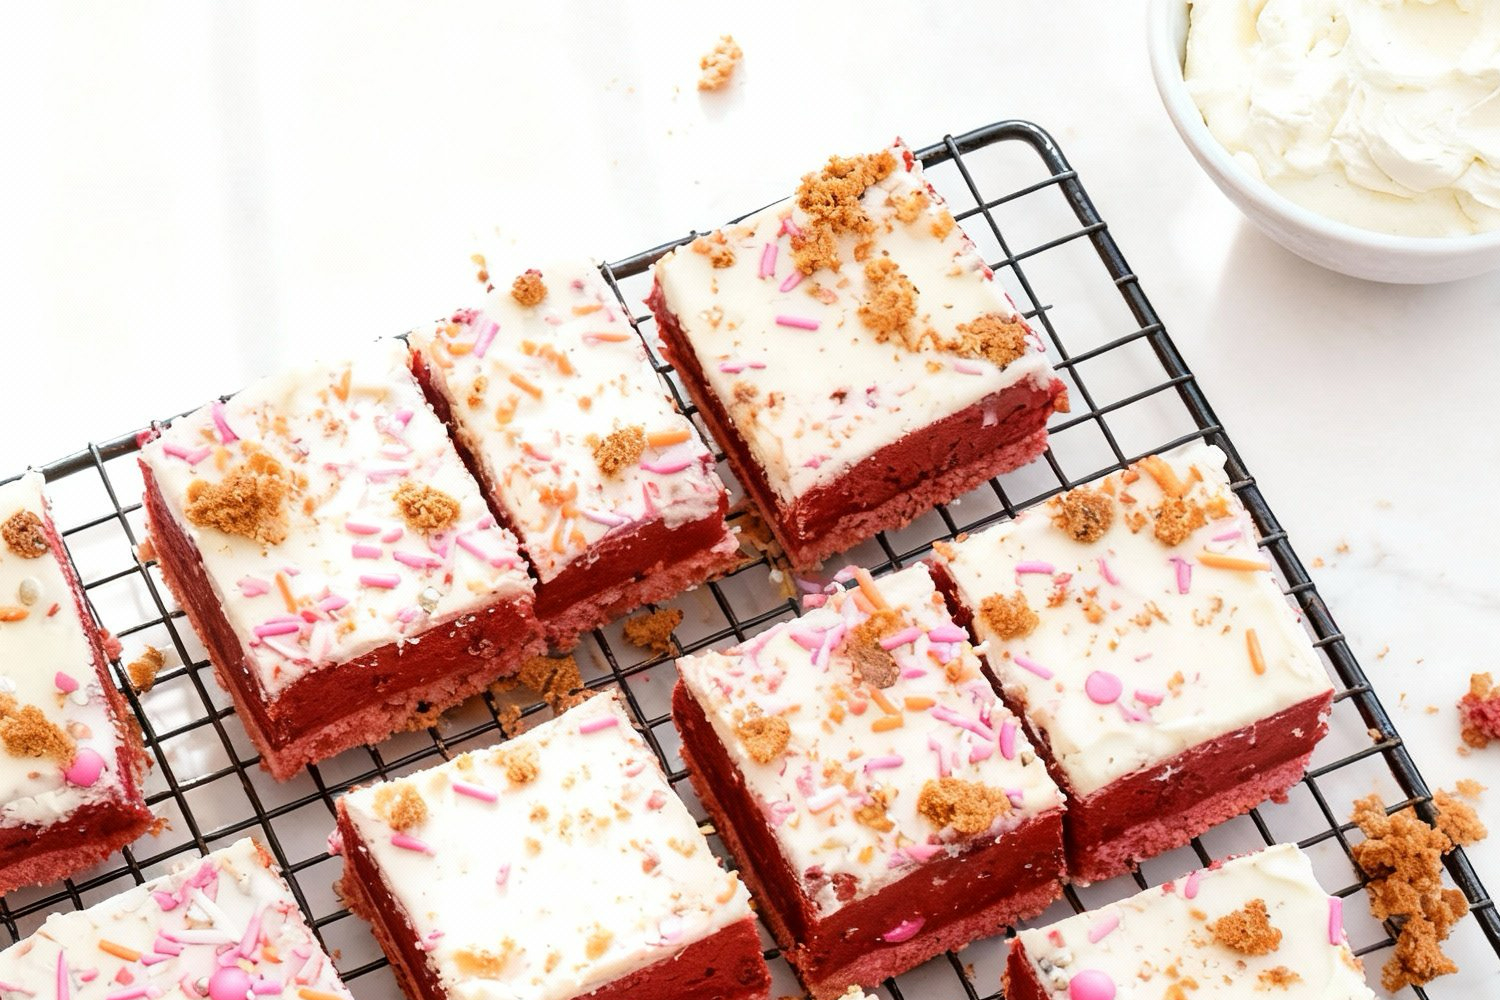
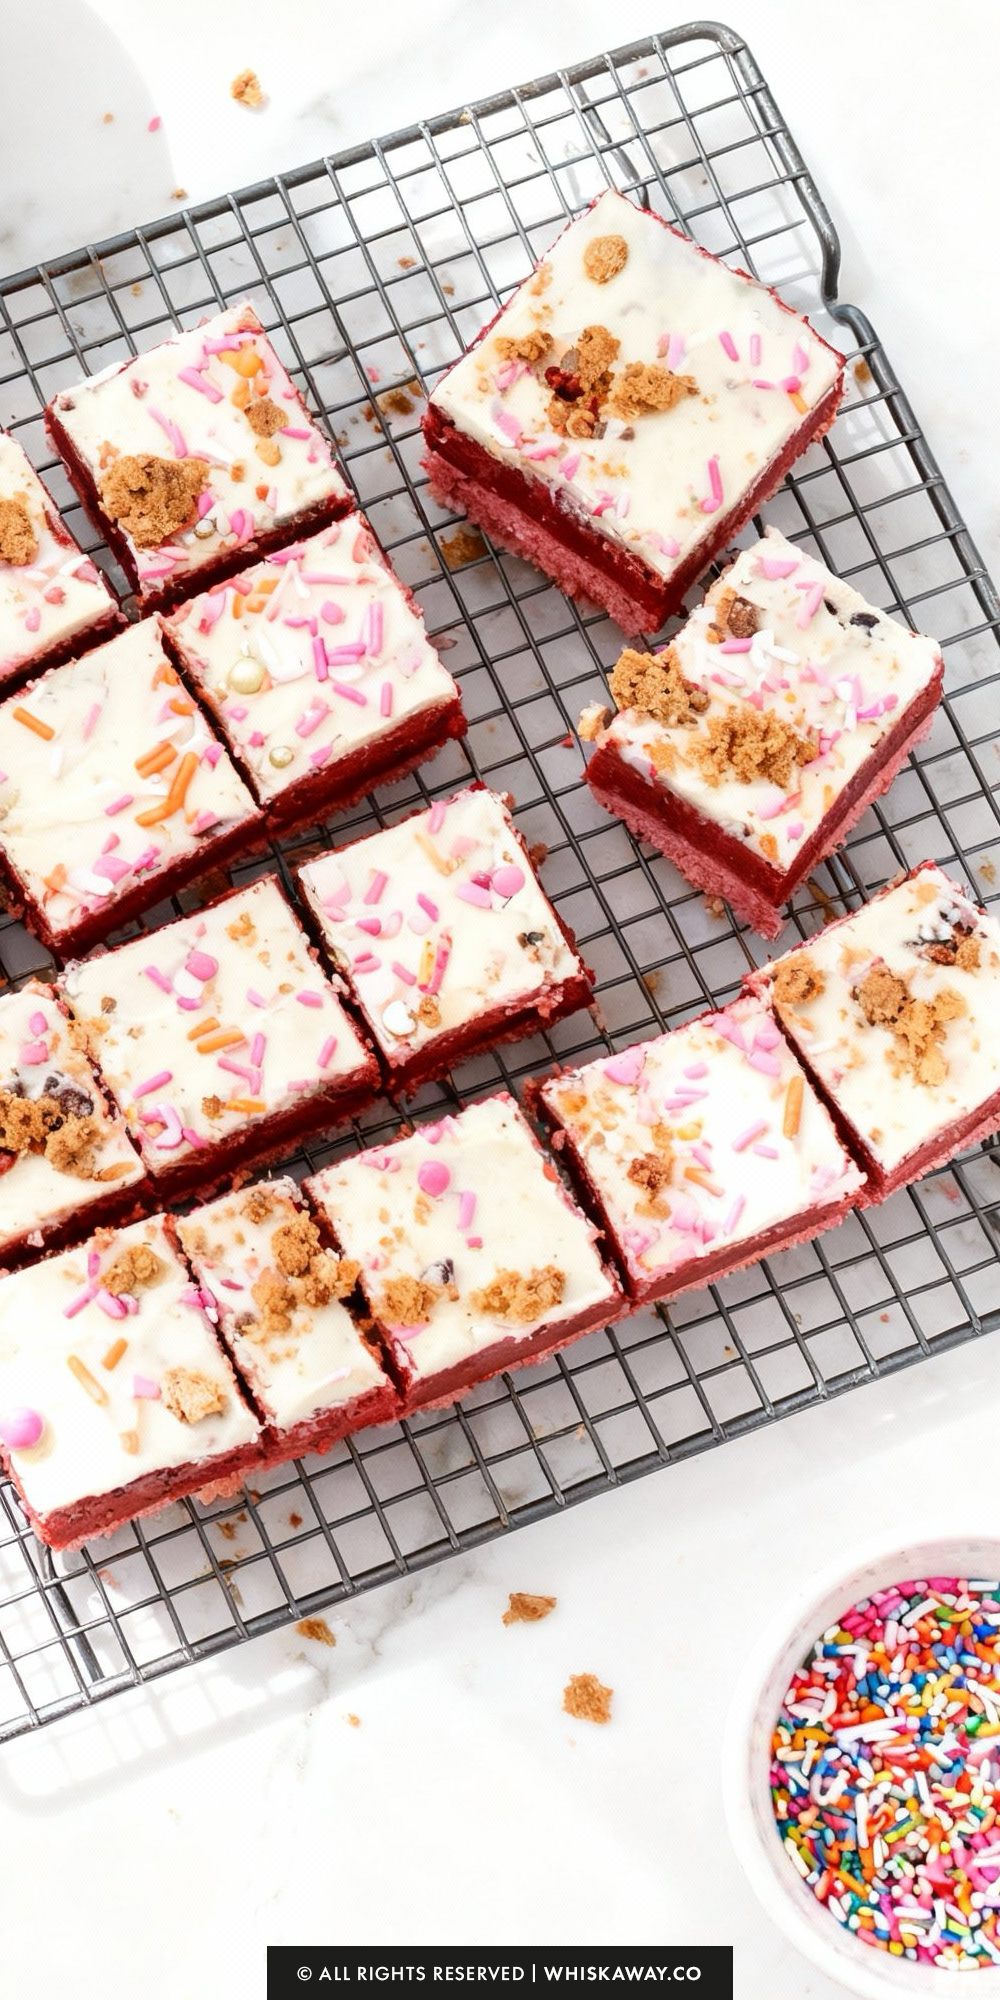
6. The Perfect Slice
To get those sharp, bakery-style squares without the ganache cracking or smearing:
Run a sharp chef’s knife under hot water, wipe it dry, and make one firm cut.
Wipe the knife clean and reheat it between every single cut. This melts through the hard ganache top and glides through the dense dough.
Easy Baking Tips That Have Worked for Me
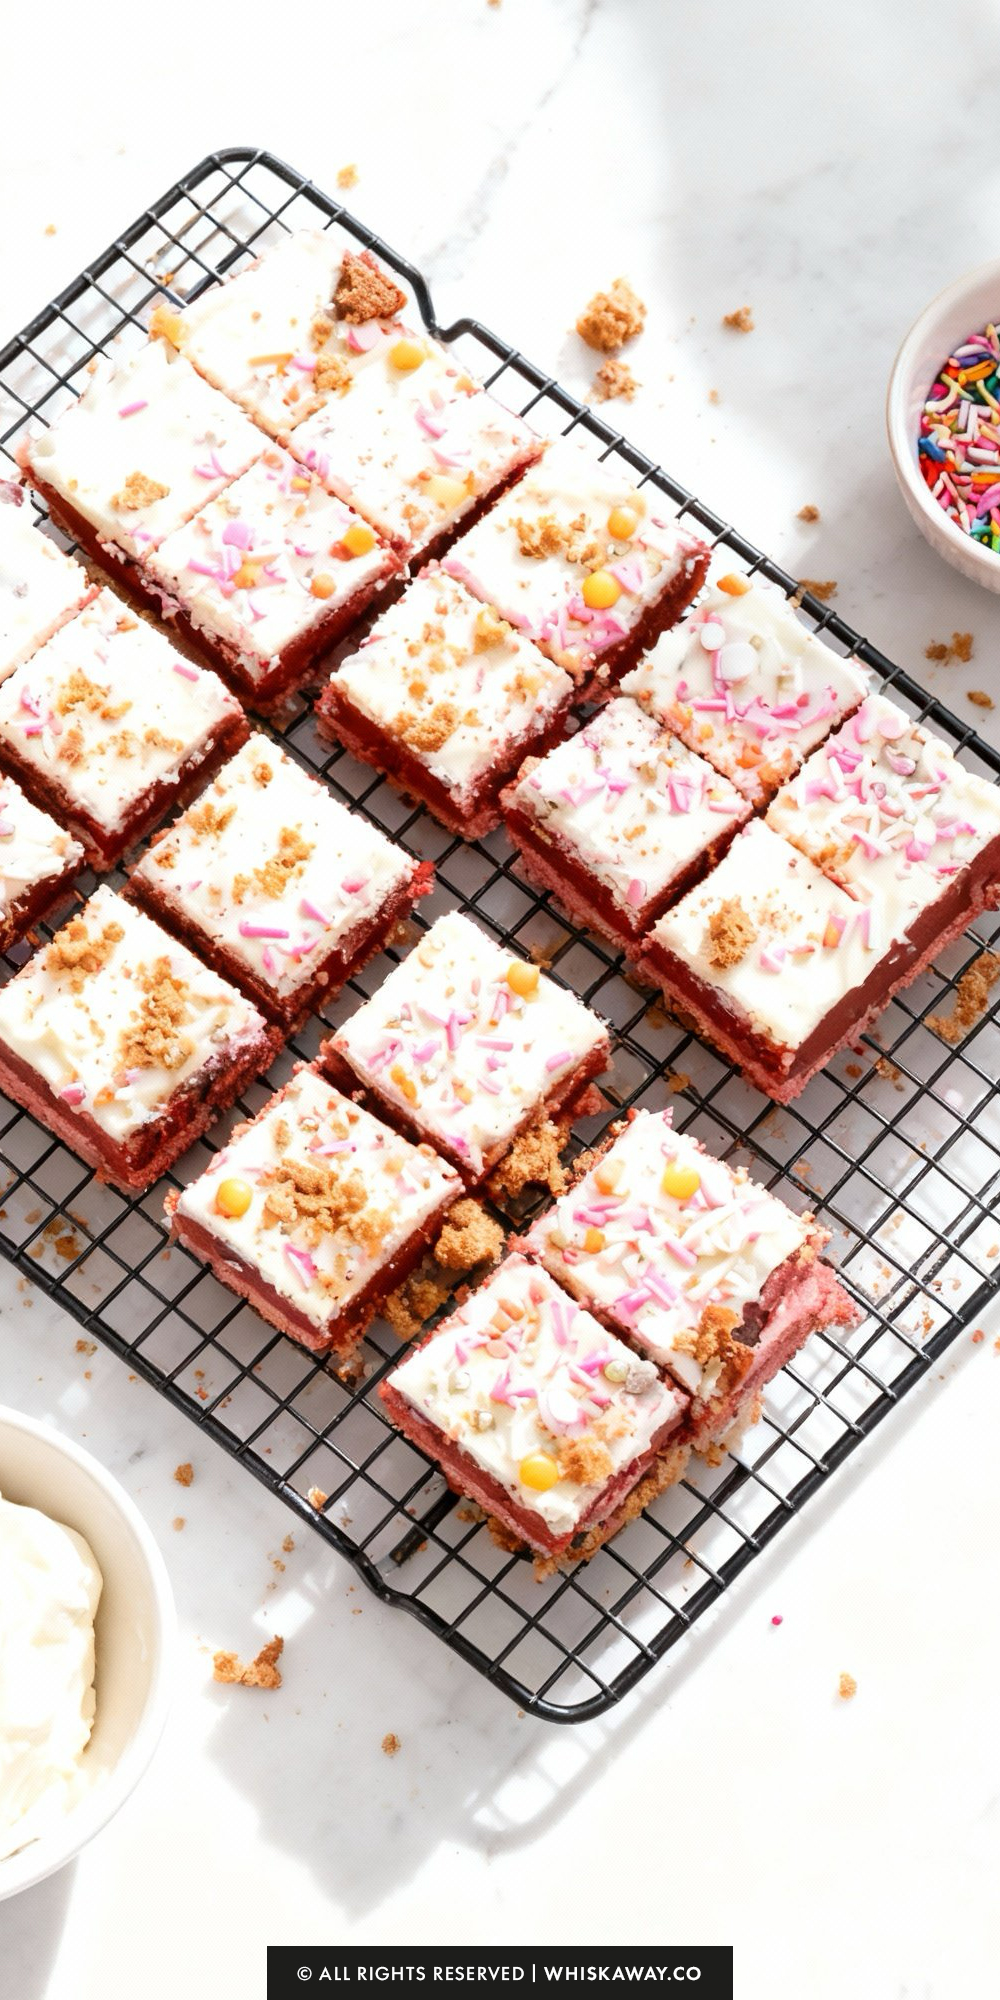
Pressing red velvet cookie dough into a pan gives a satisfying tactile experience as it forms an even layer.
Baking produces soft, chewy bars with slightly crisp edges, perfect for tasting warm or cooled. The red velvet color creates a festive, inviting look, while the cocoa flavor is rich and satisfying.
Cutting into neat squares offers a visually pleasing presentation. Every bite balances soft texture with deep flavor, making this a simple yet indulgent treat for beginners to enjoy.
Variation Tips
These Red Velvet Cookie Dough Bars are already a feast for the eyes, but with a few simple tweaks, you can customize the flavor profile to match your cravings or the occasion.
1. The “Classic Pair” (Cream Cheese Frosting)
Red velvet and cream cheese are best friends. If you find the white chocolate ganache too sweet or miss that signature tang:
The Swap: Replace the ganache with a layer of no-bake cream cheese frosting.
The Recipe: Beat 4 oz softened cream cheese with 2 tablespoons of butter and 1 cup of powdered sugar. Spread this over the chilled dough instead of the ganache. It gives the bars a more traditional “cake” flavor.
2. The “Dark Mode” Crust
The Swap: Substitute the 26 Golden Oreos for classic Chocolate Oreos.
The Look: This creates a striking black-and-red contrast that looks dramatic and adds a deeper cocoa flavor to balance the sweet dough.
3. Nutty & Nice
Traditional red velvet cake often features pecans.
The Add-In: Mix ½ cup of finely chopped toasted pecans or walnuts into the cookie dough along with the mini chocolate chips.
The Texture: This adds a fantastic crunch that breaks up the dense, fudgy texture of the dough.
4. Double White Chocolate
The Swap: Instead of mini semi-sweet chocolate chips inside the dough, use mini white chocolate chips.
The Result: This makes the bars extra creamy and sweet, and the white chips pop visually against the bright red dough.
5. Peppermint Velvet (Holiday Edition)
The Twist: Add ½ teaspoon of peppermint extract to the dough along with the vanilla.
The Garnish: Top the white chocolate ganache with crushed candy canes instead of sprinkles. This turns a Valentine’s treat into a festive Christmas dessert instantly.
6. Dietary Adjustments
Gluten-Free
Since this recipe relies on flour as a binder, you can easily make it gluten-free.
- The Flour: Use a measure-for-measure Gluten-Free Flour Blend (ensure you still heat-treat it!).
- The Crust: Swap the Oreos for Gluten-Free Oreos or a similar GF sandwich cookie.
Dairy-Free / Vegan
- Butter: Use high-quality vegan butter sticks (not tub margarine).
- Milk: Any plant-based milk (oat or almond) works perfectly in the dough.
- Ganache: Use full-fat canned coconut milk (the thick cream from the top) instead of heavy cream to melt your dairy-free white chocolate.
- Egg-Free: Good news! This recipe is naturally egg-free, making it safe for those with egg allergies or for pregnant women craving cookie dough (provided the flour is heat-treated).
Save for Later to Your Pinterest Board
How to Properly Store Your Red Velvet Cookie Dough Bars
Because these Red Velvet Cookie Dough Bars are essentially bricks of sweetened butter and cream, temperature control is everything.
If they get too warm, they lose their structure; if they are stored improperly, they pick up fridge odors. Here is how to keep them fresh and delicious.
1. Room Temperature (Serving Only)
Do not store these on the counter.
The dough contains milk and a large amount of butter, and the ganache topping is sensitive to heat. If left out, the bars will become greasy and soft, and the dairy can spoil.
It is safe to leave them out on a dessert table for 2 hours (or 1 hour if it’s a hot day). If you see the ganache starting to look “sweaty” or shiny, get them back in the fridge immediately.
2. Refrigeration (Best for Daily Snacking)
The Duration: Up to 1 week.
Store the sliced bars in a single layer in an airtight container.
If you need to stack them, place a sheet of wax paper or parchment paper between the layers.
The white chocolate ganache can be sticky, and without the paper, the bottom of one bar will pull the topping off the bar below it.
3. Freezing (Long-Term Storage)
The Duration: Up to 3 months.
These freeze incredibly well!
Place the cut squares on a baking sheet in the freezer for 1 hour until rock hard.
Transfer the frozen bars to a freezer-safe bag or container. This prevents them from sticking together in a giant lump.
Move the desired number of bars to the refrigerator overnight. Avoid thawing on the counter, as condensation can form on the cold chocolate, making the sprinkles bleed color.
4. Serving Tips (Do Not Heat!)
Never try to “warm up” these bars in the micro-wave. The butter will melt instantly, separating from the sugar and flour, leaving you with an oily soup.
Cookie dough tastes best when it isn’t rock hard. For the ultimate texture, take the bars out of the fridge 10–15 minutes before eating.
This allows the butter to soften slightly, releasing the vanilla and chocolate flavors.
5. Storage Mistakes to Avoid
Butter acts like a sponge for odors. If you store these on a plate uncovered in the fridge, your cookie dough will taste like last night’s garlic leftovers by morning. Always seal them tight.
Don’t freeze the entire 8×8 block uncut. It becomes very difficult to slice once frozen and thawed. Always slice them into squares before freezing.
FAQs
Do I really need to heat-treat the flour?
Yes, absolutely. Raw flour is considered a raw ingredient and can contain harmful bacteria like E. coli or Salmonella. Since this is a no-bake recipe, the flour doesn’t go through the oven’s “kill step.”
How to do it: Spread the flour on a baking sheet and bake at 350°F (175°C) for 5 minutes, or microwave it in a bowl for 60–90 seconds (stirring every 20 seconds) until it reaches 160°F. Let it cool completely before using, or it will melt your butter.
Can I use liquid food coloring instead of gel?
You can, but gel coloring is highly recommended.
The Difference: Gel is concentrated, so you only need a few drops to get that deep red velvet color. Liquid food coloring is watered down; to get the same vibrancy, you have to use a lot more liquid, which can make your cookie dough sticky and harder to slice. If using liquid, add it slowly with the milk to monitor the consistency.
Why did my white chocolate ganache turn grainy or oily?
White chocolate is temperamental. If it turned grainy (seized), it likely got too hot or came into contact with a drop of water.
The Fix: Heat your cream only until it steams—do not let it boil. Pour it over the chocolate and let it sit for a minute before whisking. If you are using white chocolate chips (which contain stabilizers), they are harder to melt smoothly than a chopped baking bar. If it looks thick, stir in a teaspoon of vegetable oil or coconut oil to loosen it up.
Can I use regular chocolate Oreos for the crust?
Yes! Swapping Golden Oreos for classic Chocolate Oreos works perfectly. It will give the bars a darker, richer chocolate flavor and a black crust instead of a pink one. The butter ratio remains exactly the same.
My cookie dough is too dry and crumbly. What did I do wrong?
This usually happens if the flour was measured too heavily (scooped instead of spooned) or if the flour lost moisture during heat-treating.
The Solution: Don’t panic. Just add more milk, one teaspoon at a time, mixing after each addition, until the dough comes together into a soft, pliable ball. It should feel like Play-Doh—moldable but not sticky.

Red Velvet Cookie Dough Bars
25
small squares30
minutes1
hour15
minutesSafe-to-eat red velvet cookie dough bars topped with chocolate make an indulgent no-bake dessert.
Ingredients
- Pink Cookie Crust
26 Golden Oreo Cookies
4 tablespoon unsalted butter, melted
6-7 drops pink food coloring
- Red Velvet Cookie Dough
2 cups all-purpose flour
1 cup + 2 Tbsp light brown sugar, packed
1 ½ sticks unsalted butter, room temperature
½ cup mini chocolate chips
¼ cups + 1 Tbsp whole milk
2 teaspoon vanilla extract
2 teaspoon cocoa powde
¼ teaspoon salt
8-10 drops red food coloring
Sprinkles of your choice
- White Chocolate Ganache
8 oz. white chocolate, roughly chopped
⅓ cup heavy cream
Directions
- Prepare the Pink Crust
- Line an 8x8-inch baking pan with aluminum foil, leaving a bit of overhang on the sides to use as handles later. Lightly grease the foil with non-stick cooking spray.
- Place the Golden Oreos in a food processor and pulse until they are broken down into fine, sandy crumbs.
- Pour the melted butter and pink food coloring into the processor with the crumbs. Pulse a few more times until the mixture is evenly moistened and the color is uniform. Dump the crumbs into your prepared pan and press them down firmly to create a flat, even base.
- Pop the pan into the freezer for 30 minutes to let the crust set while you make the filling.
- Make the Red Velvet Dough
- In a large bowl (or using a stand mixer fitted with the paddle attachment), beat the room-temperature butter and packed brown sugar on medium speed. Keep mixing for 3–4 minutes until the mixture is pale, light, and fluffy.
- Mix in the vanilla extract and salt until fully incorporated.
- Turn the mixer down to low speed. Gradually add the all-purpose flour and cocoa powder. Note: The mixture will look quite dry and crumbly at this stage; this is normal.
- With the mixer still on low, pour in the milk. The dough should start to clump together and become smooth. Finally, mix in the red food coloring and the mini chocolate chips until the color is even and the chips are distributed.
- Take the crust out of the freezer. Scoop the red velvet dough onto the crust and gently press it into a smooth, even layer that reaches all the corners.
- The White Chocolate Ganache
- Place your chopped white chocolate in a heat-proof bowl. Pour the heavy cream into a microwave-safe cup and heat it until it is steaming and just about to boil.
- Pour the hot cream directly over the white chocolate. Let it sit undisturbed for 1 minute to soften the chocolate.
- Gently whisk the mixture starting from the center until the chocolate is completely melted and you have a silky, smooth ganache.
- Pour the warm ganache over the cookie dough layer, using a spatula to spread it to the edges if needed. Immediately top with your choice of sprinkles before the chocolate sets.
- Place the pan in the refrigerator for at least 45 minutes to allow the ganache to firm up.
- Once chilled, use the foil overhang to lift the entire block out of the pan. Place it on a cutting board and use a sharp knife to slice into squares.