If you are looking for a dessert that screams “I love you” without requiring a degree in pastry arts, these Red Velvet Blossom Cookies are about to be your new best friend.
We are taking the nostalgia of the classic peanut butter blossom. You know, the one with the chocolate kiss perched on top and giving it a vibrant, crimson glow-up that is absolutely perfect for Valentine’s Day or Christmas.
So, if you are ready to impress your crush, your kids, or just treat yourself (because you deserve it), preheat that oven.
These cookies are fun, festive, and guaranteed to disappear from the plate in seconds!
Why You’ll Love This Recipe
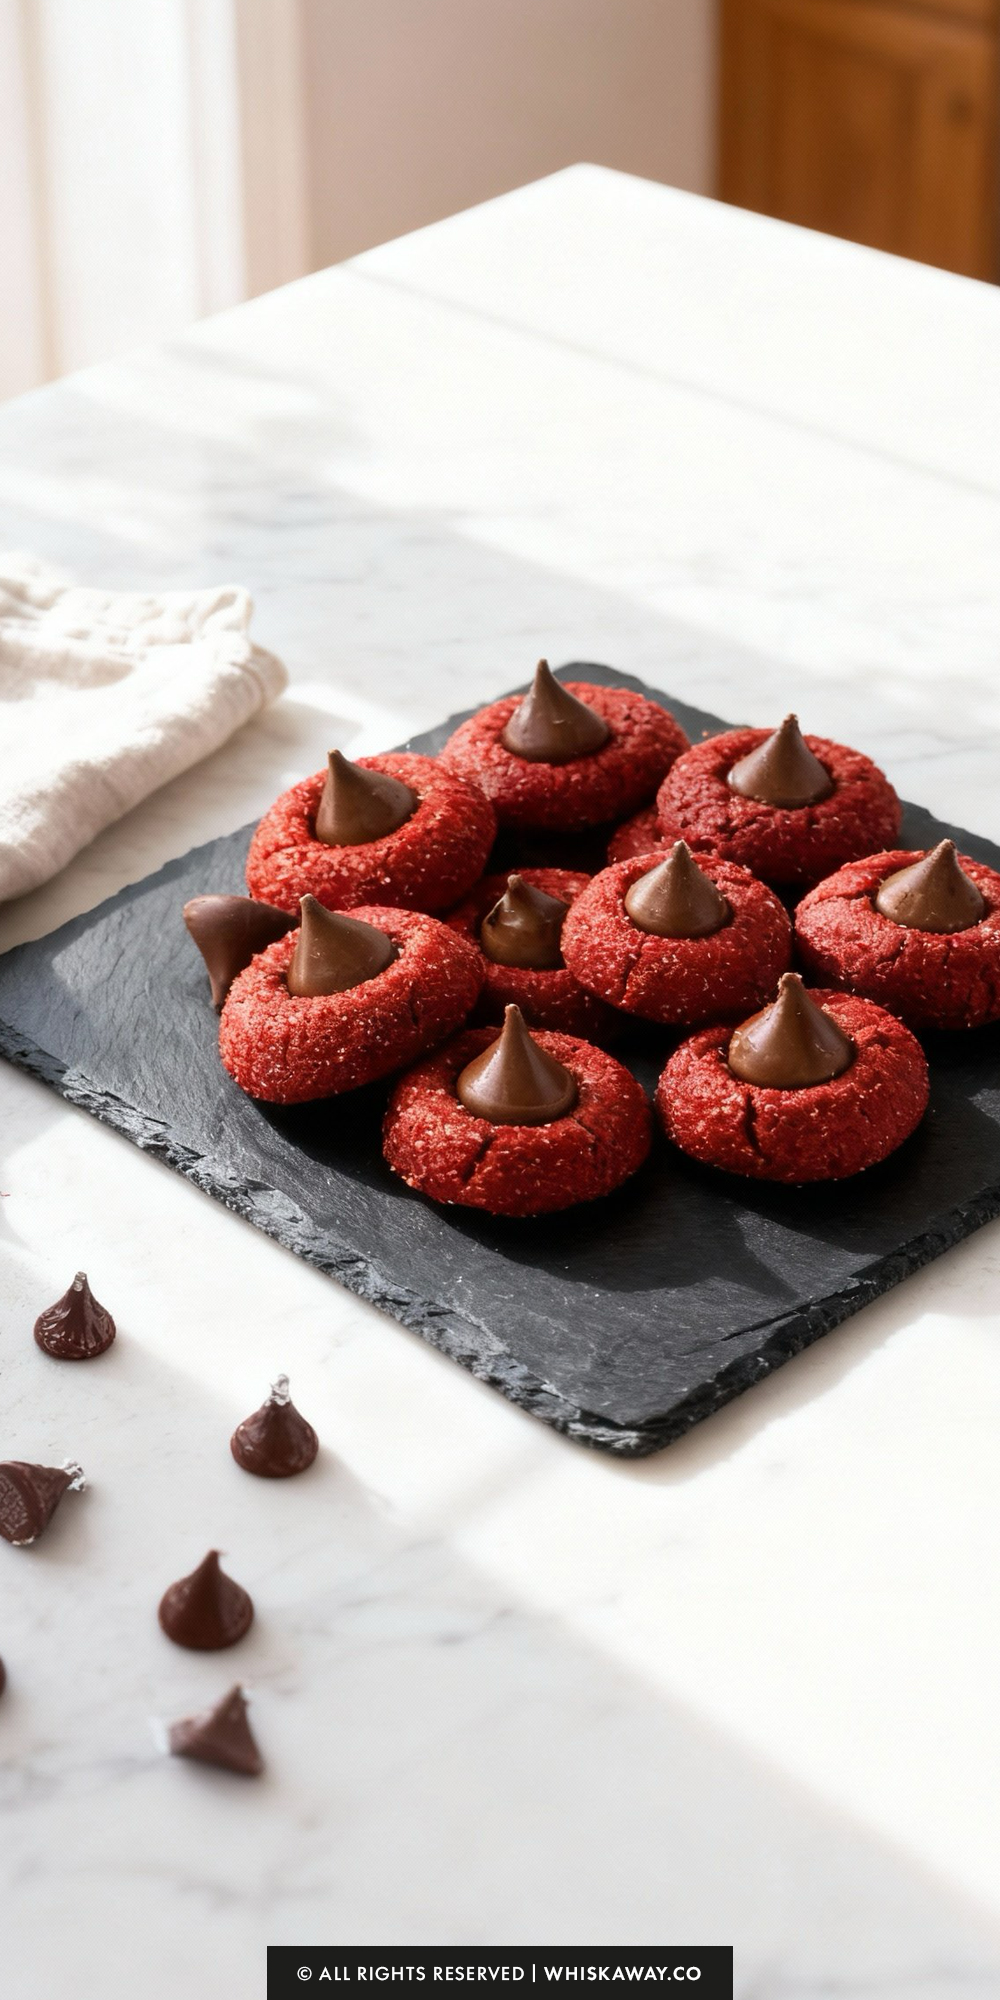
Red velvet blossom cookies are soft, tender, and filled with a chocolate center that melts perfectly in your mouth.
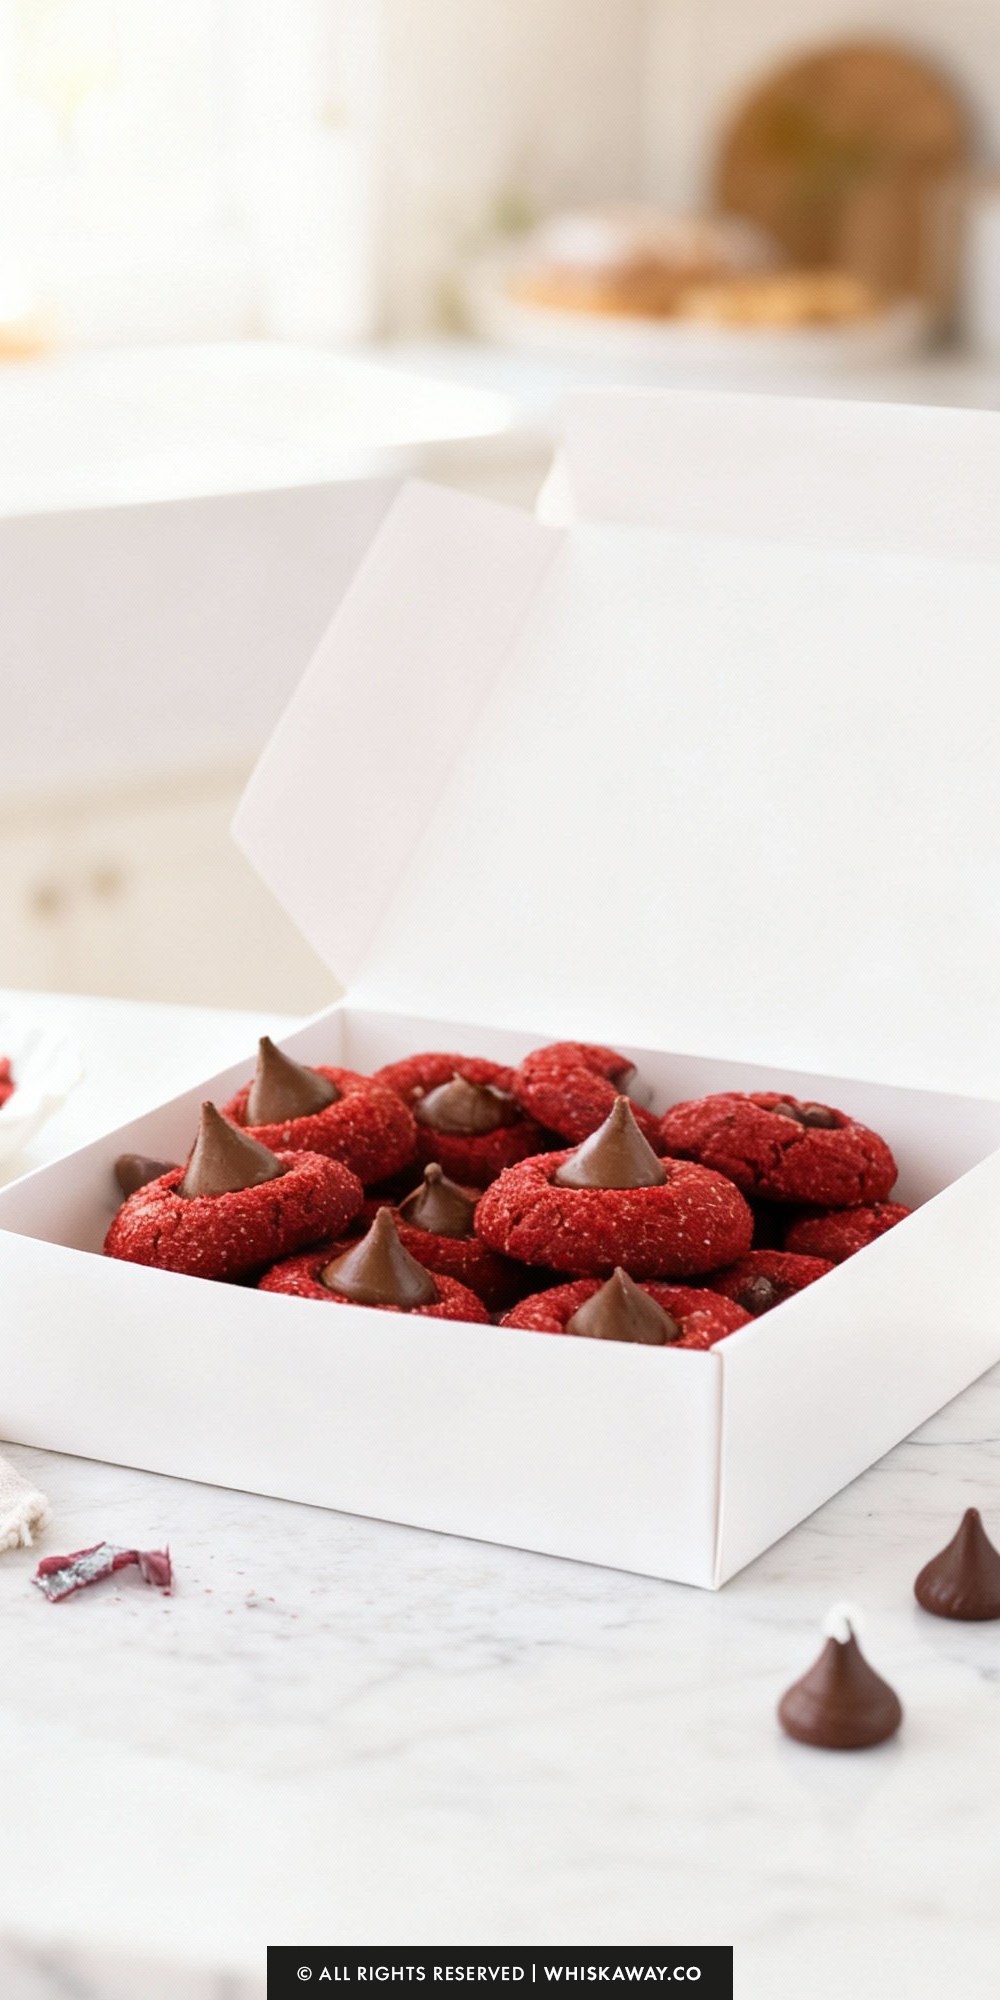
They’re visually appealing, easy to portion, and fun to bake, making them ideal for holidays, gifting, or family baking projects.
Key Reasons to Love Them:
- Soft red velvet cookie with gooey chocolate center.
- Melts in the mouth for a satisfying bite.
- Visually festive and charming.
- Easy for beginners to bake with simple steps.
- Perfect for holidays, gifting, or sharing with friends.
🔥 These red velvet blossom cookies are perfect for Valentine’s cookie trays alongside red velvet sugar cookies, festive heart thumbprint cookies, or strawberry kiss cookies.
How to Get Your Red Velvet Blossom Cookies Just Right
Blossom cookies are a classic, but the “Red Velvet” twist adds a couple of variables, specifically the food coloring and the cocoa ratio, that can be tricky.
Here is how to ensure your cookies stay vibrant, soft, and visually perfect.
1. The “Melting Kiss” Solution
The biggest tragedy with blossom cookies is when the chocolate kiss melts into a puddle because the cookie is too hot.
Unwrap your Hershey’s Kisses before you start baking and pop them in the freezer.
When you press a frozen kiss into a hot cookie, the temperature difference helps the chocolate hold its iconic shape while the bottom melts just enough to stick to the cookie.
2. Gel vs. Liquid Coloring
For that deep, professional bakery crimson color, put down the liquid drops found in the baking aisle.
Liquid food coloring is watered down; you need a lot of it to fight the brown cocoa powder, which adds excess liquid to your dough.
Use Gel Paste Coloring (like Americolor or Wilton). You only need a small amount to get a vibrant red, and it won’t alter the texture of your dough.
3. Don’t Overbake
Red velvet cookies can turn dry very quickly.
Pull them out at the 10-minute mark even if they look slightly underdone or puffy in the center. They will deflate slightly and firm up as they cool on the hot baking sheet.
If you wait until the edges are hard in the oven, the cooled cookie will be rock hard.
4. Managing the “Cracks”
When you press the kiss into the center, the edges of the cookie will naturally crack.
A few cracks look rustic and cute, but if the cookie splits wide open, the dough was likely too dry (too much flour) or too cold.
If significant cracks form, quickly use your fingers to gently pinch the dough back together while it is still hot and pliable.
5. The Cocoa Balance
Red velvet is essentially a mild chocolate flavor.
Don’t be tempted to add extra cocoa powder for “more chocolate flavor.” Too much cocoa will muddy the red color, turning the cookies a dull brownish-purple.
Stick to the 1 tablespoon listed to keep the color bright.
6. Spoon and Level Your Flour
Because this recipe relies on just one egg yolk for moisture, having the exact amount of flour is crucial.
Do not scoop the flour cup directly into the bag (this packs it down and leads to dry cookies). Instead, spoon the flour into the measuring cup and level it off with a knife.
Easy Baking Tips That Have Worked for Me
Placing a chocolate center in the middle of red velvet dough and baking creates a soft, tender cookie that hugs the chocolate perfectly.
The dough spreads slightly while retaining its shape, producing a charming blossom appearance. The aroma of cocoa and chocolate fills the kitchen, adding to the anticipation of tasting.
Once cooled, the cookies are soft with a gooey chocolate center that contrasts beautifully with the tender dough.
Each bite combines rich flavor and soft texture, making them a delightful treat to make and enjoy.
Variation Tips
These Red Velvet Blossom Cookies are showstoppers on their own, but they are also incredibly easy to customize for holidays, specific cravings, or dietary needs.
Here are a few ways to switch things up.
1. The Cream Cheese Twist (White Chocolate)
Red velvet cake is traditionally served with cream cheese frosting, so pairing it with milk chocolate can sometimes feel like a mismatch.
Replace the standard milk chocolate Kiss with a Hershey’s Hug (the white and milk striped ones) or a Birthday Cake Kiss (white chocolate).
The creamy white chocolate mimics the flavor of frosting, and the white stripes look stunning against the deep red cookie.
2. The Snowy Crinkle Look
If you want the red color to pop even more:
Instead of rolling the dough balls in red sanding sugar, roll them in granulated white sugar for a sparkle effect, or powdered sugar for a “crinkle cookie” finish.
The white coating creates a dramatic contrast with the red dough.
3. Pecan Encrusted
Many traditional Southern red velvet cakes feature pecans.
Skip the sugar coating and roll the dough balls in finely chopped pecans. This adds a savory, nutty crunch that balances the sweetness of the chocolate center perfectly.
4. Valentine’s Hearts
Since these are red, they are perfect for Valentine’s Day.
Instead of a kiss, press a chocolate heart (like Dove or Reese’s hearts) into the center. Just be aware that thinner chocolates melt faster, so freeze them beforehand!
5. Cherry Cordial Blossoms
Use Cherry Cordial Kisses instead of plain chocolate. The cherry center reinforces the fruity undertones often associated with red velvet, and the gooey center adds a surprise texture.
6. Dietary Adaptations
Gluten-Free
Swap the all-purpose flour for a high-quality 1:1 Gluten-Free Flour Blend (like King Arthur or Bob’s Red Mill). The texture remains nearly identical.
Dairy-Free
- The Butter: Use a vegan butter stick (not tub margarine).
- The Topping: Most standard Kisses contain dairy. Instead, press a square of your favorite dairy-free dark chocolate bar or a vegan chocolate button into the center immediately after baking.
Save for Later to Your Pinterest Board

How to Properly Store Your Red Velvet Blossom Cookies
Red Velvet Blossom Cookies are famous for their soft texture and that distinct chocolate peak. To keep the cookie chewy and the chocolate snappy, proper storage is essential.
1. Room Temperature (The Best Method)
The Duration: 3 to 5 days.
Store the cookies in an airtight container on the counter. This keeps the butter in the cookie soft and moist.
Pro Tip: If you want them to stay bakery-soft, place a slice of white bread in the container with the cookies. The cookies will absorb moisture from the bread, keeping them from going stale.
2. Freezing (For Long-Term Storage)
The Duration: Up to 3 months.
Flash Freeze: Place the baked, fully cooled cookies on a baking sheet in the freezer for 1 hour. This hardens the chocolate kiss so it doesn’t get crushed.
Pack: Transfer them to a freezer-safe bag or rigid container.
Thawing: Let them sit on the counter for 1–2 hours to come to room temperature. Avoid thawing in the microwave, or the chocolate kiss will melt into a puddle.
3. Refrigeration (Use with Caution)
ThI generally do not recommend refrigerating these cookies.
The cold air can dry out the red velvet dough, and the humidity change can cause “sugar bloom” on the Hershey’s Kiss (where the chocolate turns white and splotchy).
Only refrigerate if your kitchen is extremely hot and the chocolate is at risk of melting.
4. The “Stacking Strategy” (Crucial for Blossoms)
Because these cookies have a pointy chocolate mountain in the center, you cannot stack them like normal cookies.
Ideally, store them in a single layer.
If you must stack them, place a sheet of parchment paper over the bottom layer.
Place the second layer of cookies in the “gaps” between the kisses of the bottom layer (offsetting them) so they aren’t resting directly on the delicate chocolate tips.
5. Storage Mistakes to Avoid
This is the most common mistake. Even if the cookie feels cool, the chocolate kiss retains heat longer.
If you put them in a container before the chocolate is completely solid, the kisses will bump into each other and smear, ruining the look.
Avoid using soft Ziploc bags for room-temperature storage; a rigid Tupperware is much better to protect the shape of the chocolate.
FAQs
When exactly do I place the Hershey’s Kiss on the cookie?
You must place the kiss immediately after removing the cookies from the oven. Do not bake the chocolate kiss, or it will melt into a puddle and lose its shape. The residual heat from the baked cookie is enough to slightly melt the bottom of the chocolate so it adheres without collapsing the rest of the kiss.
Can I use liquid food coloring instead of gel?
It is not recommended. Liquid food coloring is very diluted, so you would need to add a significant amount to achieve a deep red color. This extra liquid can alter the dough’s consistency, making it sticky and causing the cookies to spread too much. Gel paste coloring is concentrated and produces a vibrant red without affecting the texture.
Can I make the dough ahead of time and freeze it?
Yes! This is a great make-ahead recipe. You can roll the dough into balls, coat them in sugar, and freeze them on a baking sheet. Once solid, transfer them to a freezer bag for up to 3 months. When you are ready to bake, you can bake them directly from frozen—just add 1–2 extra minutes to the baking time.
Why did my cookies turn out dry or crumbly?
This is usually caused by too much flour. If you scoop your measuring cup directly into the flour bag, you pack the flour down and can end up with 20% more than needed. Instead, use the “spoon and level” method: spoon the flour into the cup and level it off with a knife. Also, avoid overbaking—take them out at the 10-minute mark even if they look slightly soft.
How do I stack these for storage without crushing the chocolate?
Because of the pointed tip, these cookies are best stored in a single layer. If you need to stack them in a container to save space, use the “offset” method: place a layer of parchment paper over the first layer of cookies, and place the second layer of cookies in the empty spaces between the chocolate peaks of the bottom layer, rather than directly on top of them.
Red Velvet Blossom Cookies
18
cookies15
minutes10
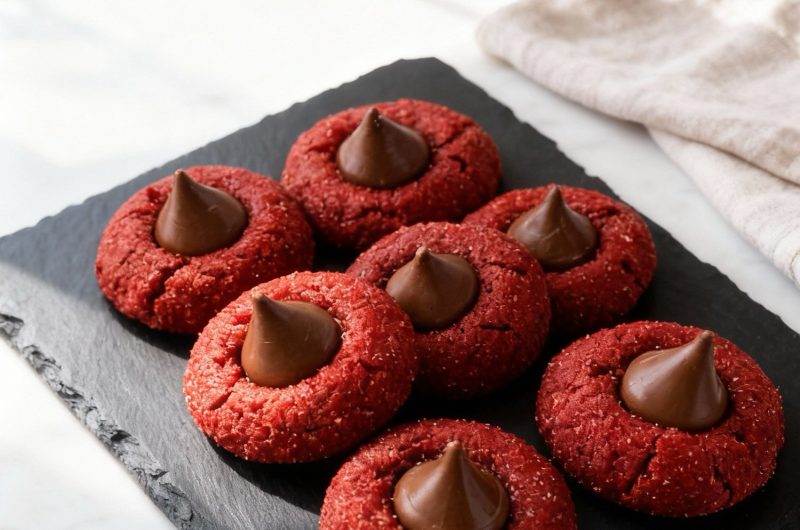
minutesSoft red velvet blossom cookies topped with chocolate kisses make a festive and irresistible treat.
Ingredients
1 cup all-purpose flour
1/2 cup brown sugar
7 tbsp butter salted or unsalted, softened
1/4 cup red sanding sugar
18 Hershey chocolate kisses
2 tbsp granulated sugar
1 tbsp cocoa powder
1 tsp vanilla extract
1 large egg yolk
1/2 tsp baking powder
1/4 tsp salt
1/4 tsp red food coloring gel
Directions
- Start by preheating your oven to 350°F (175°C). Line a large baking sheet with parchment paper so the cookies don't stick, and set it aside.
- In the bowl of a stand mixer, beat the softened butter, brown sugar, and granulated sugar together until the mixture is creamy and smooth. Next, mix in the egg yolk, vanilla extract, and red gel food coloring until everything is fully incorporated and the color is even.
- Add the flour, cocoa powder, baking powder, and salt to the wet mixture. Mix gently just until the streaks of flour disappear—be careful not to overmix. Use a tablespoon to scoop the dough into 18 even portions. Roll each portion between your palms to form a smooth ball, then roll the ball in the red sanding sugar until it is completely coated.
- Arrange the sugar-coated balls on your prepared baking sheet. Bake for 10 minutes.
- The moment you pull the tray out of the oven (while the cookies are still soft and hot), gently press a chocolate kiss into the center of each cookie.
- Allow the cookies to rest on the hot baking sheet for 10 minutes. This helps them set up and prevents them from falling apart. After 10 minutes, transfer them to a wire rack to finish cooling completely.