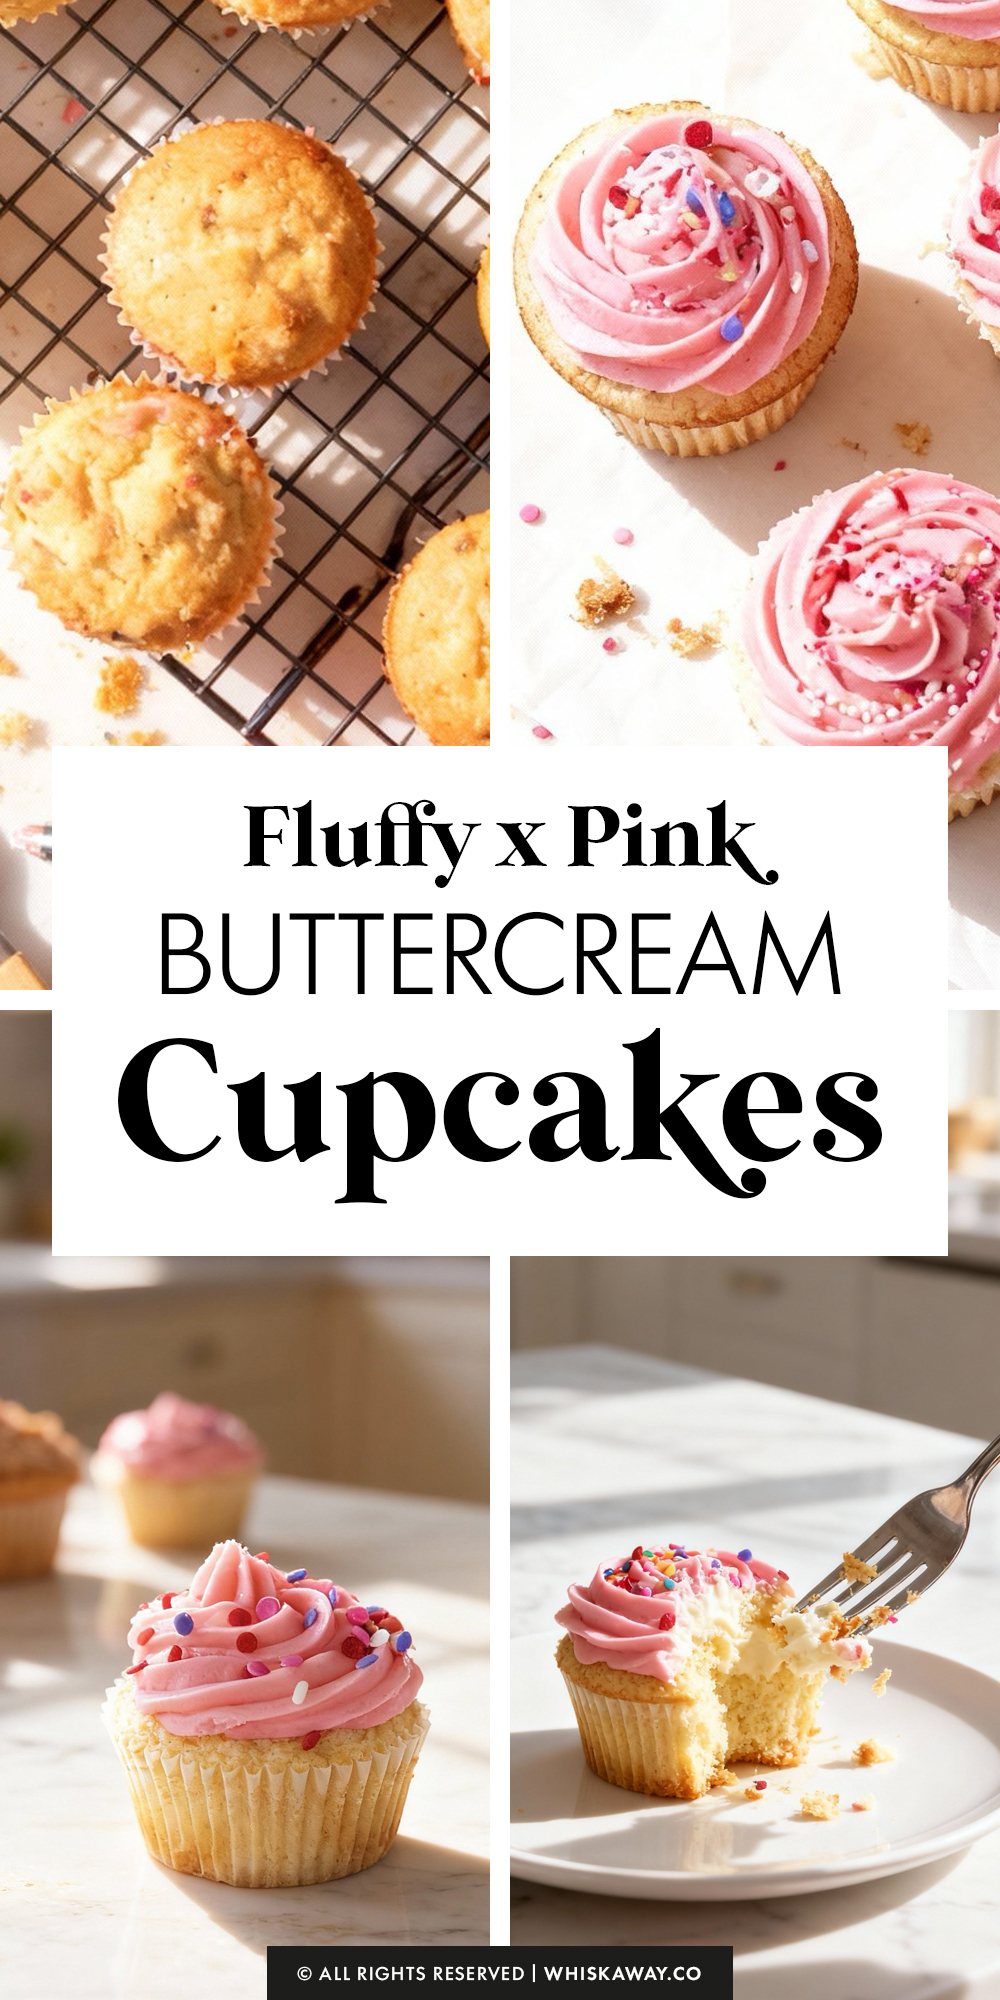
If you have been endlessly scrolling through Pinterest hunting for the ultimate Pink Buttercream Cupcakes that actually taste as luxuriously soft as they look, you can finally put down your phone.
Let’s be real for a second: we have all been victimized by a “pretty” cupcake that turned out to be as dry as sawdust the moment you bit into it. Total buzzkill!
This is the kind of treat that makes you look like a total pro at the bake sale, Valentine’s party, or just a random Tuesday night when you need a little self-care in the form of sugar.
Trust me, once you see how that frosting pipes onto the pale, perfect dome of the cake, you’ll never go back to the boxed stuff. Ready to level up your baking game?
Tie on that apron and let’s get messy!
Why You’ll Love This Recipe
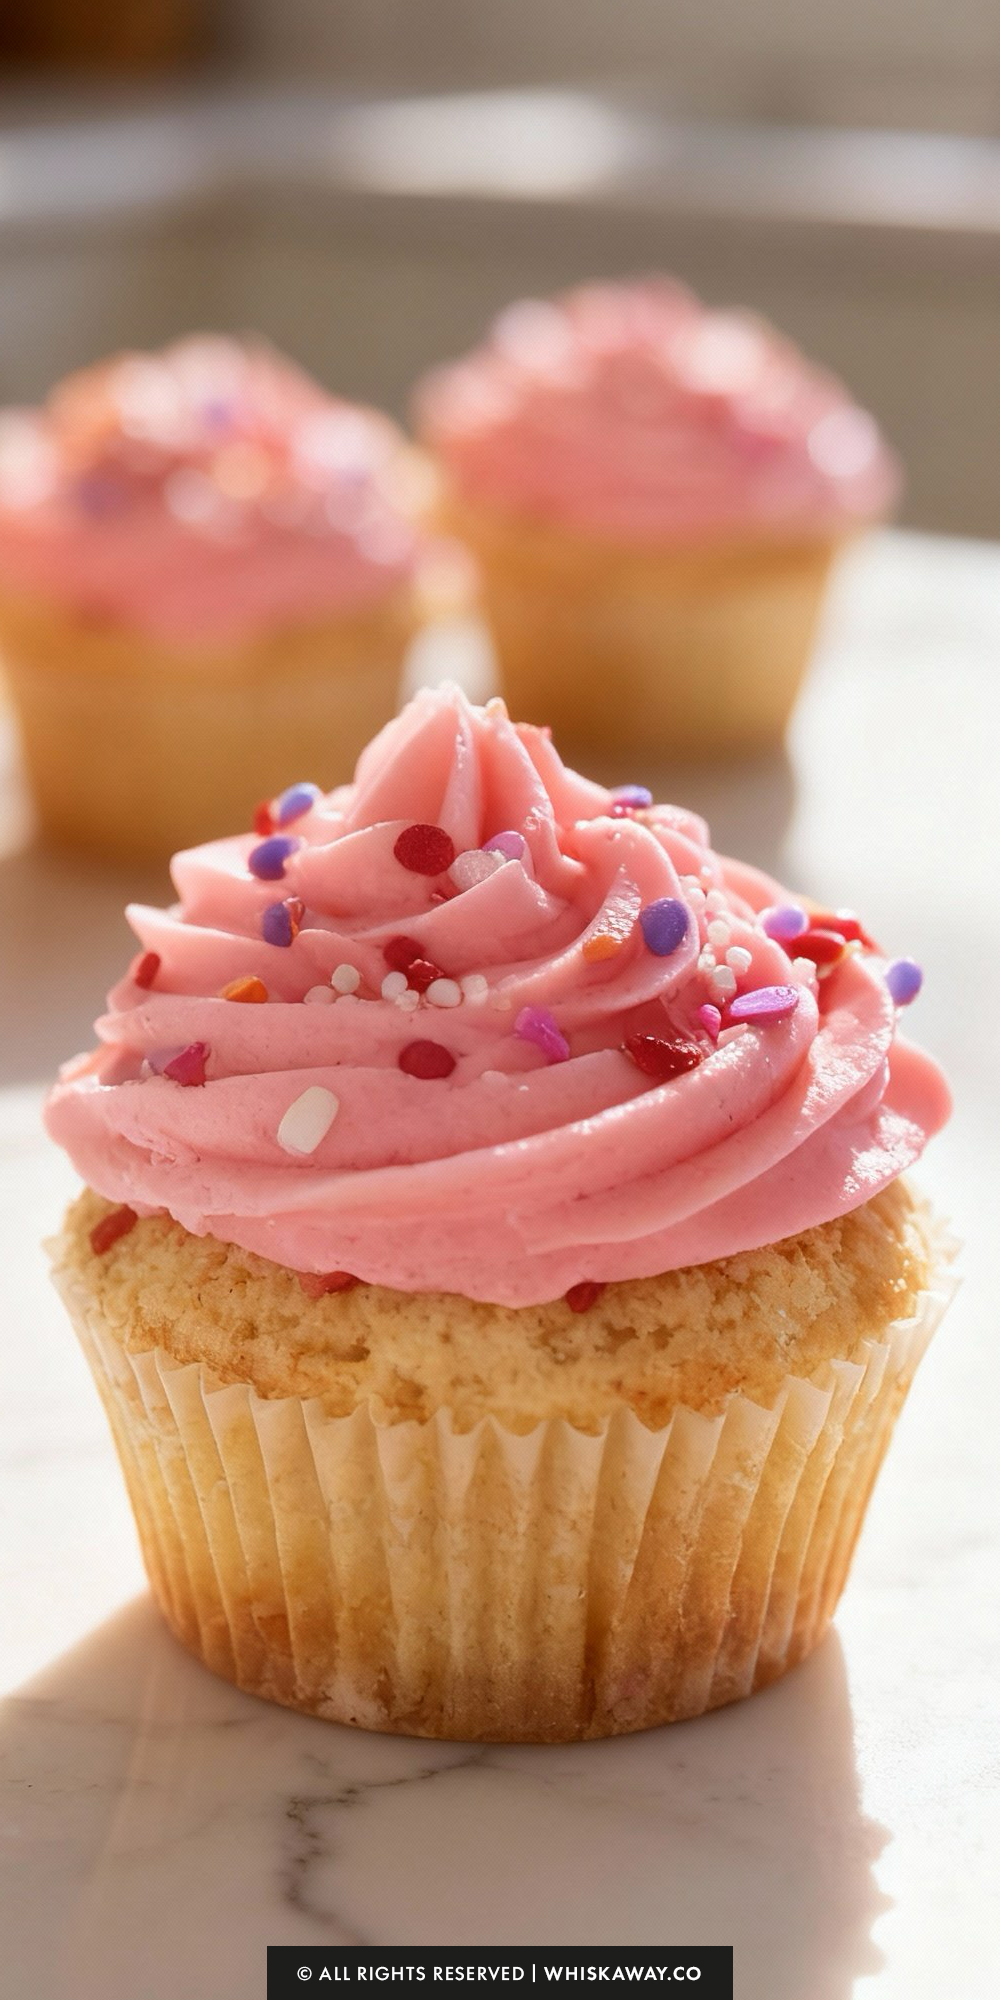
Pink buttercream cupcakes are whimsical, soft, and visually delightful, combining tender vanilla or chocolate cake with creamy, colorful frosting.
They’re perfect for celebrations, gifting, or simply brightening up a day. The smooth, airy frosting pairs perfectly with a moist cupcake, offering a balanced bite every time.
Decorating with swirls, sprinkles, or toppings is fun and beginner-friendly, making baking a playful and rewarding experience.
Key Reasons to Love Them:
- Soft, tender cupcake base with moist crumb and balanced sweetness.
- Fluffy, creamy frosting that holds its shape beautifully.
- Vibrant pink color adds charm and festive appeal.
- Easy to decorate creatively for holidays, birthdays, or events.
- Fun, hands-on process that teaches basic piping and frosting skills.
🔥 These pink buttercream cupcakes look beautiful next to heart shaped macarons, festive cake pops, or romantic chocolate covered raspberries.
How to Get Your Pink Buttercream Cupcakes Just Right
This recipe is designed to produce a “bakery-style” cupcake; dense, moist, and topped with a mountain of impossibly smooth frosting. Here is how to nail the technique.
1. Respect the “Resting” Period
Most cupcake recipes tell you to rush the batter into the oven, but this one is different.
Letting the batter sit for 15 minutes before scooping allows the flour to fully hydrate and the gluten strands to relax. This results in a taller, more uniform dome and a tender crumb.
If you skip this, your cupcakes may bake up slightly flat or uneven. Use this time to preheat your oven and line your tins.
2. The Flour Blend Matters
This recipe uses a specific ratio of All-Purpose flour and Cake flour.
All-Purpose provides the structure so the cupcake doesn’t collapse under the heavy frosting, while Cake flour keeps the texture soft and velvety.
If you try to use only All-Purpose flour, the cupcakes will be tough. If you use only Cake flour, they may be too crumbly. Stick to the blend for the perfect balance.
3. Don’t Wait for “Golden Brown”
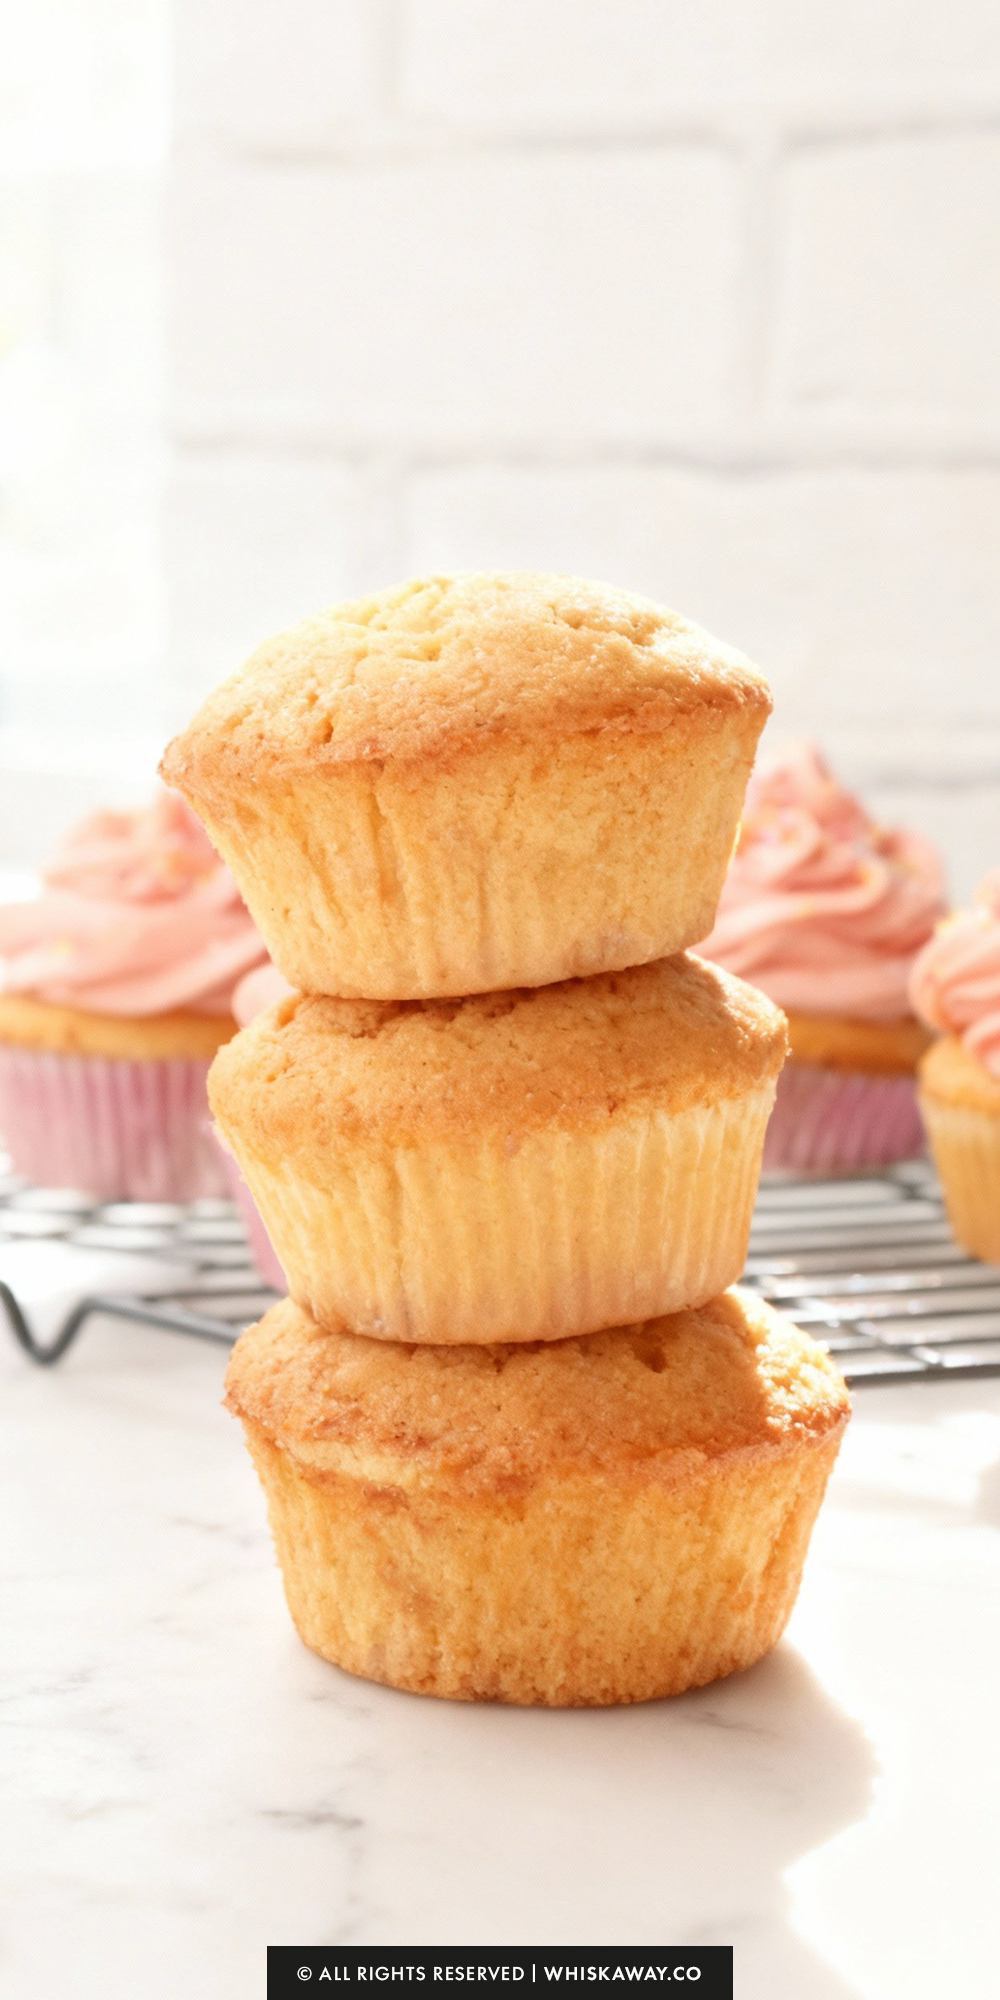
These cupcakes are formulated to stay pale and creamy in color. If you wait for the tops to turn golden brown, you have likely overbaked them.
Trust the toothpick test. As soon as it comes out clean (or with a few moist crumbs attached), pull them out. They will continue to set slightly as they cool in the pan.
4. The Secret to Gritty-Free Frosting
American buttercream (butter + powdered sugar) gets a bad reputation for being gritty or too sweet.
The 5-minute whipping time at the end is non-negotiable. This long beating process dissolves the sugar crystals into the fat and introduces air.
It transforms the frosting from a yellow, heavy paste into a white, cloud-like mousse.
Whipping also makes the butter very white, which provides a clean base for your pink food coloring. If you start with yellow butter, your pink frosting will look peach/salmon colored.
5. Gel vs. Liquid Coloring
Always use gel food coloring rather than the liquid drops found in the grocery store aisle.
Liquid drops contain water, which can break the emulsion of your buttercream and make it separate or become runny.
Gel is concentrated, so you only need a tiny drop to get a vibrant pink without changing the texture.
6. Room Temperature is Non-Negotiable
Because this batter uses a high volume of liquid (milk and heavy cream), your butter and eggs must be at room temperature.
If you add cold eggs to creamed butter, the butter will seize up into tiny lumps. This creates a curdled batter that won’t rise properly.
7. The Slapping Sound
When making the frosting, listen for the specific “slapping” sound mentioned in the instructions.
This indicates your butter is at the perfect temperature, soft enough to whip, but cool enough to hold its shape.
If it sounds slushy, your butter is too warm; pop the bowl in the fridge for 10 minutes before adding sugar.
Easy Baking Tips That Have Worked for Me
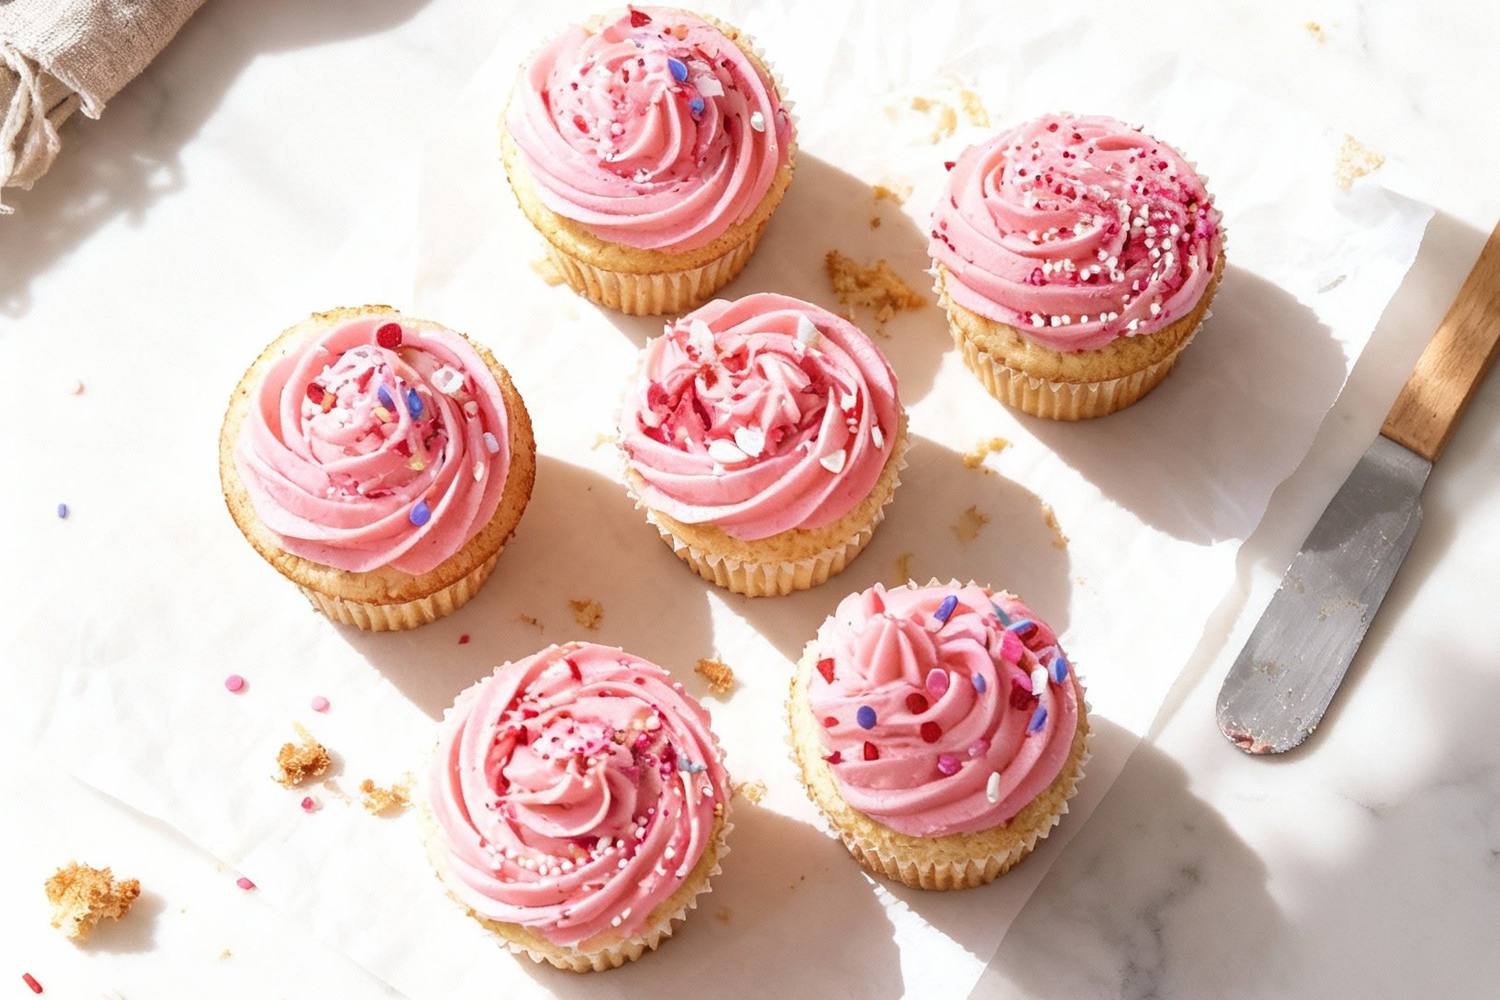
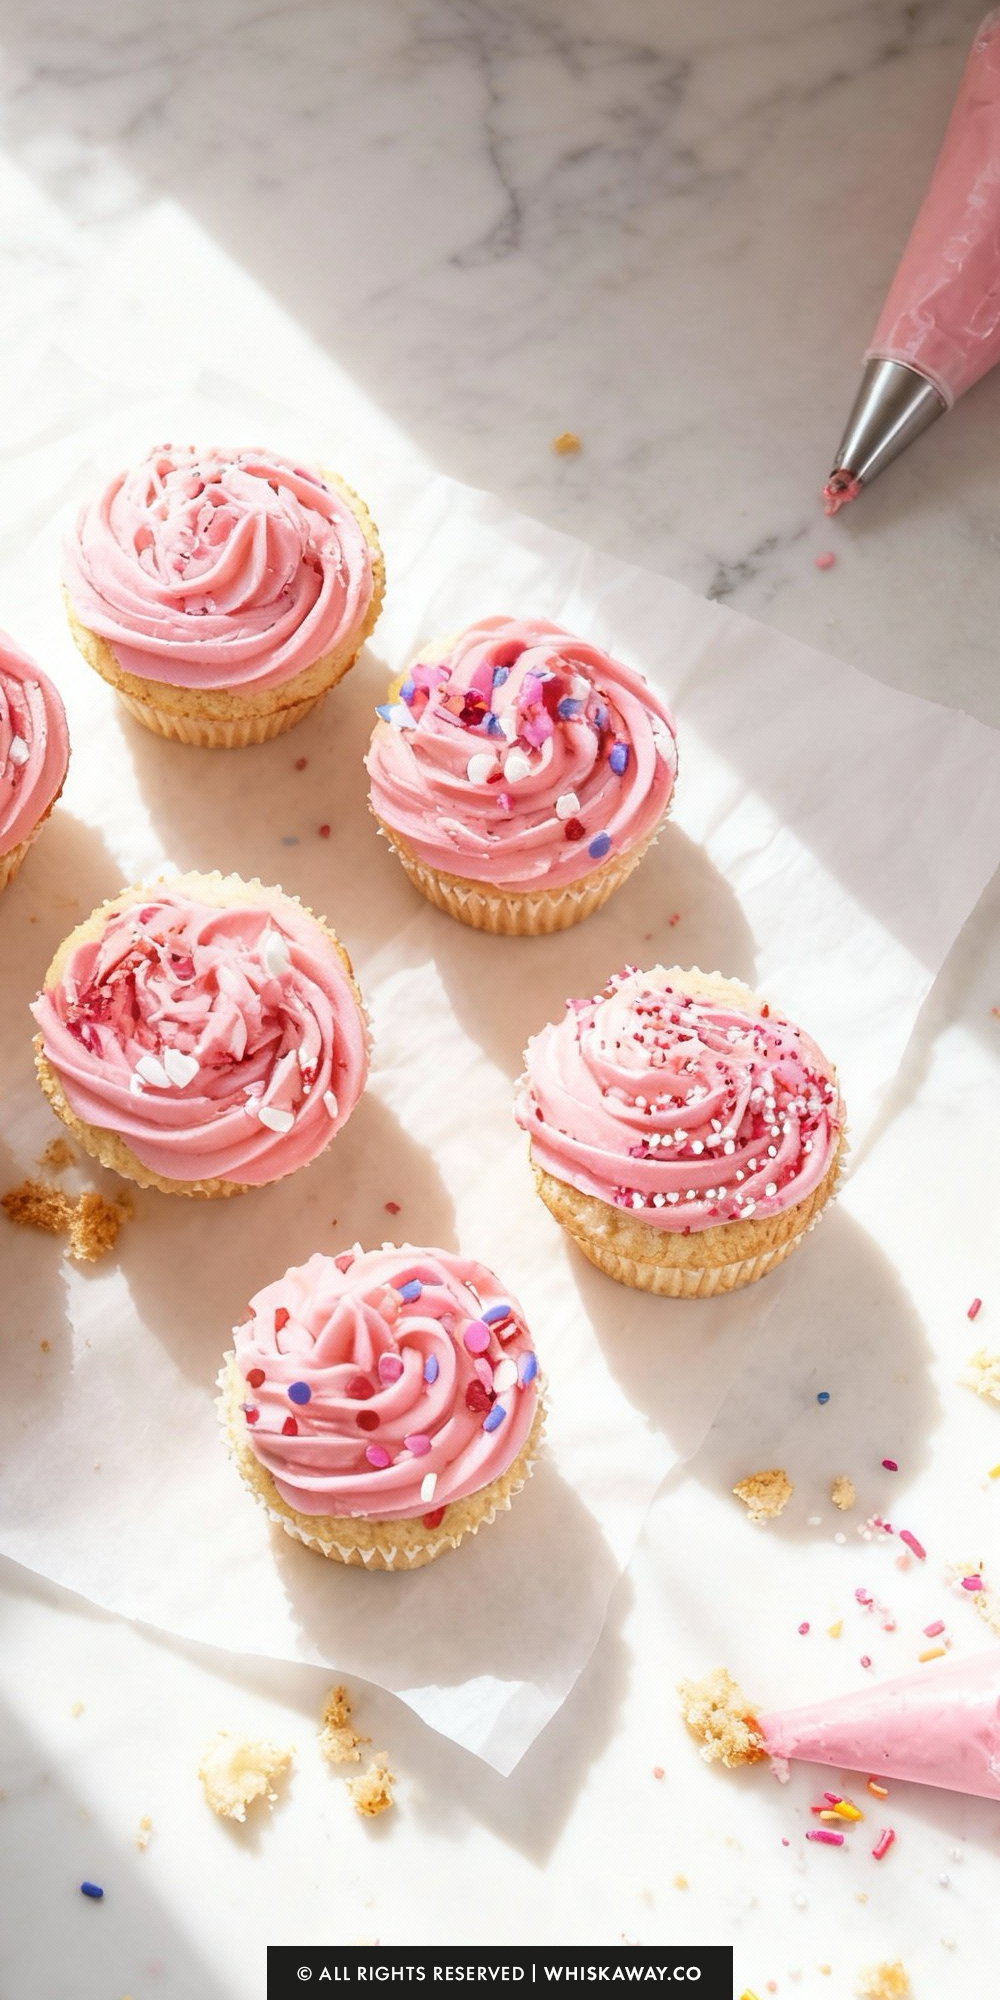
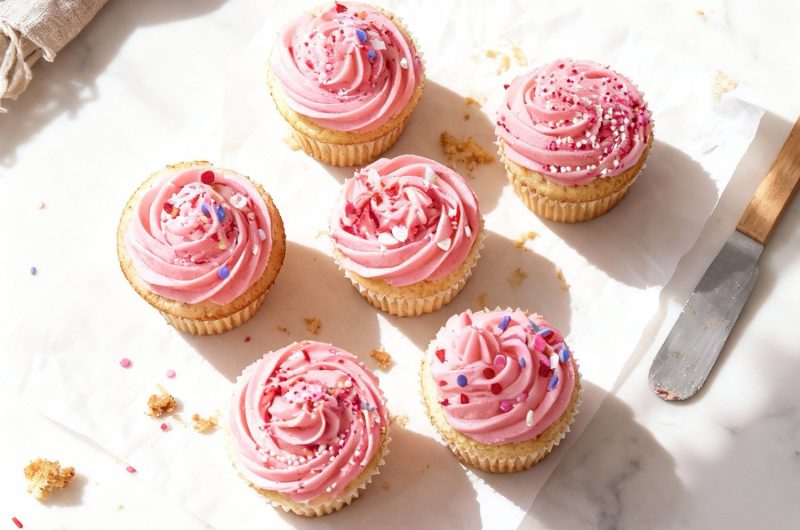
Piping fluffy, pastel pink buttercream over soft, tender cupcakes feels whimsical and fun.
Watching the frosting build into swirls adds an element of creativity and control. Each cupcake is not only visually appealing but also perfectly balanced in flavor, with soft cake and creamy frosting.
The sweet aroma enhances the experience and makes baking feel rewarding.
These cupcakes are ideal for celebrations or as a cheerful treat, giving beginners confidence in both decorating and baking skills.
Variation Tips
The beauty of a classic vanilla-base cupcake is that it accepts flavor and color changes beautifully. Here are a few ways to customize these Pink Buttercream Cupcakes for any occasion.
1. “Strawberry Milkshake” Frosting
To give the pink frosting a natural flavor boost, grind 1/2 cup of freeze-dried strawberries into a fine powder.
Mix this powder into the buttercream along with the sugar. It adds a vibrant pink color and a punchy, tart strawberry flavor that tastes exactly like a milkshake.
2. The “Wedding Cake” Flavor Profile
Replace half of the vanilla extract in both the batter and the frosting with almond extract.
This gives the cupcakes that nostalgic, aromatic “bakery” scent often associated with white wedding cakes.
3. Lemon Velvet Variation
Rub 1 tablespoon of lemon zest into the sugar before creaming it with the butter. This releases the oils and infuses the entire cupcake with citrus notes.
Add 1 teaspoon of lemon extract to the buttercream. The bright citrus flavor cuts through the sweetness of the frosting perfectly.
4. Funfetti / Birthday Cake Style
Gently fold 1/2 cup of rainbow sprinkles (jimmies, not nonpareils) into the batter right before the 15-minute rest period.
This creates colorful polka dots inside the pale cake. Use a matching sprinkle mix on top of the pink frosting for a festive look.
5. The “Hidden Heart” Center
Once the cupcakes have cooled, use a small knife or an apple corer to remove the center of the cupcake.
Spoon in a teaspoon of strawberry jam, lemon curd, or even edible cookie dough before piping the buttercream on top to hide the hole.
6. Dietary Adaptations
- Because this recipe relies on a mix of All-Purpose and Cake flour, swapping for GF is a two-step process.
- Use a high-quality 1-to-1 Gluten-Free Baking Flour to replace the All-Purpose flour.
- To mimic the “Cake Flour,” replace the 1 cup of cake flour with 3/4 cup GF flour + 2 tablespoons cornstarch.
Nut-Free: This recipe is naturally nut-free. However, if you are baking for a school event, ensure your sprinkles and food coloring are processed in a nut-free facility.
7. White Chocolate Raspberry
Fold 1/2 cup of mini white chocolate chips into the batter.
Top the pink frosting with a fresh raspberry. The tart fruit balances the very sweet American buttercream.
Save for Later to Your Pinterest Board
How to Properly Store Your Pink Buttercream Cupcakes
Because these cupcakes use a butter-based cake and a classic American buttercream, they store beautifully if treated right.
Here is how to keep them moist and fluffy for days.
1. Room Temperature (Best for 1–2 Days)
Unless your kitchen is very hot (above 75°F/24°C), room temperature is actually the best place for these cupcakes. The refrigerator tends to dry out the sponge cake.
Store them in a cake carrier or an airtight container.
American buttercream forms a slight “crust” on the outside when exposed to air. This protects the soft frosting underneath, but you still want to keep them covered to prevent the cake itself from going stale.
2. Refrigeration (Best for 3–5 Days)
When to Chill: If you need to keep them longer than 48 hours, or if you live in a humid climate where the butter might melt, move them to the fridge.
Butter acts like a sponge for refrigerator odors. Ensure your container is tightly sealed so your vanilla cupcakes don’t end up tasting like onions or leftovers.
Butter cake becomes dense and hard when cold. You must let the cupcakes sit on the counter for at least 30 minutes (preferably an hour) before serving.
This allows the butter in the cake and frosting to soften back to that melt-in-your-mouth texture.
3. Freezing (Best for up to 3 Months)
Unfrosted: Wrap the cooled cupcakes individually in plastic wrap, then place them in a freezer bag. This is the best method for advance prep.
Frosted: You can freeze fully decorated cupcakes! Place them on a baking sheet in the freezer for 1 hour until the frosting is rock hard (“flash freezing”).
Then, transfer them to a deep airtight container. You can wrap them individually, but be careful not to crush the frozen frosting piping.
Thawing: Remove the cupcakes from the container and unwrap them while they are still frozen (this prevents the wrapper from sticking to the sticky frosting as it thaws).
Let them thaw on the counter for 2–3 hours.
4. Storage Mistakes to Avoid
Never try to warm up a frosted cupcake in the microwave. The buttercream is made of butter and will melt into a puddle within seconds, ruining the decoration and making a mess.
Don’t leave cupcakes uncovered on a plate overnight. The air will suck the moisture right out of the sponge, leaving you with a dry, crumbly texture.
Even if the room is cool, direct sunlight will fade your beautiful pink food coloring and soften the butter, causing the frosting swirls to droop.
FAQs
Can I use just one type of flour if I don’t have both?
For this specific recipe, the texture relies heavily on the blend of All-Purpose and Cake flour. All-Purpose provides the structure, while Cake flour ensures the crumb is tender and velvety. If you use only All-Purpose, the cupcakes will be tough. If you only use Cake flour, they may crumble apart. In a pinch, you can make your own cake flour substitute: measure 1 cup of All-Purpose flour, remove 2 tablespoons, and replace them with cornstarch, sifting well.
Why do I have to let the batter rest for 15 minutes?
This is a professional bakery trick! Because we are mixing different flours and a high volume of liquid, resting allows the gluten strands to relax and the starch to fully absorb the moisture before it hits the heat. This results in a taller, more uniform dome and a softer texture. Use this time to clean up your workspace or preheat the oven.
My buttercream tastes too much like butter. How do I fix it?
If your frosting tastes greasy or heavy, you likely didn’t whip it long enough. The 5-minute whipping step is crucial—it aerates the butter, turning it from a yellow block of fat into a white, cloud-like mousse. The addition of salt and vanilla is also essential to cut the richness. Don’t be afraid to let the mixer run!
Can I make this recipe into a layer cake instead?
Yes, this batter works well for cakes. This recipe yields enough batter for two 8-inch or 9-inch round cake pans. You will need to increase the baking time to approximately 30–35 minutes. Keep an eye on it and use the toothpick test starting at the 25-minute mark.
How do I get that vibrant pink color without staining my teeth?
The secret is using gel food coloring (like AmeriColor or Wilton) rather than liquid drops. Gel is highly concentrated, so you only need a tiny amount (the size of a toothpick tip) to get a bright pink. Liquid coloring requires you to use much more product to achieve the same brightness, which can affect the taste and texture of your frosting.
Pink Buttercream Cupcakes
24
cupcakes20
minutes20
minutesFluffy cupcakes topped with silky pink buttercream, perfect for birthdays, baby showers, and Valentine’s Day.
Ingredients
- For the Cupcakes
2 3/4 cups sugar
2 1/2 cups flour
1 cup cake flour
1 cup whole milk
1 cup unsalted butter, room temperature
3 eggs
1/2 cup plus 3 TBSP heavy cream
1 TBSP plus 1 tsp vanilla
2 tsp baking powder
1 1/4 tsp salt
- For the Buttercream
6 cups powdered sugar, sifted
3 cups (6 sticks) unsalted butter, room temperature
2 tsp vanilla extract
1/4 tsp salt
Pink gel food coloring
Directions
- The Cupcake Batter
- In a large mixing bowl, sift together the all-purpose flour, cake flour, baking powder, and salt. Set this dry mix aside.
- In a separate pitcher or measuring cup, whisk the milk, heavy cream, and vanilla extract together until combined.
- Place the butter and sugar in the bowl of a stand mixer. Beat them together on medium speed for about 1 minute until the mixture looks fluffy and aerated.
- Mix in the eggs one at a time. Make sure each egg is fully absorbed into the batter and scrape down the sides of the bowl with a spatula before adding the next one.
- Reduce the mixer speed to low. Add the dry and liquid ingredients in alternating batches: start with 1/3 of the flour mixture, followed by 1/2 of the liquid mixture.
- Repeat this process, finishing with the final portion of flour. (Dry -> Wet -> Dry -> Wet -> Dry).
- Give the bowl a final scrape to ensure no ingredients are stuck at the bottom. Let the batter rest in the bowl for 15 minutes. This step is key for the texture.
- While the batter rests, preheat your oven to 350°F (175°C) and line two muffin tins with paper liners.
- Fill the cupcake liners about three-quarters full. Bake for 20 minutes, or until a toothpick inserted into the center comes out clean. Note: These cupcakes are designed to stay pale, so don't wait for them to turn golden brown.
- Let the cupcakes sit in the hot tins for 5 minutes, then transfer them to a wire rack to cool completely before decorating.
- The Pink Buttercream
- Place the room-temperature butter in your stand mixer. Beat it on its own until it turns very pale and smooth. You are looking for a specific texture where the butter makes a distinct "slapping" sound against the sides of the bowl (this takes about 30 seconds for soft butter).
- Gradually Add the sifted powdered sugar one cup at a time. Ensure each cup is fully incorporated before adding the next to avoid a powdery mess.
- Once all the sugar is in, scrape down the paddle and the bowl. Add the vanilla extract and salt, mixing on low for 15 seconds. Then, increase the speed to high and whip for 5 full minutes. Stop to scrape the bowl occasionally. The frosting might look soft at first, but the long whipping time will add air, increasing the volume and stiffening the texture.
- Add the pink gel food coloring little by little until you reach your desired shade. Transfer the frosting to a piping bag fitted with a large star tip. Pipe generous swirls onto the cooled cupcakes and finish with sprinkles if desired.