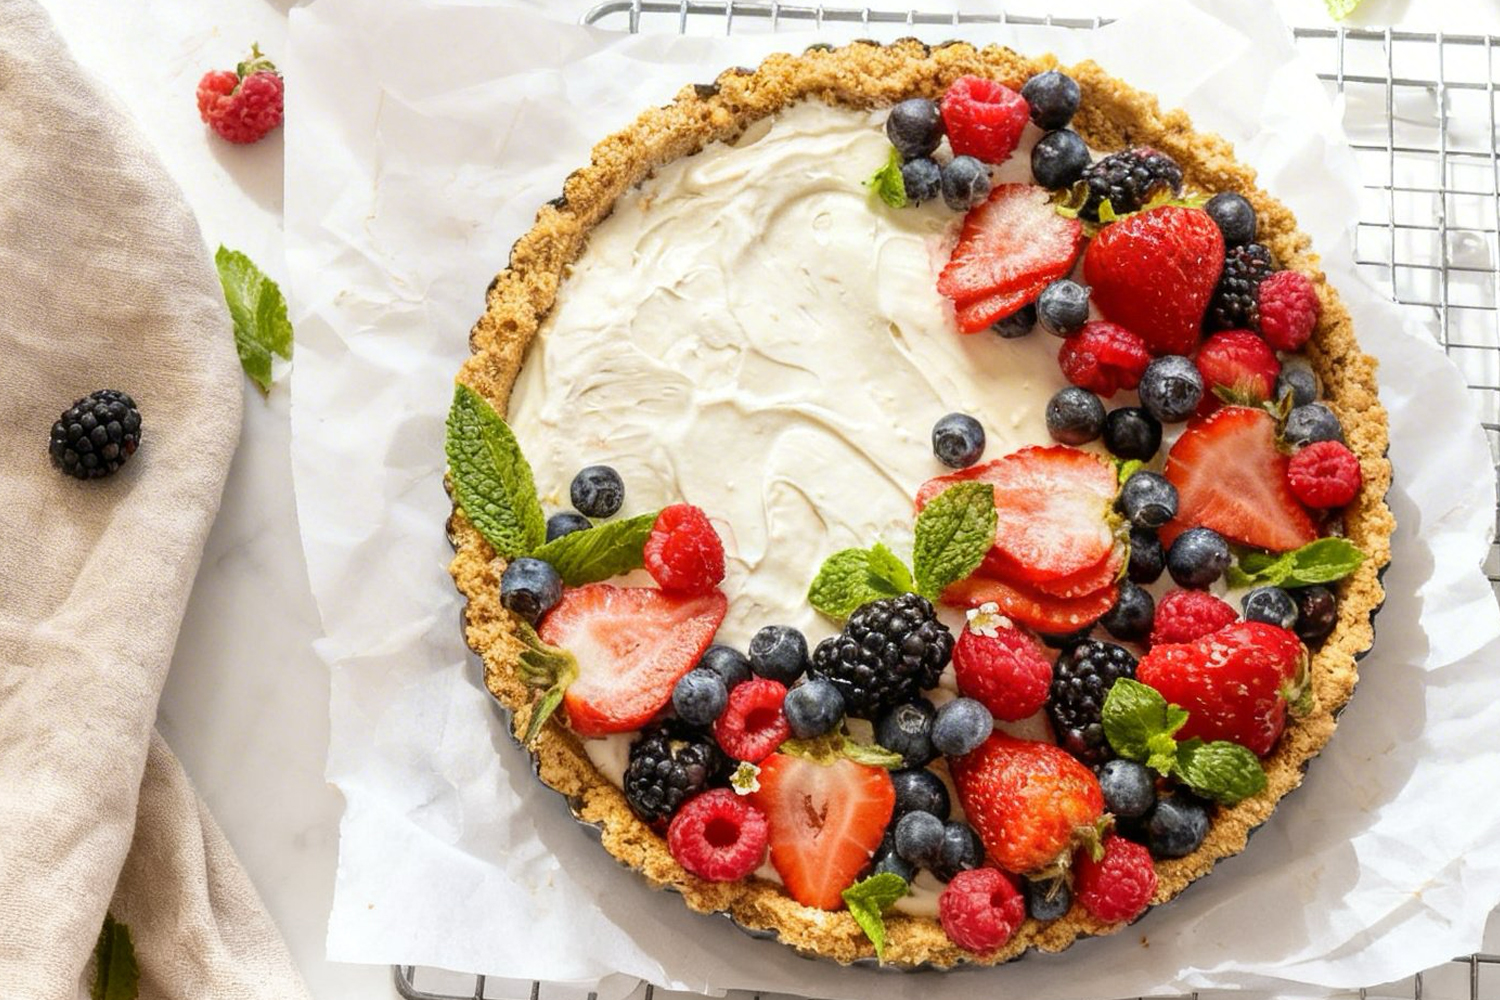
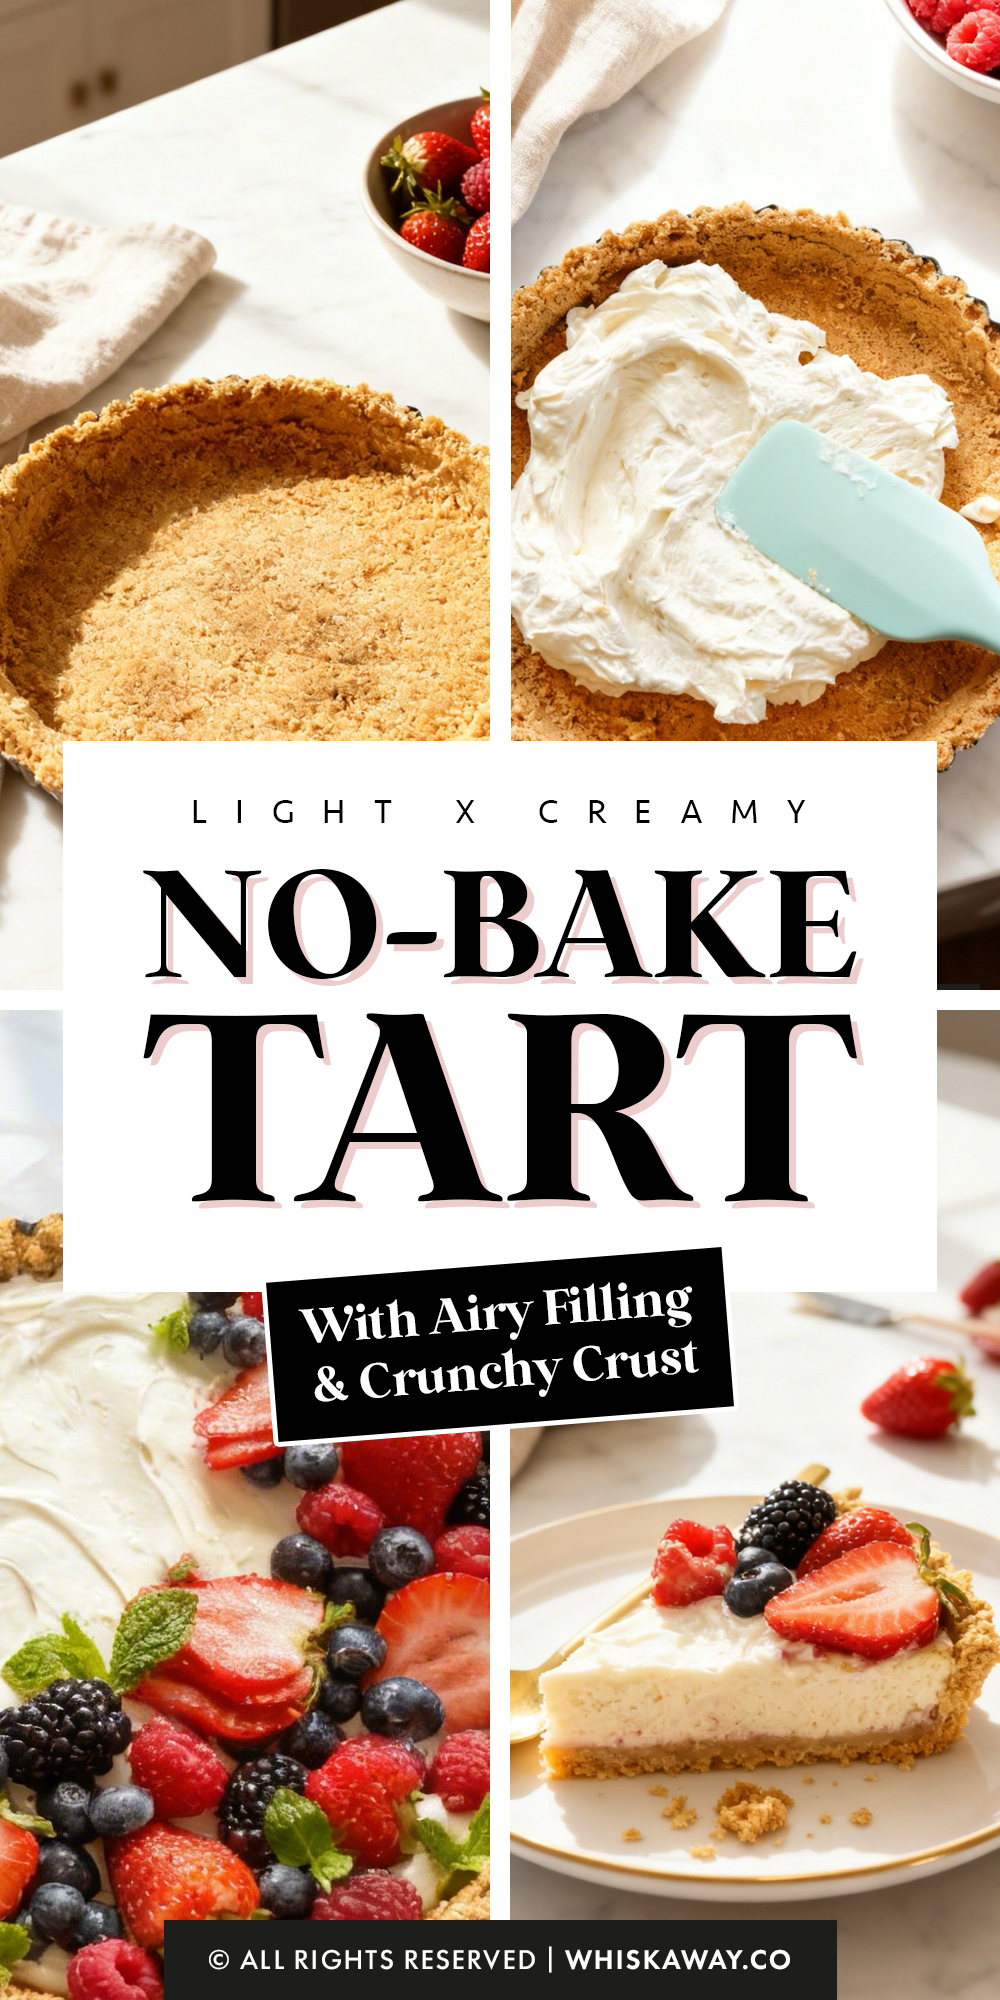
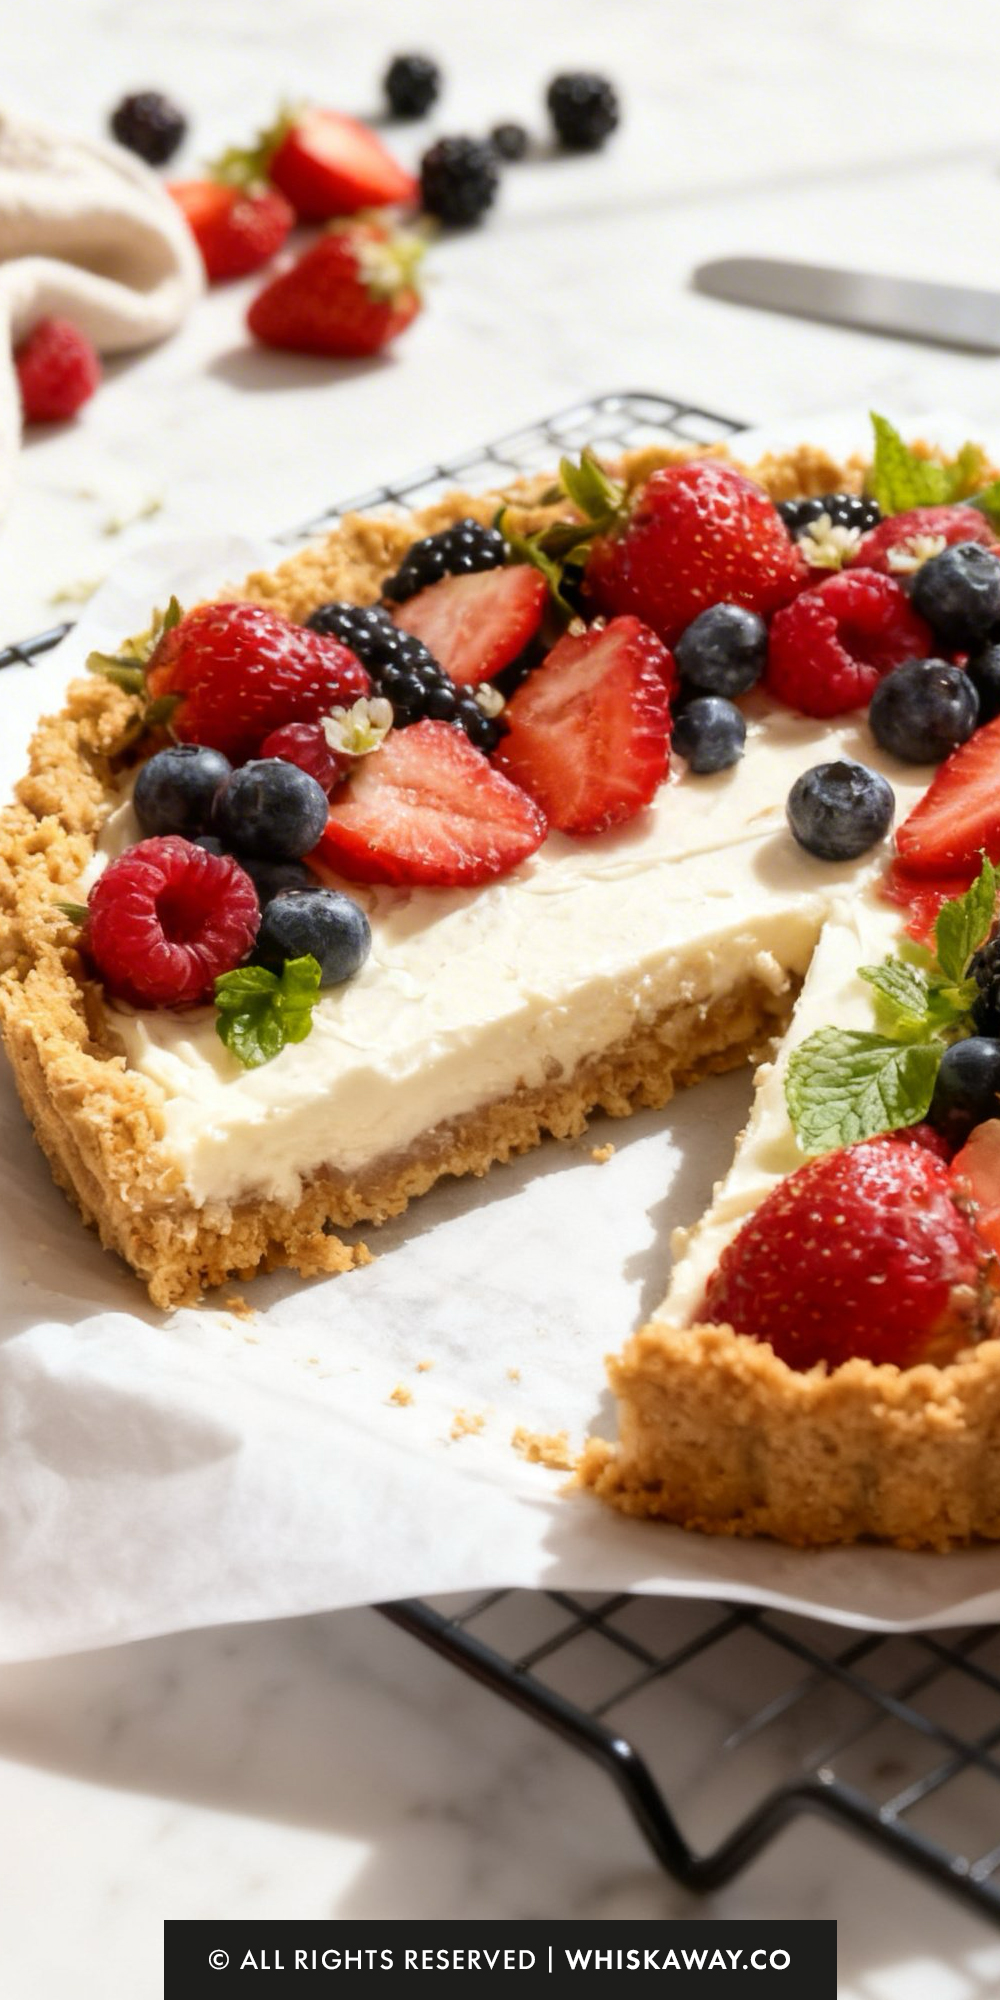
Craving a dessert that’s effortless yet impressive? My no-bake tart makes indulgence simple with a buttery crust and creamy filling that sets without an oven.
Perfect for warm days or quick treats, each bite is smooth, rich, and satisfyingly sweet. You can customize the topping with fruit, chocolate, or nuts, making no-bake tart endlessly versatile.
It’s an approachable recipe that delivers professional-looking results with minimal effort, ideal for beginners or busy bakers who still want a show-stopping dessert.
So, grab your apron and baking tools and let’s make this!
Why You’ll Love This Recipe
The appeal here is structural simplicity combined with a mousse-like texture that feels light but slices clean.
What Makes Them Special
- Butter-bound crumb crust firms up solidly when chilled
- Whipped cream folded into cream cheese creates aerated structure
- Filling sets without gelatin yet holds its shape
- No risk of overbaking or curdling
- Clean, defined slices after proper chill time
Save This Pin for Later to Your Pinterest Board
🔥 Looking for easy, no-fuss desserts with minimal oven time? Try these next:
How to Get Your No-Bake Tart Just Right
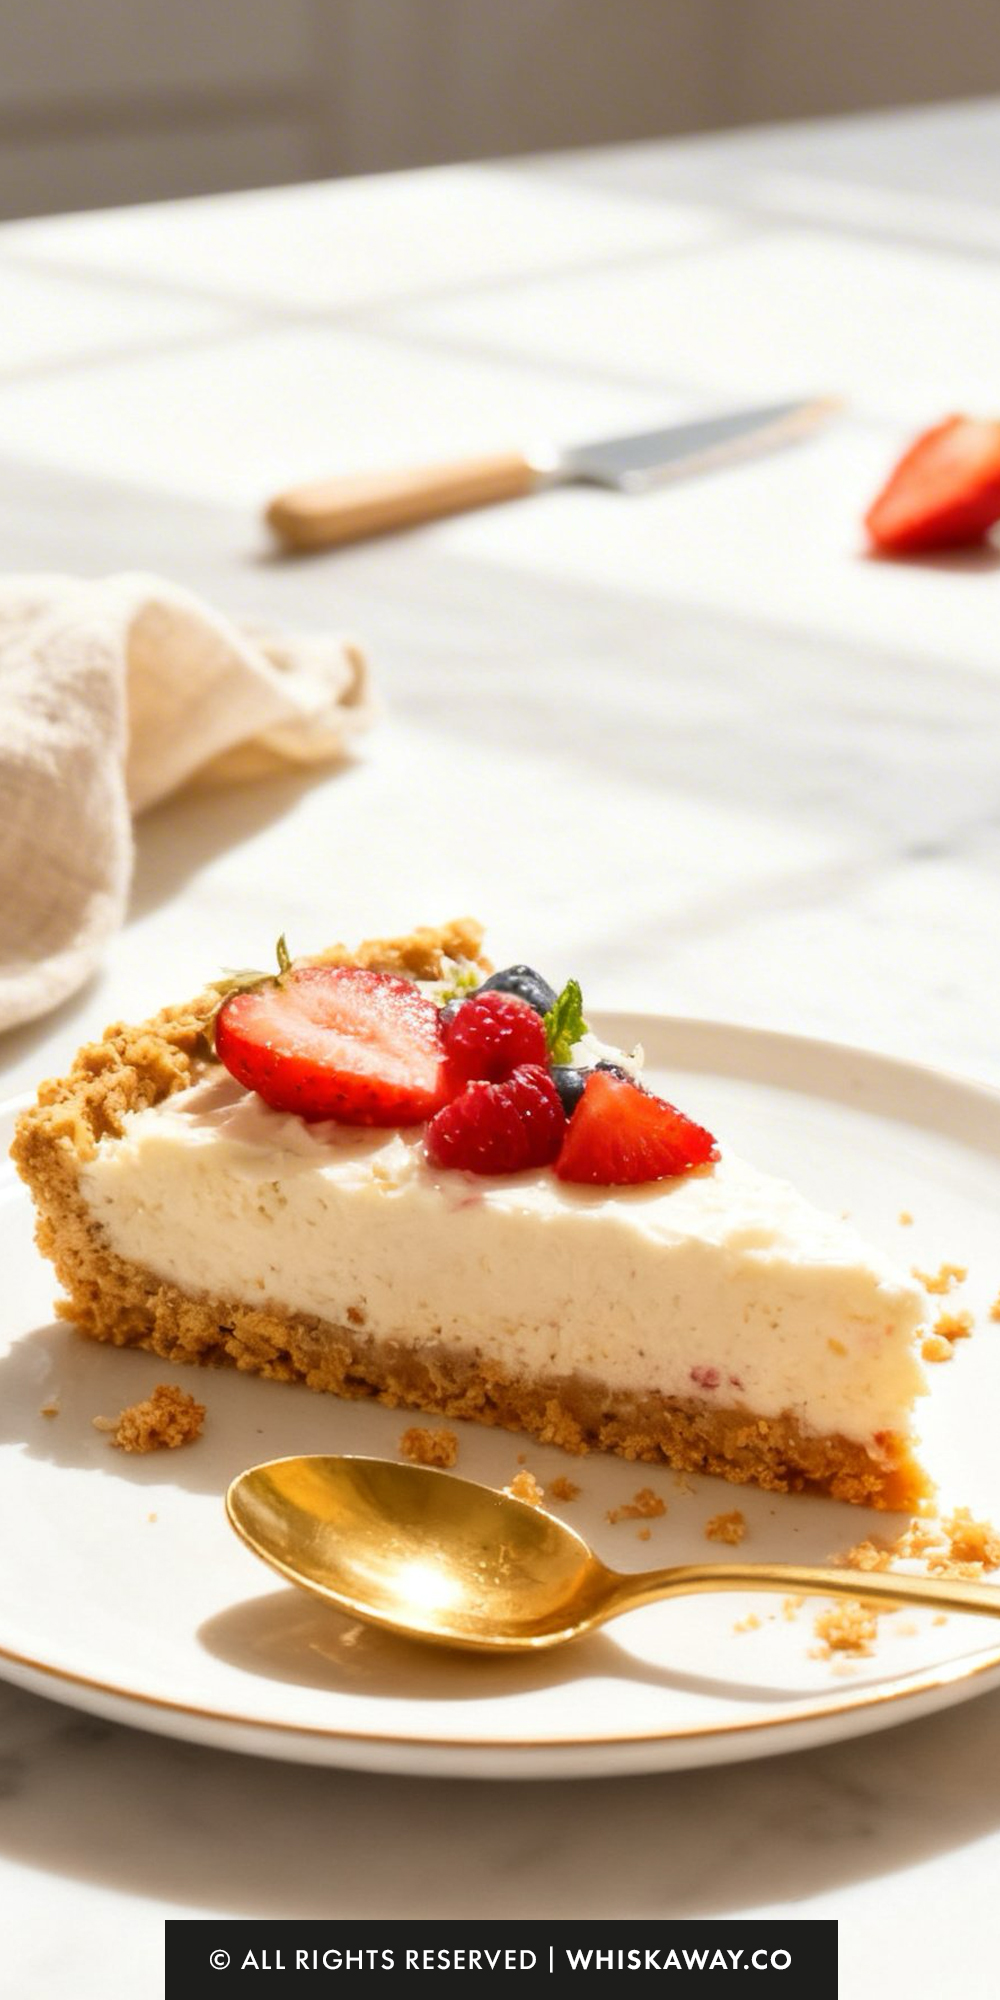
A no-bake tart is all about the contrast between a crunchy, buttery base and a cloud-like, tangy filling.
Since you aren’t using the oven to “set” the ingredients, success depends entirely on temperature control and gentle handling.
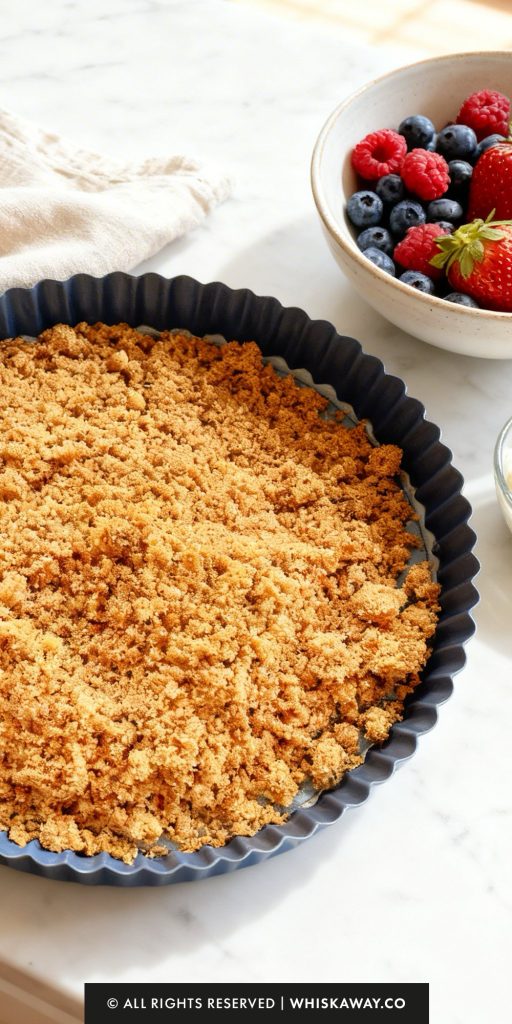
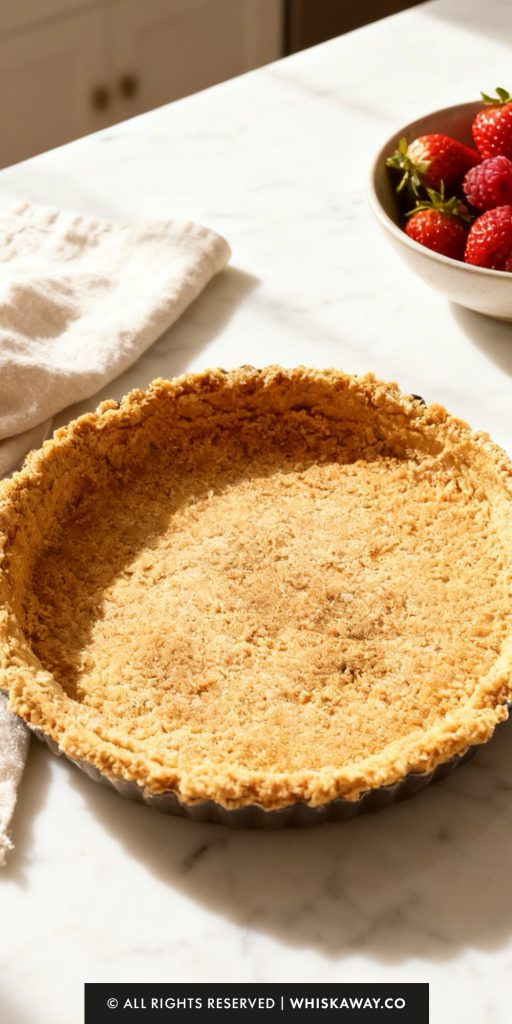
1. The “Packed-Sand” Crust Technique
The common mistake is a crumbly base that falls apart when sliced. To prevent this, ensure your graham cracker crumbs are very fine.
Use the bottom of a flat measuring cup or a heavy glass to press the crumbs into the pan. You want to press hard enough that the butter “locks” the crumbs together.
Pay extra attention to the “elbow” of the pan, where the bottom meets the sides, to ensure it’s not too thick or too thin.
2. Temperature is Everything
For the Cream Cheese: It must be completely softened to room temperature before you start. If it’s even slightly cold, you will end up with tiny white lumps in your filling that no amount of whisking can fix.
For the Cream: Conversely, your heavy whipping cream must be ice-cold. Cold cream traps air bubbles more effectively, leading to a more stable, voluminous whipped cream that provides the “lift” for the tart.
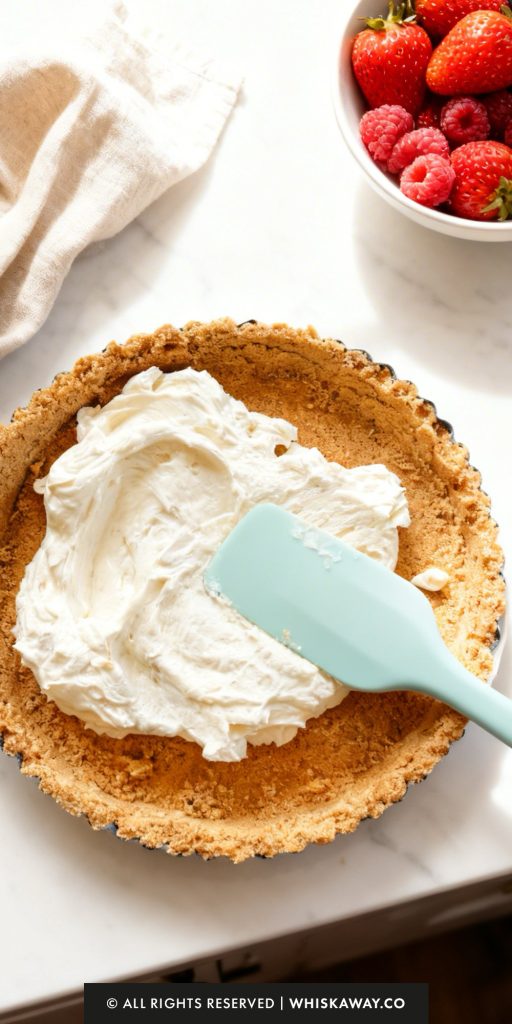
3. The Art of the “Fold”
When combining the whipped cream with the cream cheese, do not use the mixer. Use a large rubber spatula.
Cut through the center of the mixture, scrape along the bottom, and flip it over. Rotate the bowl as you go.
This “folding” preserves the air you worked so hard to beat into the cream, resulting in a mousse-like texture rather than a heavy, dense one.
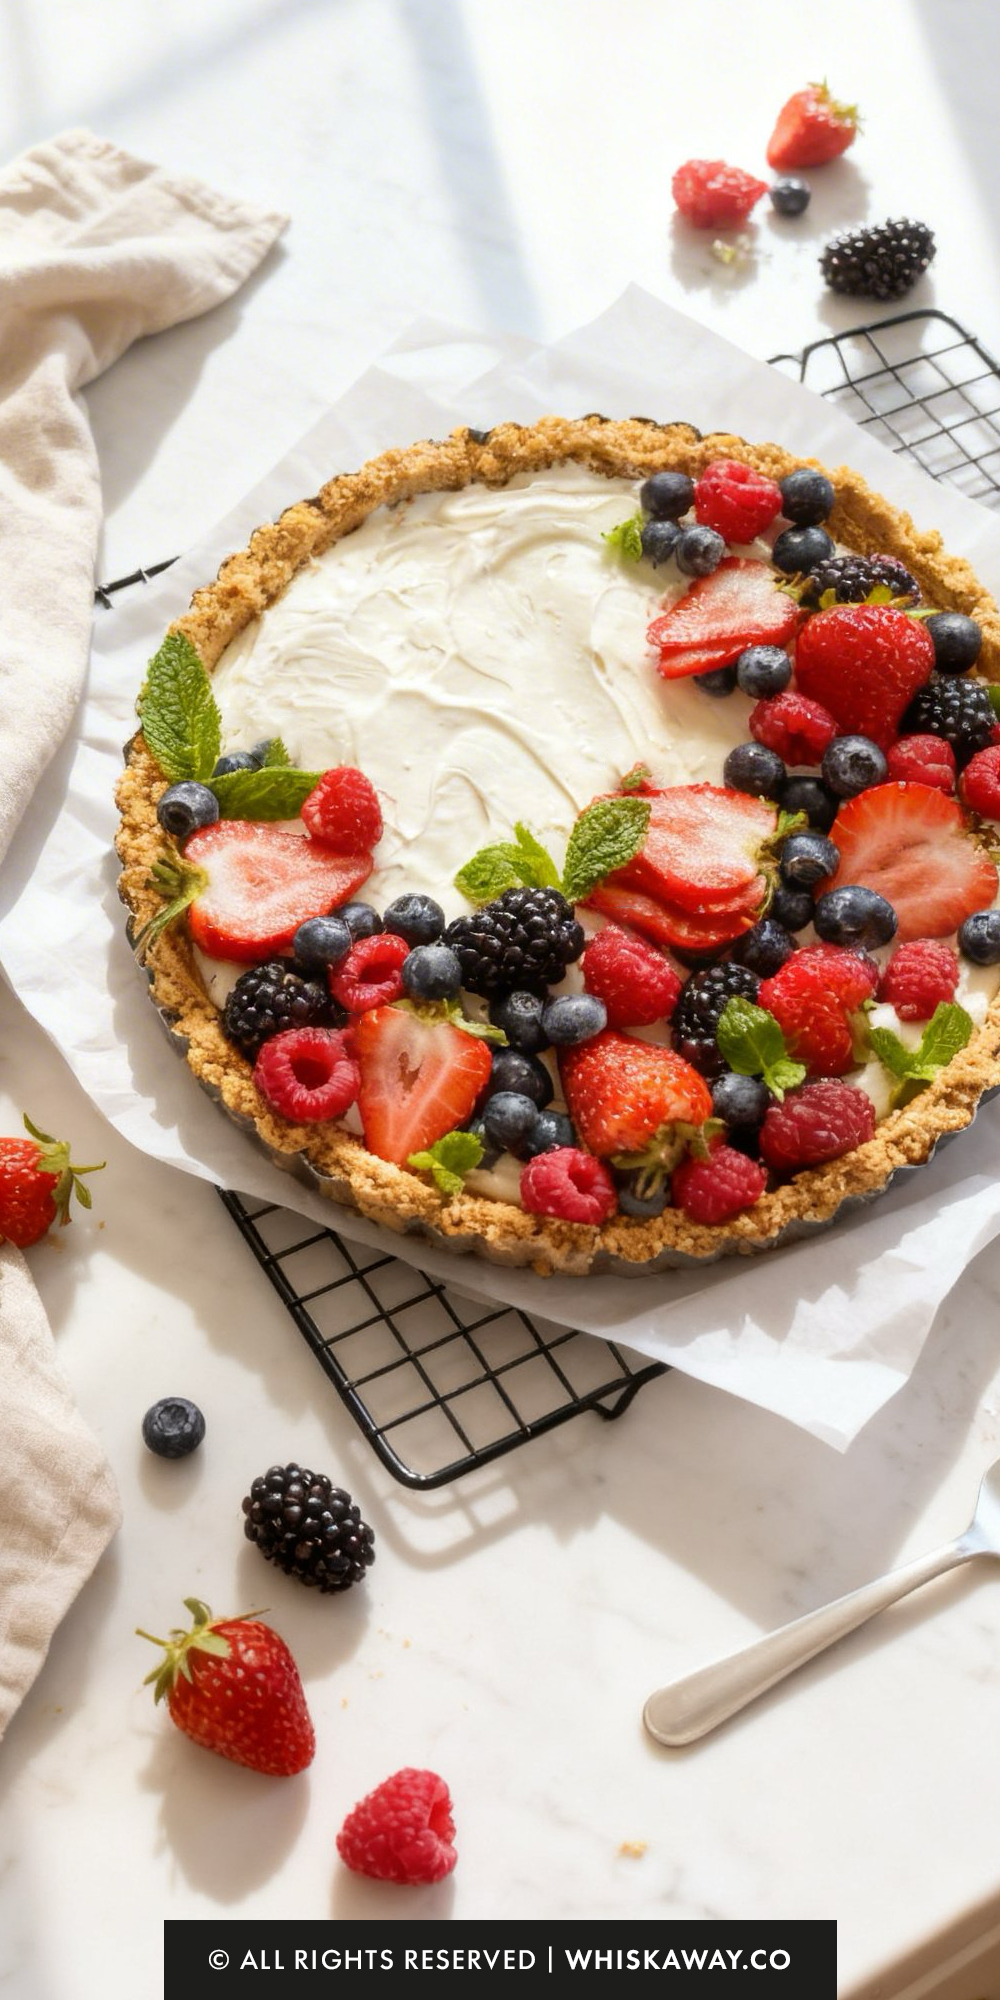
4. Berry Management
Wash your berries at least 30 minutes before decorating and pat them completely dry with paper towels.
If you put wet berries on the filling, the water will mix with the sugar and create “weeping” purple or red pools on the white surface, which can make the tart look messy and cause the filling to soften.
5. Common Mistakes to Avoid
Rushing the Chill: This tart relies on the butter in the crust and the fats in the filling to solidify. If you slice it too soon, the crust will crumble and the filling will slump. Give it the full hour (or more!) in the fridge.
Using “Light” or “Tub” Cream Cheese: These varieties have higher water content and different stabilizers. For a tart that holds its shape, always use full-fat brick-style cream cheese.
Over-whipping the Cream: If you whisk the cream too long, it will become grainy and eventually turn into butter. Stop the moment you see “stiff peaks” that stand straight up when you lift the whisk
Baking Tips for This Recipe
- Press the crust firmly using the flat bottom of a glass because loose crumbs won’t hold when sliced.
- Chill the crust at least one hour before filling so butter fully solidifies.
- Beat cream to stiff peaks, not soft peaks. Underwhipped cream weakens structure.
- Fold gently using a spatula, scraping from bottom to top to preserve air.
- Refrigerate at least 2 hours after assembling for defined slices.
Variation Tips
The beauty of a no-bake tart is its flexibility. Since you aren’t worrying about oven temperatures or chemical leaveners, you can easily adapt the flavor profile to match the season or your personal cravings.
1. The “Tropical” Twist
Transform this into a summer getaway on a plate.
- Swap the lemon juice and zest for lime juice and zest.
- Use crushed Maria cookies or digestive biscuits instead of graham crackers.
- Top with sliced mango, kiwi, and a sprinkle of toasted coconut flakes.
2. Chocolate-Dipped Berry Style
For those who believe everything is better with a bit of cocoa.
- Use chocolate graham crackers or crushed Oreo cookies (remove the cream first if you want a deeper chocolate punch).
- Fold in 1/4 cup of mini chocolate chips or finely shaved dark chocolate into the cream cheese filling.
- Once the fruit is arranged, drizzle the top with melted semi-sweet chocolate.
3. Biscoff or Gingersnap Base
Add a warm, spiced depth to the tart.
- Replace the graham cracker crumbs with crushed Biscoff (speculoos) cookies or gingersnaps.
- Add a pinch of cinnamon to the filling. This pairs beautifully with blackberries and stone fruits like sliced peaches or plums.
4. White Chocolate Cream
Elevate the filling to a richer, more decadent level.
- Melt 3 ounces of white chocolate and let it cool slightly. Fold it into the cream cheese mixture before adding the whipped cream.
- The white chocolate acts as an extra stabilizer, giving the tart a firmer, more fudge-like set.
5. Dietary Adaptations
Gluten-Free:
Simply substitute the graham crackers for gluten-free graham-style crumbs. Since this is a no-bake recipe, the texture remains almost identical to the original.
Reduced Sugar:
Use a monk fruit or erythritol powdered sweetener (1:1 ratio) in the filling. Ensure the fruit you choose is naturally lower in sugar, like raspberries and blackberries.
Dairy-Free / Vegan (Advanced):
- The Butter: Use melted coconut oil or vegan butter sticks.
- The Filling: Use a vegan brick-style cream cheese and swap the heavy cream for chilled coconut cream (the thick part from the top of the can). Beat the coconut cream until it reaches a whipped consistency.
Note: The filling will be slightly softer and have a subtle coconut flavor.
How to Properly Store Your No-Bake Tart
A No-Bake Berry Tart is the perfect “make-ahead” dessert, but because it relies on chilled fats (butter and cream) rather than heat to stay together, it is quite sensitive to temperature.
To keep your crust crunchy and your filling fluffy, follow these storage guidelines.
1. Room Temperature (Safety Warning)
The Limit: Maximum 1 hour.
Because the filling contains heavy cream and cream cheese, it can become a food safety risk if left out too long.
Additionally, the butter in the graham cracker crust will begin to melt, causing the tart to lose its structure and making it difficult to slice.
2. Refrigeration (The Best Method)
Duration: 2 to 3 days.
Store the tart in its pan (if it has a removable bottom) to provide support. Place it inside a tart carrier or a large airtight container.
If you don’t have a container deep enough, you can loosely tent aluminum foil over the top.
Avoid placing plastic wrap directly onto the berries, as it will cause them to “sweat” and release juices that can color the white filling.
3. Freezing (Long-Term Storage)
Duration: Up to 1 month.
You can freeze this tart, but it is best to do so before adding the fresh berries. Fresh berries become mushy and release water when thawed, which will ruin the texture of the filling.
Move the tart from the freezer to the fridge 4 to 6 hours before you plan to serve it. Once it has thawed slightly, arrange the fresh berries on top.
4. Maintenance & Serving Tips
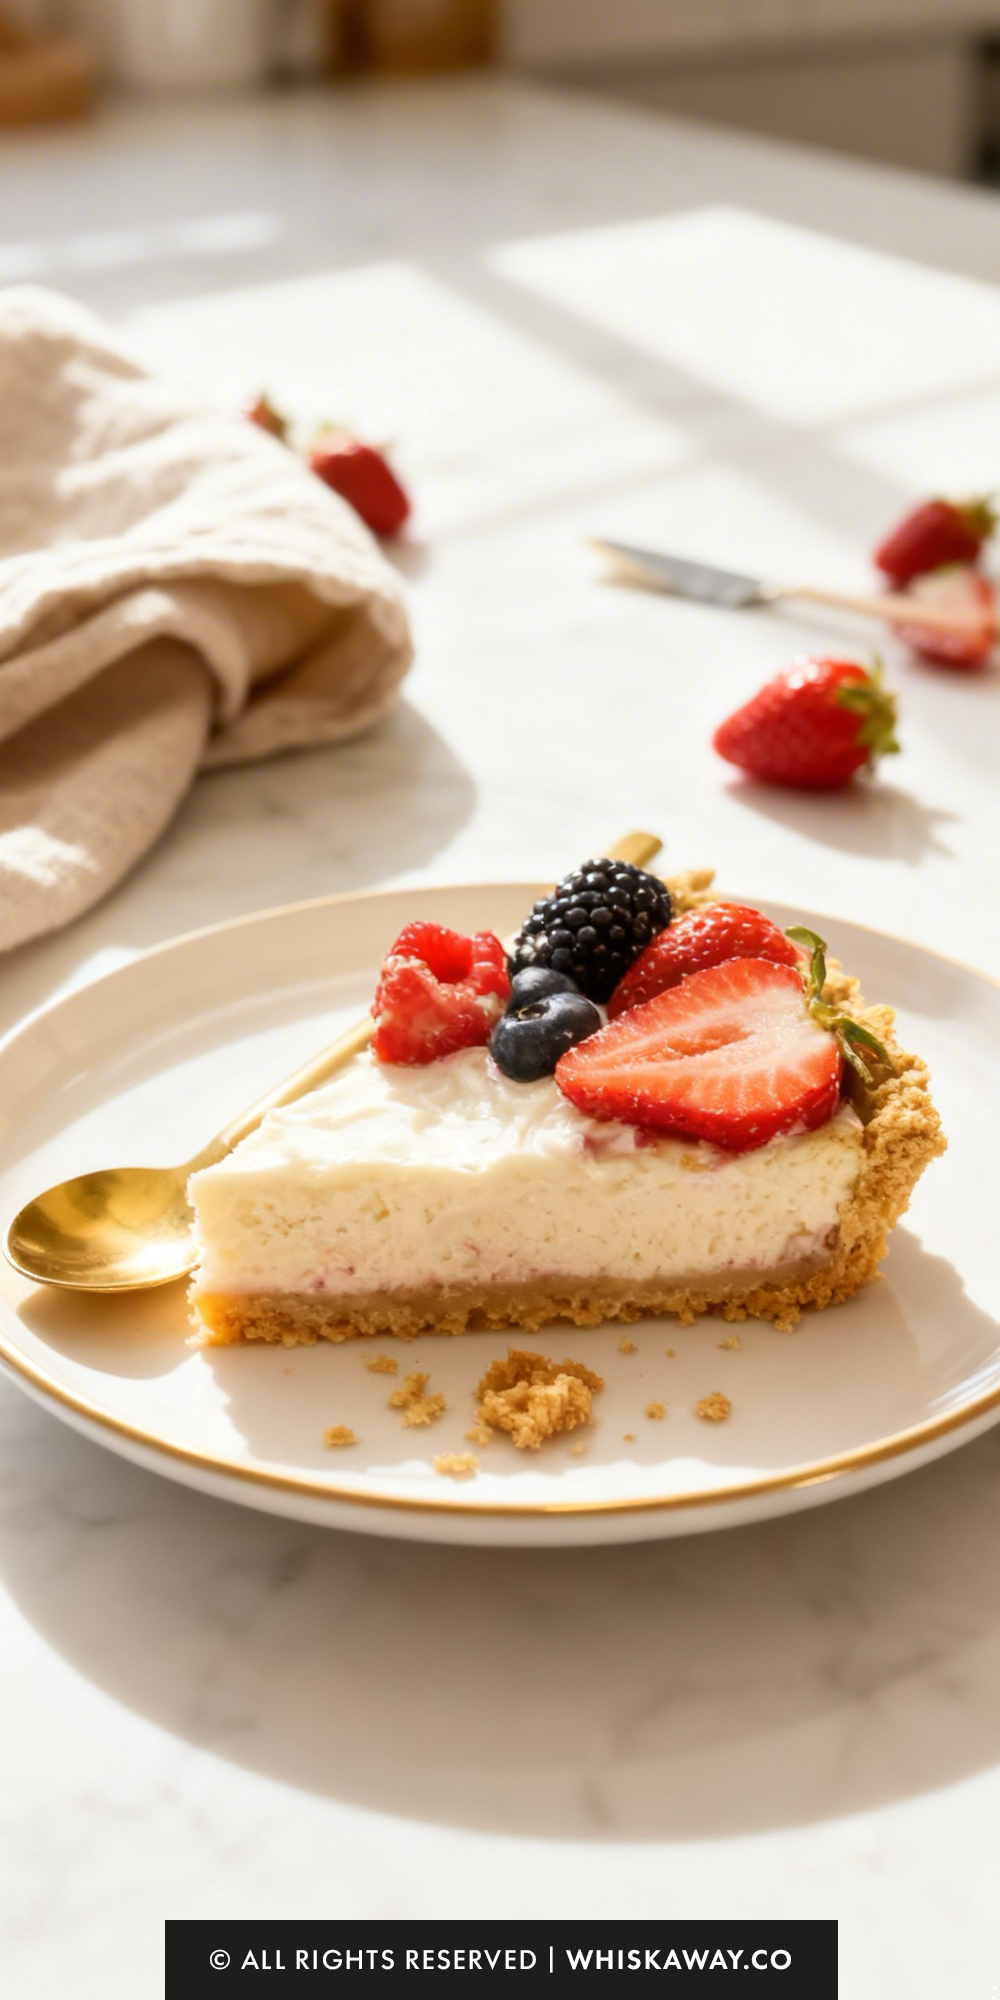
For the cleanest slices, use a sharp knife that has been dipped in hot water and wiped dry between every single cut. This helps the knife glide through the cold cream cheese without sticking.
It may seem obvious, but never attempt to reheat a no-bake tart. Heat will immediately liquify the filling and turn the dessert into a puddle.
If you are garnishing with fresh mint, add it at the very last second. Mint leaves wilt quickly in the refrigerator and can turn black where they touch the moisture of the filling.
5. Storage Mistakes to Avoid
Condensation Traps: Never put the tart in a sealed container if it’s still “sweating” from the assembly process.
Let it sit in the fridge uncovered for 30 minutes to stabilize before sealing it up.
Fridge Odor Absorption: Cream cheese and butter are like sponges for smells.
If your fridge has strong-smelling foods (like cut onions or seafood), ensure your tart is in a truly airtight container, or it will pick up those flavors within hours.
Pre-Washing Berries: If you wash your berries and put them on the tart while they are still damp, the moisture will break down the cream cheese filling.
Always pat berries bone-dry before decorating.
FAQs
My filling is too soft and doesn’t hold its shape. What went wrong?
This is usually down to one of two things: the fat content or the whipping stage. To ensure a firm set, you must use full-fat, brick-style cream cheese. “Light” or “spreadable” versions have higher water content and won’t solidify properly. Additionally, make sure your heavy cream is whipped to stiff peaks before folding it in; if the cream is too soft, the filling will be runny.
Can I use a different type of cookie for the crust?
Absolutely. While graham crackers are classic, you can swap them 1:1 for digestive biscuits, Biscoff cookies, or even vanilla wafers. The key is to maintain the ratio of crumbs to melted butter. If your chosen cookie is particularly oily (like an Oreo with the cream still inside), you may need to reduce the butter by a tablespoon.
Can I use frozen berries instead of fresh for the topping?
It is not recommended. Frozen berries release a significant amount of moisture as they thaw. This extra liquid will bleed into the white filling, causing “staining” and making the top of your tart soggy. For the best presentation and texture, stick to firm, fresh berries that have been patted dry.
How far in advance can I make this tart?
You can prepare the crust and the filling up to 24 hours in advance. In fact, a longer chill time often leads to a better set and easier slicing. However, wait to add the fresh fruit topping until you are within 2–4 hours of serving to keep the berries looking vibrant and to prevent them from releasing juices into the cream.
How do I get a clean slice without the crust crumbling?
The secret is in the pressing and the temperature. When making the crust, use the bottom of a flat glass to pack the crumbs as tightly as possible—this “locks” the butter and crumbs together. Before slicing, ensure the tart has been in the fridge for at least an hour. Use a sharp, thin knife and wipe it clean with a warm, damp cloth between every slice for that professional, “bakery-case” look.

No-Bake Tart
8
Slices35
minutesThis no-bake tart recipe is simple, creamy, and requires no oven for a quick, delicious treat.
Ingredients
- Crust
1 ½ cups graham cracker crumbs
6 Tablespoons butter, melted
1 Tablespoon sugar
- Filling
8 ounces cream cheese, softened
½ cup cold heavy whipping cream
1/2 cup powdered sugar
2 teaspoons lemon juice (plus Zest of one lemon)
½ teaspoon vanilla extract
- Topping
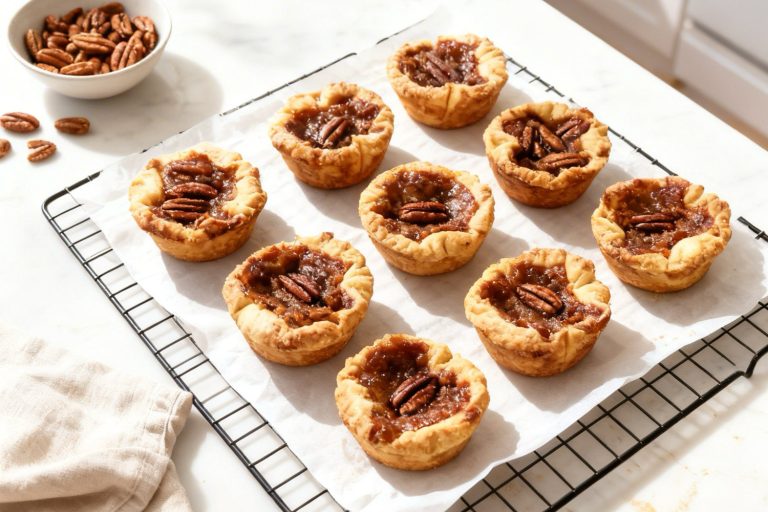
¾ pound fresh strawberries, sliced
1 pint raspberries
1 pint blueberries
(Optional) blackberries
(Optional) fresh mint for garnish
Directions
- In a mixing bowl, combine the graham cracker crumbs, melted butter, and sugar. Stir until the mixture resembles wet sand and the crumbs are evenly coated. Transfer the mixture to a tart pan, pressing it firmly into the bottom and up the fluted sides to create a solid shell. Refrigerate the crust for at least one hour to allow the butter to solidify and set the base.
- Using a stand mixer (or hand mixer) fitted with the whisk attachment, beat the heavy cream and vanilla extract on high speed. Continue until stiff peaks form (the cream should stand upright when the whisk is lifted). Transfer the whipped cream to a separate bowl and set it aside.
- Switch to the paddle attachment on your mixer. Beat the softened cream cheese, powdered sugar, lemon zest, and lemon juice together. Continue mixing until the texture is silky and completely free of lumps.
- Using a silicone spatula, gently fold the whipped cream into the lemon-cream cheese mixture. Use a slow, circular motion to incorporate the two, being careful not to over-work the batter so the filling remains light and airy rather than dense.
- Pour the creamy filling into your chilled graham cracker crust, smoothing the top with a spatula. Arrange your fresh strawberries, raspberries, and blueberries in a decorative pattern over the surface.
- Place the tart back in the refrigerator for at least one hour before serving. This final rest allows the flavors to meld and ensures the tart is firm enough to yield clean, beautiful slices.