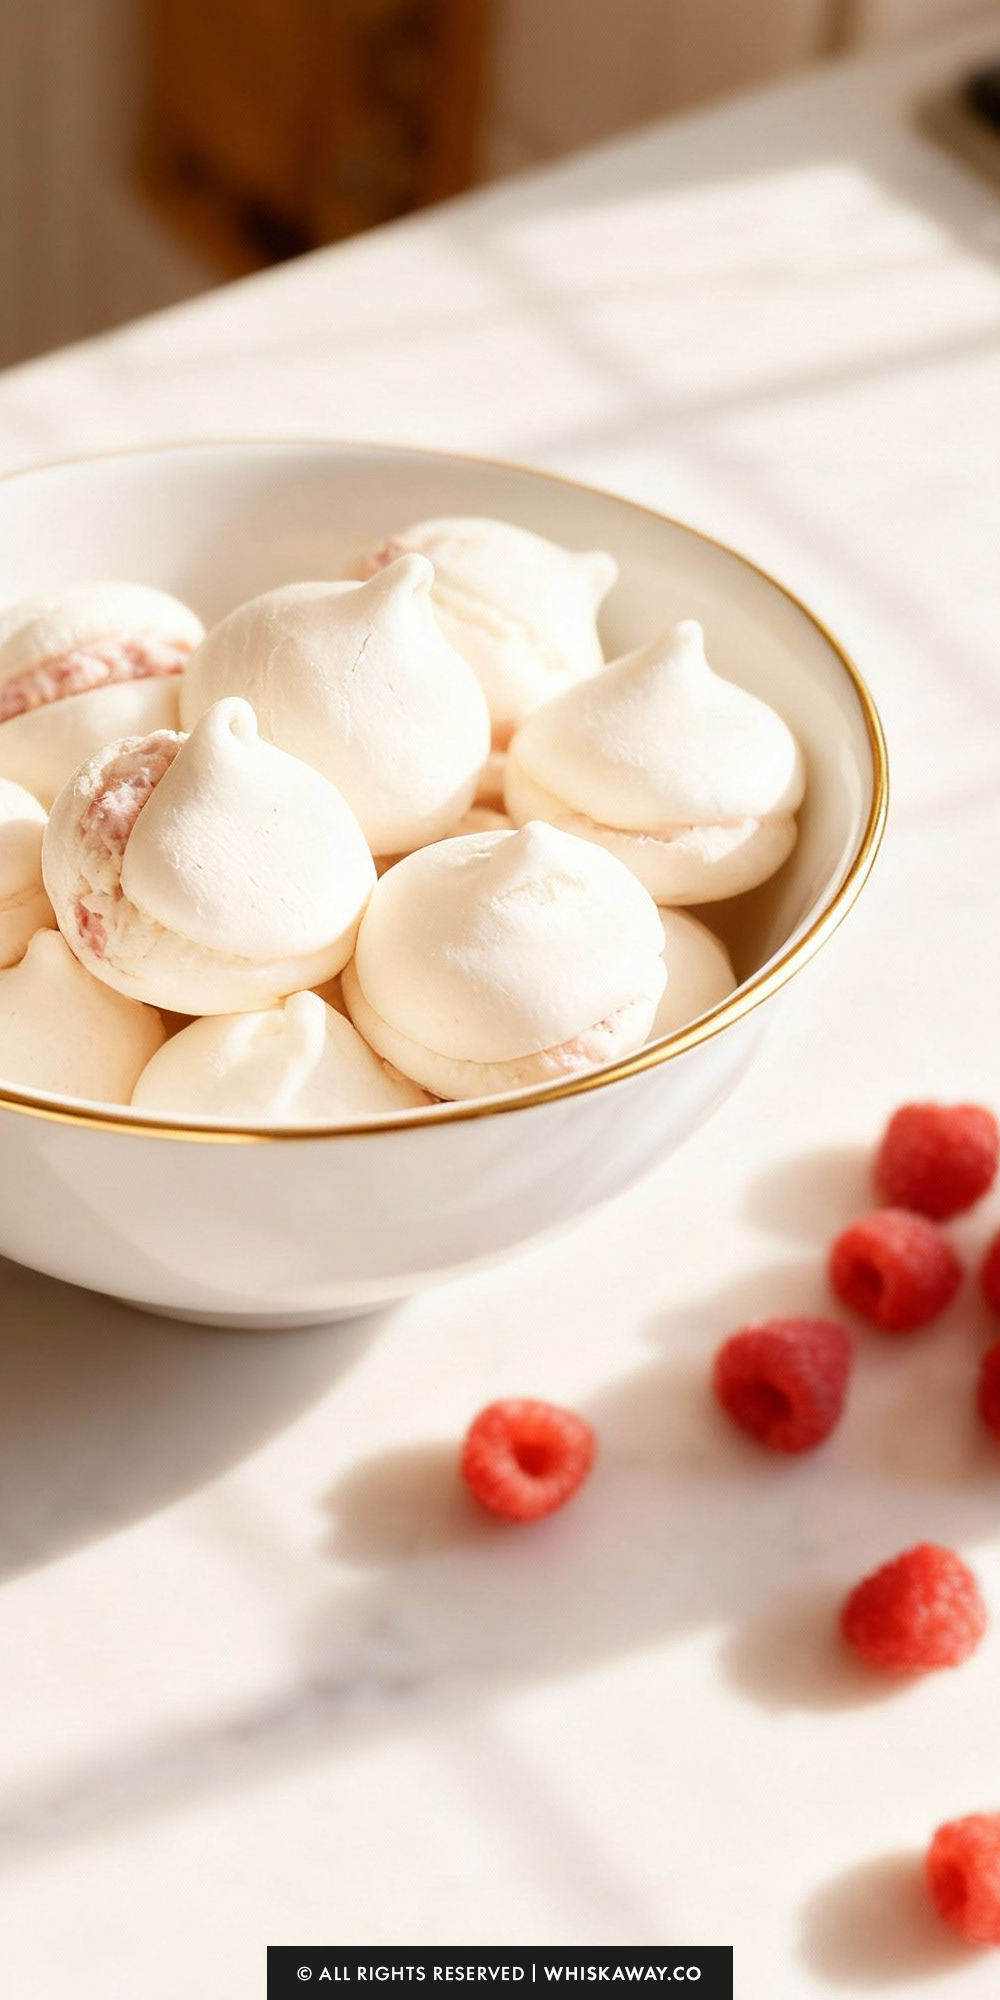
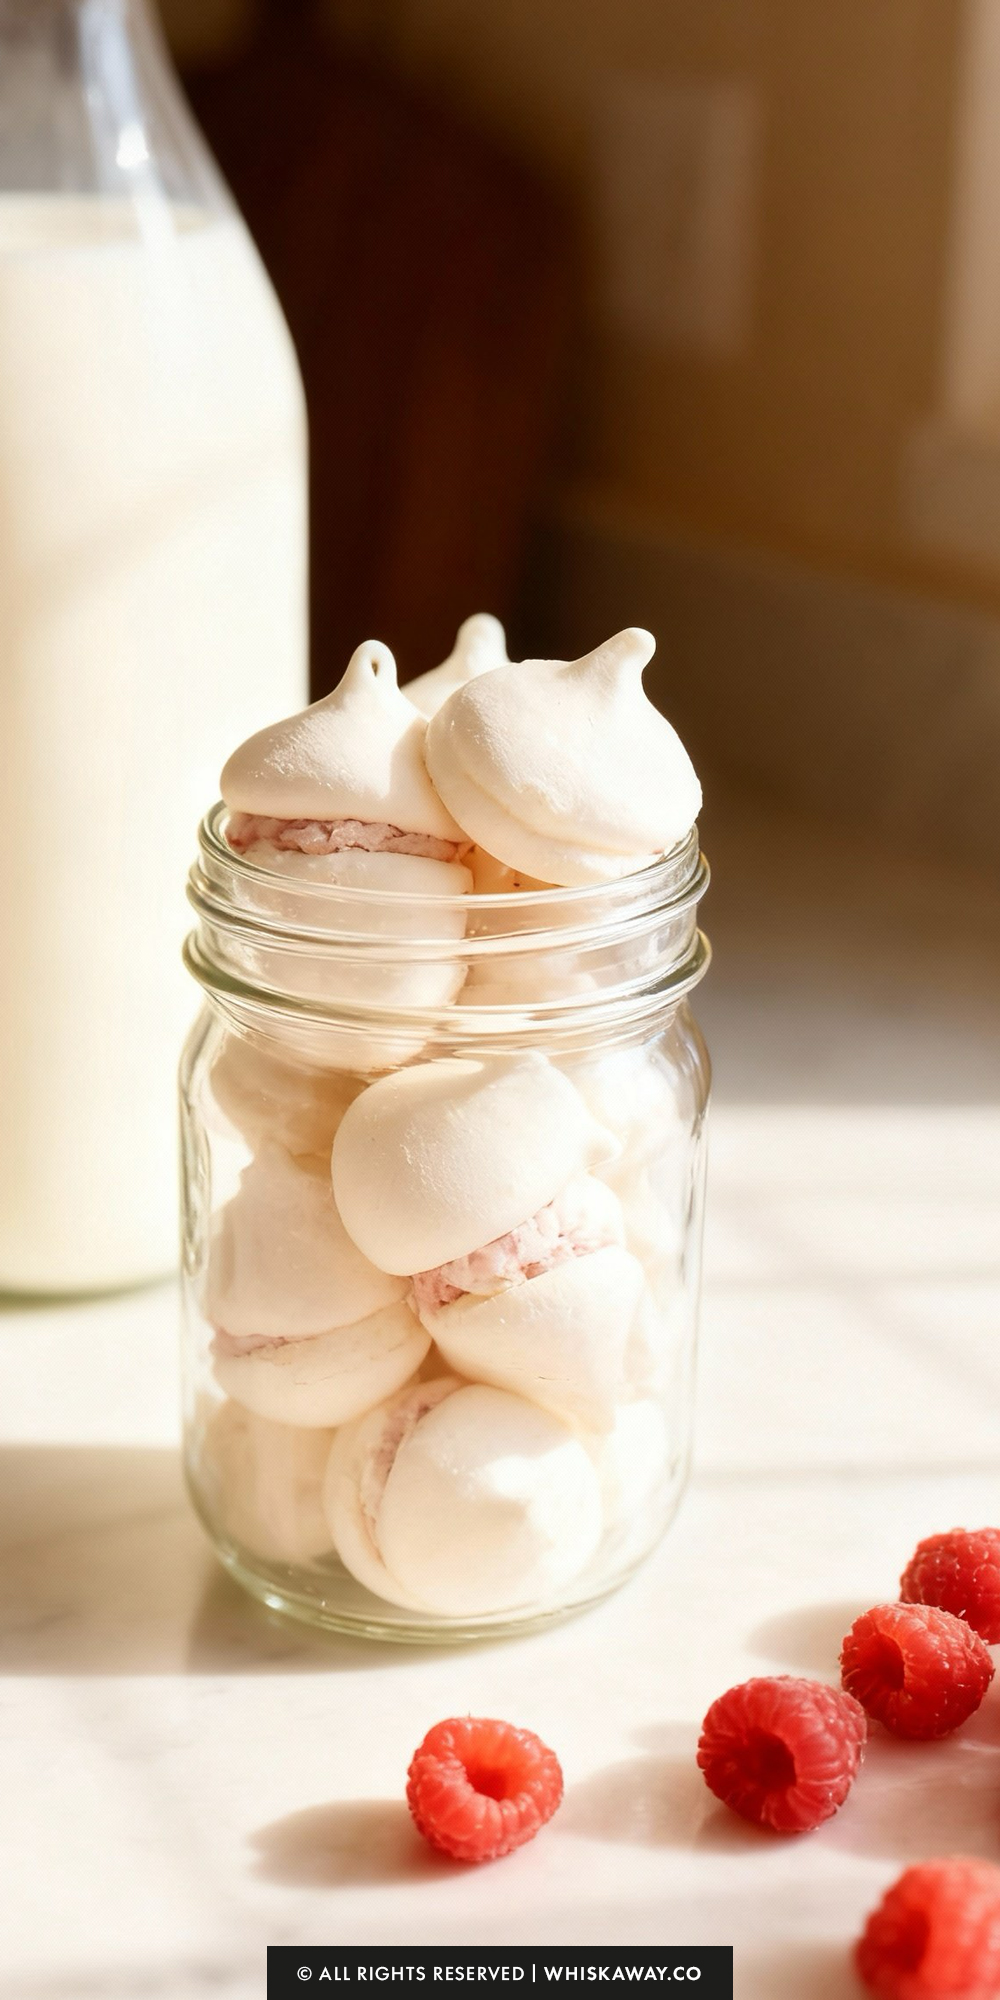
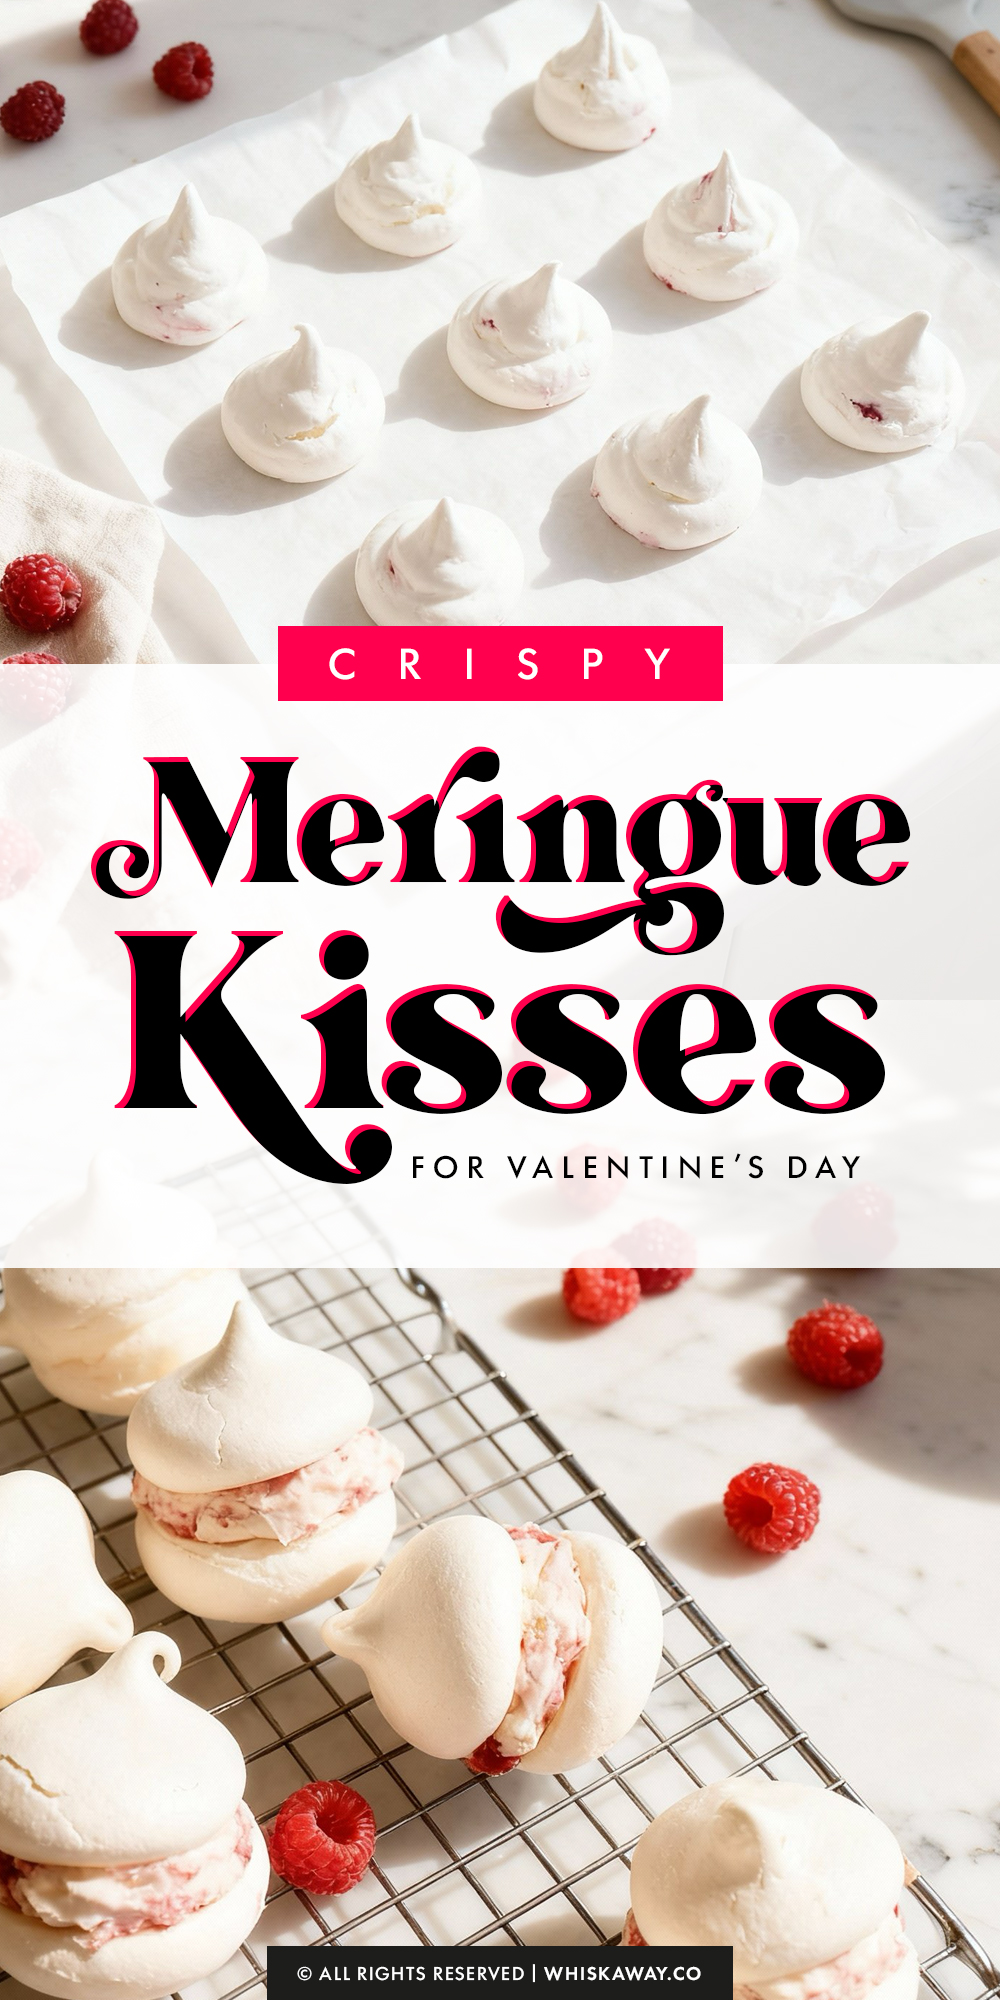
There is something oddly satisfying about watching a bowl of clear liquid turn into glossy, stiff peaks, and these Meringue Kisses are the ultimate proof that baking is basically magic.
We’re talking about a dessert that looks incredibly boujee, like something you’d pick up at a high-end patisserie in Paris, but is actually made from the humblest ingredients in your pantry.
eriously, it’s just egg whites and sugar. That’s it. No fancy flours, no expensive butter, just pure technique and a little bit of patience.
Grab your whisk and let’s whip up some edible clouds. Your coffee break is about to get a major upgrade!
Why You’ll Love This Recipe
Meringue kisses are delicate, light, and melt-in-your-mouth treats that are surprisingly simple to make.
They add elegance to any dessert table and can be flavored or colored for creativity.
The crisp exterior and airy interior create a delightful contrast that makes each bite satisfying.
Key Reasons to Love Them:
- Light, airy texture with a crisp outer shell.
- Easy to flavor and color for creative variations.
- Elegant and visually appealing treats.
- Beginner-friendly for learning piping and meringue techniques.
- Perfect for gifting or serving at celebrations.
🔥 These light and airy meringue kisses pair beautifully with heart shaped macarons, festive heart thumbprint cookies, or elegant chocolate covered raspberries.
How to Get Your Meringue Kisses Just Right
Meringue is less about “cooking” and more about chemistry. It requires creating a stable foam structure using protein and sugar.
While the ingredients list is short, the technique is precise. Here is how to ensure your kisses turn out crisp, shiny, and lighter than air.
1. The Spotless Bowl Rule
Fat is the enemy of meringue. Even a microscopic trace of grease or egg yolk will prevent the egg whites from whipping up to full volume.
Before you start, wipe down your mixing bowl and whisk attachment with a paper towel dipped in a little lemon juice or white vinegar.
This eliminates any residual grease and provides a slightly acidic environment that helps stabilize the egg proteins.
2. Room Temperature is Best
Cold egg whites hold their shape well, but room-temperature egg whites can trap more air, resulting in a fluffier, more voluminous meringue.
Separate your eggs while they are cold (it’s easier to keep the yolk intact), then let the whites sit in the bowl on the counter for 30 minutes before whisking.
3. The “Rub Test” (Crucial for Texture)
If your meringue “weeps” (oozes sticky syrup) after baking, it means the sugar didn’t fully dissolve.
Before you stop whisking, take a small amount of meringue and rub it between your thumb and forefinger.
Gritty? Keep whisking. The grains of sugar are still intact.
Smooth like shaving cream? You are done.
4. Visualizing the Peaks
Knowing when to stop whisking the whites (before adding sugar) and when to stop the final mix is the hardest part.
When you pull the whisk out, the meringue should stand straight up like a mountain peak without the tip curling over. If it curls, it’s a “soft peak” and needs more air.
5. Add Sugar Slow and Steady
Patience is everything here. If you dump the sugar in all at once, you will deflate the air you just whipped into the eggs.
Add it a dessertspoon at a time, counting to 5 between each spoonful.
This ensures the sugar dissolves into the protein structure rather than weighing it down.
6. Don’t Bake on a Rainy Day
Sugar is hygroscopic, meaning it attracts moisture from the air.
The Reality: If it is very humid or raining heavily, your meringues may absorb moisture from the air as soon as they come out of the oven, turning chewy and sticky instantly.
If you must bake on a humid day, keep them in an airtight container the second they are cool.
7. Knowing When They Are Done
Meringues dry out rather than bake.
Don’t rely solely on the timer. Gently try to lift one kiss off the parchment paper. If it sticks at all, it needs more time.
It should pop off the paper effortlessly with a dry, hollow sound when tapped.
Easy Baking Tips That Have Worked for Me
Piping airy meringue into little peaks is almost magical, as the soft mixture holds its shape and creates delicate forms.
Baking transforms the meringue into crisp, light cookies with a tender interior. The process is meditative, allowing beginners to focus on technique while producing beautiful, melt-in-your-mouth treats.
Handling them carefully after baking ensures they stay intact. Each bite is airy, sweet, and perfectly delicate, offering both visual and sensory satisfaction.
Variation Tips
Meringue is like a blank canvas, sweet, airy, and white, which makes it the perfect base for playing with colors and flavors.
Here are a few ways to upgrade your kisses from simple sugar drops to boutique-bakery treats.
1. The “Painted Bag” Technique (For Stripes)
If you want those beautiful, professional-looking colored stripes running down the sides of your kisses:
Turn your piping bag inside out (or reach inside) and paint 3–4 vertical stripes of gel food coloring from the tip to the middle of the bag using a paintbrush. Carefully spoon the white meringue in.
When you pipe, the meringue will pick up the color, creating gorgeous ribbons of color. Note: Always use gel paste, not liquid drops, as liquid can make the meringue runny.
2. Chocolate Dipped Bottoms
Once the kisses are baked and fully cooled, melt some dark or milk chocolate. Dip the bottom flat side of each kiss into the chocolate and place it back on the parchment paper to set.
While the chocolate is wet, dip it into crushed pistachios or sprinkles for extra crunch.
3. Flavor Infusions
Standard meringue is just sweet, so adding flavor helps balance it.
Fold in ½ teaspoon of vanilla, almond, or peppermint extract right at the end of whisking.
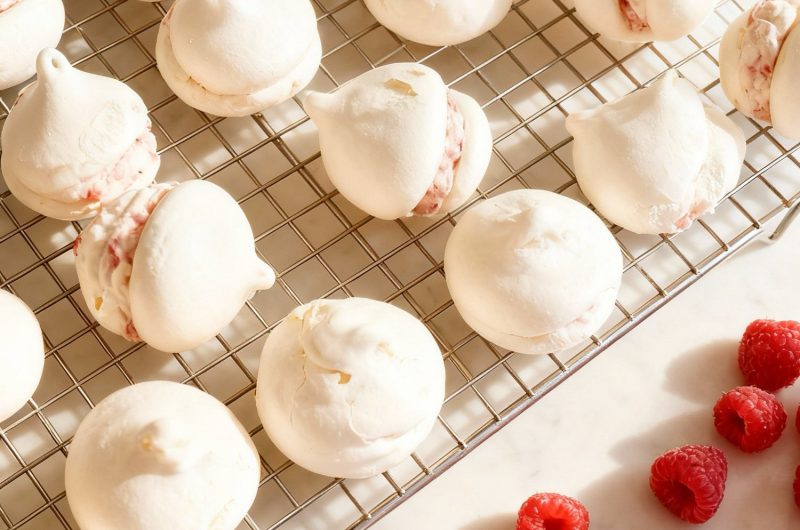
Freeze-Dried Fruit: For a punch of fruit flavor without the moisture (which ruins meringue), pulverize freeze-dried strawberries or raspberries into a fine powder and fold it into the stiff meringue. This adds a tart kick and a pretty speckled pink look.
4. Mini Pavlova Nests
Instead of piping a “kiss” (pulling up at the end), pipe a flat circle, then pipe a second ring on top of the outer edge to create a little bowl shape.
Once baked, fill the center with lemon curd, a dollop of whipped cream, and a fresh blueberry.
5. Mocha Swirl
Sift 1 tablespoon of cocoa powder and 1 teaspoon of instant espresso powder over the stiff meringue.
Fold it in only 2 or 3 times—do not mix it fully! You want visible streaks of cocoa running through the white foam for a marbled effect.
6. Dietary Adjustments
Vegan (Aquafaba)
You can actually make this recipe without eggs!
Replace the 3 egg whites with the liquid from one 15oz can of chickpeas (about 1/2 cup to 3/4 cup).
Whisk the chickpea water exactly like egg whites. It takes a little longer to get to stiff peaks (add a pinch of cream of tartar to help), but it bakes up into a perfect vegan meringue.
Refined Sugar-Free
Meringue relies on the structure of sugar crystals, so liquid sweeteners (maple syrup/honey) will not work.
However, you can use granulated erythritol or monk fruit sweetener.
Pulse it in a blender first to make it a fine powder, as these sweeteners can sometimes be grainier than regular sugar.
Save for Later to Your Pinterest Board
How to Properly Store Your Meringue Kisses
The biggest enemy of a perfect meringue is moisture. Because they are essentially made of sugar, they act like sponges and will absorb humidity from the air, turning your crisp, light kisses into sticky, chewy marshmallows.
Here is how to keep them dry and crunchy.
1. Room Temperature (The Gold Standard)
The Duration: Up to 2 weeks.
This is the best way to store meringues. Place them in an airtight container (Tupperware or a glass jar with a rubber seal) and keep them in a cool, dry cupboard.
If you have them, throw a little silica gel packet (the kind you find in vitamin bottles or seaweed snacks) into the bottom of the jar. It absorbs excess moisture and keeps the meringues bone-dry.
2. Freezing (For Long-Term Stashing)
The Duration: Up to 1 month.
Meringues freeze surprisingly well, provided they don’t get crushed. Layer them in a hard-sided container with parchment paper between the layers.
Thawing: This is the tricky part. Do not open the container while they are thawing. Take the container out of the freezer and let it sit on the counter for at least an hour before opening the lid.
If you open it while they are cold, condensation will form instantly on the sugar, making them sticky.
3. Refrigeration (Avoid This!)
Do not store plain meringues in the fridge.
Fridges are naturally humid environments. Unless your container is hermetically sealed, the moisture will soften the meringues within hours, causing them to “weep” (leak syrup) or collapse.
4. How to “Refresh” Soft Meringues
If you left the lid off and your kisses have turned soft or chewy, don’t throw them away! You can dry them out again.
Preheat your oven to 200°F (90°C). Place the meringues on a baking sheet and bake for 10–15 minutes.
Turn the oven off and let them cool inside. This evaporates the absorbed moisture and restores that signature “snap.”
5. Storage Mistakes to Avoid
The “Cookie Jar” Mistake: Never store meringues in the same container as soft cookies (like chocolate chip). The moisture from the soft cookies will migrate to the dry meringues, ruining both.
Garnishing Too Early: If you plan to serve these with whipped cream and berries (as listed in the ingredients), assemble them immediately before serving.
If you sandwich the cream between the kisses and put them in the fridge, they will dissolve into a mushy mess within 30 minutes.
FAQs
Can I use liquid egg whites from a carton?
No, it is not recommended. Carton egg whites are pasteurized at high temperatures, which alters the proteins and prevents them from whipping up into a stable, stiff structure. For the best volume and stability, always use fresh eggs and separate the whites from the yolks yourself.
Can I reduce the amount of sugar?
No. In meringue, sugar does more than just sweeten—it provides the structural scaffolding. The standard ratio is 2:1 (two parts sugar to one part egg white). If you reduce the sugar, the foam will not be strong enough to hold its shape in the oven, and the kisses will likely collapse or turn into a soft, rubbery foam rather than a crisp shell.
Why are my meringues sticky or chewy?
This is almost always caused by humidity. Sugar attracts moisture from the air. If it is a rainy day, or if you take them out of the oven before they are fully dried, they will become tacky. If they are chewy, you can put them back in the oven at 200°F (90°C) for another 10–15 minutes to dry them out further.
Why did my meringues crack?
Cracking is caused by a sudden change in temperature (thermal shock). Don’t open the oven door during baking. When the baking time is up, turn the oven off and leave the door slightly ajar (stick a wooden spoon in the door) to let the meringues cool down gradually inside the oven.
Can I assemble the meringues with cream ahead of time?
No. Meringue dissolves quickly when it touches moisture. If you sandwich whipped cream and berries between the kisses, they will turn into a soggy mush within 30 minutes. Always store the baked kisses in an airtight container and assemble the dessert immediately before serving to keep that perfect crunch.
Meringue Kisses
35
servings30
minutes40
minutesThese airy meringue kisses are crisp, sweet, and perfect for holidays, parties, or elegant dessert tables.
Ingredients
225g (8oz) caster sugar (ie double the weight of the egg whites)
3 large egg whites (which weighed 113g (4oz))
- To serve
Whipped cream
Berries
A simple fruit sauce made by tumbling a handful of berries (frozen or fresh) into some warmed jam in a small saucepan and allowing the mixture to bubble until the berries are slightly soft.
Directions
- Start by preheating your oven to 110ºC (225ºF). If you are using a fan-assisted oven, set it to 100ºC, or use Gas Mark ¼. Meringue needs low, gentle heat to dry out rather than cook.
- Whisk the Whites Place your egg whites into a spotlessly clean, large bowl. Whisk them continuously until they reach the "stiff peak" stage. To test this, you should be able to carefully turn the bowl upside down without the eggs moving or sliding out.
- Keep the whisk running and begin adding the caster sugar very gradually. You can add it one dessertspoon at a time or pour it in a slow, steady trickle. The goal is to incorporate it slowly so the volume doesn't deflate.
- Once all the sugar is in, turn the mixer speed up to high and keep whisking for another 5 minutes. You are looking for the mixture to transform into a thick, glossy white cream. Dip your finger in and turn it upright; the peak of meringue on your fingertip should stand up straight without drooping.
- Spoon the thick meringue batter into a piping bag. Before you start piping shapes, squeeze a tiny dot of meringue onto each corner of your baking trays. Press your parchment paper down onto these dots—this acts as "edible glue" to stop the paper from sliding around while you work.
- Pipe small mounds onto the baking parchment, aiming for a width of about 4–5cm each. Leave a little bit of breathing room between them so the air can circulate.
- Place the trays in the oven and bake for 30 to 40 minutes. You will know they are ready when you can gently lift a meringue off the paper and the base releases cleanly without sticking or tearing.
- Remove the trays from the oven and let the meringues cool completely on the baking sheets before serving.