Let’s be real for a second: sometimes you want to be the hero of the party, but you absolutely do not have the energy to bake a three-tier cake.
That is precisely where these Marshmallow Pops come in to save your life.
They are the ultimate “fake it ’til you make it” dessert.
They look adorable and professionally made, but they require zero baking, zero measuring cups, and zero stress.
Why You’ll Love This Recipe
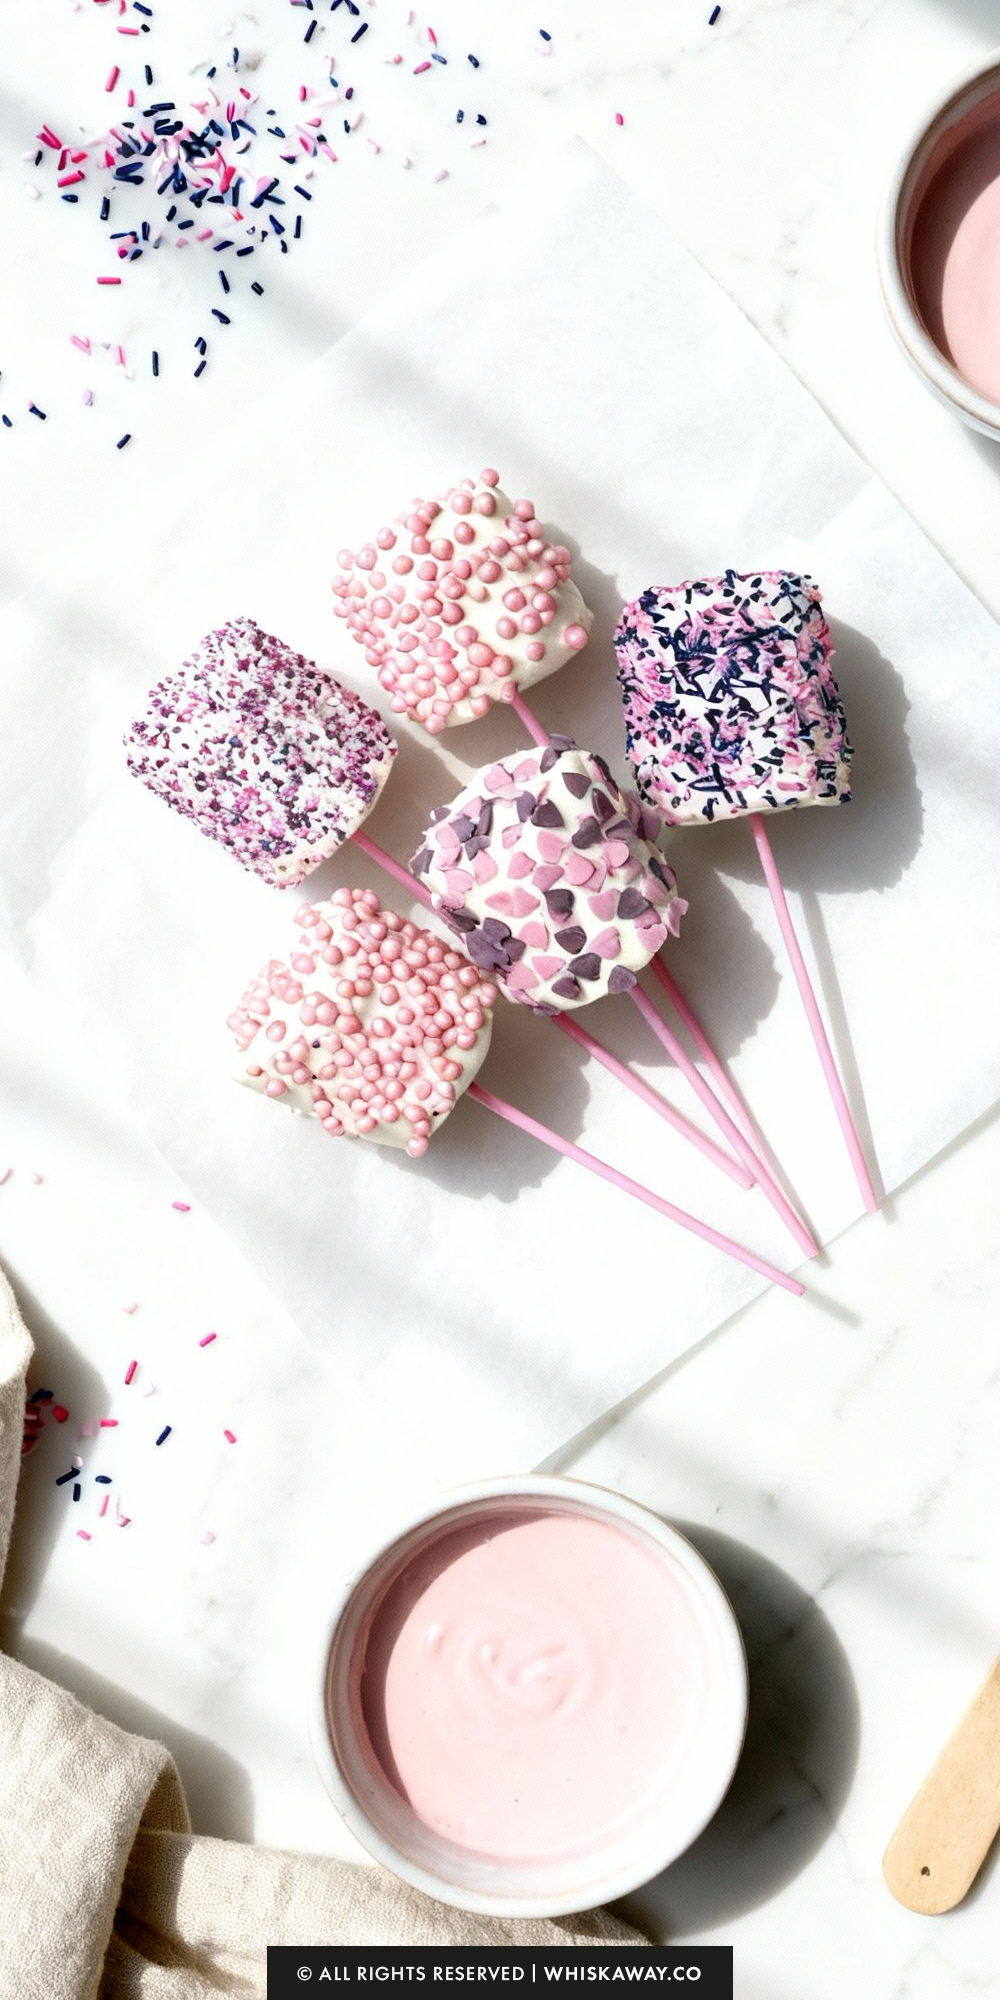
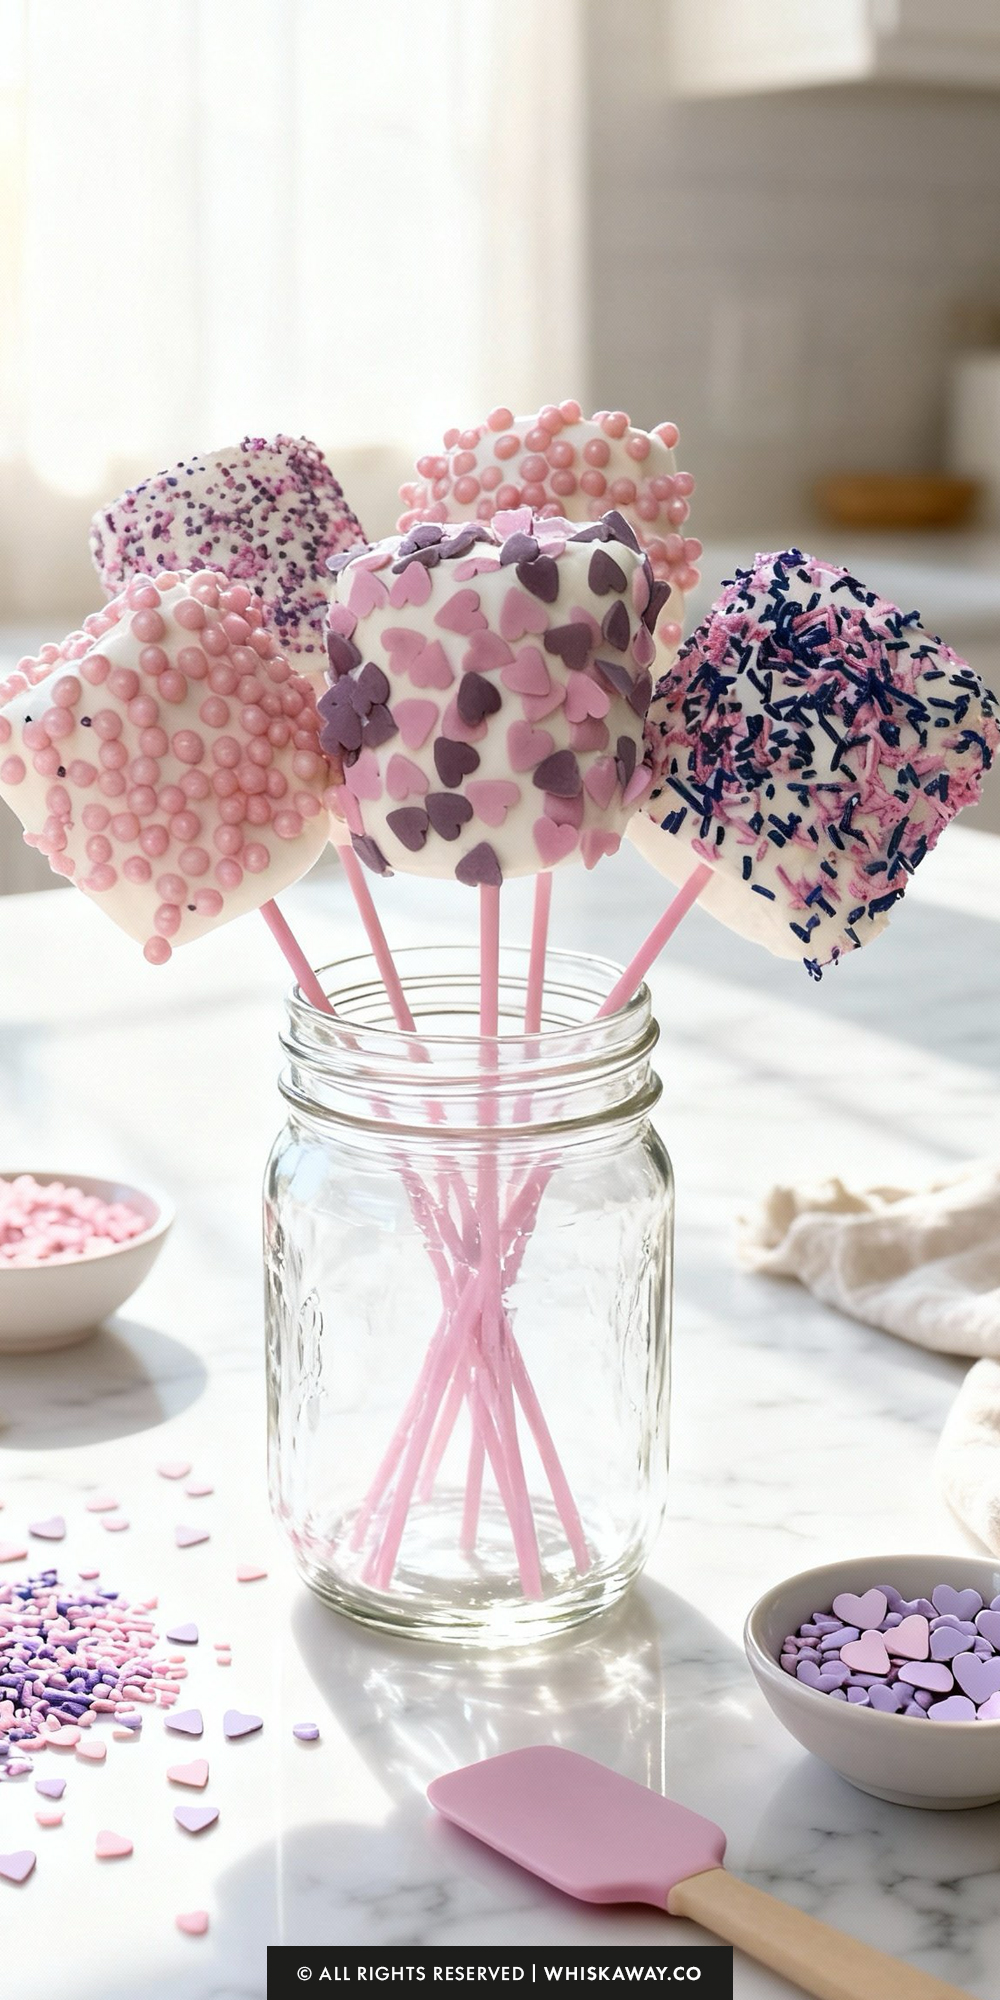
Marshmallow pops are playful, colorful, and incredibly easy to make.
They are soft inside with a crisp chocolate coating outside and allow for creativity with decorations, making them a fun project for beginners and kids alike.
Key Reasons to Love Them:
- Soft marshmallow interior with a crisp chocolate coating.
- Creative and customizable with sprinkles, drizzle, or colors.
- Bite-sized and portable, perfect for parties or gifts.
- Simple and forgiving for beginner bakers.
- Fun, hands-on process that engages kids and adults.
🔥 These chocolate-dipped marshmallow pops are fun to serve alongside cake pops, elegant chocolate covered raspberries, or bite-sized red velvet truffles.
How to Get Your Marshmallow Pops Just Right
Marshmallow pops are the easiest of all the “pop” treats, but they have their own unique set of challenges, mostly involving gravity and sticky messes.
Here is how to make them look professional rather than like a Pinterest fail.
1. The “Anchor” Technique
Marshmallows have a powdery exterior but a sticky interior, and sometimes the stick can slide right out when you try to dip them.
The Fix: Before you start dipping the whole pop, dip the tip of your lollipop stick into the melted chocolate (about half an inch) and then push it into the marshmallow.
Let it sit for 5 minutes. This creates an internal anchor that locks the marshmallow to the stick.
2. Temperature Control is Crucial
Marshmallows are essentially whipped sugar and gelatin. If your melting chocolate is scorching hot, it will start to melt the outer layer of the marshmallow on contact.
The Sign: If your marshmallow starts to droop or lose its square/round shape, your chocolate is too hot.
The Fix: After melting the candy melts, let the bowl sit on the counter for 2–3 minutes to cool slightly before dipping. It should be fluid but not hot to the touch.
3. Preventing the “Chocolate Foot”
The recipe calls for drying them flat (marshmallow-side down).
The downside to this method is that gravity pulls the chocolate down, creating a wide, uneven pool at the base.
The Technique: As mentioned in the instructions, you must move them. Place the dipped pop on the parchment.
Count to 10. Then, gently lift it and move it over two inches to a clean spot. Do this one more time after another minute.
This leaves the excess puddle behind and gives you a clean, sharp edge at the bottom.
4. Thinning the Candy Melts
White chocolate candy melts can be quite thick and gloppy. A thick coating is heavy and can pull the marshmallow off the stick.
The Secret: Add 1 teaspoon of solid coconut oil or vegetable shortening to the candy melts before heating.
This thins the viscosity, allowing you to get a smooth, thin shell that snaps when you bite it, rather than a thick, waxy layer.
5. Speed is Everything
Unlike cake pops, marshmallows don’t retain cold, so the chocolate sets strictly based on room temperature.
The Setup: Have your sprinkles poured into small bowls before you dip a single pop. You have a window of about 15–30 seconds before the chocolate “skin” forms.
Once that skin forms, sprinkles will bounce right off.
6. Freshness First
Marshmallows stale very quickly once the bag is opened.
The Rule: Do not open the bag of marshmallows until you have your station set up and your chocolate melted.
If you use marshmallows that have been sitting out for a few hours, the outside becomes leathery and hard to bite through.
Easy Baking Tips That Have Worked for Me
Inserting sticks into soft marshmallows is simple yet gives a fun, interactive element that makes them perfect for decorating.
Dipping each marshmallow into melted chocolate allows the coating to cling smoothly and evenly, creating a professional look without much effort.
Adding sprinkles or drizzles enhances the visual appeal and makes each pop unique. Letting the chocolate set ensures a firm exterior while keeping the marshmallow soft inside.
These playful treats are satisfying to make and even more enjoyable to share, offering a combination of texture, flavor, and visual delight.
Variation Tips
The humble marshmallow is the perfect blank canvas. Because it is essentially a cloud of sweet vanilla air, it pairs with almost anything.
Here is how to upgrade these pops for different vibes.
1. The “S’more” on a Stick
Capture the campfire magic without the open flame.
The Swap: Use milk chocolate melting wafers instead of white.
The Topping: Immediately after dipping, roll the bottom half of the pop in crushed graham crackers.
The Finish: Stick a few mini chocolate chips into the top while wet.
2. Cookies & Cream Crunch
This creates a great texture contrast between the fluffy inside and crunchy outside.
The Method: Dip the marshmallow in white chocolate as directed.
The Topping: Roll the wet pop heavily in crushed Oreo cookies (cream and all).
3. The “Double-Decker” (Snowmen)
Why stop at one marshmallow?
The Build: Thread two marshmallows onto the stick instead of one.
The Dip: Dip the entire stack in white chocolate.
The Decor: Once dry, use edible marker or piping gel to draw a face on the top marshmallow and buttons on the bottom one. Use a pretzel stick for arms!
4. Salted Caramel Drizzle
For a more sophisticated, adult-friendly treat.
The Dip: Coat in dark chocolate.
The Topping: Sprinkle with flaky sea salt.
The Finish: Once the chocolate is set, drizzle store-bought thick caramel sauce over the top in a zig-zag pattern.
5. Stuffed Surprise
Hide a secret inside the marshmallow.
The Prep: Use a small knife to cut a slit in the side of the marshmallow.
The Filling: Shove a single chocolate chip, a small piece of soft caramel, or a dried cherry inside before putting it on the stick.
The Dip: Coat as usual. The coating hides the surgery scar!
6. Vegan / Dairy-Free Option
Marshmallows usually contain gelatin (not vegetarian), and candy melts often contain milk.
The Swap: Buy vegan marshmallows (like the brand Dandies), which are made with tapioca syrup and carrageenan.
The Coating: Use high-quality dairy-free semi-sweet chocolate chips melted with 1 tablespoon of coconut oil to get the right dipping consistency.
7. Peanut Butter Lover
The Dip: Melt peanut butter chips instead of white chocolate (add a little oil to thin them out).
The Topping: Drizzle with melted chocolate or roll in chopped peanuts.
Save for Later to Your Pinterest Board
How to Properly Store Your Marshmallow Pops
Marshmallow pops are one of the most durable treats you can make, often lasting longer than cakes or cookies. However, they have one major enemy: moisture.
Here is how to keep them fresh and snappy.
1. Room Temperature (Best for up to 1 Week)
The Gold Standard: This is the absolute best way to store marshmallow pops. Marshmallows stay fluffy and the chocolate coating stays shiny at room temperature.
The Setup: Store them in an airtight container or individually wrapped in cellophane bags. Keep them in a cool, dry place away from sunlight (like a pantry).
Shelf Life: While they remain safe to eat for weeks, the marshmallow will start to stale and get “chewy” after about 7 days.
2. Refrigeration (Emergency Only)
When to Use: Only put these in the fridge if your kitchen is extremely hot (above 75°F/24°C) and the chocolate is at risk of melting.
The Risk: Refrigerators are humid. Marshmallows absorb moisture from the air, which can make them sticky or cause the chocolate shell to “sweat” (develop water beads) when you take them out.
How to Protect: If you must refrigerate, place them in an airtight container with a paper towel at the bottom to absorb humidity.
When removing them, leave the lid on until they reach room temperature to prevent condensation.
3. Freezing (Not Recommended)
Avoid freezing finished marshmallow pops.
Why: When frozen marshmallows thaw, the gelatin structure changes, often becoming gummy or dissolving into a sticky goo inside the shell.
Additionally, the chocolate coating usually cracks due to the expansion of the marshmallow as it freezes. It is better to make these fresh.
4. Packaging for Gifts
Individual Wrapping: The professional way to store these is to place a small cellophane treat bag over the pop and secure it around the stick with a twist tie or ribbon.
This creates a mini airtight seal for each pop, keeping them fresh longer and making them easy to transport.
Prevents Scuffing: Wrapping them individually also stops the chocolate from rubbing against other pops and getting scratched.
5. Storage Mistakes to Avoid
Reheating: Never attempt to reheat a marshmallow pop.
Unlike a cookie, applying heat will cause the chocolate to melt instantly and the marshmallow to collapse into a puddle.
These are meant to be eaten at room temperature.
Humidity: Do not store them in a container that isn’t completely dry.
Even a drop of water inside a Tupperware container can cause the sugar in the sprinkles to bleed and the chocolate to seize or bloom (turn white).
FAQs
Why does the marshmallow slide off the stick when I dip it?
This usually happens because the inside of the marshmallow is slippery. The fix is simple: before you insert the stick into the marshmallow, dip the tip of the stick into the melted chocolate. Then, push it into the marshmallow and let it sit for a few minutes. The chocolate will harden inside, acting as “edible glue” to hold the pop securely in place.
Can I use regular white chocolate chips instead of Candy Melts?
Yes, but with a caveat. Candy Melts are formulated with oil so they melt smoothly and harden into a crisp shell very quickly. Regular white chocolate chips often melt into a thicker, stickier consistency and take much longer to set. If you use real chocolate chips, mix in 1 tablespoon of coconut oil or shortening to help it thin out and harden properly.
Can I make these ahead of time for a party?
Absolutely! Marshmallow pops are one of the best treats for party prep. You can make them 3 to 4 days in advance. Just ensure they are stored in an airtight container at room temperature (not in the fridge) to keep the marshmallows soft and the chocolate shiny.
My chocolate seized and turned chunky. Can I save it?
This usually happens if a drop of water gets into the bowl or if the chocolate was overheated. Unfortunately, once chocolate seizes, it is very difficult to return it to a dipping consistency. It is usually best to start over with a fresh batch. To prevent this, ensure your bowl and spoon are completely dry before you start.
How do I dry them without getting a flat bottom?
The recipe method (drying flat on parchment) will always create a small flat spot. If you want a perfectly round pop, you need to dry them upright. You can push the sticks into a block of Styrofoam, a floral foam brick, or even a cardboard box with small holes poked in it. Let them stand upright until the chocolate is fully hard.
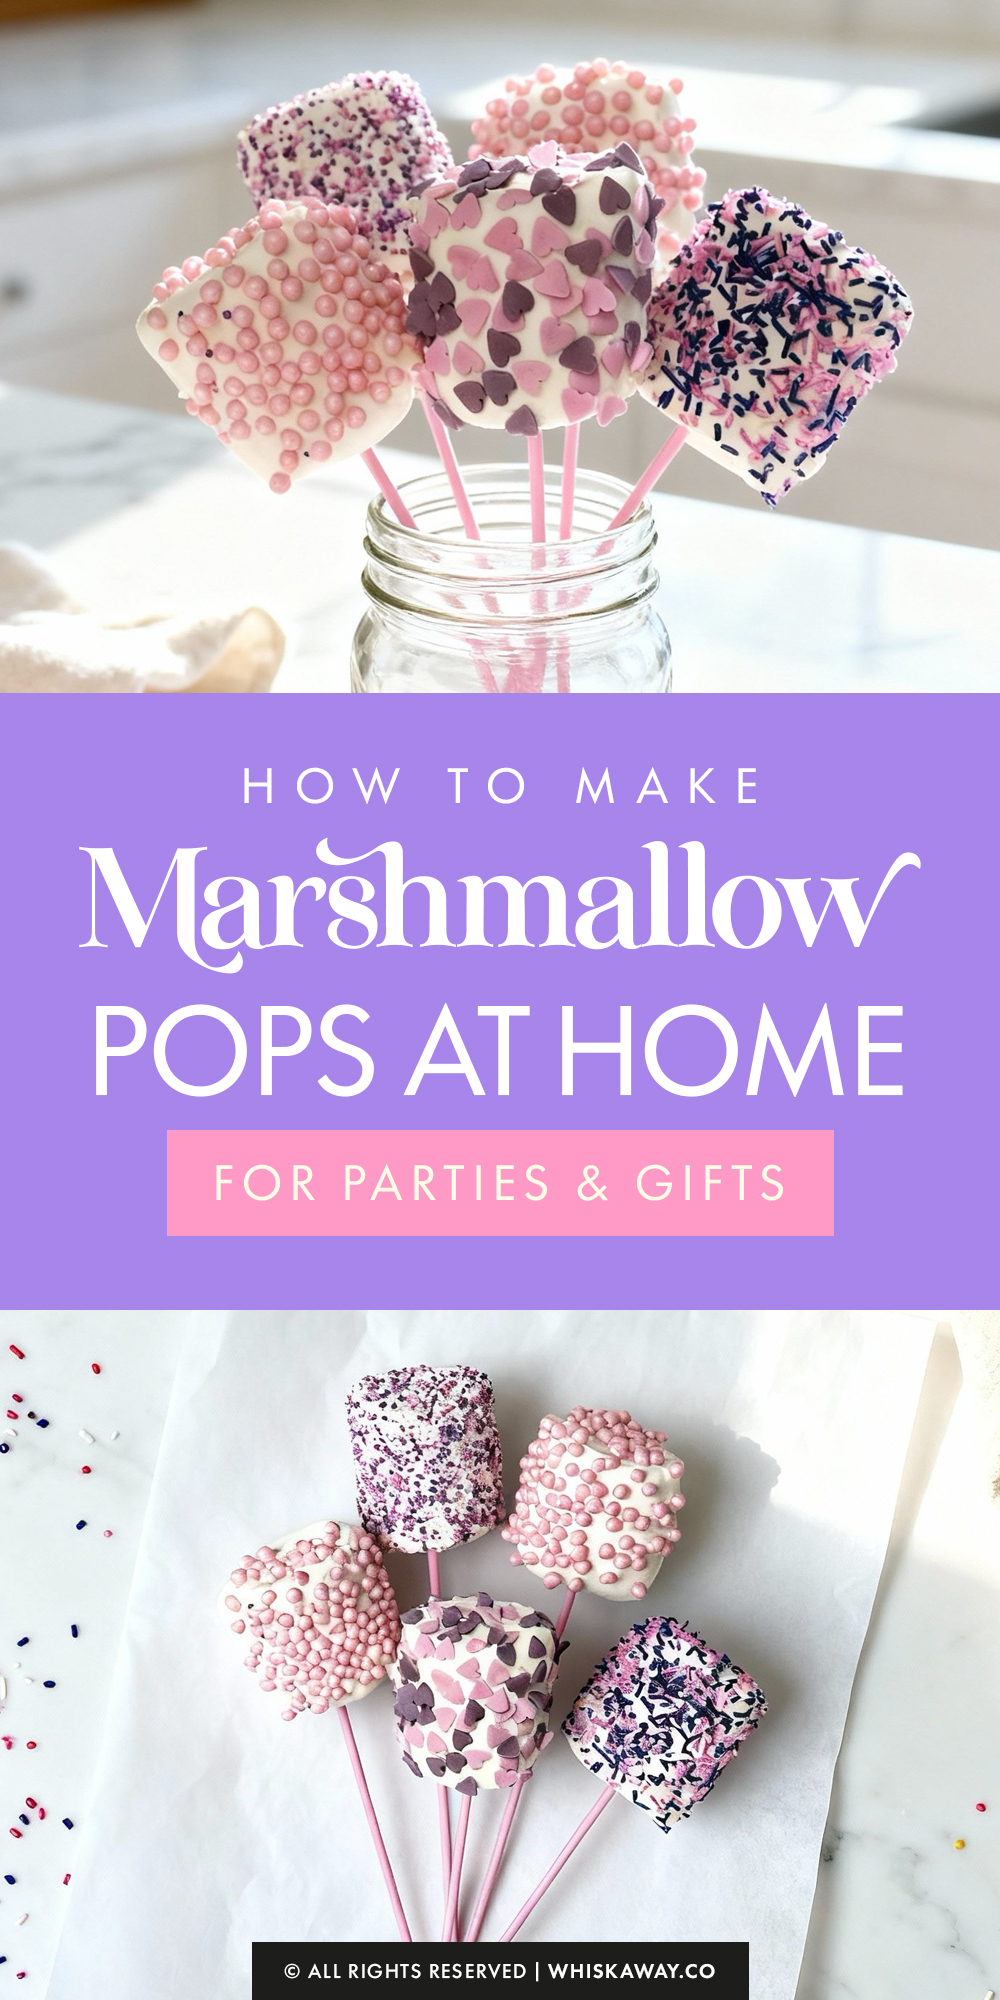
Marshmallow Pops
12
servingsEasy marshmallow pops dipped in chocolate and decorated for any occasion, fun to make and perfect for parties.
Ingredients
12 pink plastic sticks
12 Large Marshmallows
1 bag of white chocolate Candy Melts
One container of assorted Valentine’s Day sprinkles
Directions
- Prepare Your Station Before you start melting anything, set up your drying area.
- Lay out a sheet of parchment paper or wax paper on a baking sheet or directly on your counter. This prevents the pops from sticking while they set.
- Insert the Sticks Take your lollipop sticks and push one firmly into the flat bottom of each large marshmallow.
- Push it in about halfway so it feels secure, but be careful not to poke it all the way through the top.
- Melt the Candy Place the white chocolate candy melts in a microwave-safe bowl. Heat them on high power in 30-second intervals.
- Stir well after every interval, even if they still look solid, until the mixture is completely smooth and lump-free.
- Dip and Coat Dip a marshmallow straight down into the melted chocolate until it is fully submerged.
- Lift it out and gently tap the stick on the edge of the bowl to let the excess chocolate drip off. Note: You want a thin, even coat.
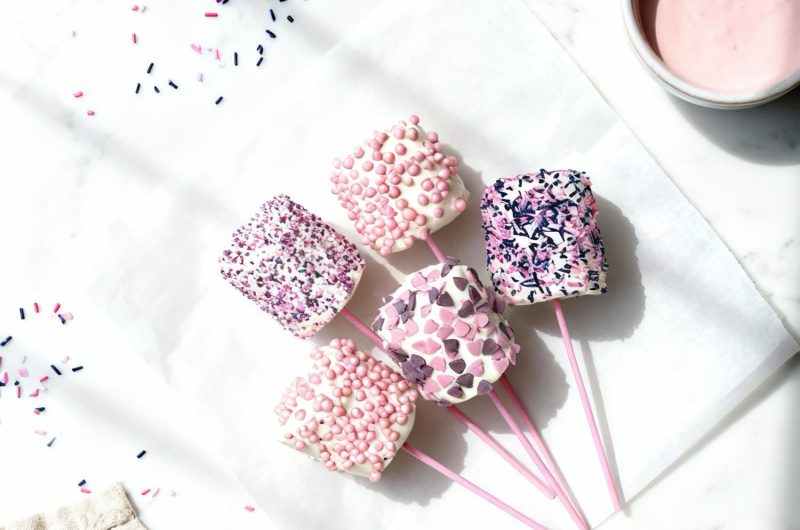
- Add the Sprinkles You have to move quickly here! While the chocolate is still wet, hold the pop over a small plate (to catch the mess) and shake your festive sprinkles all over the marshmallow.
- Dry and Reposition Place the decorated pop standing up (marshmallow side down) on your parchment paper.
- Pro Tip: To avoid a wide "foot" or puddle of chocolate forming at the base, gently lift the pop and move it to a clean spot on the paper after about 60 seconds.
- Set and Serve Repeat the process for the remaining marshmallows. The candy coating hardens very fast, so they will be set and ready to eat or package in just a few minutes!