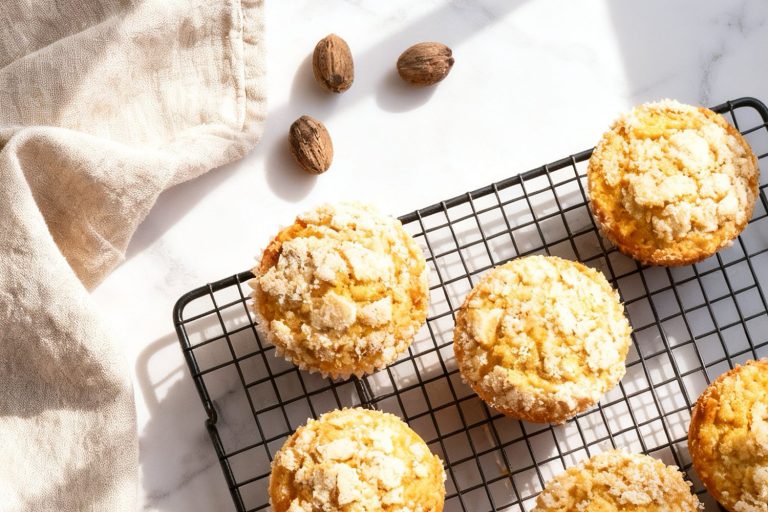
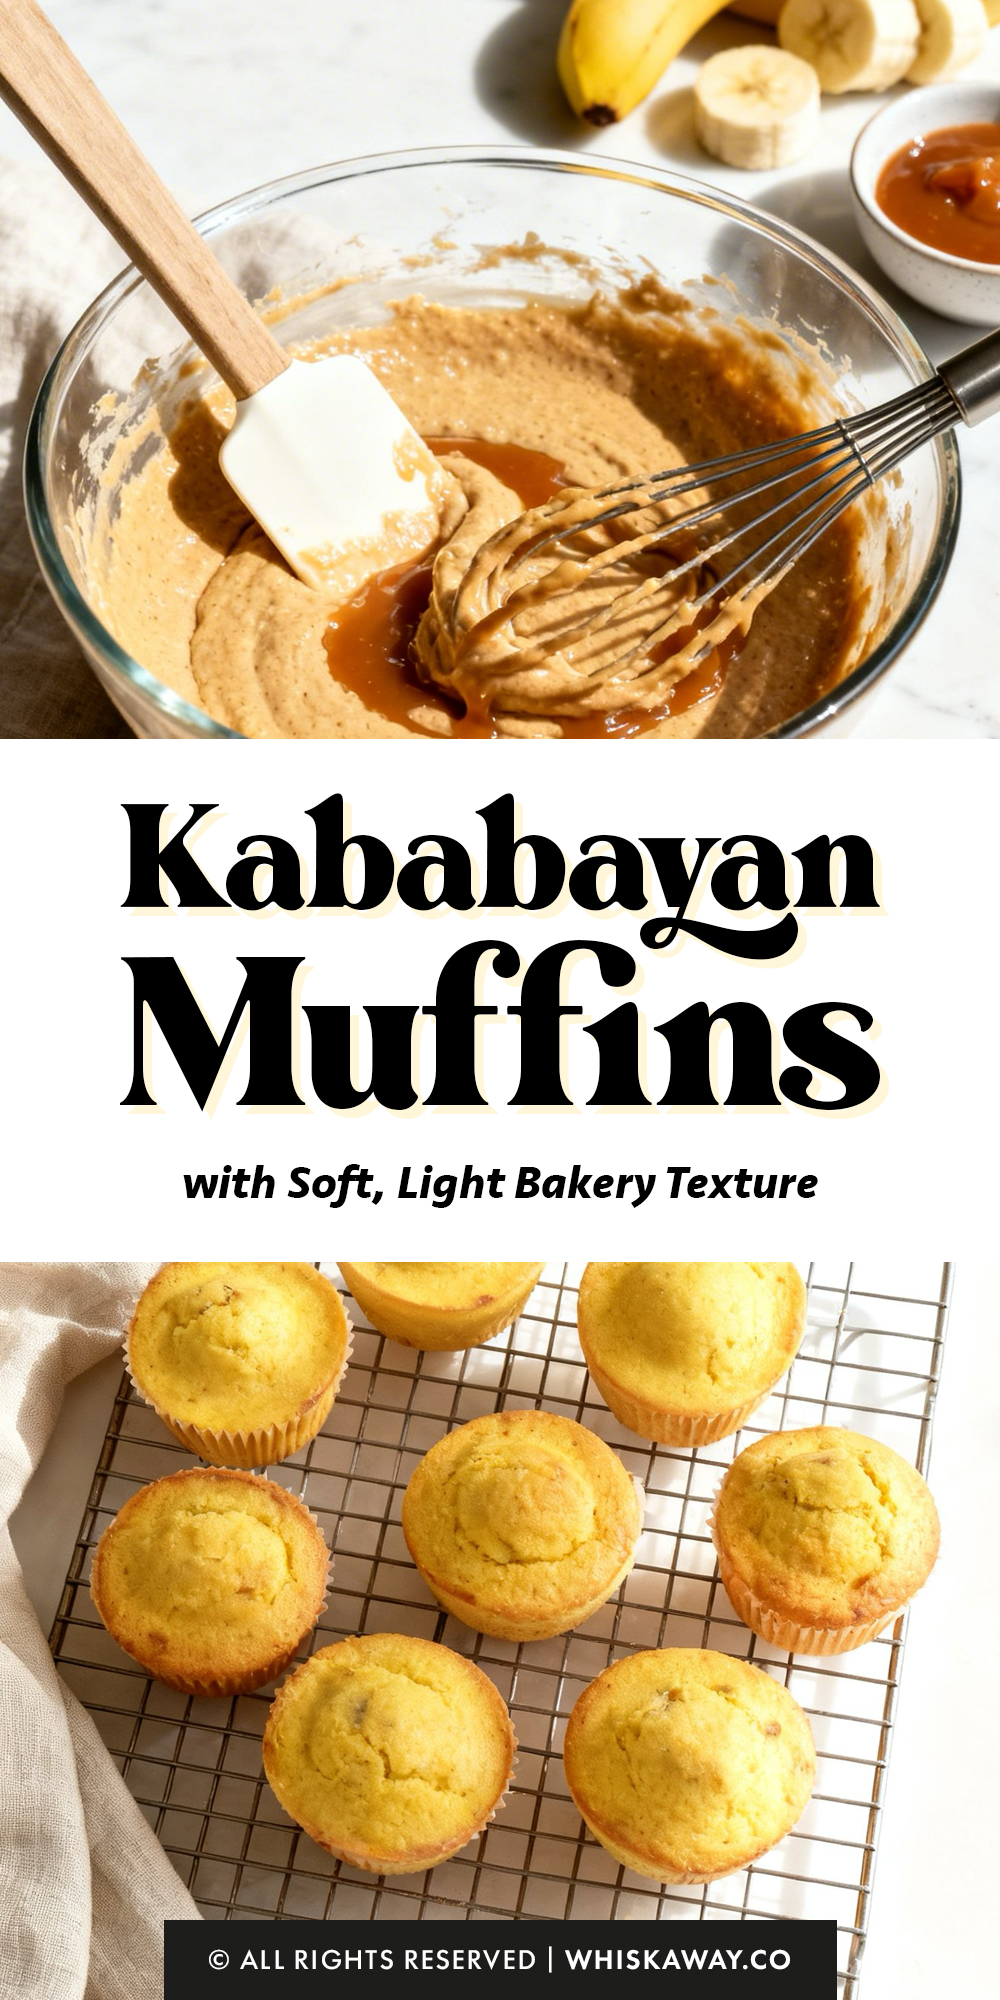
Ever wanted a muffin that’s uniquely tropical and satisfying? Kababayan muffins are the Filipino-style muffins that combine soft, moist texture with a hint of coconut sweetness.
These bite-sized treats are perfect for brunch, snacks, or sharing with friends.
Simple to make yet packed with flavor, they offer a light, tropical twist that’s both nostalgic and comforting.
Why You’ll Love This Recipe
Inspired by Filipino bakery favorites, these kababayan muffins are soft, buttery, and lightly sweet with a golden top.
What Makes Them Special
- Classic kababayan flavor
- Soft, fluffy interior
- Lightly sweet and buttery
- Simple, nostalgic taste
- Perfect with coffee or tea
🔥 Kababayan muffins are simple, nostalgic, and bakery-inspired. If you enjoyed their light texture and subtle sweetness, these recipes offer similar comfort.
How to Get Your Kababayan Muffins Just Right
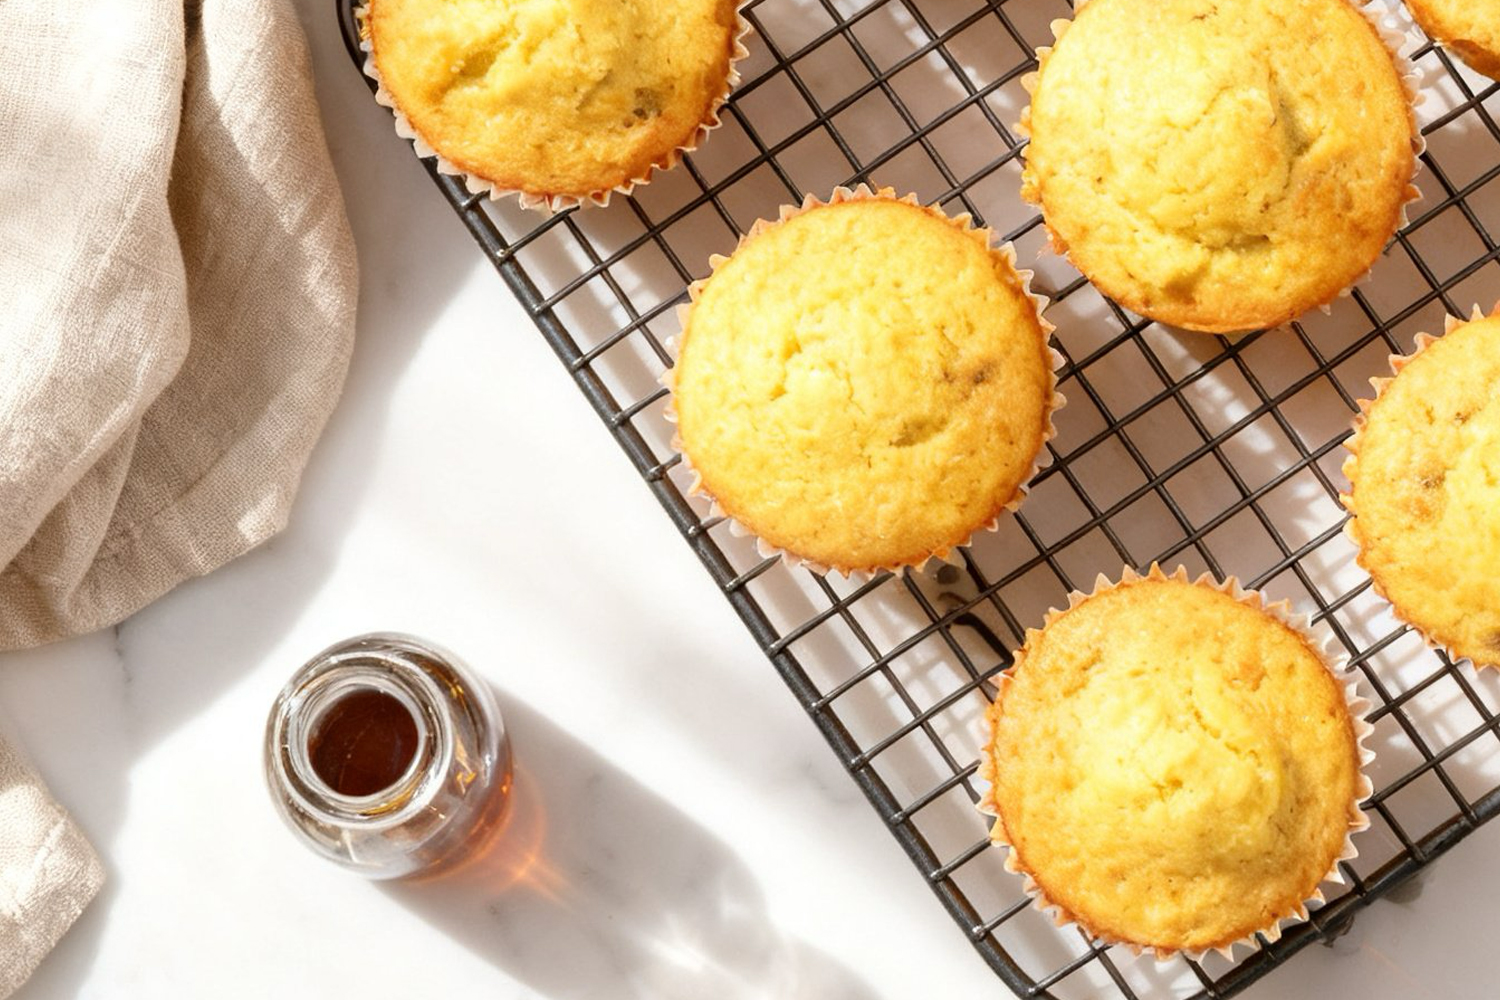
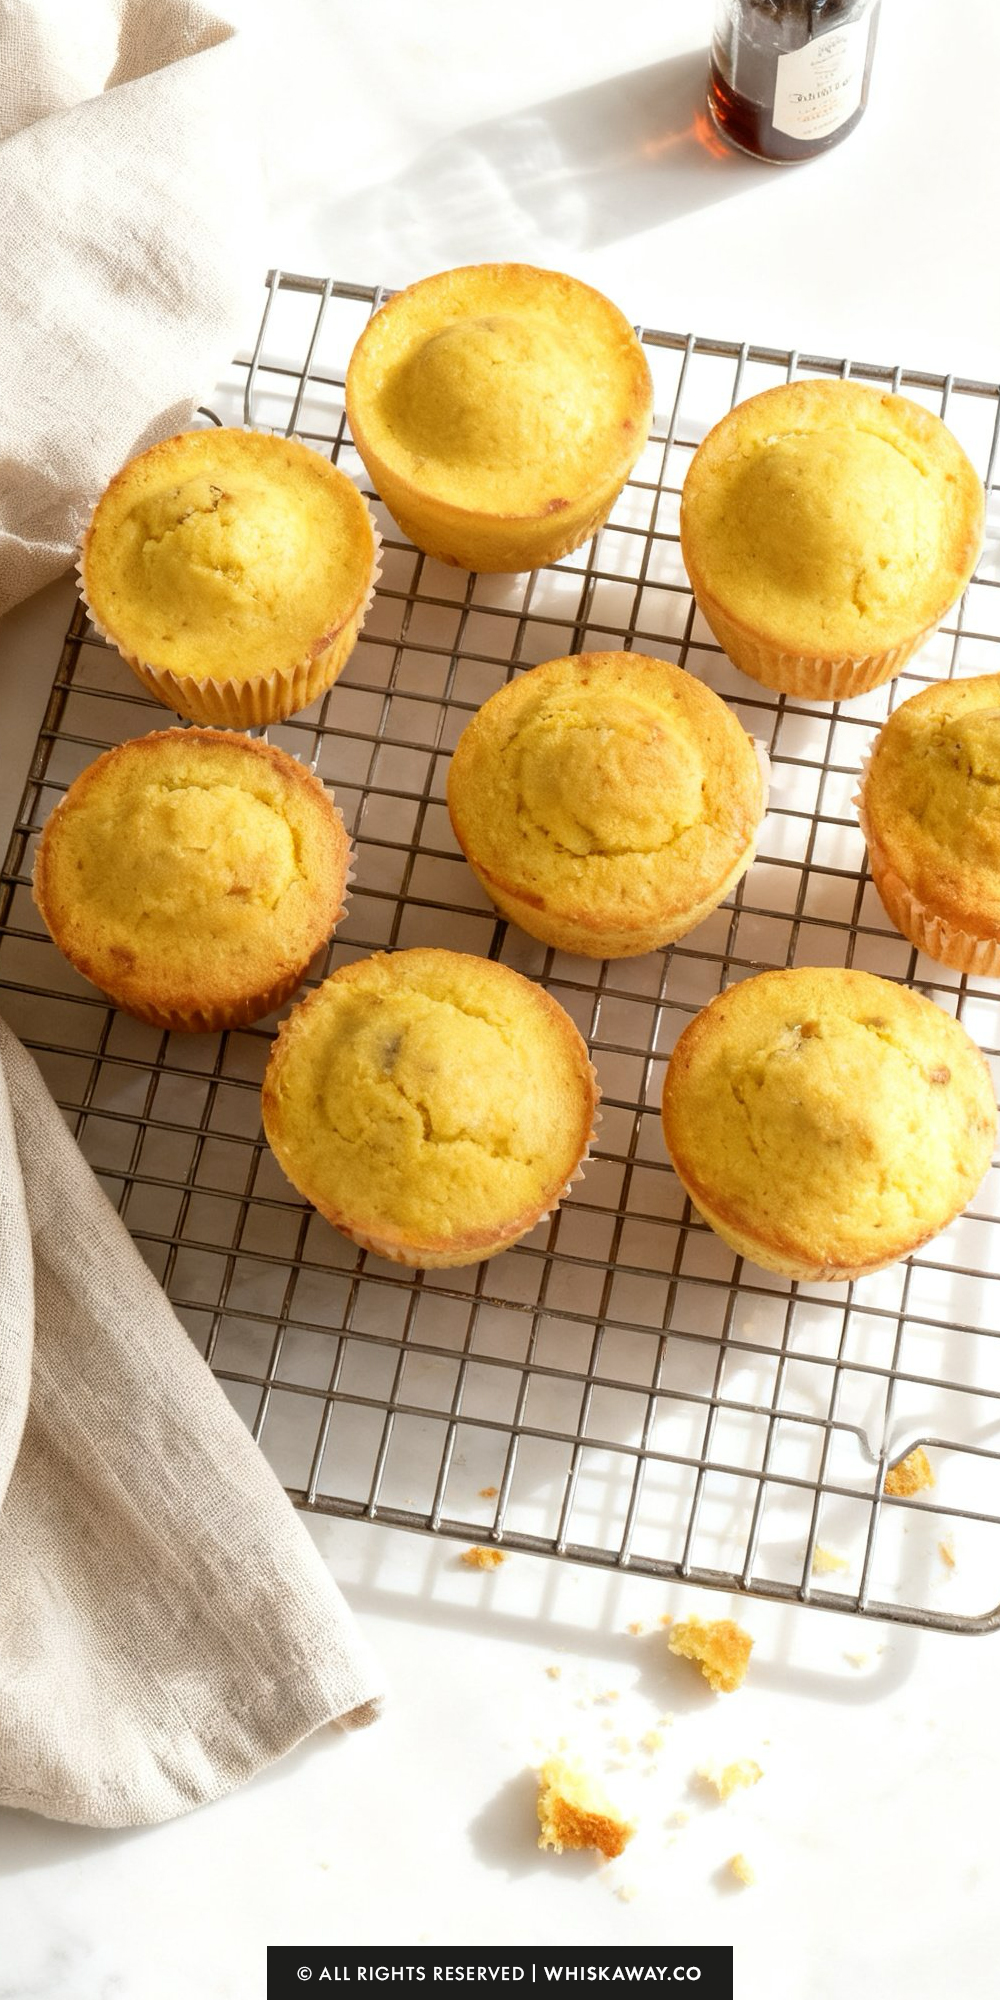
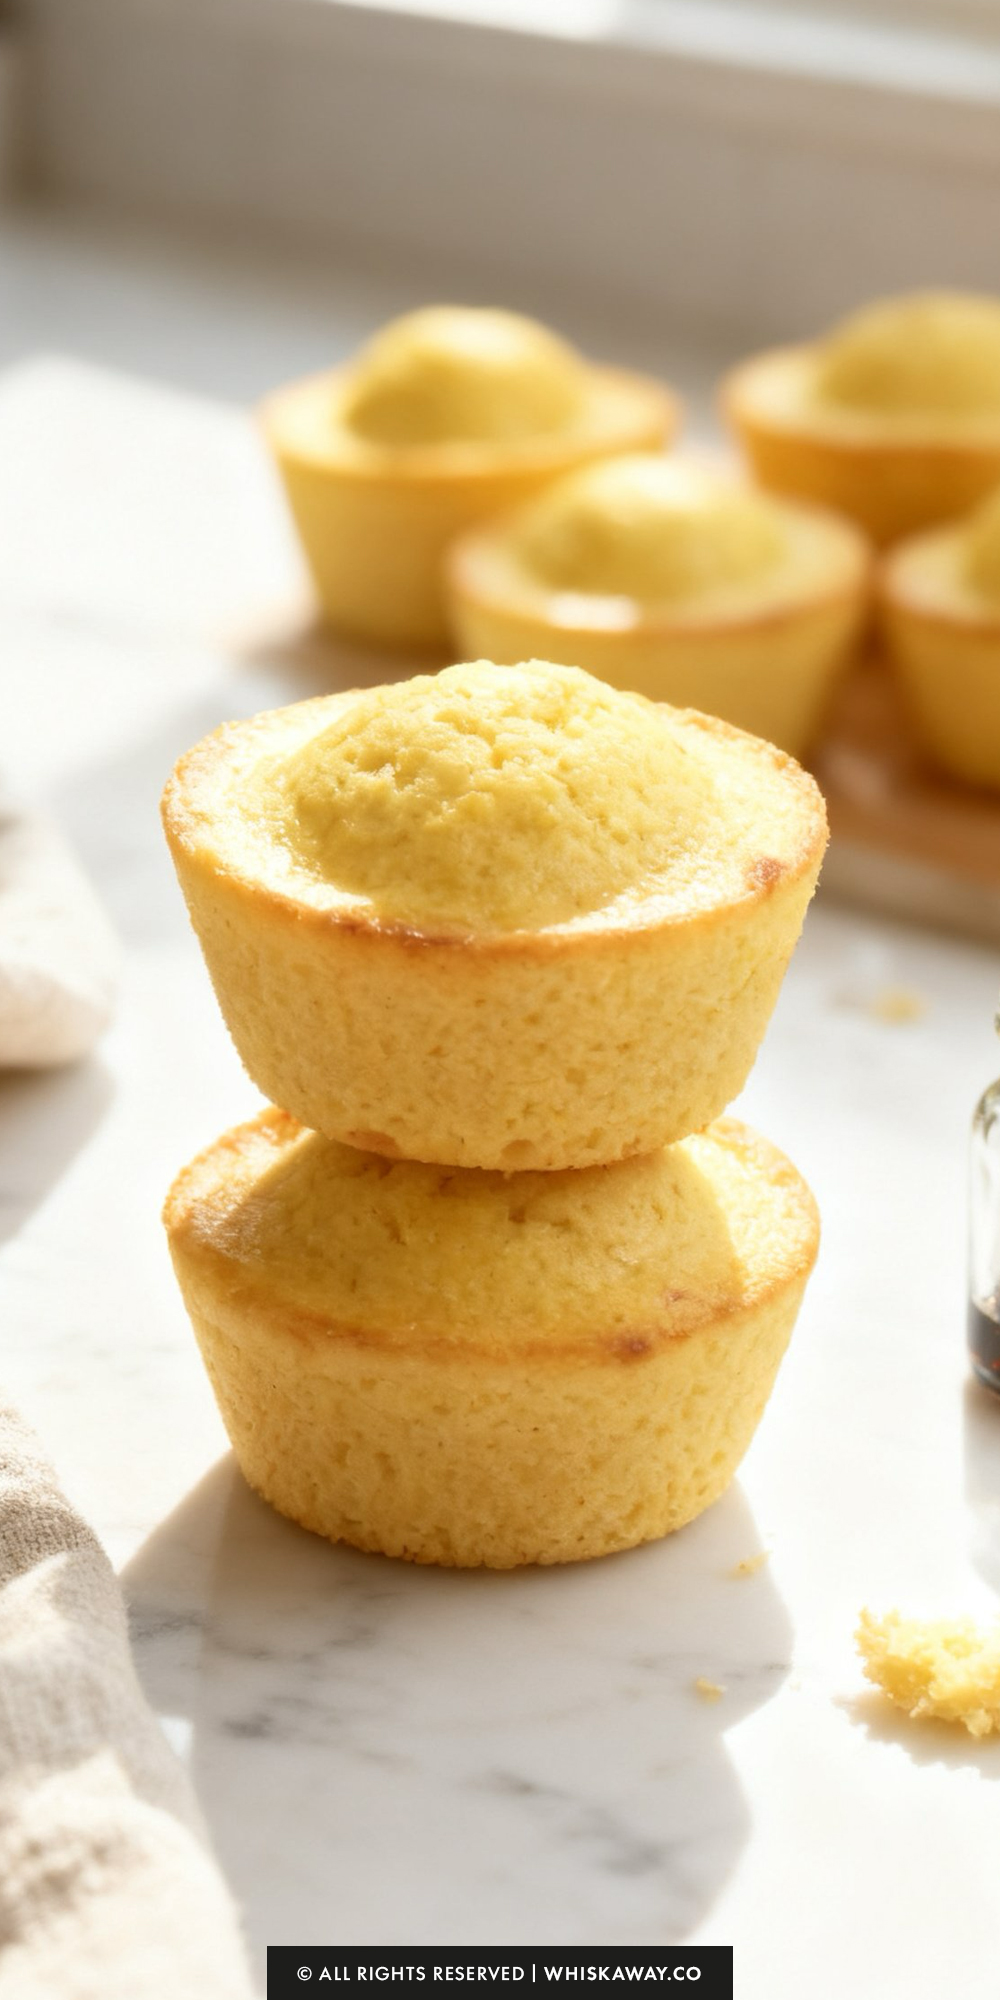
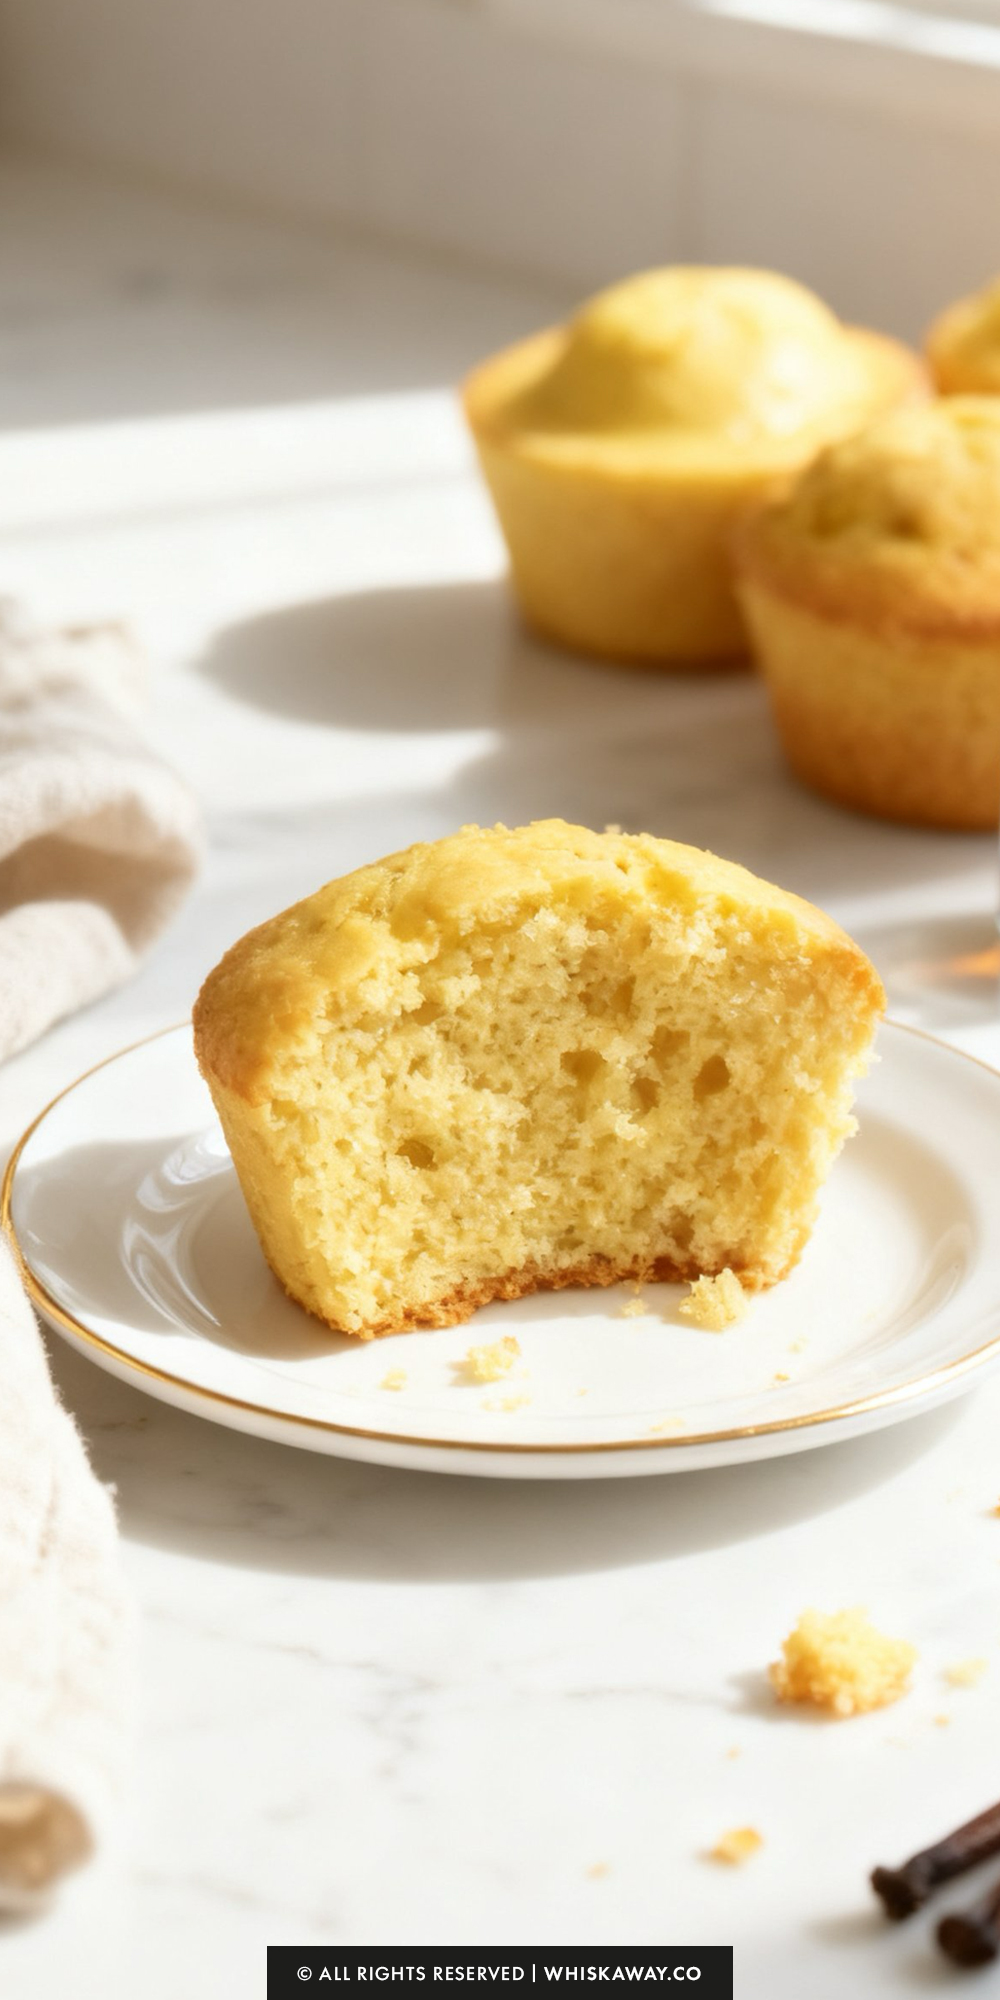
The Kababayan Muffin is a beloved Filipino panaderia classic, famous for its golden color and its unique “salakot” shape, resembling a traditional native hat with a flared brim and a domed center.
Achieving this specific look and the moist, dense-yet-spongy texture requires mastering a few traditional bakery techniques.
1. The Temperature “Blast” Technique
This is the most critical step for the “salakot” shape. The initial high heat (200°C/400°F) causes the edges of the batter to cook and climb the sides of the tin rapidly, while the center remains liquid and “craters.”
Do not open the oven door when you lower the temperature to 160°C. Simply turn the dial down.
Opening the door causes a sudden drop in pressure that can prevent the center from ever rising into that iconic dome.
2. Don’t Skimp on the Greasing Paste
The mixture of lard, oil, and flour is more than just a non-stick agent; it provides structural support.
Apply the paste thickly. This heavy coating helps the batter “grip” the sides of the tin during the high-heat phase, allowing the edges to flare out and form the “brim” of the hat.
Without this thick layer, the muffin might just slide up and down, resulting in a generic rounded top.
3. The “Ribbon” Consistency Test
The batter should be much thinner than a standard American cupcake batter.
When you lift your whisk, the batter should fall in a smooth, continuous stream that folds over itself like a ribbon and disappears into the rest of the batter after a few seconds.
If it breaks off in “clumps,” it is too thick, add a tablespoon of water at a time until it flows correctly.
A batter that is too thick will produce a heavy, bready muffin rather than a light, spongy one.
4. Use Real Evaporated Milk
Authentic Kababayan muffins rely on the concentrated proteins and sugars in evaporated milk for their signature richness and moist crumb.
Do not substitute with regular whole milk or low-fat versions.
Regular milk has too much water, which can lead to a “holey” or tunneled texture inside the muffin instead of a fine, tight crumb.
5. Common Mistakes to Avoid
- Over-mixing the Flour: Once you add the flour and baking powder, whisk only until the lumps are gone. Over-mixing develops gluten, which will make the muffins tough and chewy rather than soft and spongy.
- Skipping the Sifting: Because the batter is quite liquid, any tiny lumps of flour will be very noticeable in the finished product. Always sift your dry ingredients to ensure a perfectly smooth “ribbon.”
- Under-filling the Cups: Fill the tins to at least 3/4 full. If there isn’t enough batter, there won’t be enough volume to create the “overflow” effect that forms the brim of the salakot.
Easy Baking Tips That Have Worked for Me
- Beating the eggs well is non-negotiable—it’s the structure.
- I bake at a slightly higher temp for the signature dome.
- I grease generously. These stick more than they look like they should.
- I pull them early; carryover heat finishes the crumb.
- They’re best eaten fresh.
Save For Later to Your Pinterest Board
Variation Tips
The Kababayan Muffin is a traditional Filipino staple known for its simplicity and distinct shape. While the classic version is iconic, its neutral, sweet base makes it a wonderful canvas for creative local and modern variations.
1. The “Ube-Laced” Kababayan
Give these muffins a vibrant purple hue and a nutty, earthy flavor profile.
The Tweak: Replace the yellow food coloring with 1 teaspoon of Ube extract.
The Add-in: For a more authentic texture, stir in 2 tablespoons of ube halaya (purple yam jam) into the wet ingredients.
The Result: You’ll get the same “salakot” shape but with a striking purple color and a deeper, more complex sweetness.
2. Coconut & Pandan Twist
Inspired by other Filipino favorites like Buko Pandan:
The Swap: Use coconut oil instead of vegetable oil in the batter.
The Flavor: Replace the vanilla extract and yellow coloring with 1/2 teaspoon of Pandan extract (which will turn the muffins a beautiful green).
The Texture: Sprinkle a few shreds of macapuno (sweetened coconut strings) into the center of the batter before baking.
3. Cheese-Topped Savory-Sweet
Filipinos love the combination of sweet cake and salty cheese.
The Add-in: Once the center dome begins to rise during the second stage of baking (the 160°C phase), quickly open the oven and drop a small cube or a pinch of shredded quick-melt cheese (like Eden or cheddar) onto the center.
The Experience: The cheese melts into the “hat” part of the muffin, providing a savory contrast to the sweet, dense cake.
4. The “Milo” or Chocolate Version
For a kid-friendly bakery treat:
The Tweak: Sift in 3 tablespoons of Milo or unsweetened cocoa powder along with the flour.
The Adjustment: You may need to add an extra tablespoon of evaporated milk to maintain that perfect “ribbon” consistency, as cocoa powder can be drying.
5. Dietary Adaptations
Dairy-Free:
Replace the evaporated milk with evaporated coconut milk.
This is a fantastic substitute because it maintains the high fat and protein content needed for the dense texture while adding a subtle tropical aroma.
Egg-Free:
Replace the 2 eggs with 1/2 cup of unsweetened applesauce or a commercial egg replacer. Note that the muffins may not rise as dramatically into the “dome” shape without the protein structure of the eggs.
Lower Sugar:
You can reduce the sugar to 1 cup without significantly affecting the structure.
However, don’t go lower than that, as the sugar is essential for the caramelization that helps the edges “grip” the pan to form the brim.
Lard Alternatives:
If you prefer not to use lard for the greasing paste, vegetable shortening (like Crisco) is the best alternative.
Avoid using only oil, as it won’t be thick enough to help the batter “climb” the walls of the tin.
How to Properly Store Your Kababayan Muffins
Storage TipsKababayan muffins are unique because of their dense, moist, and slightly gummy texture, qualities that come from the evaporated milk and oil.
Because they are more moisture-rich than a typical crumbly muffin, they are prone to becoming “sweaty” if stored improperly or developing mold quickly in warm, humid environments.
1. Room Temperature (Best for Short-Term)
Duration: 1 to 3 days.
Once the muffins have cooled completely, place them in an airtight container or a resealable plastic bag.
If you live in a particularly humid climate, keep the container in a cool, dark spot. Since these muffins are quite moist, any trapped heat in the container will cause them to spoil faster.
2. Refrigeration (Best for Maintaining Texture)
Duration: Up to 1 week.
Because of the evaporated milk and eggs, refrigeration is the safest way to prevent spoilage beyond the first 48 hours.
Ensure they are in a sealed container so they don’t absorb odors from other foods in the fridge.
ote that the muffins may feel slightly firmer when cold; this is normal and easily fixed with a quick reheat.
3. Freezing (Long-Term Storage)
Duration: Up to 3 months.
Wrap each individual muffin tightly in plastic wrap or aluminum foil to prevent freezer burn, then place the wrapped muffins in a heavy-duty freezer bag.
Thaw them on the counter for about 30 minutes or overnight in the refrigerator before reheating.
4. How to Reheat for the Best Results
Kababayan muffins are best enjoyed slightly warm, which restores their signature soft and spongy “panaderia” feel.
The Microwave (Fastest): Wrap a muffin in a damp paper towel and heat for 10–15 seconds. This mimics a steaming effect and ensures the center is soft without drying out the edges.
The Steamer (Traditional): For the most authentic experience, steam the muffins for 2–3 minutes. This is the best way to revive day-old muffins, as it adds moisture back into the dense crumb.
The Oven/Toaster Oven: If you prefer a slightly firmer edge, heat at 300°F (150°C) for about 5 minutes. Be careful not to leave them too long, as they can quickly turn from soft to “bready.”
5. Storage Mistakes to Avoid
Storing While Warm: This is the most critical mistake. If you seal these muffins while even slightly warm, condensation will form inside the container.
This makes the “brim” of the salakot soggy and creates a breeding ground for mold.
Using Paper Bags: Unlike crusty bread, Kababayan muffins should not be stored in paper bags.
The paper will pull the moisture and oil out of the muffin, leaving it dry and tough within a few hours.
Ignoring Humidity: If your kitchen is very warm, the high sugar and moisture content in Kababayan can lead to spoilage faster than other baked goods.
When in doubt, move them to the refrigerator.
FAQs
Why didn’t my muffins form the “salakot” (hat) shape?
The “salakot” shape depends on two factors: the greasing paste and the temperature change. The thick lard-flour-oil paste helps the batter “climb” and stick to the sides of the tin to form the brim. Meanwhile, the initial high heat of 200°C forces the edges to set quickly while the center stays liquid, eventually puffing up into a dome when the heat is lowered.
Can I use regular whole milk instead of evaporated milk?
It is not recommended. Evaporated milk has about 60% of its water removed, making it much creamier and more concentrated in protein and sugar. This is what gives Kababayan its signature dense, moist, and slightly gummy “panaderia” texture. Using regular milk will result in a muffin that is too airy, watery, and lacks the traditional flavor.
My batter looks very thin. Did I do something wrong?
Unlike American muffins, which have a thick, scoopable batter, Kababayan batter is quite fluid. It should fall from your whisk in a continuous “ribbon.” This thin consistency is intentional; it allows the muffins to rise quickly during the high-heat phase and ensures the final texture is spongy rather than bready or tough.
Can I just use a standard non-stick cooking spray for the pans?
For this specific recipe, no. Standard non-stick spray is too thin. The traditional Filipino bakery “greasing paste” (lard, oil, and flour) provides a physical barrier and structural support that allows the batter to flare out over the edges of the cup. Without that thick coating, you will likely get a standard rounded muffin instead of the flared brim.
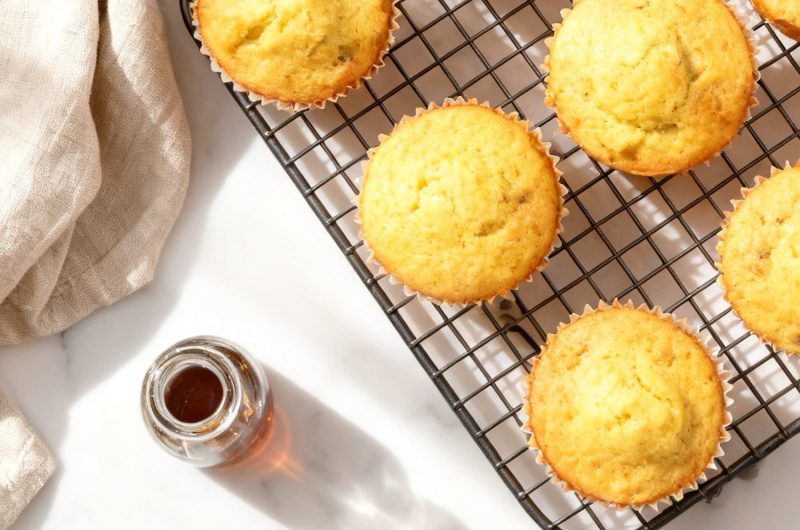
What is the best way to serve Kababayan muffins?
In the Philippines, these are a quintessential merienda (mid-afternoon snack). They are best served slightly warm or at room temperature. For the most authentic experience, pair them with a cup of hot Barako coffee or hot tsokolate (Filipino hot chocolate). Because they are dense, they are perfect for “dunking”!
Kababayan Muffins
24
muffins5
minutes35
minutesThese kababayan muffins are tender, sweet, and a nostalgic breakfast treat.
Ingredients
3 cups all-purpose flour
1 can (370ml) evaporated milk
1 1/4 cups sugar
2/3 cup vegetable oil or coconut oil
1/2 cup lard or shortening (for greasing the pan)
2 large eggs
3 tablespoons flour (for greasing the pan)
2 tablespoons oil (for greasing the pan)
3 teaspoons baking powder
1 teaspoon vanilla
1/4 teaspoon salt
Yellow food color
Directions
- In a large mixing bowl, combine the peanut butter, softened butter, brown sugar, and granulated sugar. Beat the mixture thoroughly until it is uniform and well-integrated.
- SIncorporate the eggs and vanilla extract. Continue beating the mixture until it transforms into a light, airy, and fluffy consistency. This aeration is what gives the bars their tender crumb.
- Gradually stir in the flour, baking powder, and salt. Blend until the dry ingredients are just fully incorporated and no streaks of flour remain, ensuring a smooth, cohesive batter.
- Transfer the batter into an ungreased 13x9-inch baking pan, spreading it into an even layer with a spatula. Scatter the entire 12-ounce bag of dark chocolate chips across the surface as uniformly as possible.
- Place the pan in a preheated 350°F (177°C) oven and bake for exactly 5 minutes.
- Carefully remove the pan from the oven. The chocolate chips should now be glossy and soft. Take a butter knife and gently drag it through the softened chocolate and the top layer of batter to create a beautiful marbled pattern. Pro-Tip: Avoid over-swirling; you want distinct ribbons of chocolate rather than a solid brown top.
- Return the pan to the oven for an additional 20 minutes. You are looking for the edges to turn a light golden brown. Allow the bars to cool completely in the pan. This is crucial for structural integrity; cutting them while warm will cause the edges to crumble and the chocolate swirl to smudge.
- Once cold, cut into 24 even bars and serve.
- Technique Insight for the Perfect Swirl:
- When marbling in Step 5, use a figure-eight motion with your knife. This ensures the chocolate is distributed both horizontally and vertically, creating those deep, decadent pockets of dark chocolate that make these bars a standout treat.