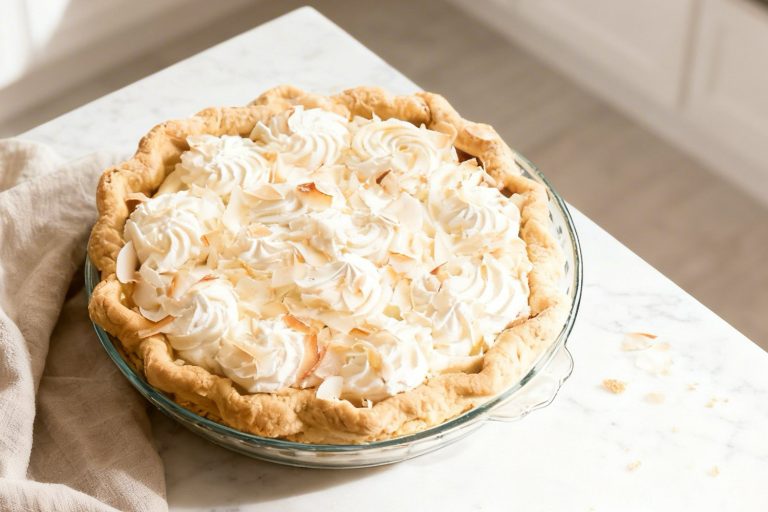
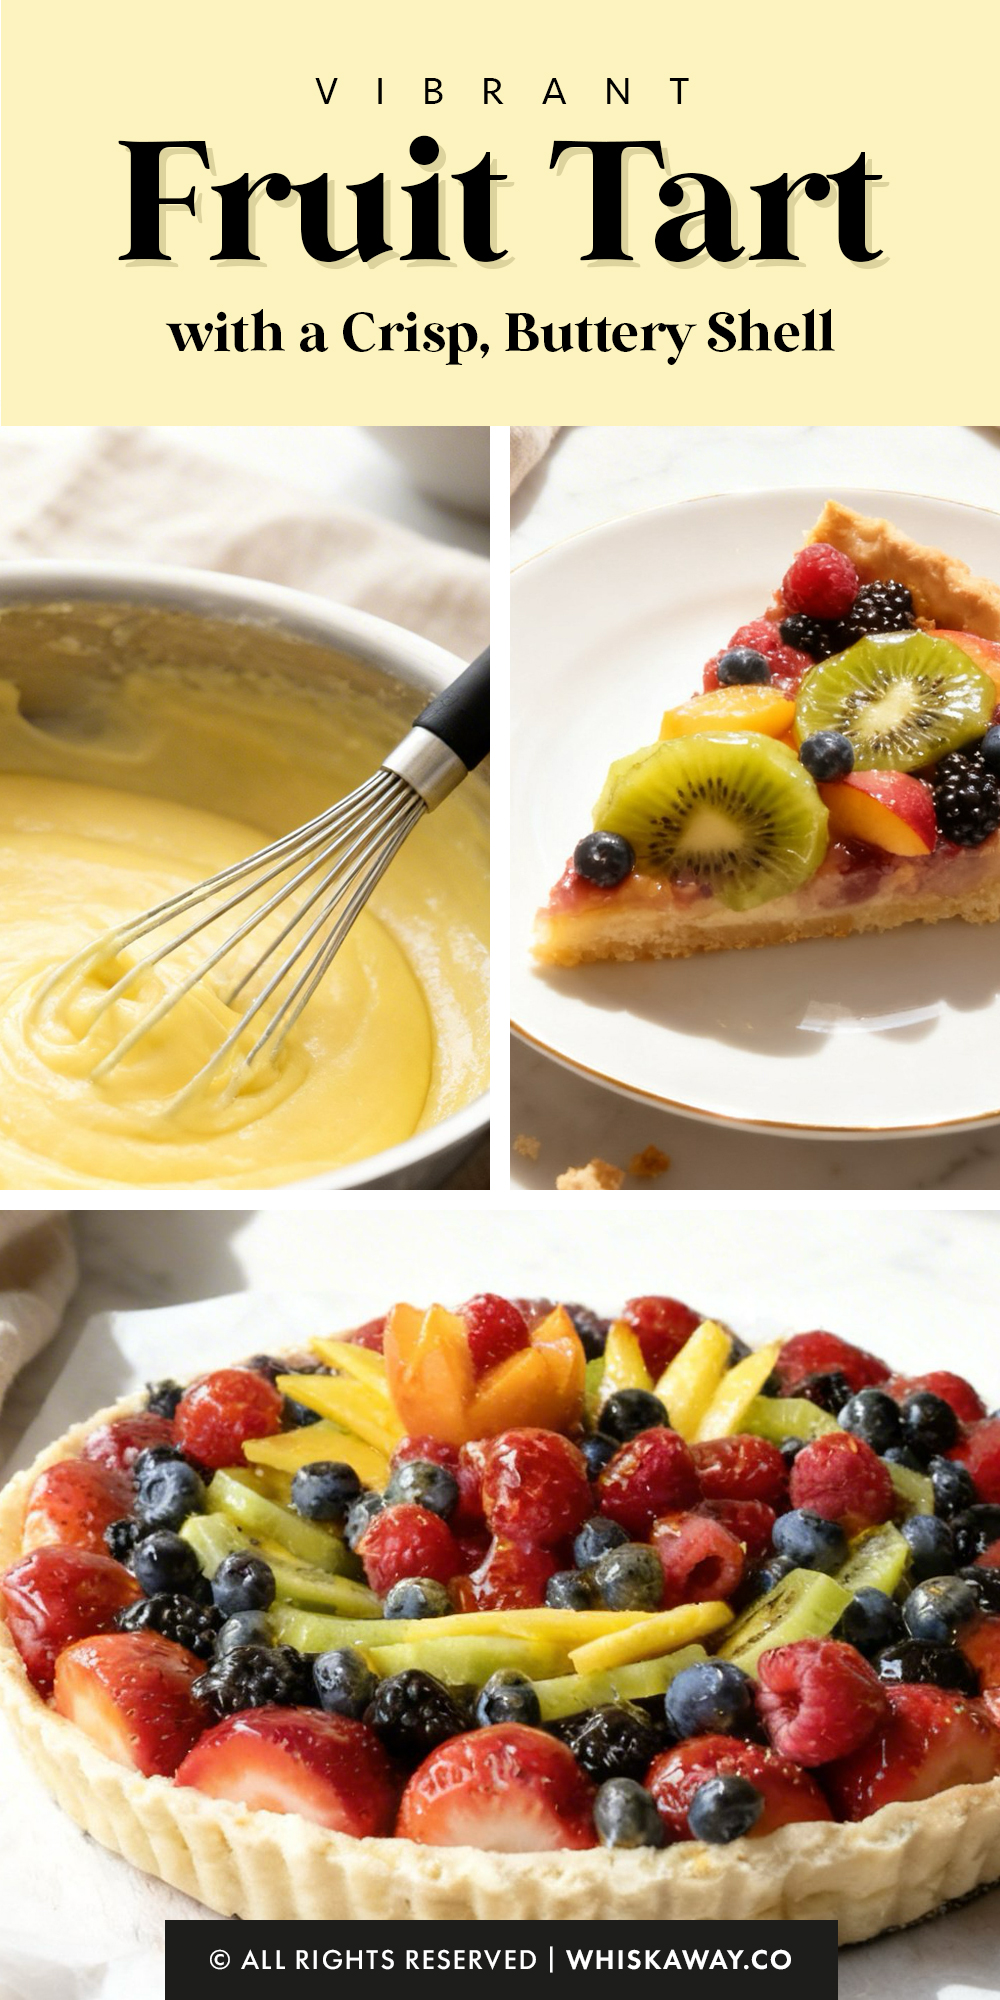
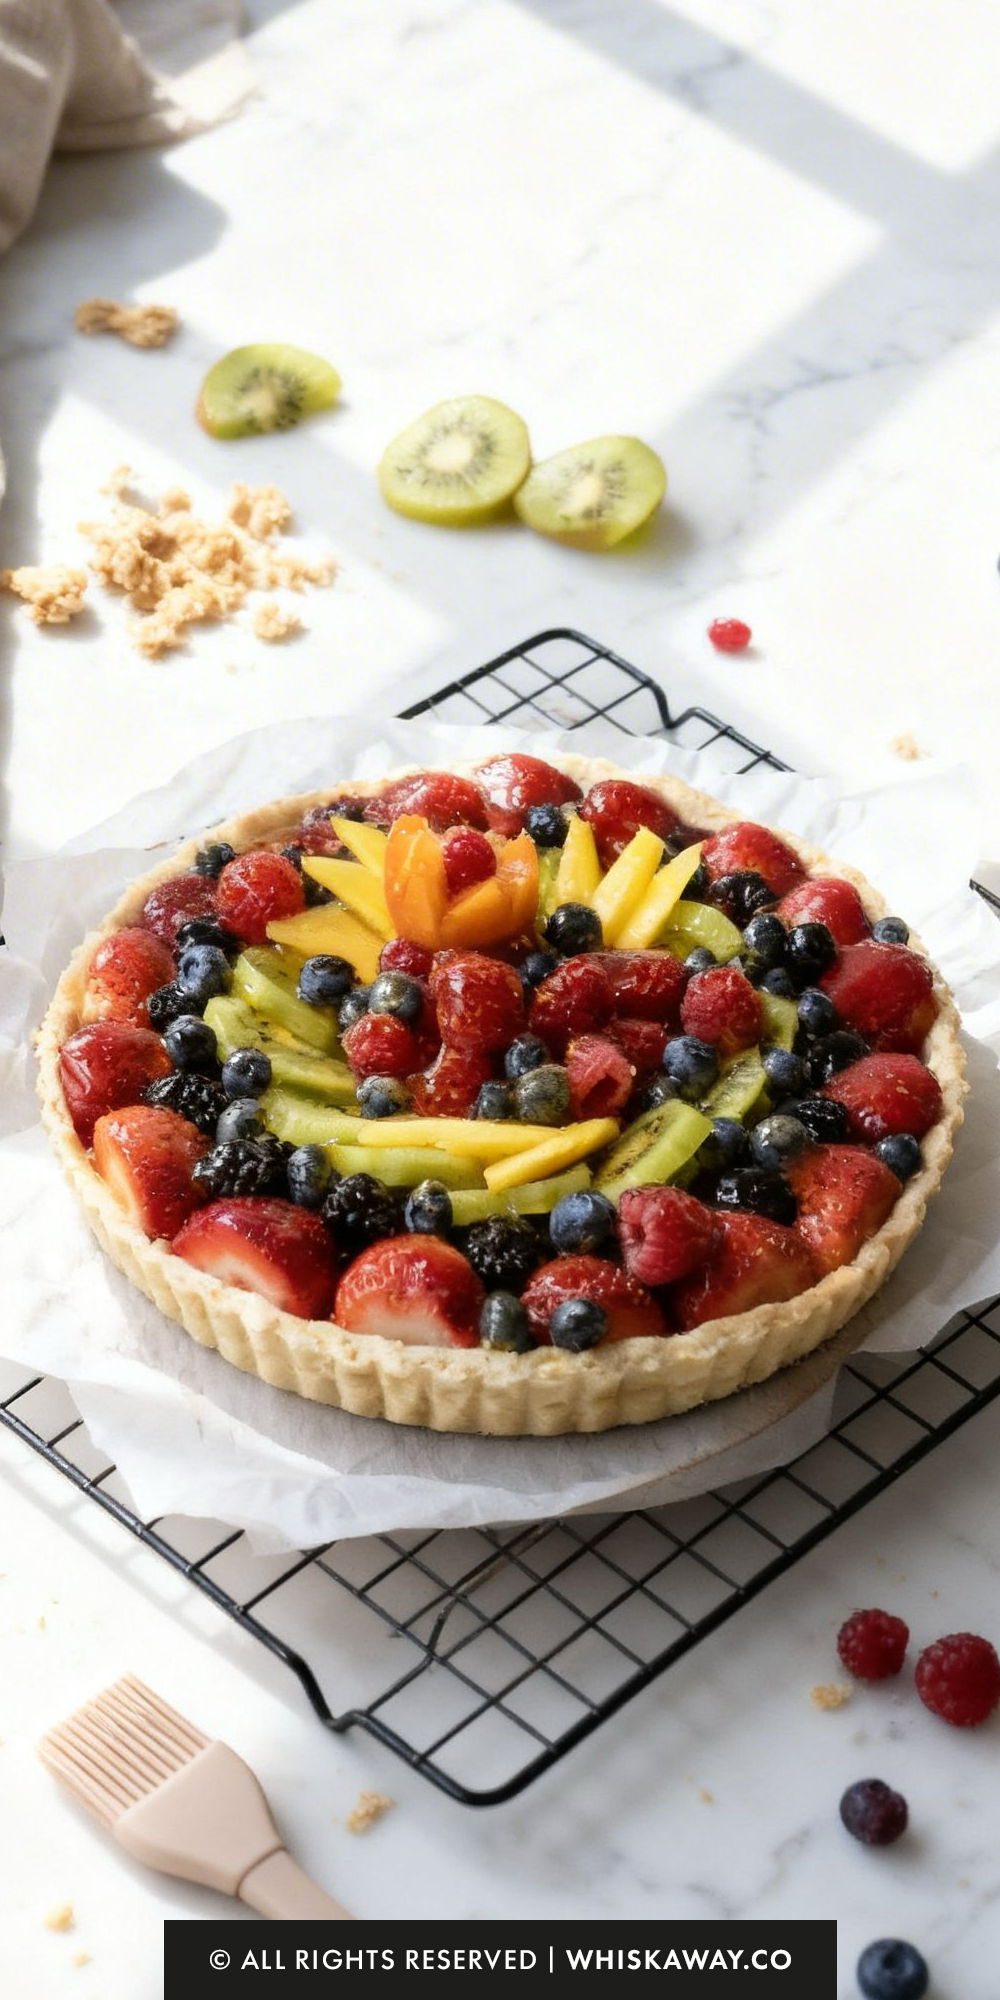
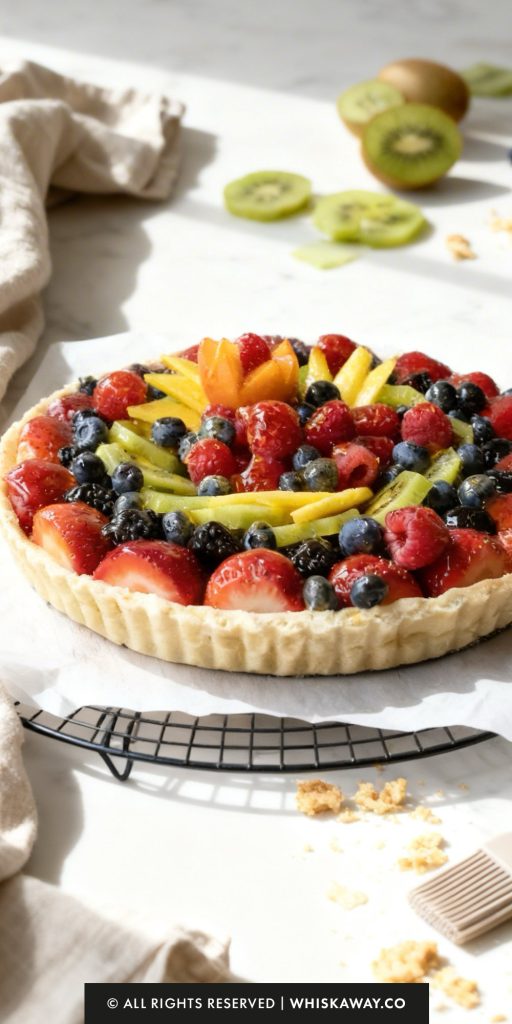
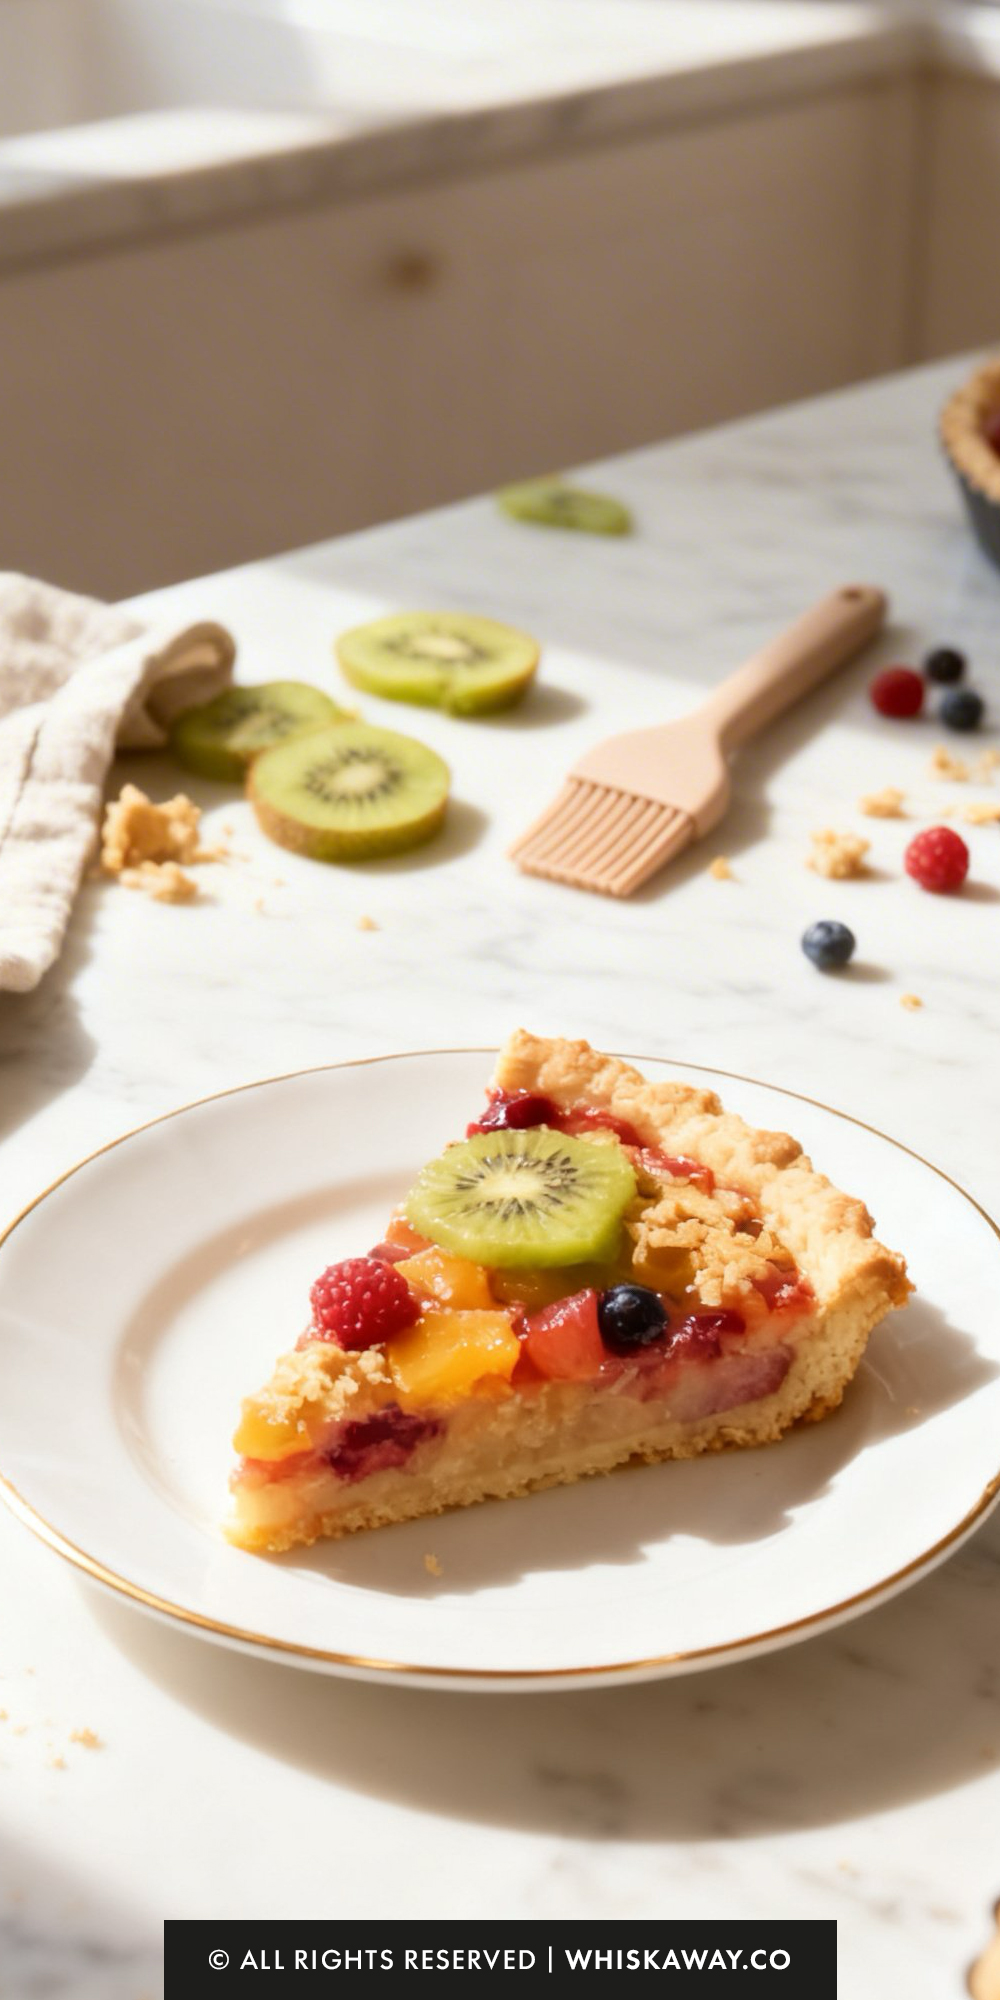
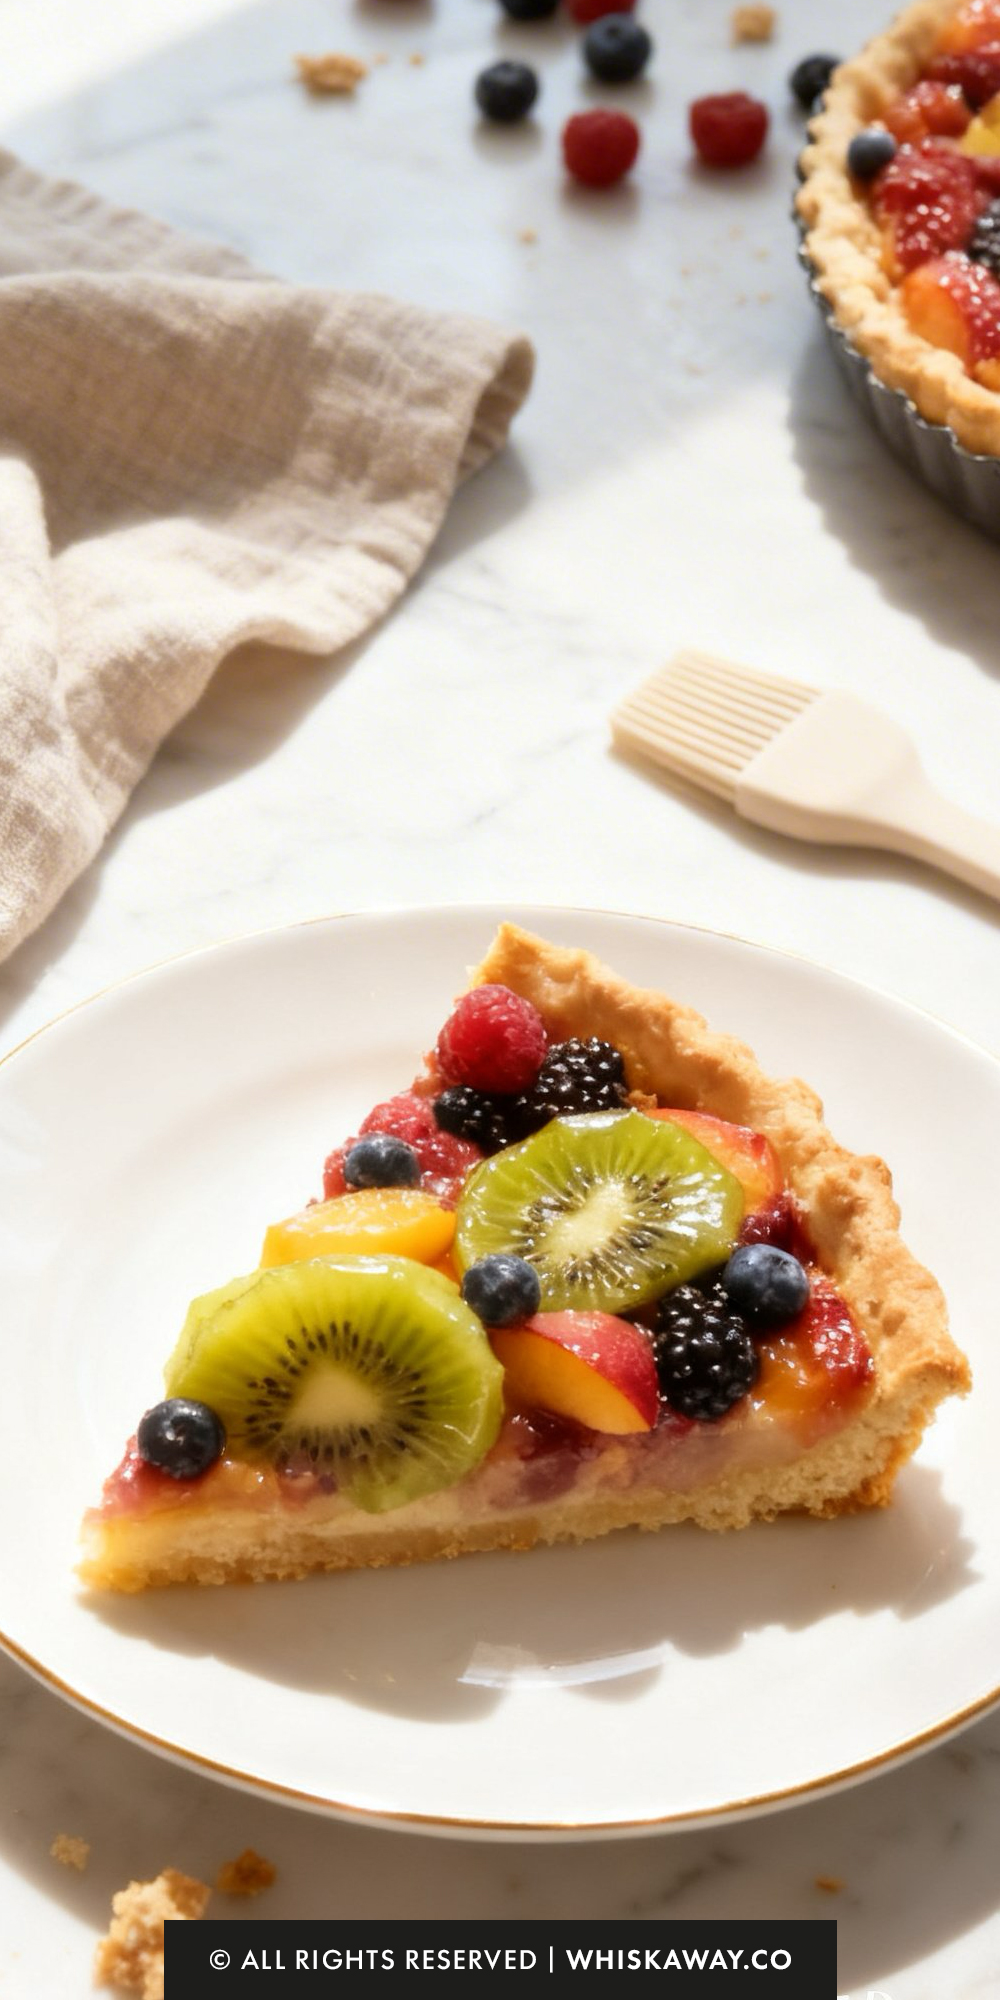
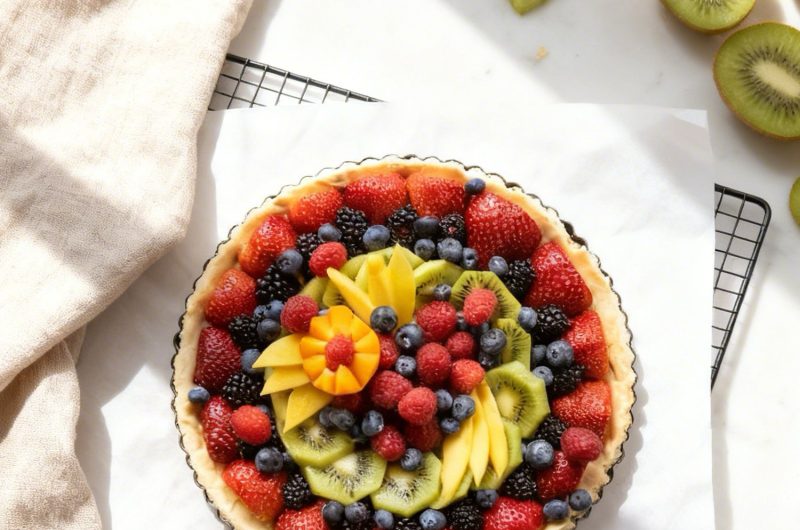
Want a dessert that looks as stunning as it tastes? This fruit tart is a beautiful combination of crisp pastry, creamy filling, and fresh, colorful fruit.
Baking a fruit tart at home is surprisingly easy, and it’s versatile enough to use seasonal fruits or your favorites.
It’s perfect for brunch, tea time, or as a show-stopping dessert at any gathering. The vibrant presentation and fresh flavors make it a crowd-pleaser every time.
Ready? Let’s start baking!
Why You’ll Love This Recipe
This dessert stands out because it layers textures deliberately: crisp shell, stable pastry cream, and fresh fruit.
What Makes Them Special
- Shortcrust shell stays crisp beneath the filling
- Pastry cream is thick enough to anchor sliced fruit
- Fresh fruit adds natural acidity and contrast
- Light glaze prevents fruit from drying out
- Each component can be prepared ahead and assembled fresh
Save This Pin for Later to Your Pinterest Board
🔥 If you enjoy elegant fruit-forward desserts with a pastry base, you’ll also love these:
How to Get Your Fruit Tart Just Right
A professional fruit tart is defined by a “snap” in the crust, a velvety-smooth pastry cream, and fruit that looks like sparkling jewels.
Achieving this balance requires attention to temperature and moisture management.
Here are my best tips:
1. Master the “Pâte Sucrée” (Sweet Crust)
Keep it Cold: If the dough becomes too soft while rolling, it will shrink in the oven.
If it feels tacky or limp, slide it (on its parchment) back into the fridge for 10 minutes before continuing.
The “Patchwork” Secret: This dough is high in sugar and butter, making it fragile. If it breaks while you are transferring it to the pan, don’t panic. Simply “spackle” the holes with extra scraps of dough and press them in.
Once baked, no one will see the repairs.
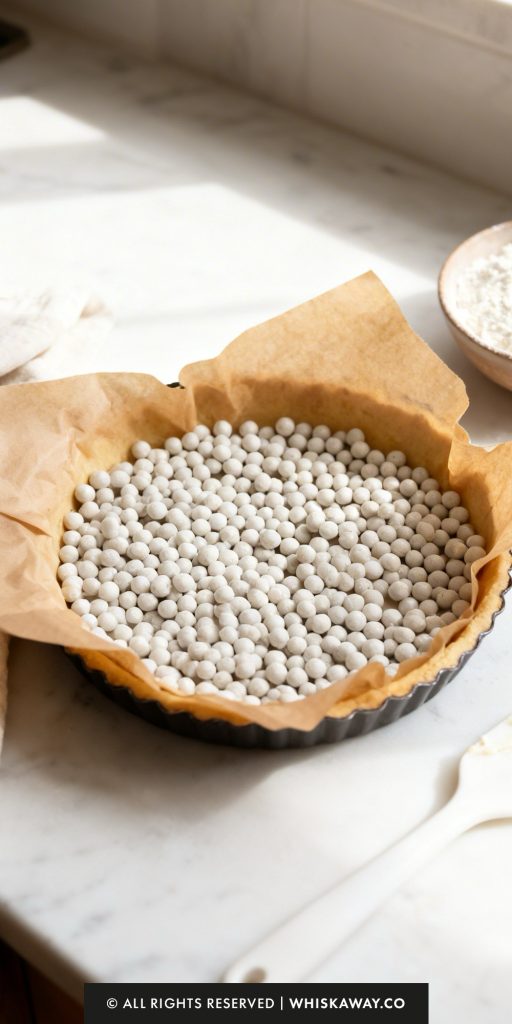
Docking: Even with pie weights, the bottom can sometimes puff up.
Prick the bottom of the raw dough with a fork (called “docking”) before blind-baking to let steam escape.
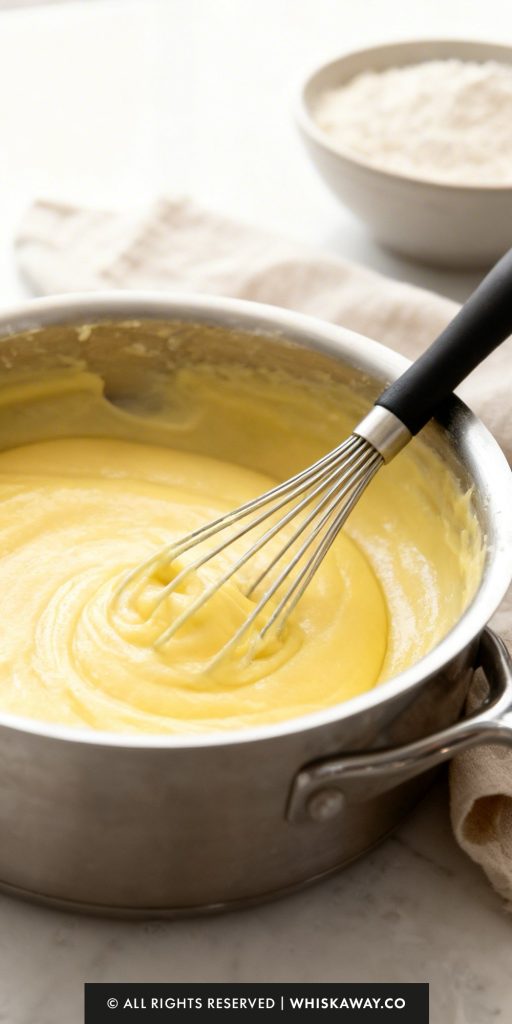
2. Achieving Silky Pastry Cream
When tempering your eggs, add the hot milk very slowly at first. If you go too fast, you’ll end up with sweet scrambled eggs.
For a truly world-class texture, pass your finished pastry cream through a fine-mesh strainer while it’s still hot.
This catches any tiny bits of cooked egg, ensuring a perfectly smooth mouthfeel.
Don’t walk away while the cream is thickening on the stove. Constant whisking prevents the starch from clumping and the bottom from scorching.
3. Fruit Selection and Prep
After washing berries or slicing wet fruit (like kiwi or mango), pat them dry with a paper towel. Excess water will bleed into the pastry cream and make it runny.
Place “bleeding” fruits (like cut strawberries or raspberries) last, or position them so they don’t stain lighter fruits like peaches or bananas.
Don’t skip the apricot jam glaze! It’s not just for looks; it acts as a sealant that prevents the fruit from oxidizing and shriveling in the fridge.
4. Common Mistakes to Avoid
Filling a Warm Crust: Never add the pastry cream to a warm tart shell. The heat will melt the fats in the cream, turning your filling into a liquid mess and making the crust soggy.
Over-mixing the Dough: Once you add the flour, stop mixing as soon as the dough clumps. Over-working develops gluten, which leads to a tough, bready crust rather than a crisp, cookie-like one.
Rushing the Chill: If the pastry cream isn’t fully chilled (at least 2 hours), it won’t hold the weight of the fruit decorations, and your beautiful pattern will sink into the center.
Baking Tips for This Recipe
- Dock (poke holes in) the tart shell before baking to prevent air bubbles.
- Use pie weights during blind baking so the sides don’t shrink.
- Let pastry cream cool fully before spreading as warm cream will soften the crust.
- Pat fruit dry before arranging to prevent watery glaze.
- Brush glaze lightly; too much makes fruit slide when slicing.
Variation Tips
The beauty of a classic fruit tart lies in its versatility. Once you have mastered the foundational Pâte Sucrée and Crème Pâtissière, you can transform the flavor profile to suit any season or occasion.
1. Infusing the Pastry Cream
The pastry cream is a blank canvas. By changing the infusion, you can completely shift the tart’s character.
Chocolate Velvet: Whisk 2 ounces of melted semi-sweet chocolate into the finished, warm pastry cream before chilling. This creates a rich, decadent base that pairs beautifully with raspberries or strawberries.
Citrus Zest: For a brighter, tangier tart, whisk in 1 tablespoon of lemon, lime, or orange zest along with the vanilla.
This is especially refreshing in the summer when paired with stone fruits like peaches.
Nutty Pistachio: Fold 2 tablespoons of high-quality pistachio paste into the finished cream.
The earthy, nutty flavor complements the sweetness of the fruit and adds a sophisticated green hue to the presentation.
Earl Grey or Lavender: While scalding the milk, steep 2 tea bags of Earl Grey or 1 teaspoon of culinary lavender for 5 minutes.
Strain the milk before proceeding with the egg yolks. This adds an elegant, floral note.
2. Modifying the Crust
While the traditional sweet crust is cookie-like and buttery, these tweaks can add a new dimension of flavor.
Cocoa Crust: Replace 3 tablespoons of the all-purpose flour with high-quality unsweetened cocoa powder. This creates a “dark” look and a bittersweet flavor that makes colorful fruit pop.
Almond or Hazelnut Base: Swap 1/4 cup of the flour for finely ground almond or hazelnut meal. This adds a subtle “sandiness” and a rich, toasted aroma to the shell.
Spiced Shell: Add 1/2 teaspoon of cinnamon or a pinch of cardamom to the flour mixture. This is an excellent way to transition the recipe into autumn, especially if topping with sautéed apples or pears.

3. Creative Glazes and Toppings
The glaze does more than add shine; it can introduce a secondary flavor.
Red Currant Glaze: If your tart features mostly red fruits (strawberries, raspberries, pomegranate), use melted red currant jelly instead of apricot jam. It provides a deeper, ruby-red finish.
Honey-Lemon Glaze: Mix 2 tablespoons of honey with 1 teaspoon of warm lemon juice. This is a great natural alternative if you want a lighter, less “sticky” sweetness.
Texture Additions: Just before serving, sprinkle the edges of the tart with toasted sliced almonds, shredded coconut, or crushed pistachios for an added crunch.
4. Dietary Modifications
Note: When making dietary swaps, the texture of the pastry cream may vary slightly, but the flavor will remain delicious.
Gluten-Free: Use a 1:1 Gluten-Free Flour blend (one that includes xanthan gum) for both the crust and the pastry cream. Since this crust is a “short” dough, it adapts very well to gluten-free flours.
Dairy-Free / Vegan:
- Crust: Use a high-quality vegan butter stick in place of dairy butter.
- Cream: Replace the whole milk with full-fat coconut milk or oat milk. Use a cornstarch-only thickening method (omit the egg yolks and increase cornstarch to 1/3 cup).
The coconut milk version will have a lovely tropical flavor that pairs perfectly with mango and kiwi.
How to Properly Store Your Fruit Tart
A Fruit Tart is one of the most delicate pastries to store. It is a battle against moisture: the pastry cream and fresh fruit naturally want to soften the crisp, buttery crust.
For the best experience, this dessert is ideally served the same day it is assembled.
1. Refrigeration (The Best Method)
Because of the egg-based pastry cream and fresh fruit, this tart must be kept refrigerated.
Duration: 1 to 2 days.
While the tart is safe to eat for up to 3 days, the crust will begin to lose its “snap” after 24 hours as it absorbs moisture from the cream.
Store the tart in its pan (if it has a removable bottom) to provide structural support. Place it inside a large airtight container or a cake carrier.
If you don’t have a container large enough, tent some foil over the tart. Avoid let plastic wrap touch the fruit directly, as it can pull off the glaze or cause the fruit to “sweat.”
2. Room Temperature (Service Only)
Limit: No more than 2 hours.
Pastry cream is a high-protein, high-moisture environment that can grow bacteria quickly if left in the “danger zone” (above 4°C or 40°F).
Additionally, the butter in the crust will soften, making the tart difficult to slice cleanly.
3. Freezing: What You Need to Know
You can freeze components, but freezing a fully assembled fruit tart is not recommended.
Upon thawing, fresh fruit releases significant water (becoming mushy), and the pastry cream may “weep” or separate, leaving you with a soggy, unappealing crust.
4. The Pro-Solution (Component Freezing)
You can freeze the unbaked dough disk for up to 3 months. Alternatively, freeze the baked tart shell (well-wrapped in foil and plastic) for up to 1 month.
To use, simply thaw at room temperature and fill fresh.
Pastry cream does not freeze well; the cornstarch bond often breaks, resulting in a grainy texture. Always make the cream fresh or 1–2 days ahead in the fridge.
5. Reheating and Refreshing
Standard fruit tarts are never reheated because the custard would melt and the fresh fruit would cook.
However, if you have an empty baked shell that has gone soft:
- Place the empty shell in a 150°C (300°F) oven for 5 minutes. This will “re-crisp” the butter. Let it cool completely before adding the cold pastry cream.
Storage Mistakes to Avoid
Storing While Warm: Never assemble or cover the tart if the crust or the pastry cream is still even slightly warm. Trapped steam is the fastest way to turn a crisp crust into a gummy one.
Pre-Slicing: Try to keep the tart whole until you are ready to serve. Once sliced, the exposed pastry cream and the cut edges of the fruit will dry out much faster.
Strong Fridge Odors: Butter and cream act like sponges for smells. Ensure your tart is in a sealed environment if your fridge contains strong-smelling items like cut onions or blue cheese.
FAQs
Why did my tart crust shrink down the sides of the pan during baking?
Shrinkage is usually caused by two things: overworking the dough or insufficient chilling. When you over-mix the dough, you develop gluten, which acts like a rubber band and pulls back when heated. To prevent this, mix only until the dough just comes together. Additionally, ensure the dough is cold when it enters the oven; chilling relaxes the gluten and firms up the butter.
Can I use frozen fruit to top my tart?
It is highly recommended to use fresh fruit only. Frozen fruit releases a significant amount of juice as it thaws, which will “bleed” into your pastry cream and turn the crust soggy within minutes. For a professional look and the best texture, stick to firm, fresh seasonal fruits.
My pastry cream has lumps in it. Can I save it?
Yes! Lumps usually form if the milk is added too quickly or if the heat is too high. If you notice lumps while cooking, whisk vigorously. If they remain once the cream is finished, simply pass the hot pastry cream through a fine-mesh sieve into a clean bowl. This will catch any cooked egg bits or starch clumps, leaving you with a perfectly smooth custard.
How far in advance can I make this tart?
You can prepare the components 1 to 2 days ahead of time. Store the baked tart shell in an airtight container at room temperature and the pastry cream in the refrigerator. However, for the best results, assemble the tart on the day you plan to serve it. This ensures the crust stays “snap-crisp” and the fruit looks its freshest.
Is there a substitute for the apricot jam glaze?
If you don’t have apricot jam, any light-colored, clear jelly will work, such as apple jelly or white grape jelly. Avoid dark-colored jams (like strawberry or grape) as they will stain the fruit and the pastry cream, making the tart look messy rather than polished.
Pro-Tip: If you want to extra-insulate your crust against sogginess, you can brush a thin layer of melted white chocolate over the inside of the cooled tart shell before adding the pastry cream. This creates a moisture barrier!
Fruit Tart
8
Slices20
minutes1
hour40
minutesThis fruit tart is colorful, sweet, and perfect for any gathering or tea time.
Ingredients
- For the Pastry Cream
2 cups whole milk
1 cup granulated sugar
6 egg yolks
1/4 cup cornstarch
1 teaspoon vanilla extract
1/4 teaspoon Salt
- For the Tart Dough
1 1/4 cups all-purpose flour, sifted
1/2 cup powdered sugar
7 tablespoons butter, softened
1 egg
1/2 teaspoon vanilla extract
1/4 teaspoon Salt
1/4 teaspoon baking powder
- For the Fruit Tart
1 pint Fresh cut fruit (such as strawberries, blueberries, blackberries, raspberries, peaches, mango, and kiwi)
Apricot jam, melted (as needed)
Directions
- Prepare the Pastry Cream (Crème Pâtissière)
- In a medium saucepan (non-reactive/non-aluminum), heat the milk over medium heat. Stir occasionally to ensure it doesn't scorch. Watch for small bubbles forming around the edges (approximately 180°F), which should take about 6 to 8 minutes.
- While the milk heats, whisk the egg yolks and granulated sugar together in a large bowl until smooth. Incorporate the cornstarch and salt, whisking until no lumps remain.
- To prevent scrambling, slowly pour about half of the hot milk into the yolk mixture while whisking vigorously. Once combined, whisk in the rest of the milk and transfer the entire mixture back into the saucepan.
- Cook over medium heat, whisking constantly. After 5 to 8 minutes, the mixture should thicken into a sturdy, pudding-like consistency.
- Stir in the vanilla extract, then transfer the cream to a clean bowl. Immediately press a piece of plastic wrap directly against the surface of the cream to prevent a skin from forming. Refrigerate for 2 to 3 hours until completely cold.
- Prepare the Tart Dough (Pâte Sucrée)
- Using a stand mixer with the paddle attachment or a hand mixer, beat the softened butter and powdered sugar on medium-high. Continue for about 3 minutes until the mixture is light, pale, and airy.
- Scrape down the bowl and incorporate the egg. Mix well, then add the vanilla and salt, ensuring everything is fully blended.
- Turn the mixer to low. Add the sifted flour and baking powder, mixing only until the dough just begins to clump together. Avoid over-mixing, as this makes the crust tough.
- Form the dough into a disk, wrap it tightly in plastic, and let it firm up in the refrigerator for at least 1 hour.
- Bake the Crust
- Preheat your oven to 350°F. On a surface dusted lightly with flour, roll the chilled dough out to a thickness of 1/8 to 1/4 inch. If it cracks, simply use your fingers to patch it back together.
- Carefully drape the dough over a 9-inch tart pan (ideally one with a removable bottom). Press the dough firmly into the fluted sides and the base, then trim away any overhang.
- Line the dough with parchment paper or foil and fill it to the brim with pie weights or dried beans. Bake for 12 minutes.
- Carefully lift out the weights and paper. Return the crust to the oven for another 10 to 15 minutes until it is beautifully golden and baked through. Allow the shell to cool entirely before filling.
- Final Assembly
- Spread the chilled pastry cream evenly into the cooled tart shell.
- Arrange your fresh fruit (strawberries, kiwi, berries, etc.) in concentric circles or your preferred artistic pattern.
- Melt the apricot jam until fluid. Using a pastry brush, lightly coat the fruit. This provides a professional "patisserie" shine and keeps the fruit from drying out.