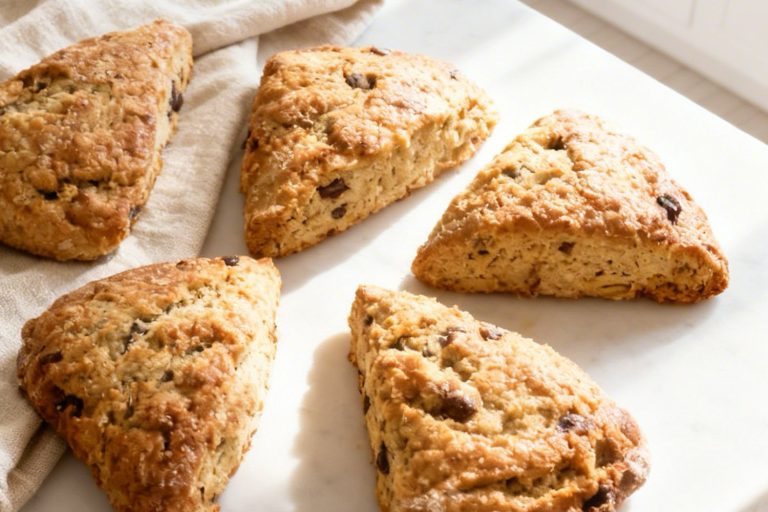
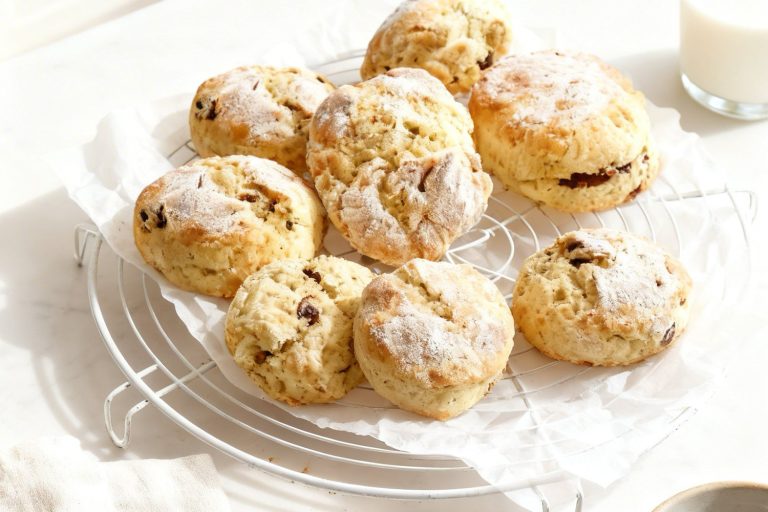
Imagine biting into a scone that’s slightly sweet, nutty, and perfectly tender. Could date and walnut scones be your new favorite morning treat?
Packed with rich, caramel-like dates and crunchy walnuts, each bite offers a satisfying mix of textures and flavors.
These scones are surprisingly easy to bake at home, giving you that bakery-quality taste without the fuss.
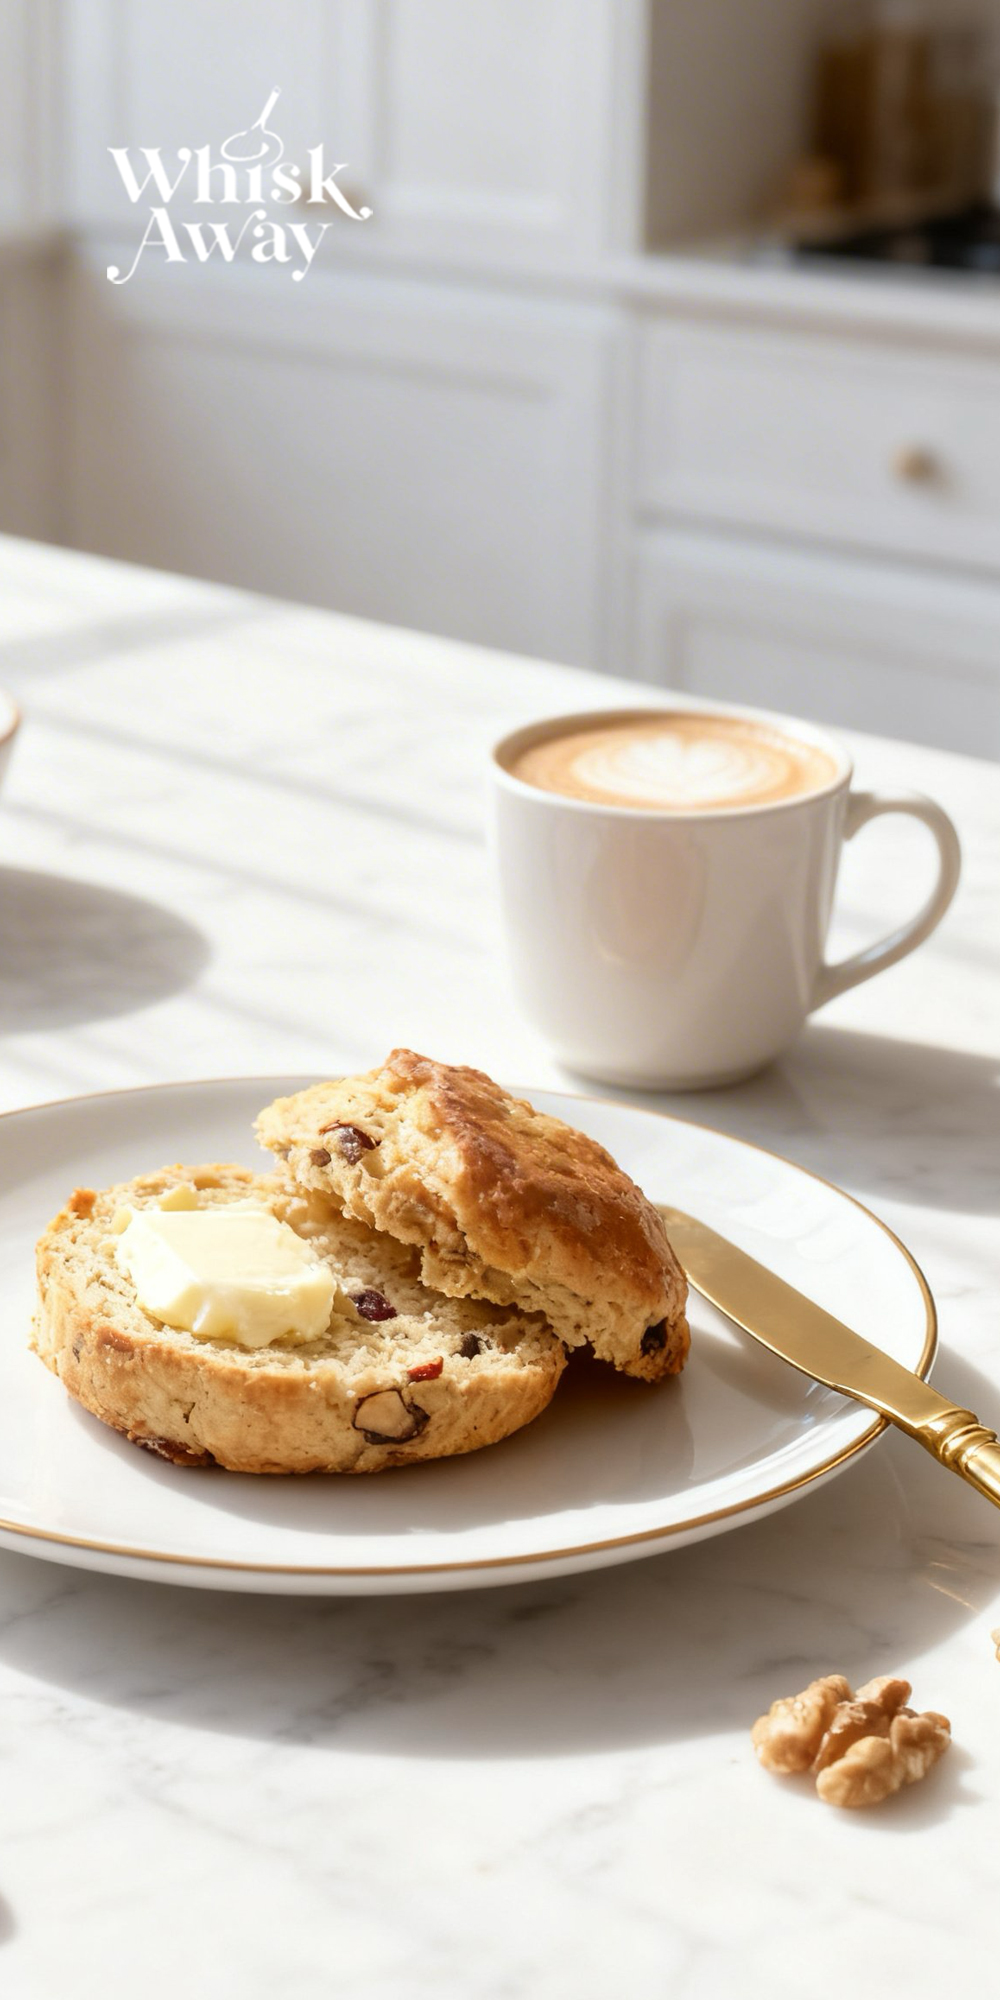
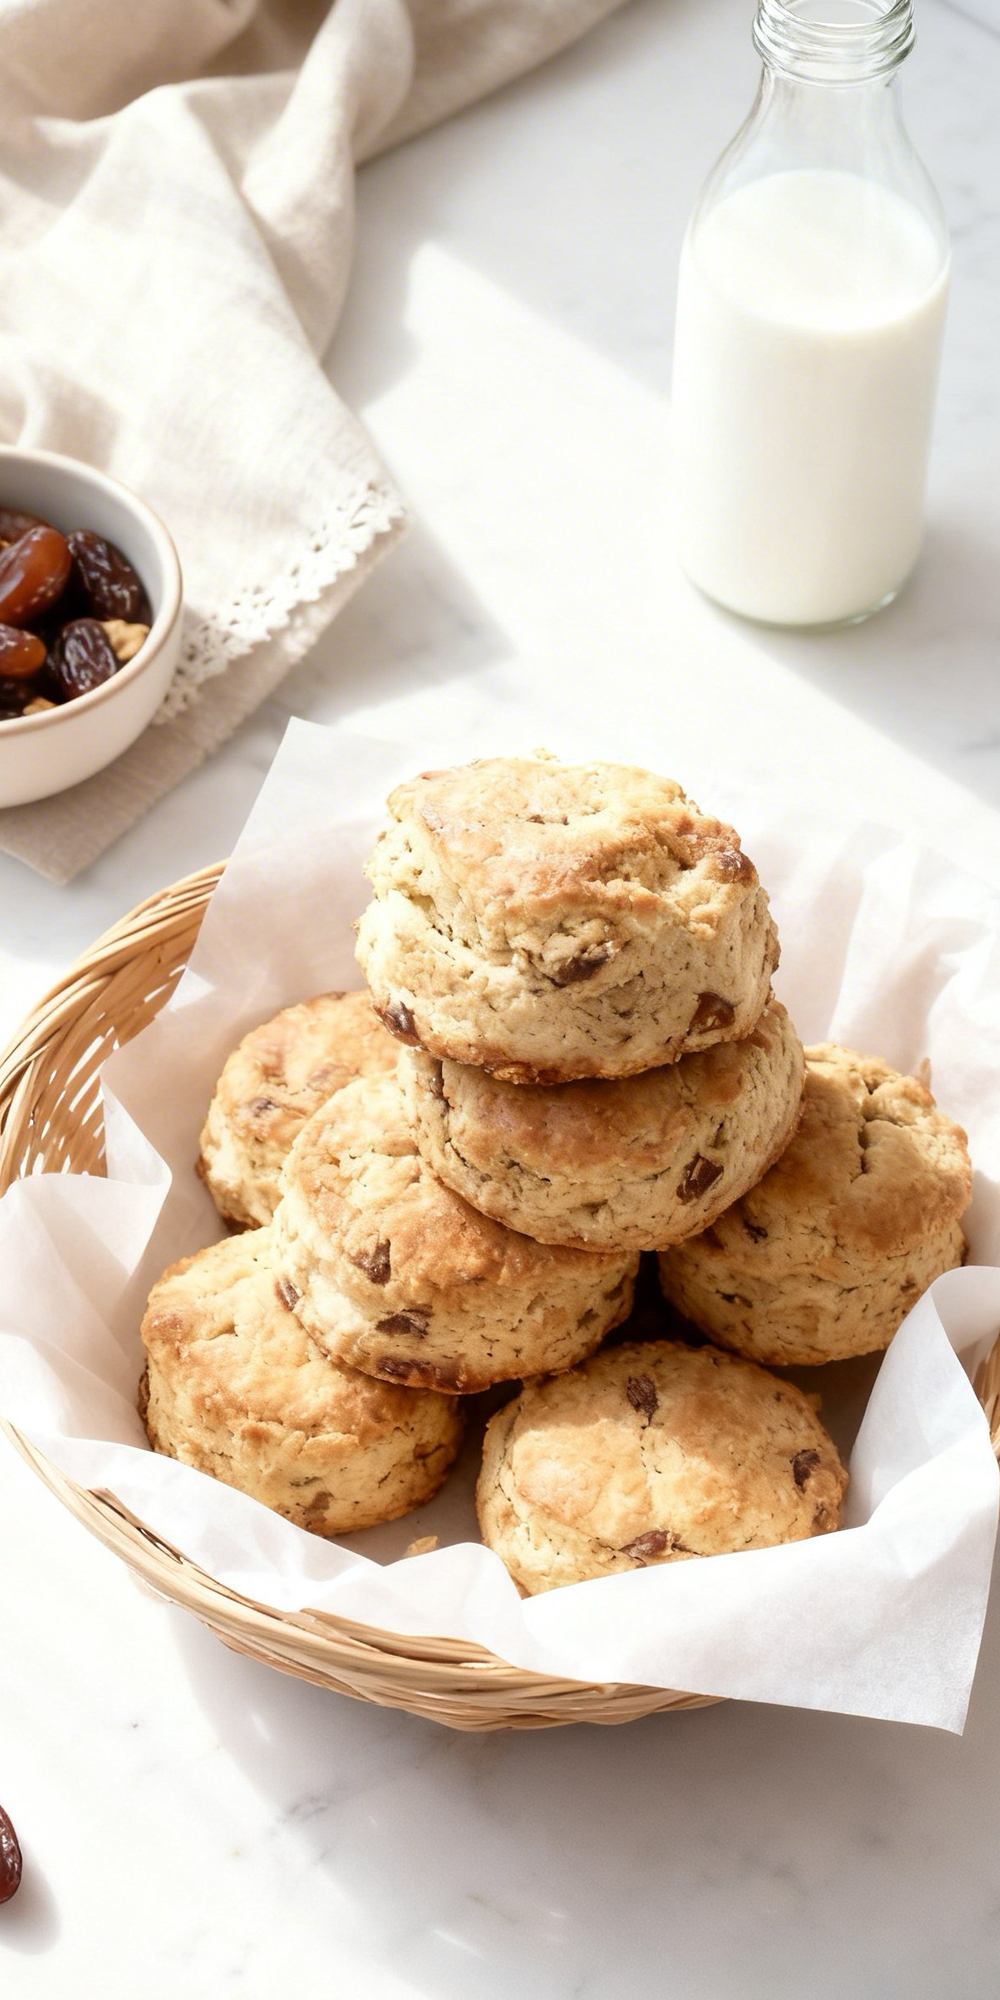
Serve them warm with butter or a touch of jam, and suddenly your breakfast feels like a special occasion.
The combination of chewy fruit and nutty crunch makes these date & walnut scones a standout on any brunch table or a cozy weekend treat for yourself.
Why You’ll Love This Recipe
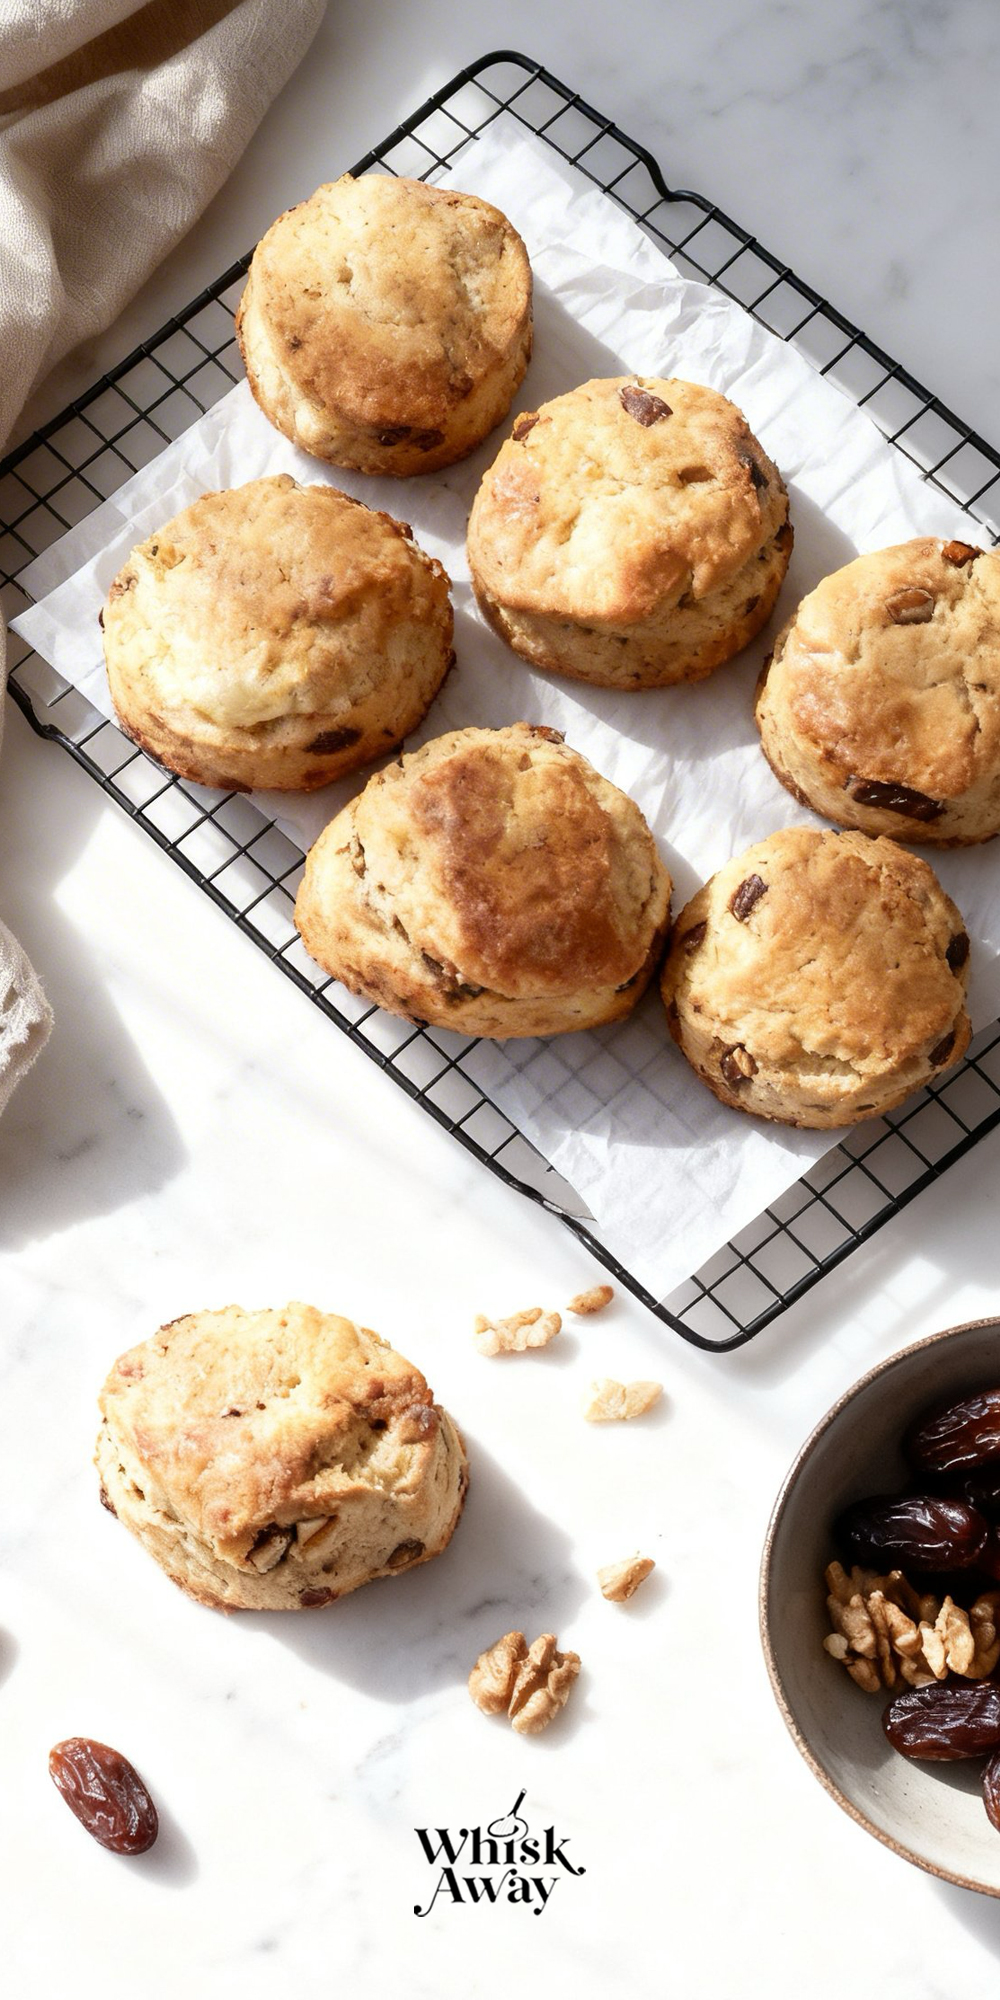
These scones combine sweet caramel-like dates with toasty walnuts for a scone that’s rich, satisfying, and perfect as a snack or breakfast treat.
What Makes Them Special
- Dates provide natural sweetness and a chewy texture contrast.
- Walnuts add a nutty, toasted flavor and satisfying crunch.
- Slightly rustic, hearty flavor that pairs well with maple butter.
- Not too sweet, just enough to feel indulgent without heavy sugar.
- Great with coffee or a robust breakfast tea.
Save This Pin for Later to Your Pinterest Board

🔥 These date and walnut scones are rich, hearty, and naturally sweet. If you enjoy nutty flavors, maple pecan scones and classic English plain scones are great next recipes to try. For another wholesome option, vegan banana bread-style scones work beautifully.
How to Get Your Date & Walnut Scones Just Right
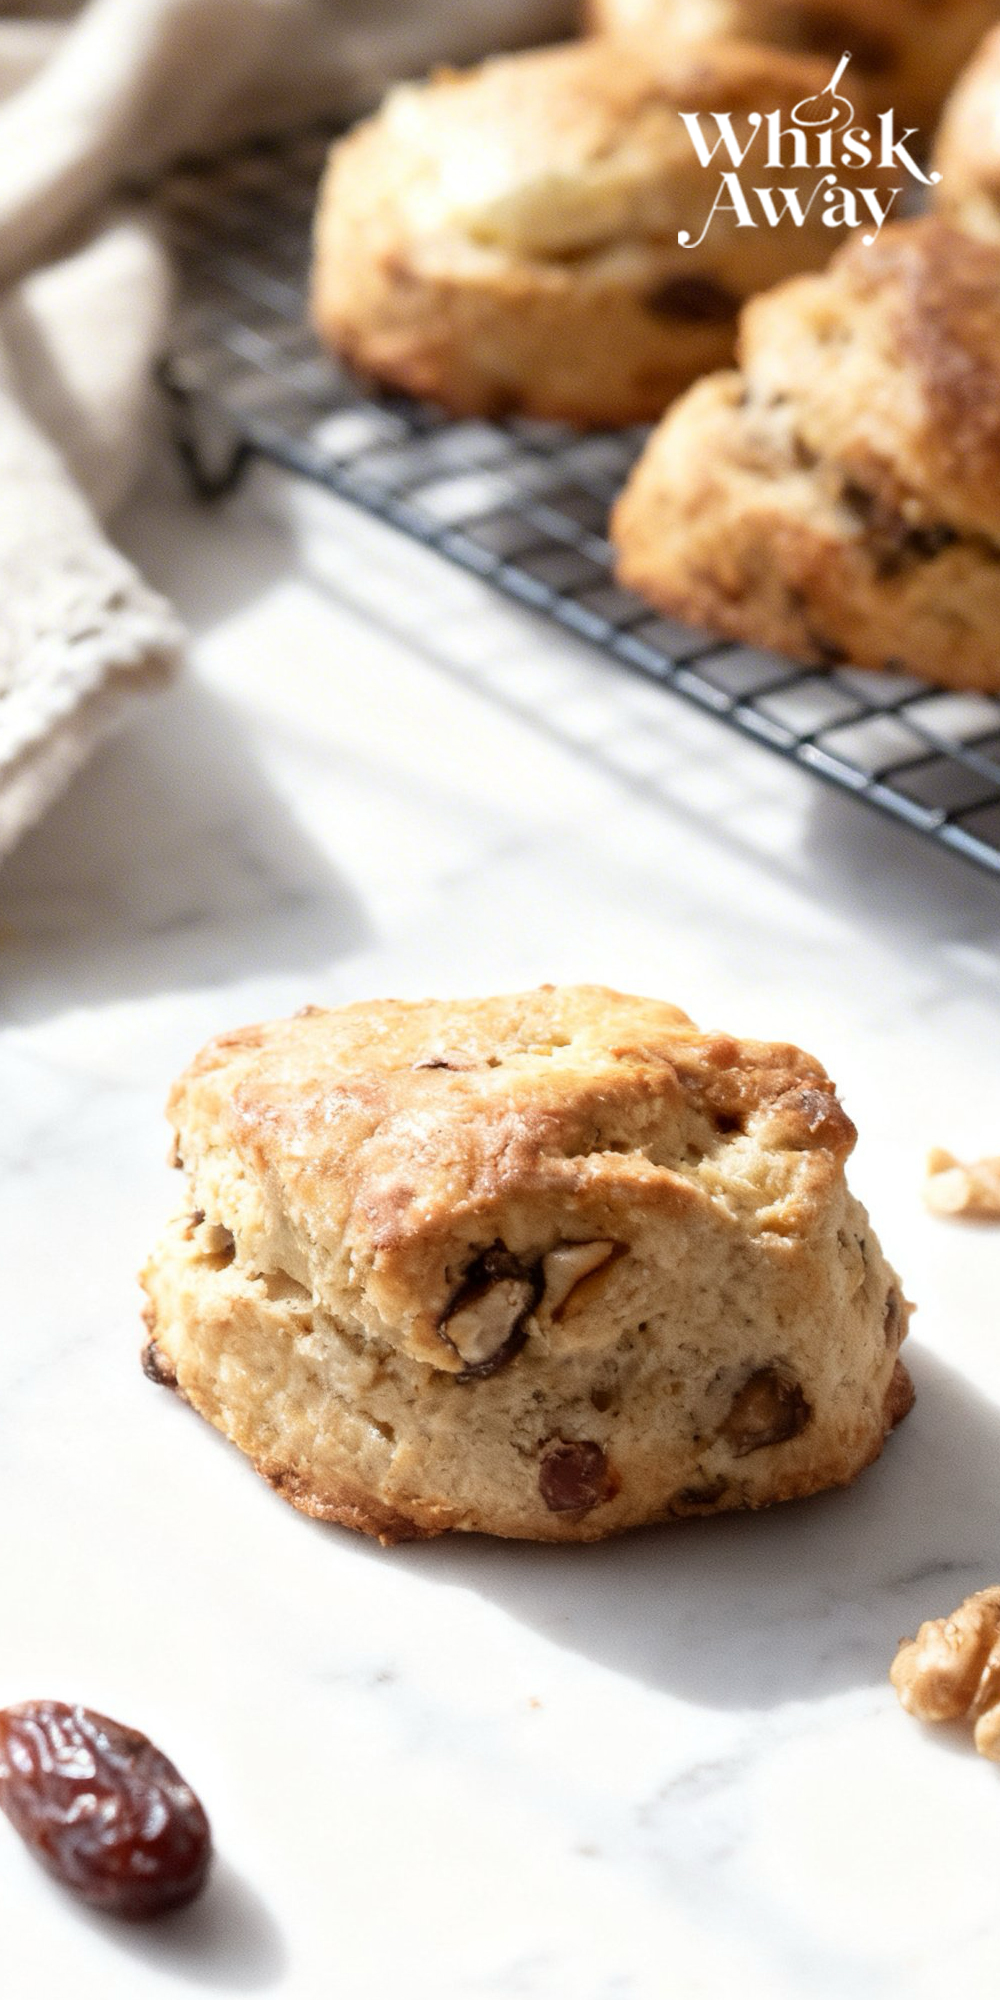
Date and walnut scones are a classic for a reason: the chewy, caramel-like sweetness of the dates perfectly offsets the earthy, slightly bitter crunch of the walnuts.
Because these scones use self-raising flour and bicarbonate of soda, they are prone to a very high, airy ris, if handled with care.
1. The Secret to the Spiced Crumb
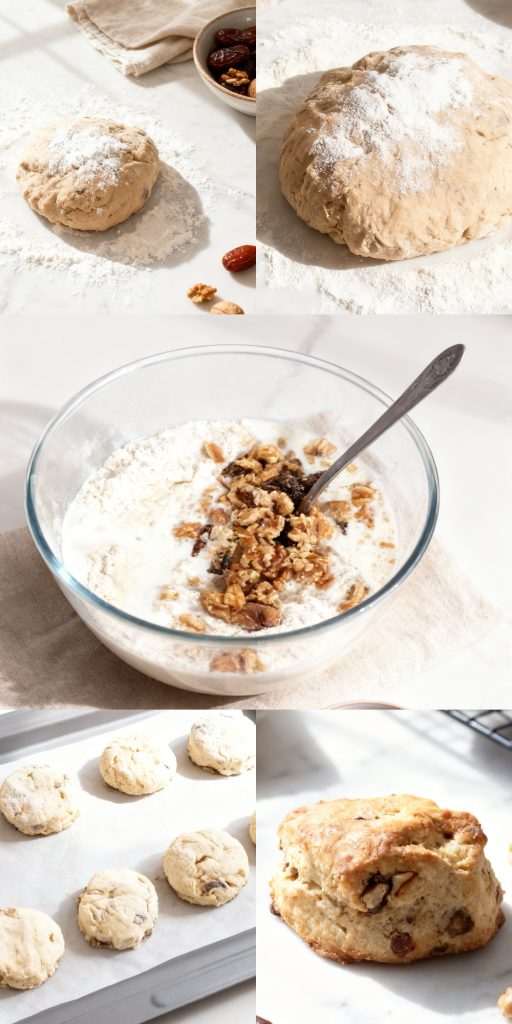
(a) Sifting the self-raising flour with the bicarbonate of soda and mixed spice isn’t just about removing lumps; it’s about aerating the flour.
This ensures the lift is uniform throughout the dough, preventing lopsided scones.
(b) Dates can be sticky and tend to clump together. After chopping them, toss the date pieces in a tablespoon of the dry flour mixture before adding the buttermilk.
This coats the dates and ensures they stay separated and evenly distributed in every bite.
(c) For a professional depth of flavor, toast your chopped walnuts in a dry pan over medium heat for 3 minutes before adding them.
This releases the natural oils and makes the nutty flavor pop against the warm mixed spice.
2. Mastery of the Knife Mixing Technique
(a) Using a metal butter knife to mix in the buttermilk is a traditional baker’s secret.
Unlike a spoon, which can mash the dough and develop too much gluten, the thin edge of a knife cuts through the mixture, combining the wet and dry ingredients with minimal friction.
(b) Stop mixing the moment you no longer see streaks of dry flour.
The dough should look shaggy and slightly messy. If it looks perfectly smooth, you’ve over-mixed it.
3. Common Mistakes to Avoid
The Twist Trap: When using your biscuit cutter, never twist it as you press down.
Twisting crimps the edges of the dough together, which acts as a seal that prevents the scone from rising vertically.
Press straight down and pull straight up for that classic, tall crack in the middle.
Too Much Flour: When patting the dough out on your workspace, use the bare minimum of flour.
Excess flour on the bottom of the scones can burn in the high-heat oven and create a bitter aftertaste.
The Over-Bake: Because dates have a high sugar content, they can scorch if left in too long. Start checking your scones at the 12-minute mark.
They should be golden brown and sound slightly hollow when tapped on the bottom.
4. Timing & Technique Advice
Height Matters: 4cm (about 1.5 inches) might feel thick when you are patting out the dough, but this is the secret to a substantial, cafe-style scone.
If you pat the dough too thin, you’ll end up with biscuit-style scones that are crunchy rather than fluffy.
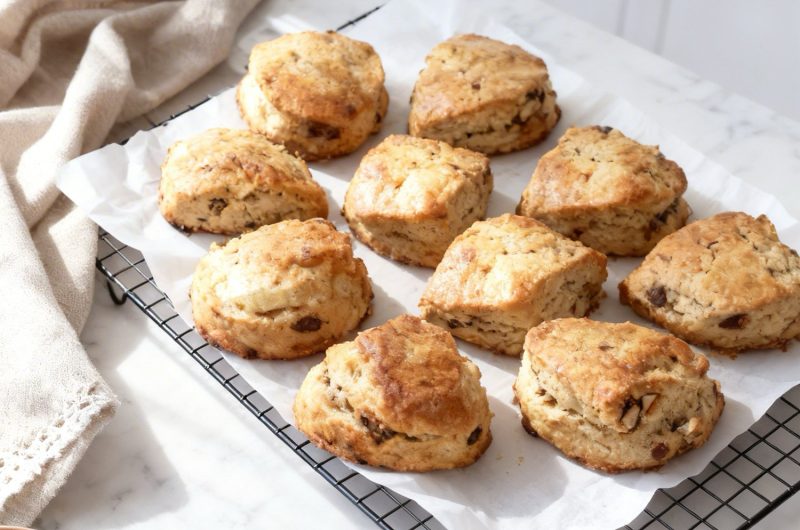
The Cooling Window: Don’t be in a rush to move them to the wire rack. Let them sit on the hot baking tray for 2 minutes.
This brief rest allows the interior to finish steaming, ensuring the center is fully baked and not doughy.
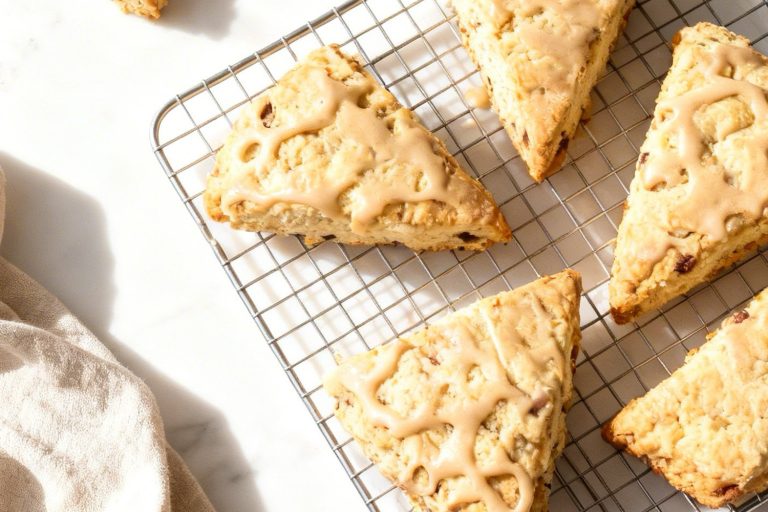
Pro-Tip: For an extra-crunchy top, sprinkle a tiny bit of demerara sugar over the milk glaze just before baking.
The dark, molasses flavor of the sugar complements the dates and walnuts beautifully.
Baking Tips for This Recipe
Chop dates and walnuts to a uniform size: Similar-sized pieces distribute more evenly and prevent dense, heavy pockets.
Toss add-ins in flour before folding in: Flour coating prevents them from sinking to the bottom of the dough.
Warm the dates briefly in milk or cream before adding: Warming softens them and infuses the dough with their sweetness without adding extra liquid later.
Use buttermilk or cream for liquid: Slight acidity helps tenderize the crumb.
Shape gently into a disc and cut straight down: Clean cuts help maintain height.
Variation Tips
The Date & Walnut Scone is a rustic powerhouse of flavor.
While the classic combination is hard to beat, the hearty nature of the dough allows for several creative shifts in flavor and texture that can elevate your afternoon tea to something truly special.
1. The Honey-Glazed Nut
For a glossier, sweeter finish that highlights the earthiness of the walnuts:
Replace the caster sugar in the dough with 2 tablespoons of local honey.
After baking, while the scones are still warm, brush the tops with a mixture of melted butter and honey.
The results is a stickier, more indulgent scone with a deep floral sweetness.
2. The Chocolate-Date Decadence
If you want to lean into the caramel notes of the dates:
Fold in 50g of dark chocolate chips (at least 70% cocoa) along with the walnuts.
The bitterness of the dark chocolate cuts through the sugar of the dates, creating a sophisticated “dessert” scone.
3. The Coffee-Infused Morning Scone
Coffee and walnuts are a legendary pairing:
Dissolve 1 teaspoon of espresso powder into the buttermilk before adding it to the flour.
The subtle coffee undertone deepens the “mixed spice” flavors and makes these the perfect companion to a morning latte.
4. Texture & Ingredient Alternatives
The Nut Swap: If you aren’t a fan of walnuts, pecans are a perfect 1:1 substitute.
They offer a sweeter, more buttery flavor that pairs beautifully with dates.
The Boozy Date: For an adult twist, soak your chopped dates in 2 tablespoons of dark rum or brandy for 30 minutes before baking.
Drain them well and toss in a little flour before adding to the dough.
Wholemeal Variation: Replace 150g of the self-raising flour with wholemeal (whole wheat) self-raising flour.
This adds a nutty, grainy texture that complements the rustic feel of the dates and walnuts.
5. Dietary Adaptations
Gluten-Free:
Use a 1:1 gluten-free self-raising flour blend. Since dates and walnuts add a lot of structural heft,”gluten-free versions of this recipe tend to hold together much better than plain scones.
Dairy-Free & Vegan:
Use a chilled vegan butter block and replace the buttermilk with almond or soy milk mixed with 1 tablespoon of lemon juice (let it stand for 5 minutes).
The dates provide so much moisture that you’ll hardly notice the absence of dairy.
Refined Sugar-Free:
Omit the caster sugar entirely. The dates provide a significant amount of natural sweetness.
You can add an extra 10g of chopped dates to ensure the sweetness remains balanced.
6. Creative Serving Idea
These scones are magnificent when served warm with a thick slice of sharp cheddar cheese.
he salty-sweet combination of the cheese against the dates and walnuts is a classic British pairing that is surprisingly addictive.
How to Properly Store Your Date & Walnut Scones
Date and Walnut Scones are uniquely resilient due to the moisture in the dates and the healthy fats in the walnuts.
While most scones are strictly a day-of treat, these hold their texture surprisingly well, provided you protect the walnuts from becoming soft and the dates from making the crumb too sticky.
1. Room Temperature (Best for Daily Use)
Duration: Up to 3 days.
Once the scones have cooled completely, place them in an airtight container.
Keeping them at room temperature preserves the soft, cake-like crumb.
If you store them while even slightly warm, the dates will release steam, making the scone gummy and the walnuts lose their snap.
2. Refrigeration (For Longer Freshness)
Duration: Up to 5 days.
If your kitchen is warm, the fridge is a good option.
Note: Cold air dries out scones quickly. Ensure they are double-wrapped or kept in a very high-quality airtight container.
Always reheat refrigerated scones, as the butter in the dough needs to be “woken up” to restore the tender texture.
3. Freezing (The “Batch-Baking” Strategy)
Duration: Up to 3 months.
These scones freeze exceptionally well because the dates act as a natural humectant.
To Freeze: Wrap each scone individually in foil or plastic wrap, then place them in a freezer bag.
To Thaw: Thaw at room temperature for 1–2 hours or overnight in the fridge.
4. How to Reheat for “Just-Baked” Flavor
Because dates contain natural sugars, they can caramelize beautifully during a quick reheat, making the scone even more delicious than when it was first baked.
The Oven Method (Highly Recommended): Warm the scones at 300°F (150°C) for 5–10 minutes.
This recrisps the walnuts and ensures the interior is soft and the dates are slightly gooey.
The Toaster: If you have larger scones, slice them in half and toast them on a medium setting.
The direct heat toasts the walnuts further, enhancing their flavor.
The Microwave: Only use as a last resort for 10 seconds. Any longer and the dates will become incredibly hot (sugar burns!), while the dough will turn chewy.
5. Storage Mistakes to Avoid
The Fruit Bleed: If you store these with other types of scones (like plain ones), the moisture and spice from the dates will migrate. Always store spiced/fruit scones in their own container.
Skipping the Cool-Down: This is the most critical step. If you package them while warm, the walnuts will absorb the trapped steam and become rubbery instead of crunchy.
Using Breathable Bags: Paper bags are fine for the first hour after baking, but for long-term storage, you need a full seal.
FAQs
Can I use regular flour if I don’t have Self-Raising Flour?
Yes, you can easily make your own. For the 450g of flour required in this recipe, use 450g of All-Purpose Flour mixed with 3 teaspoons of baking powder and an extra half-teaspoon of salt. Sift them together at least twice to ensure the leavening agents are perfectly distributed for a consistent rise.
Why do my dates all sink to the bottom of the scone?
Dates are heavy and sticky. To keep them suspended in the dough, chop them into small pieces and toss them in a tablespoon of the dry flour mixture before adding the buttermilk. This “flour coating” creates friction, helping the dates grip the dough as it rises in the oven.
What is Mixed Spice and can I substitute it?
Mixed Spice is a classic British blend typically containing cinnamon, coriander seed, caraway, nutmeg, ginger, and cloves. If you can’t find it, you can create a quick substitute using 1 part cinnamon, ½ part ginger, and a pinch of nutmeg and cloves. It provides that signature warm, autumnal aroma that makes these scones so comforting.
My walnuts taste a bit bitter. How can I fix this?
The skins of walnuts can sometimes have a bitter edge. To mellow this out, toast your chopped walnuts in a dry pan over medium heat for 3 minutes before adding them to the dough. This process brings the natural oils to the surface, replacing the bitterness with a rich, toasted flavor that complements the sweet dates.
Can I use dried dates instead of fresh (Medjool) dates?
Absolutely. While Medjool dates are softer and more caramel-like, standard dried “stoned” dates work perfectly well in this recipe. If your dried dates feel particularly hard or tough, soak them in a little warm water (or tea!) for 10 minutes, then pat them dry thoroughly before chopping and adding them to the mix.
Date & Walnut Scones
8
servings10
minutes14
minutesThis date & walnut scones recipe is nutty, lightly sweet, and tender with rich dates.
Ingredients
450 g Self Raising Flour
300 ml Buttermilk
100 g Butter
70 g Caster Sugar
60 g Walnuts, chopped
50 g Dates, stoned and chopped
2 tablespoons Milk, for glazing
1 teaspoon Bicarbonate of Soda
1 teaspoon Mixed Spice
¼ teaspoon Salt
Directions
- Start by setting your oven to 220°C (200°C fan / Gas Mark 7). Prepare your baking sheet by lining it with parchment paper to prevent sticking.
- Sift the self-raising flour into a spacious mixing bowl. Whisk in the salt, bicarbonate of soda, and the mixed spice until the aromatics are evenly distributed.
- Take your cold, cubed butter and work it into the flour using your fingertips. Continue until the mixture resembles fine breadcrumbs, ensuring no large lumps of butter remain.
- Using a metal knife, stir in the caster sugar until just combined.
- Pour the buttermilk into the bowl, then add your chopped dates and walnuts.
- Use a metal knife to bring the ingredients together. The thin blade helps combine the wet and dry components without crushing the air out of the dough.
- Briefly use your hands to gather the mixture into a cohesive dough. Remember: the less you handle it, the lighter your scones will be.
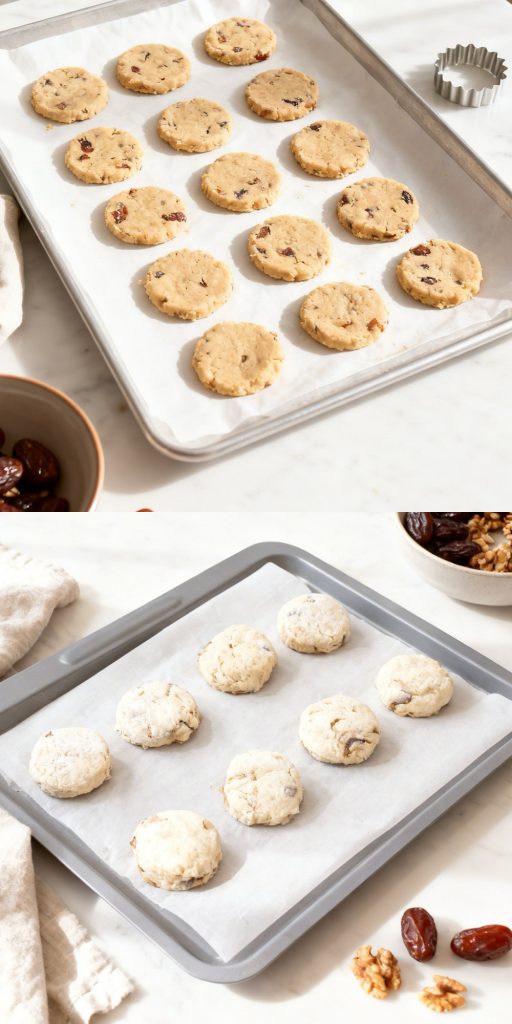
- Dust a clean work surface or board with a little flour. Transfer the dough and, using only your hands, gently pat it into a circular shape roughly 4cm (1.5 inches) thick.
- Use a 5cm biscuit cutter to stamp out your rounds. Crucial Tip: Press the cutter straight down and lift it straight up—do not twist it. Twisting seals the edges and prevents a high, even rise.
- Reform the leftover dough as needed to get approximately 8 to 10 scones, depending on your cutter size.
- Arrange the scones on your prepared tray. Lightly brush the tops with milk for a golden finish.
- Slide the tray into the oven for 12–14 minutes. You are looking for a significant rise and a deep golden color.
- Let them rest on the baking tray for a couple of minutes to set before using a spatula to move them to a wire rack.