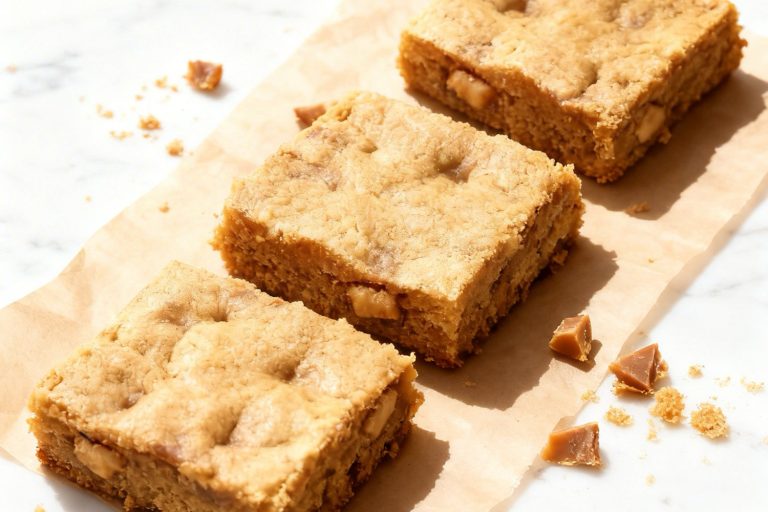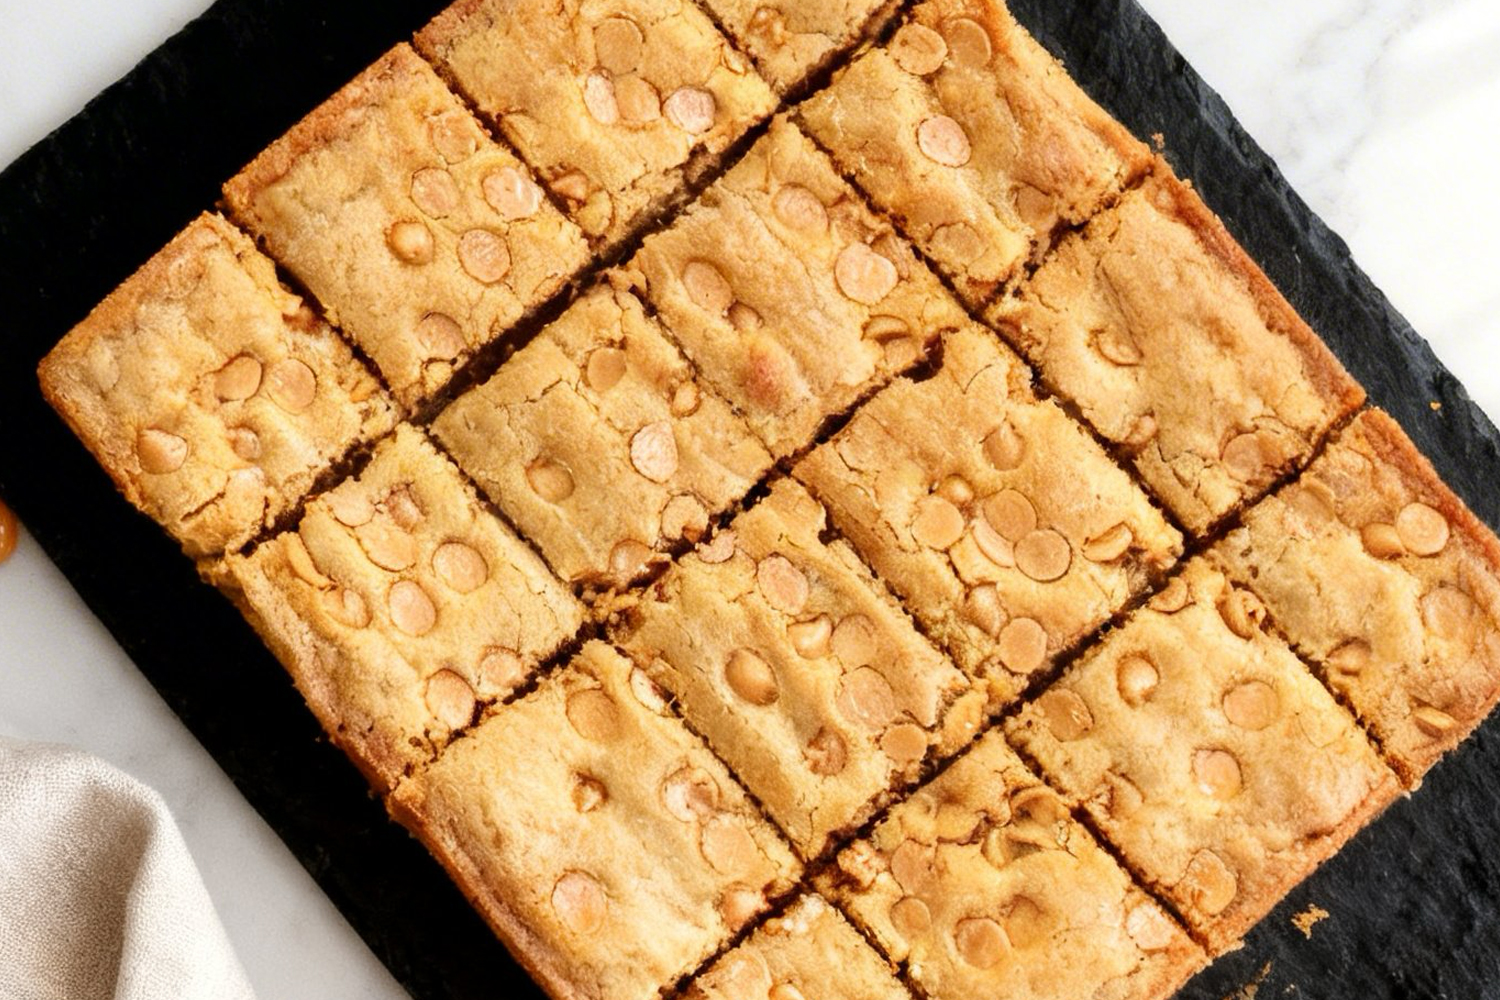
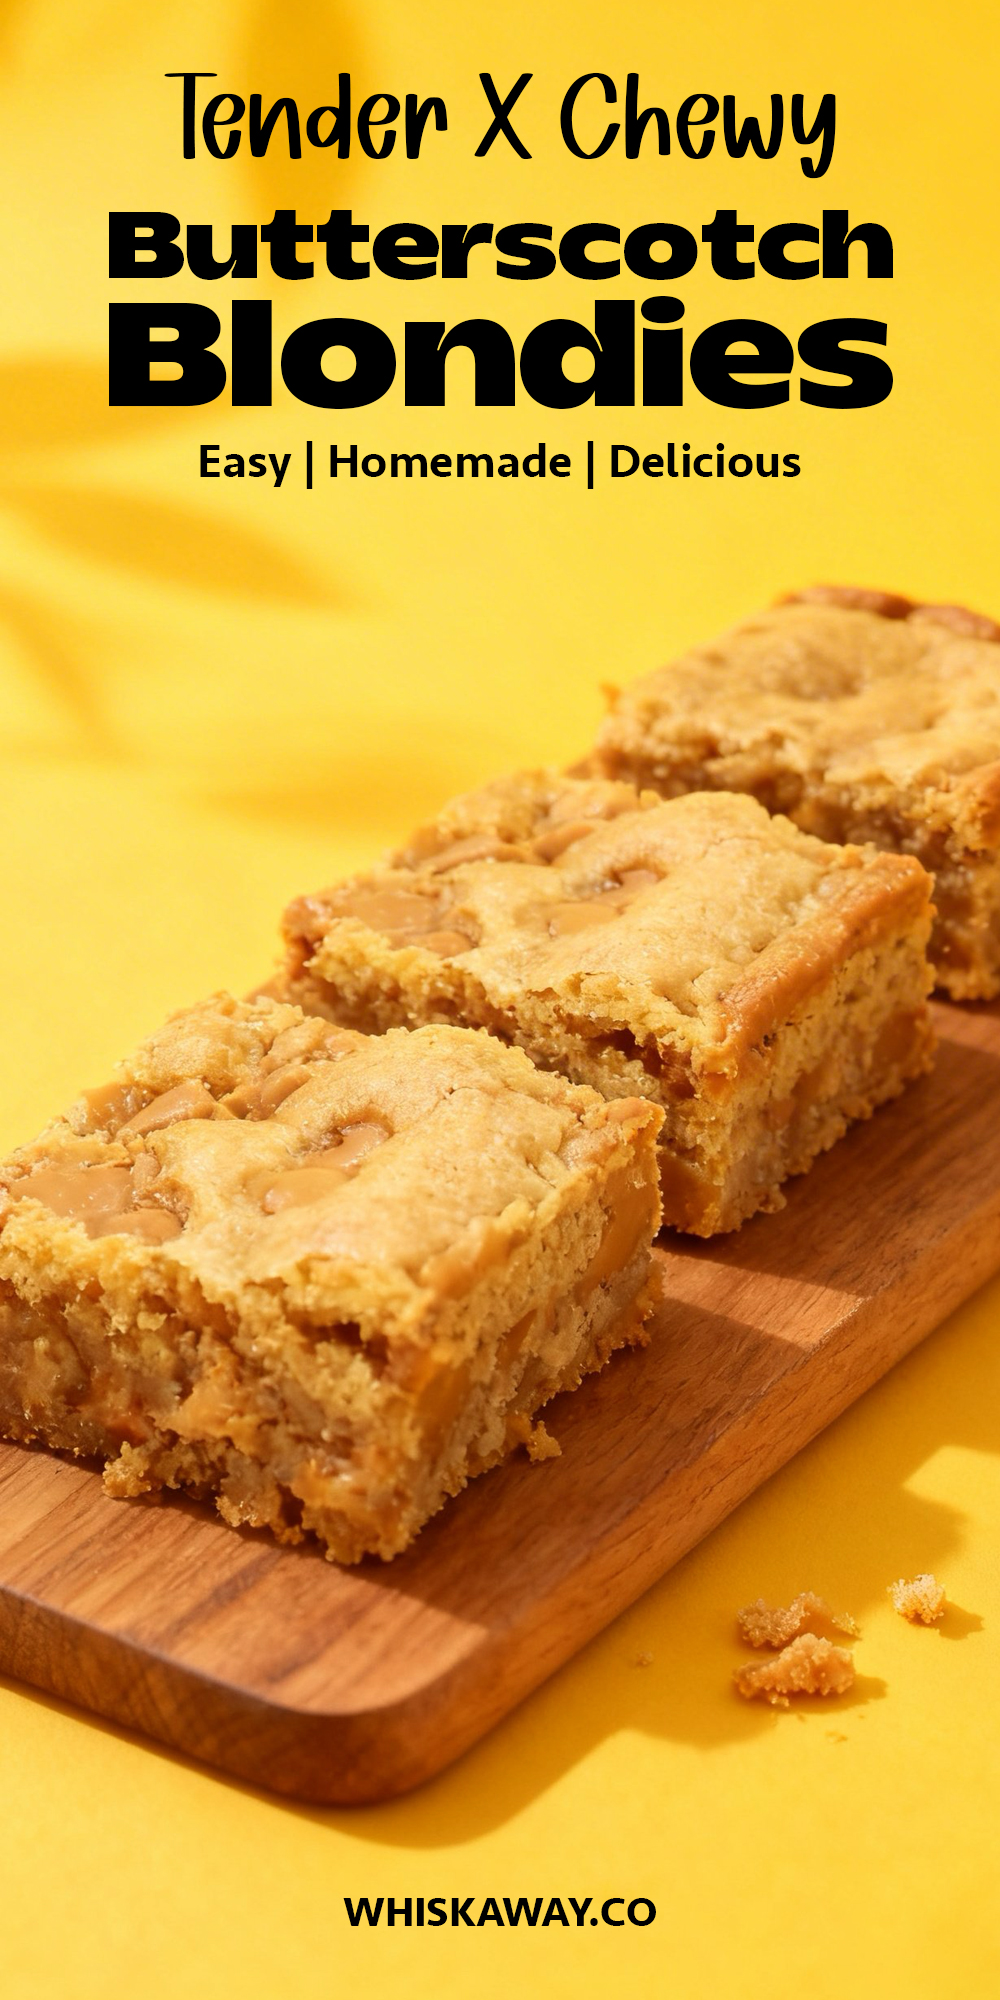
I learned something important the day I made these butterscotch blondie bars: blondies can be just as addictive as brownies. This easy blondie recipe mixes brown sugar, butter, and plenty of butterscotch chips for a soft, chewy treat. It’s great for sharing at parties, adding to dessert boxes, or just enjoying with a cup of coffee. Even if you’re not a seasoned baker, these bars are simple enough to make at home without any fuss.

🔥 InternalLinking
Why You’ll Love These Butterscotch Blondies Bars
As soon as the sweet aroma fills your kitchen, these chewy blondie bars promise pure buttery comfort.
- Caramel-like butterscotch flavor shines in every bite.
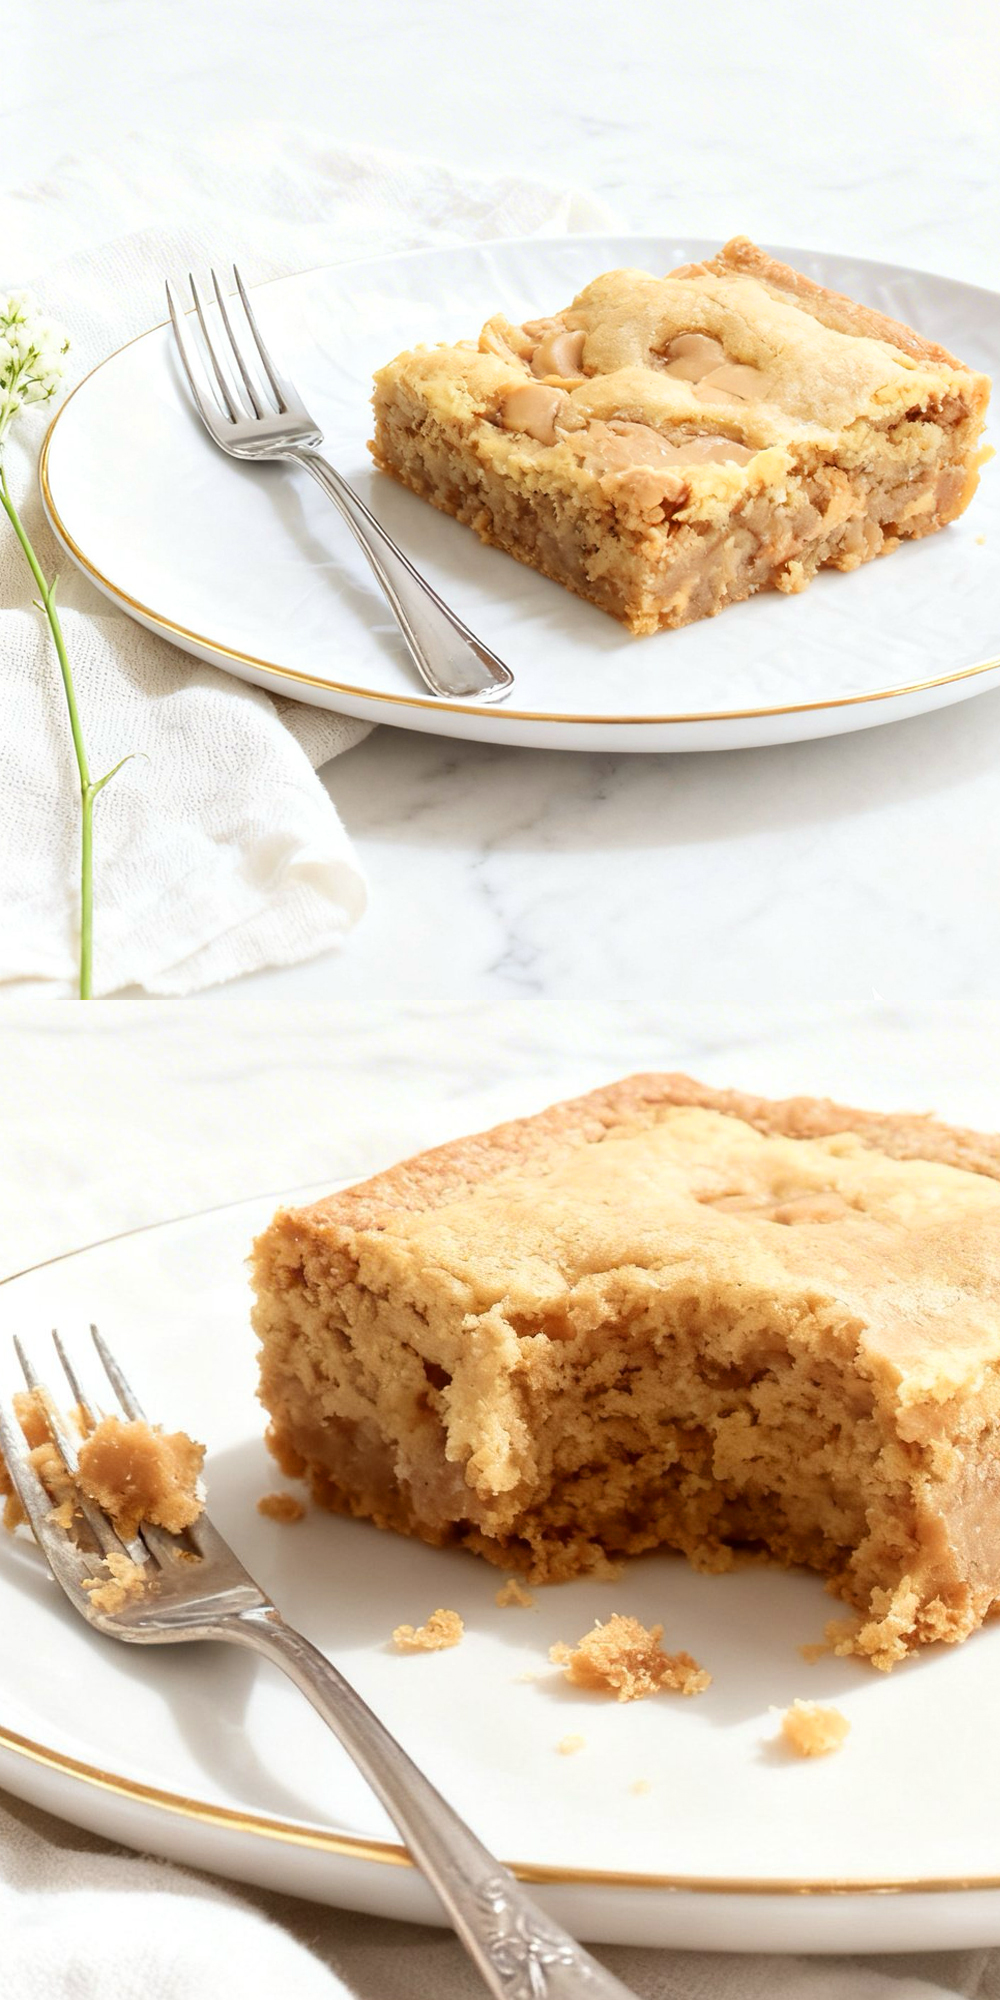
- Tender center with lightly crisp golden edges.
- Easy to bake in one pan for fuss-free prep.
- A cozy dessert that feels nostalgic and homemade.
- Lovely served slightly warm with a scoop of ice cream.
Save This Pin for Later to Your Pinterest Board
Ingredients
- All-purpose flour: This gives your blondies structure while keeping them tender and soft. A gentle fold is key here—overmixing will make your bars cakier instead of buttery and chewy.
- Butter: I use unsalted butter, melted for an easy-to-mix, silky batter. For an extra depth of flavor, try browning the butter slightly—it gives a subtle caramel note that pairs beautifully with the butterscotch.
- Light brown sugar: Packed brown sugar is what makes these blondies chewy and adds that rich, buttery sweetness. Make sure it’s packed tightly when measuring for the perfect texture.
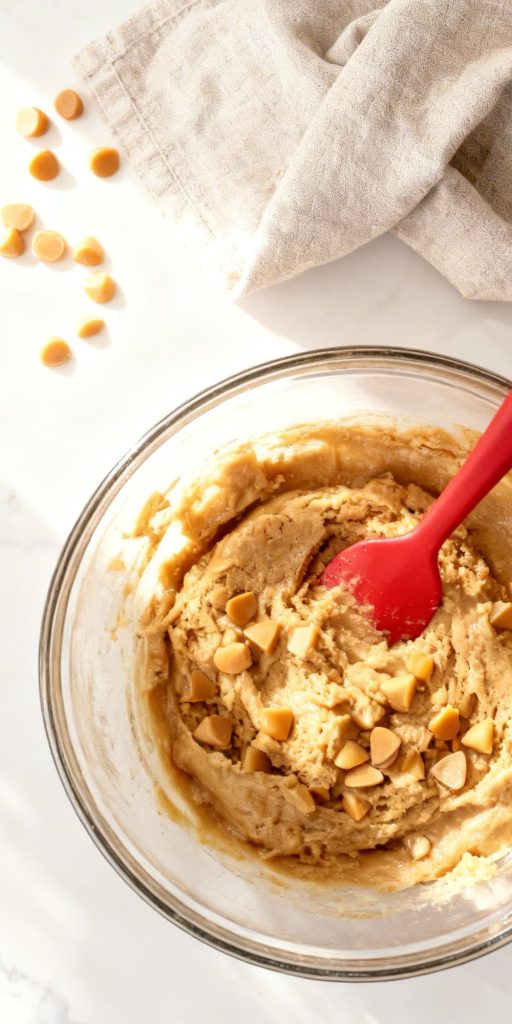
- Butterscotch chips: These little pockets of caramel-y goodness are what make blondies special. Toss a few on top before baking for extra gooey bites, or fold them into the batter for chocolate-like ribbons of sweetness throughout.
- Eggs: The eggs bind everything together and give the blondies a soft, tender crumb. Room temperature eggs mix in more easily, giving your batter a smooth consistency.
- Vanilla extract: A splash of pure vanilla amplifies the buttery, sweet flavor and adds that comforting aroma that makes the kitchen smell irresistible.
- Baking powder: Just a touch gives a slight lift so your bars aren’t too dense.
- Salt: Enhances the sweetness and balances the buttery flavor. Even a pinch can make a huge difference in taste.
Tips To Get Your Recipe Right
- Let the butter and sugar cool: After mixing the brown sugar into melted butter, wait until the mixture is lukewarm before adding the eggs. Adding eggs too soon can scramble them and ruin the texture.
- Whisk eggs and vanilla well: Beat the eggs and vanilla until frothy before combining with the butter-sugar mix. This helps create a thin, shiny crackled top during baking.
- Mix just enough: Once you add the flour, stop mixing as soon as the streaks disappear. Over-mixing develops gluten, which makes blondies tough instead of chewy.
- Check the center for doneness: Insert a toothpick into the middle; it should come out with a few moist golden crumbs. If it’s dry, the blondies are overbaked.
- Cool completely before slicing: Let the blondies sit at room temperature for at least one hour. This helps them set so the center stays chewy and the slices hold their shape.

Storage Tips
- Room temperature storage: Keep cooled blondies in an airtight container for up to 4 days, placing parchment between layers and optionally adding a slice of white bread to maintain softness.
- Refrigeration: Store tightly wrapped in the fridge for up to a week to achieve a dense, chewy texture. Let bars sit at room temperature for 15 minutes before eating for optimal flavor.
- Freezing: Wrap individual bars in plastic, then freeze up to 3 months. Thaw on the counter for 30 minutes for fresh-baked taste.
- Reheating: Warm single bars in the microwave for 10–12 seconds, or a batch in the oven at 300°F (150°C) for 5 minutes, covering loosely with foil; a toaster oven can recrisp edges in 2 minutes.
- Storage mistakes to avoid: Never store warm blondies, leave them uncovered, or keep them with crispy cookies, as this can cause staling, sogginess, or drying out.
FAQs
-
My blondies are more like cake than chewy bars. What happened?
The most likely culprit is over-mixing or over-measuring the flour. When you stir the batter too vigorously after adding the dry ingredients, you develop gluten, which creates a bread-like, cakey texture. Additionally, if you don’t pack your brown sugar into the measuring cup, you lose out on the moisture-retaining molasses that creates that signature chew. Next time, fold the flour in gently until just combined.
-
Can I use white sugar if I’m out of brown sugar?
While you technically can, you shouldn’t if you want a true blondie. Brown sugar contains molasses, which provides the butterscotch flavor and the moist, soft texture. Using 100% white sugar will result in a sugar cookie bar that is much crispier and lacks the depth of flavor. If you’re in a pinch, you can mimic brown sugar by mixing 1 tablespoon of molasses into every cup of white sugar.
-
Why is my batter so thick? Did I forget an ingredient?
Don’t worry—blondie batter is notorious for being incredibly thick, almost like a soft cookie dough. Because there is very little liquid (just eggs and vanilla) compared to the amount of flour and sugar, it won’t pour like cake batter. You will need to use a spatula or the back of a spoon to spread it firmly and evenly into the corners of your pan.
-
How do I know they are done without over-baking them?
This is the hardest part of blondie baking! Look for the edges to be golden brown and pulling away slightly from the sides of the pan. The center should look set but still have a very slight jiggle when the pan is shaken. If a toothpick comes out with a few moist crumbs, take them out immediately. If the toothpick is dry, they are over-baked. Remember: they continue to cook in the hot pan for several minutes after leaving the oven.
-
Can I add other mix-ins besides butterscotch chips?
Absolutely! Blondies are the ultimate blank canvas. While butterscotch chips are traditional, you can swap them for white chocolate chips, dark chocolate chunks, or even shredded coconut. Toffee bits are also a fantastic addition if you want to double down on the crunch and caramel flavor. Just keep the total volume of mix-ins to about 1 to 1 ½ cups so the bars don’t fall apart.
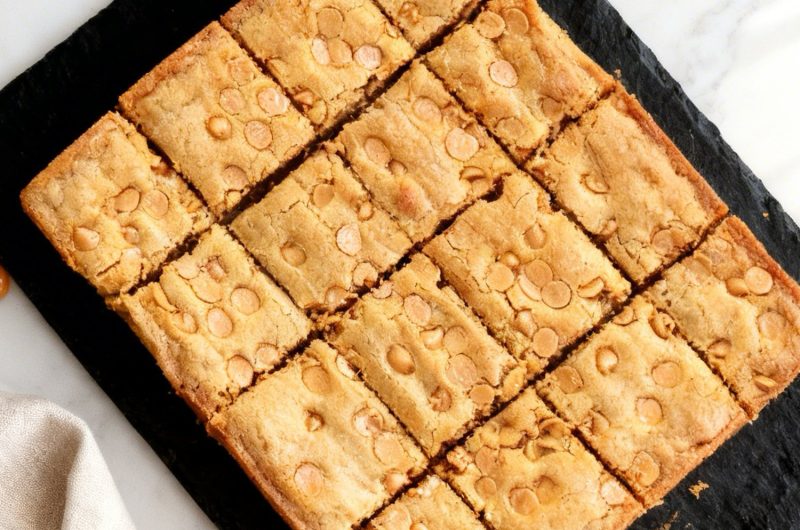
Butterscotch Blondies
16
servings10
minutes30
minutesThese butterscotch blondies are soft, buttery, and full of caramel flavor.
Ingredients
2 cups All-purpose flour
2 sticks Butter
1 ½ cups Light brown sugar (packed)
1 cup Butterscotch chips (plus more for sprinkling on top)
2 Eggs (room temperature)
2 teaspoons Vanilla extract
½ teaspoon Baking powder
½ teaspoon Salt
Directions
- Set your oven temperature to 350°F (180°C).
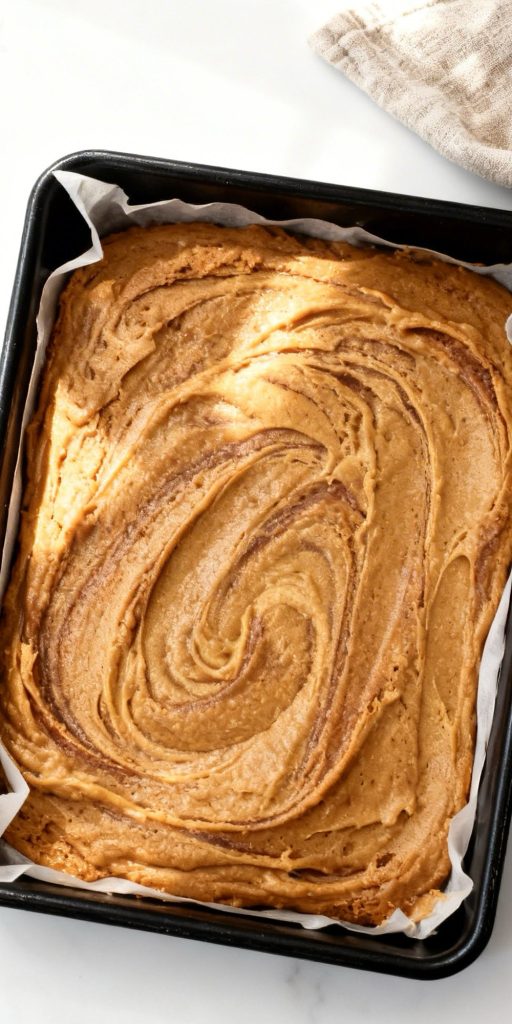
- Use a 9-inch square baking dish. For the best results, line it with parchment paper (leaving a slight overhang for easy removal) or give it a thorough coating of non-stick cooking spray.
- Place the two sticks of butter in a small saucepan over low-medium heat until fully liquefied.
- Remove the pan from the stove and stir in the packed brown sugar. Mix well and set it aside to come down to room temperature.
- Note: Integrating the sugar while the butter is warm helps create that signature shiny, crackled top.
- In a small bowl, beat the room-temperature eggs and vanilla extract together until the mixture looks light and foamy.
- In a separate, larger mixing bowl, whisk the flour, baking powder, and salt together to ensure the leavening agent is evenly distributed.
- Pour the frothy egg mixture into the dry ingredients, followed by the butter and brown sugar mixture.
- Stir the ingredients together just until the flour disappears. This will be a very thick, heavy batter. Avoid over-mixing, as this can lead to a tough, bready bar instead of a chewy one.
- Gently fold in your butterscotch chips.
- Spread the thick batter into your prepared pan, smoothing it out to the edges. Scatter your extra butterscotch chips over the surface for a professional look.
- Slide the pan into the oven for 30 minutes. They are done when a toothpick inserted into the center comes out clean or with just a few dry crumbs.
- Allow the blondies to cool completely in the pan. This resting period is what develops that dense, chewy texture.
- Once sliced, these will stay fresh in an airtight container at room temperature for up to 3 days.