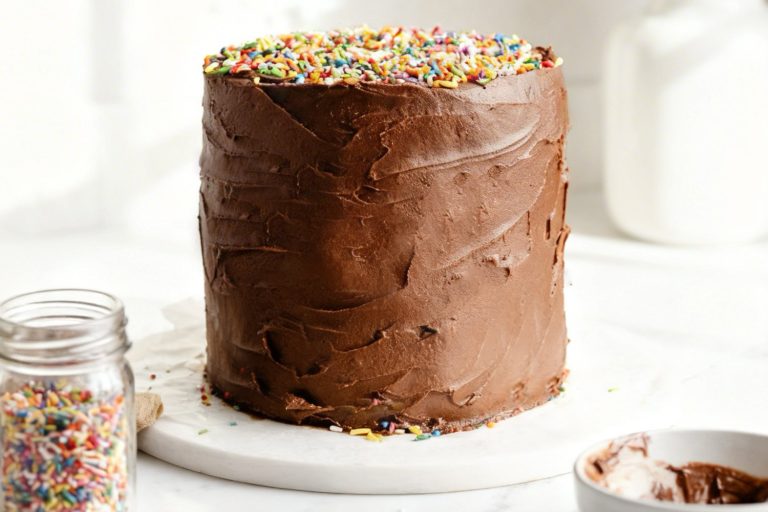
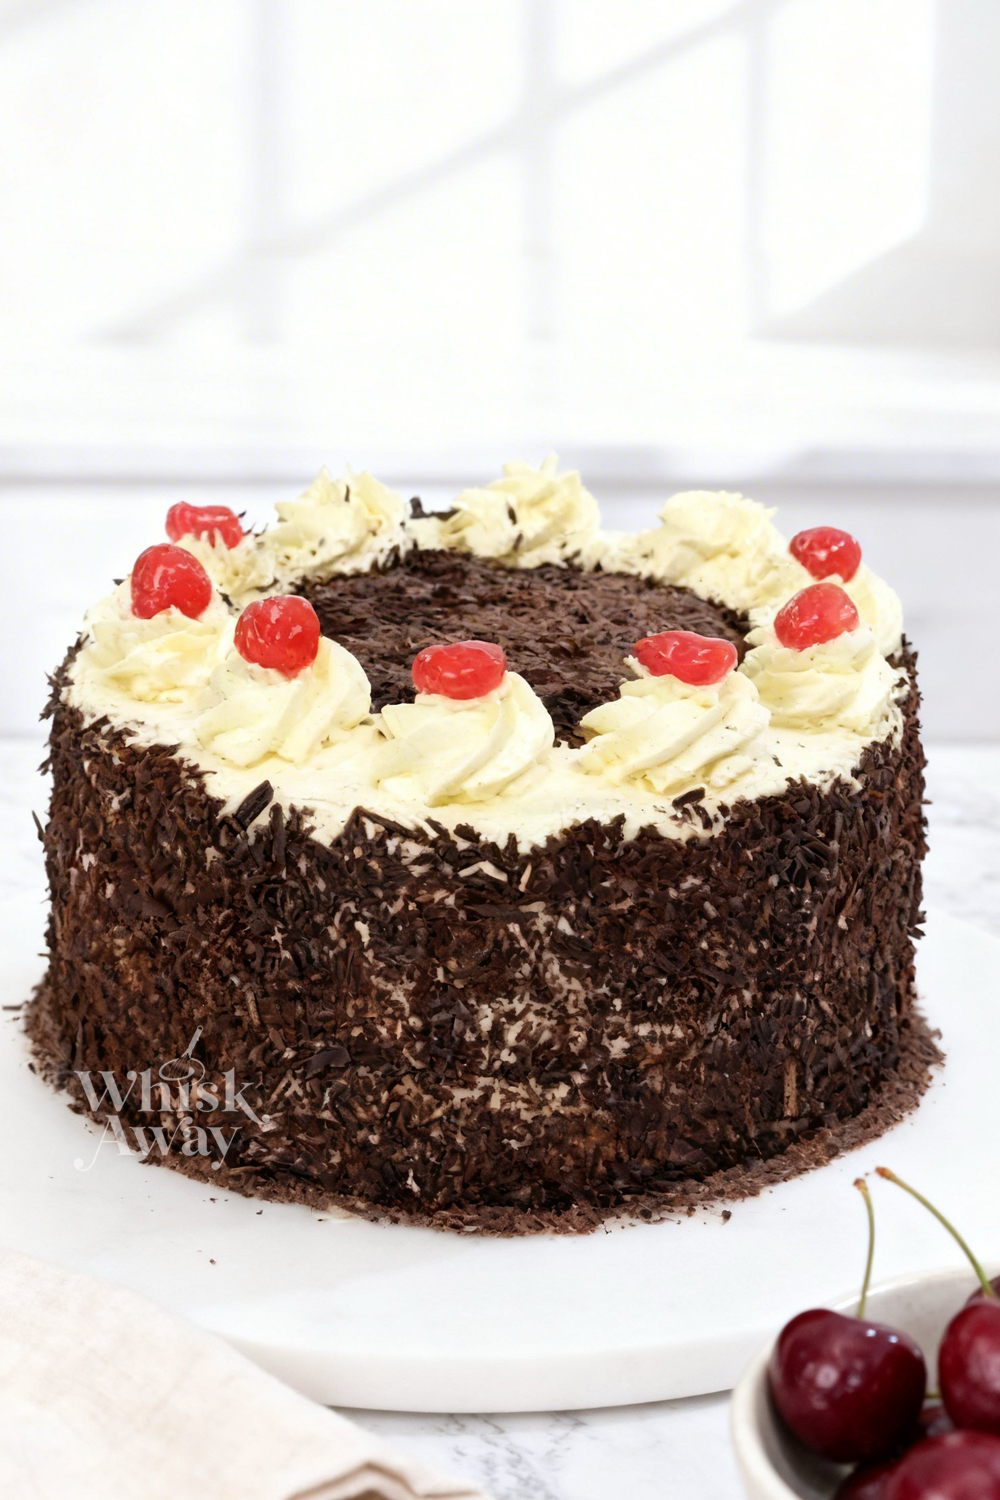
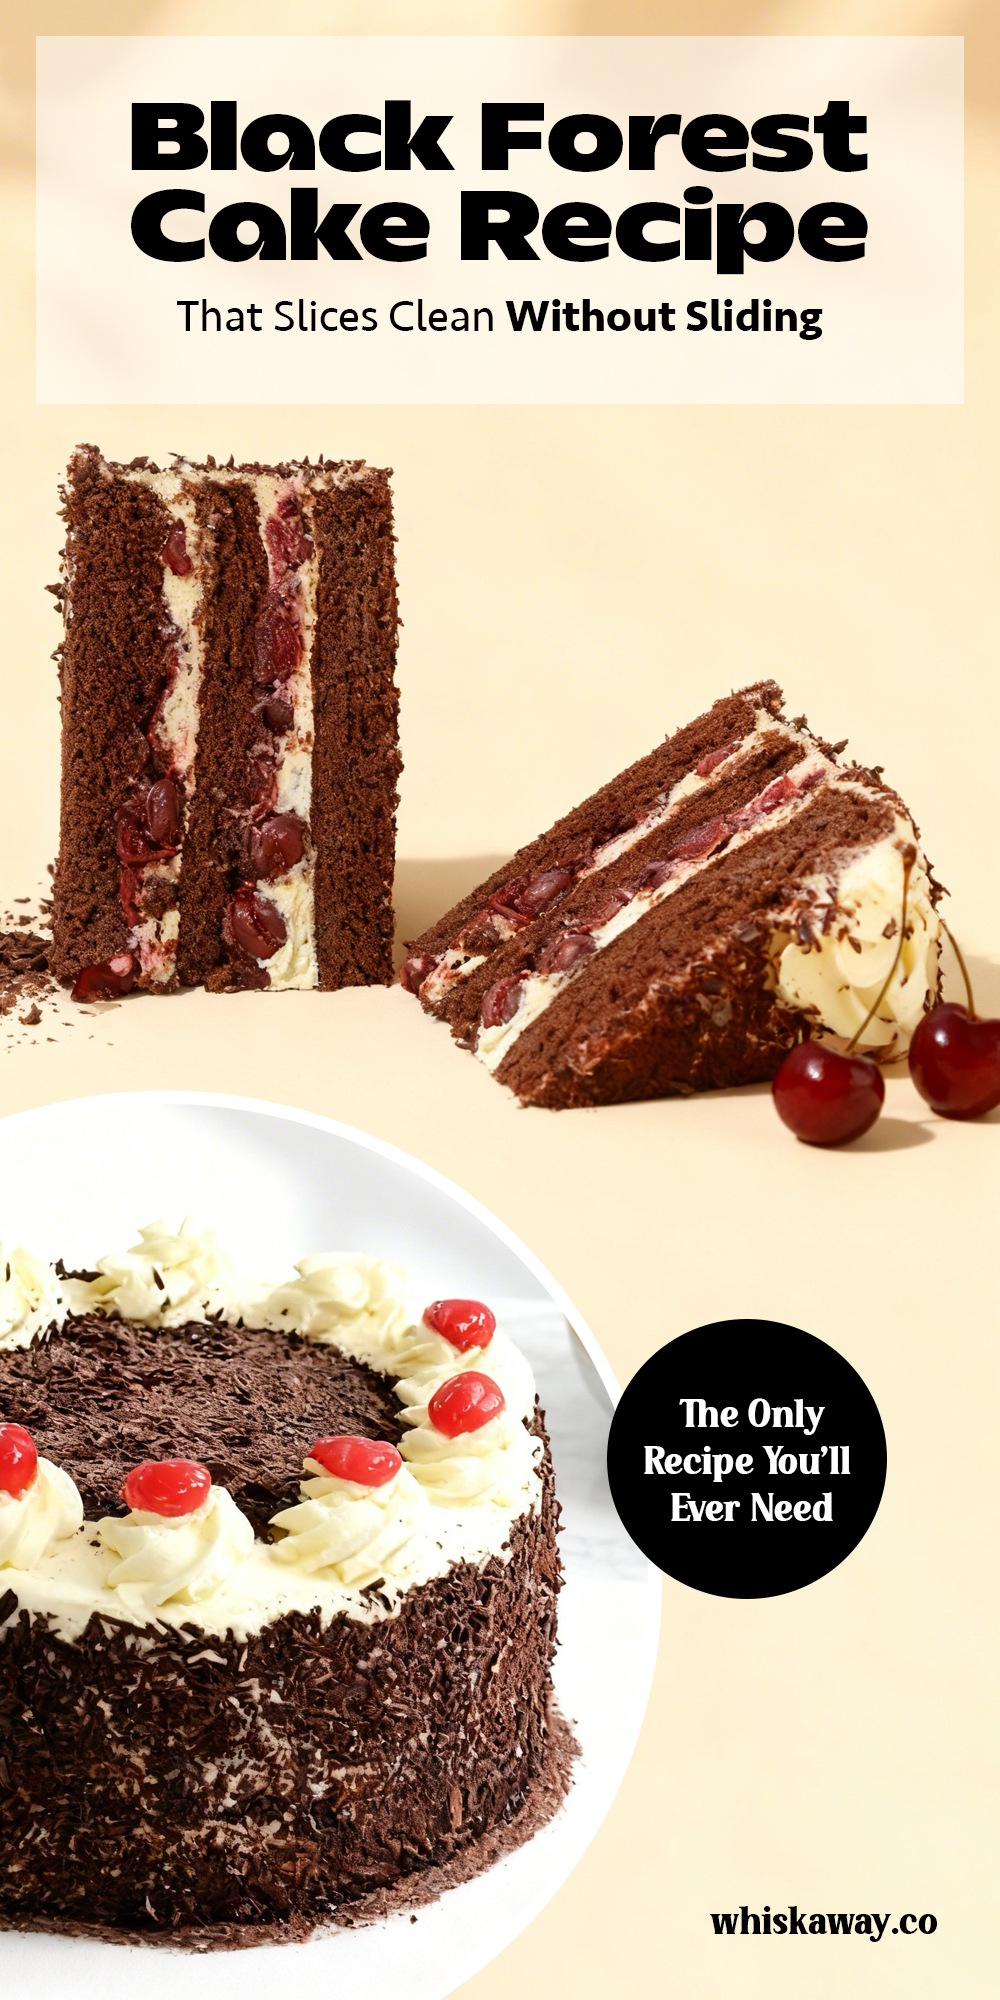
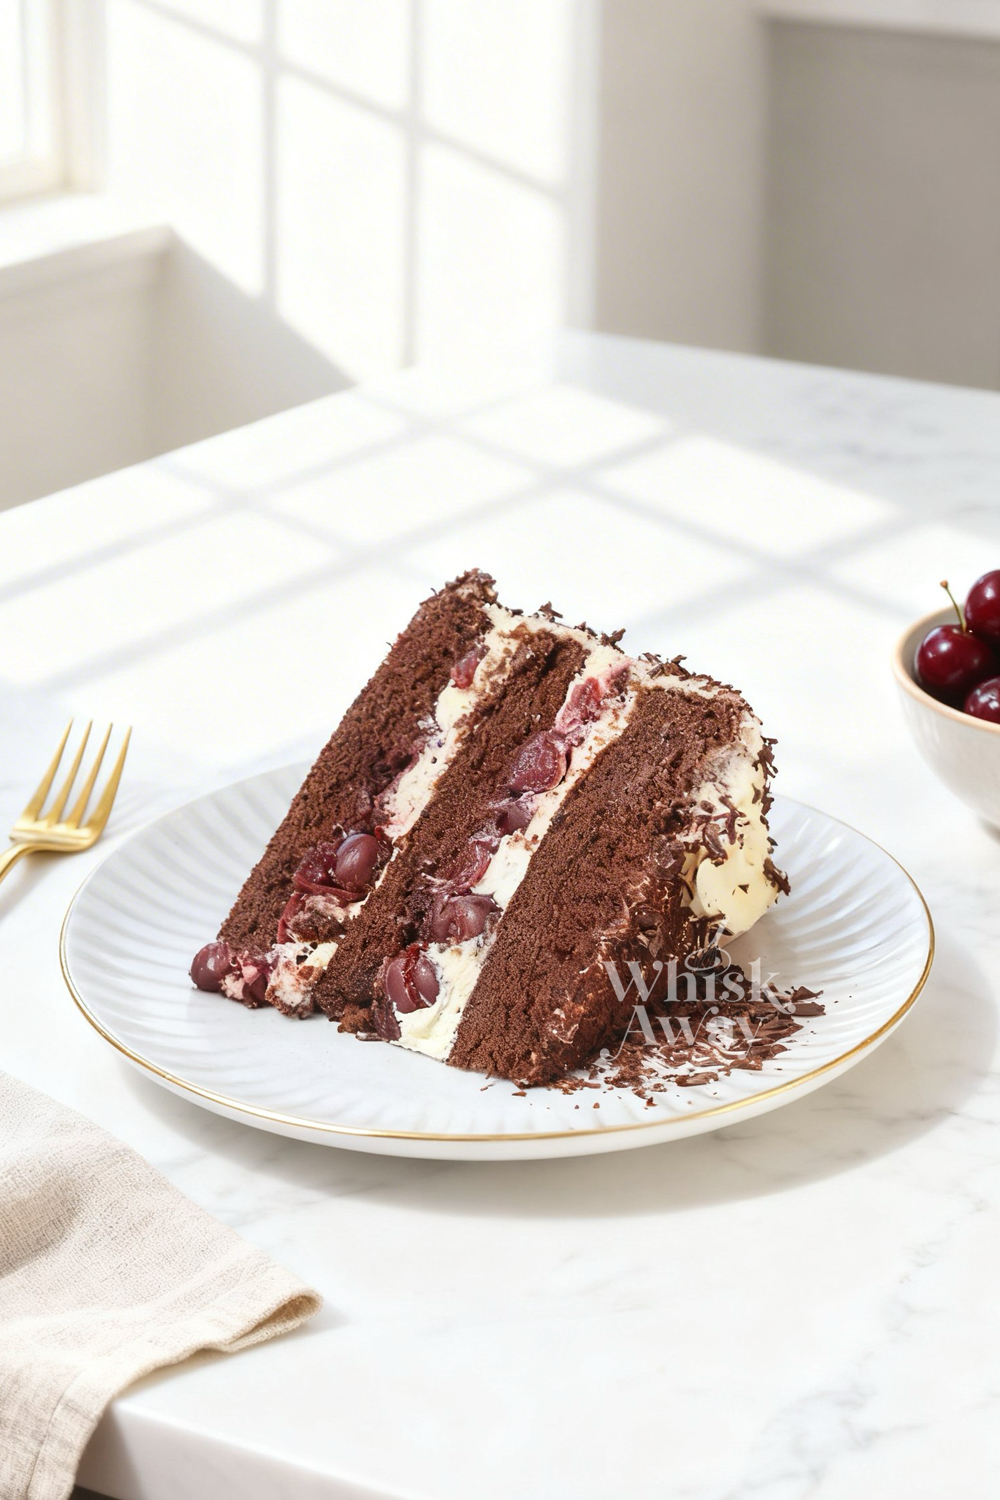
A combination of rich chocolate, tart cherries, and airy whipped cream is what makes black forest cake such a timeless favorite. The dark chocolate layers are soft and moist, bringing depth and richness that pairs beautifully with the bright, slightly tangy cherries layered throughout. Light whipped cream sits between and around the layers, adding a smooth, airy contrast that keeps every bite from feeling too heavy. This is the kind of dessert that feels right at home on a celebration table, yet simple enough to make for a weekend baking project when something special is needed. Despite its elegant appearance, it comes together with straightforward steps and everyday ingredients, making it achievable even for home bakers. Every slice of black forest cake delivers a balanced mix of fudgy cake, juicy fruit, and creamy softness. Without further ado, grab your apron and pre-heat your oven and let’s bake this crowd-pleaser!
🔥 This black forest cake layers chocolate, cherries, and cream into a classic, indulgent dessert. If you love that mix of rich and fruity, consider trying:
- Chocolate Ganache Cake – focuses purely on deep chocolate intensity
- Strawberry Crunch Cake – swaps cherries for strawberries with added texture
- Chocolate Angel Food Cake – a lighter chocolate option with an airy crumb
Why You’ll Love This Black Forest Cake
Once the layers are stacked and frosted, it’s easy to see why this cake is a showstopper
- Vibrant red layers with a tender, moist crumb
- Smooth, tangy cream cheese frosting balances sweetness
- Perfect for birthdays, anniversaries, or special celebrations
- Beautifully striking when sliced, making each piece photogenic
- A classic southern dessert that feels indulgent yet approachable
Save This Pin for Later to Your Pinterest Board
Ingredients
For the Chocolate Sponge Cake
- White granulated sugar: Sweetens the cake and helps create a fine, tender crumb.
- All-purpose flour: Provides structure while keeping the sponge light and airy.
- Eggs: Bind ingredients together and add lift, giving the sponge its soft, fluffy texture.
- Cocoa powder: Adds deep chocolate flavor and rich color.
- Cornstarch: Lightens the sponge and ensures a delicate, tender texture.
- Vegetable oil: Adds moisture and keeps the sponge soft.
- Unsalted butter: Contributes richness and a slightly denser, flavorful crumb.
- Vanilla essence/extract: Enhances sweetness and complements chocolate flavor.
- Instant coffee powder: Intensifies the chocolate flavor without adding a coffee taste.
- Salt: Balances sweetness and enhances chocolate depth.
For the Stabilized Whipped Cream
- Whipping cream: Provides lightness, creaminess, and volume to the frosting.
- Mascarpone: Adds richness, smooth texture, and slight tang.
- Icing sugar: Sweetens and helps stabilize the cream.
- Vanilla essence/extract: Enhances flavor and complements the chocolate and cherry notes.
Tips To Get Your Recipe Right
- Warm your eggs and sugar over a water bath to 45°C (113°F) before whipping. This breaks down the proteins and allows the batter to trap more air, giving the sponge its signature lightness.
- Sift flour and cocoa then fold them in gently using a figure-8 motion. Any vigorous stirring will deflate your whipped eggs and result in a dense, flat sponge.
- Keep both the mascarpone and whipping cream straight from the fridge. This ensures proper emulsification and prevents the cream from turning grainy or collapsing under the cake layers.
- Be generous with the cherry syrup when soaking the sponge layers. Brushing until the cake feels slightly damp is key to achieving the iconic melt-in-your-mouth texture.
- Allow the assembled cake to rest in the fridge for at least 4 hours. This lets the cream firm up and the layers stabilize, preventing sliding and keeping the cherries perfectly in place.
Storage Tips
- Keep it in the fridge at all times: This cake is made with fresh whipped cream, so it must be stored in the refrigerator. Only take it out for serving, and do not leave it at room temperature for more than 1–2 hours.
- Store it covered properly: Place the cake in a tall airtight container or cover it with a large bowl. This helps keep the cream fresh and prevents the cake from absorbing fridge smells.
- Let it rest for better flavor: The cake often tastes even better the next day. The cherry syrup soaks into the layers, making the cake more moist and easier to slice.
- Protect the cut sides: After slicing, cover the exposed inside with parchment paper or plastic wrap. This keeps the sponge soft and prevents it from drying out in the fridge.
- Never heat the cake: Do not microwave or warm this cake. The whipped cream will melt quickly and ruin the texture. This cake is best enjoyed cold straight from the fridge.
FAQs
Can I use canned cherry pie filling instead of making it from scratch?
You can, but it will drastically change the flavor. Canned cherry pie filling is heavily sweetened and uses a different thickener, lacking the sharp, tart bite of morello cherries that is essential to cut through the rich mascarpone cream. If you are in a rush and must use a can, skip adding any extra sugar or cornstarch to it.
Why did my chocolate sponge come out flat and dense?
Because this sponge doesn’t use baking powder or baking soda, it relies entirely on the air whipped into the eggs. A flat cake usually means the egg and sugar mixture wasn’t warmed enough (it needs to hit 45°C/113°F) or wasn’t whipped long enough to reach the thick ribbon stage. Another common culprit is folding in the flour too aggressively, which pops all those delicate air bubbles.
Why did my mascarpone whipped cream split and turn grainy?
Mascarpone is a high-fat dairy product that can curdle or split into butter very quickly if mishandled. This happens if the mascarpone or the heavy cream wasn’t completely cold, or if you mixed it for too long. Always start with fridge-cold ingredients and stop your mixer the exact moment you achieve stiff peaks.
How far in advance can I make this cake?
You should aim to make it one full day in advance. Unlike butter-based cakes that dry out in the fridge, Black Forest Cake thrives on an overnight rest. The 24 hours in the refrigerator allows the cherry syrup to fully soak into the sponge and gives the stabilized cream time to firm up, making the cake incredibly flavorful and much easier to slice cleanly.
How long can this cake sit out on the counter?
Because the entire exterior and filling are made of fresh, lightly sweetened dairy, this cake is highly perishable. It should not sit at room temperature for more than 1 to 2 hours, especially in a warm room. Keep it chilled in the refrigerator right up until you are ready to serve.
Black Forest Cake
12
servings1
hour22
minutes4
hoursThis black forest cake is layered, chocolatey, and packed with juicy cherries.
Ingredients
- Chocolate Sponge Cake
1 Cup (200 G) White Granulated Sugar
¾ Cup (90 G) All-Purpose Flour
6 Large Eggs
⅓ Cup (35 G) Cocoa Powder (Dutch-Processed Preferred)
¼ Cup (30 G) Cornstarch
2 Tbsp (30 G) Unflavoured Vegetable Oil
2 Tbsp (28 G) Melted Unsalted Butter
2 Tsp Vanilla Essence/Extract
1 Tsp Instant Coffee Powder
¼ Tsp Salt
- Stabilised Whipped Cream
3 Cups (670 G) Whipping Cream (Cold, Min. 34% Fat)
1 Cup (225 G) Mascarpone (Cold)
½ Cup (60 G) Icing Sugar
1 Tsp Vanilla Essence/Extract
- Cherry Filling
2 Cups (400 G) Morello Cherries (Syrup Removed)
¼ Cup (50 G) White Granulated Sugar
3 Tbsp (40 G) Cherry Juice (From The Jar)
2 Tbsp (15 G) Cornstarch
1 Tbsp (14 G) Fresh Lemon Juice
⅛ Tsp Almond Essence Or Extract
⅛ Tsp Ground Cinnamon
- Cherry Syrup (For Soaking)
⅔ Cup (150 G) Cherry Juice (From The Jar)
⅛ Tsp Almond Essence Or Extract
Decorations & Finishing:
1 Block (180 G) Dark Chocolate (50% Dark)
10–12 Cherries (Fresh, Glacé, Or Maraschino)
Directions
- The Fruit Elements
- In a small saucepan, whisk the cherry juice, sugar, lemon juice, cornstarch, almond extract, and cinnamon. Whisk constantly over medium heat until the mixture clarifies and thickens into a glossy gel.
- Remove from heat and gently fold in the morello cherries. Transfer to a bowl and let this cool completely. Simply stir the cherry juice and almond extract together in a small jug. Keep this aside for the assembly phase.
- The Chocolate Sponge
- Preheat to 160°C (320°F) fan-forced. Line the bottoms of three 8-inch pans with parchment. Crucial: Do not grease the sides; the batter needs to climb the walls to rise.
- Sift the flour, cornstarch, cocoa, coffee powder, and salt together. Whisk to combine.
- Whisk the eggs, sugar, and vanilla in a heatproof bowl set over a pot of simmering water (don't let the bowl touch the water). Whisk until the sugar dissolves and the liquid feels warm—about 45°C (113°F). Remove from heat.
- Use a mixer on medium-high for 5–10 minutes until the eggs triple in size and reach the ribbon stage (leaving a trail when the whisk is lifted). Finish on low speed for 2 minutes to stabilize the air bubbles.
- Sift half the dry ingredients over the eggs. Fold gently with a spatula. Add the rest of the dry mix and fold until nearly combined. Finally, fold in the melted butter/oil mixture until just unified.
- Divide into pans. Run a toothpick through the batter to pop large bubbles. Bake for 20–22 minutes.
- Once out, drop the pans from a height of 10cm to release steam. Cool upside down for 30 minutes. Run a knife around the edge to release, then cool fully on a rack.
- Once cold, lightly rub or trim the very top crust off the sponges so they can absorb the syrup better.
- Chocolate & Cream
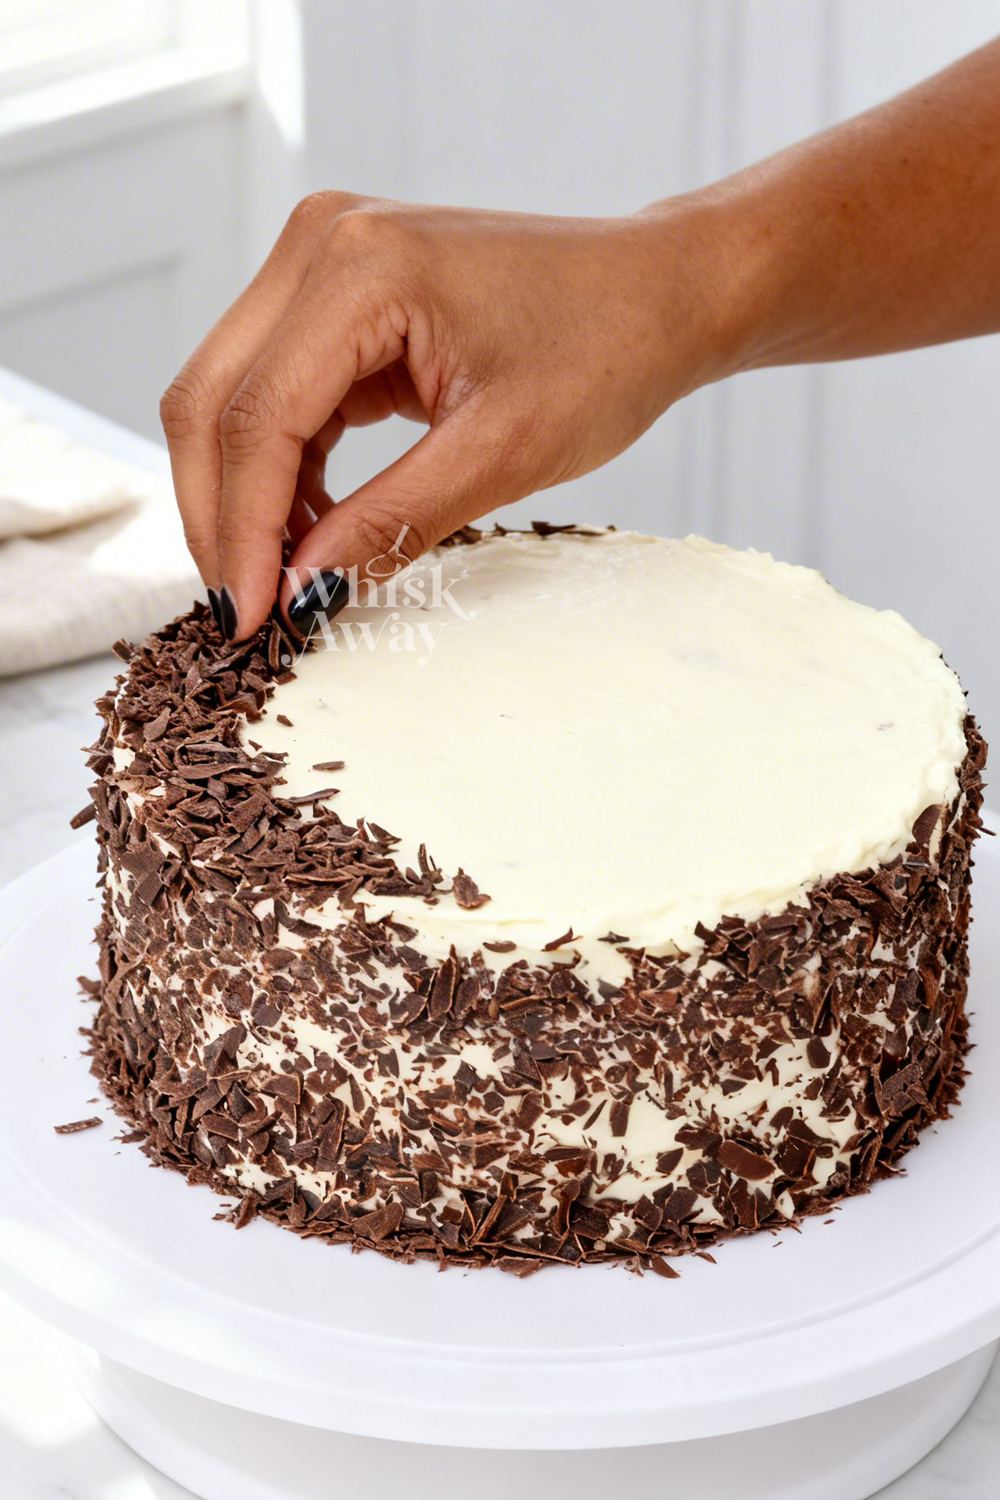
- Use a potato peeler to shave a 180g block of dark chocolate into delicate shards. Chill these until needed.
- Ensure your mascarpone and cream are very cold. Beat the mascarpone, icing sugar, and vanilla on medium-high until smooth (about 1 minute). Pour in the heavy cream. Start slow to avoid splashing, then whip to stiff peaks. Be careful not to over-whip into butter!
- Assembly
- Place the first sponge layer down. Brush generously with 1/3 of the cherry soak.
- Pipe a ring of whipped cream around the edge of the cake. This dam keeps the fruit from leaking. Fill the center with half the cherry filling, then smooth a layer of cream over the top.
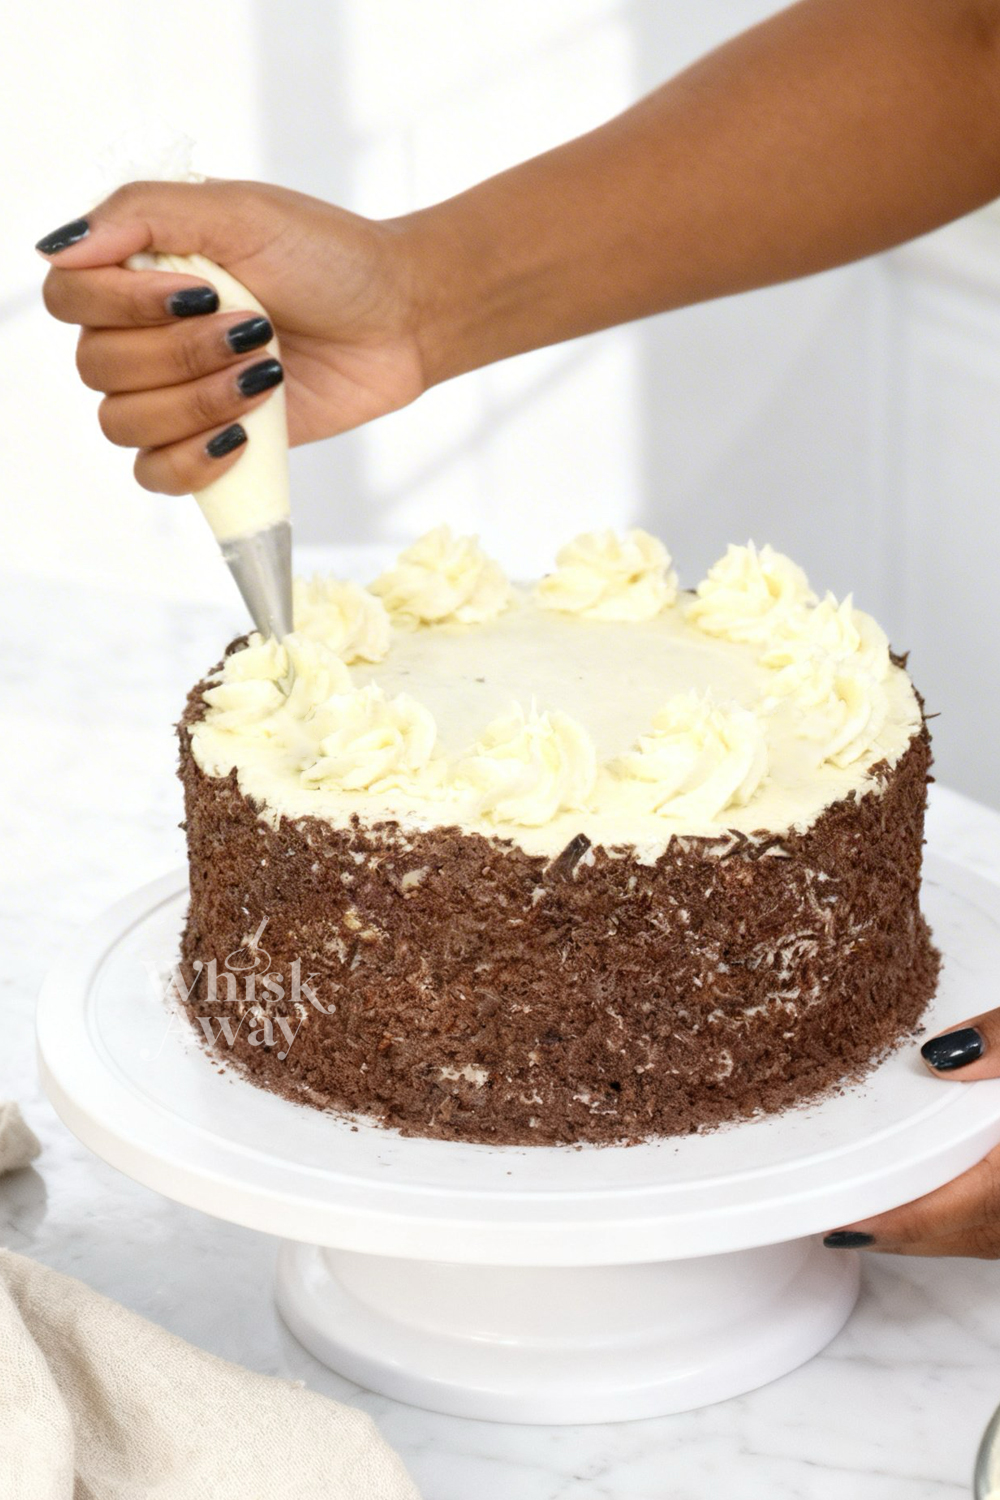
- Add the second sponge, soak it, build the cream dam, add the remaining cherries, and another layer of cream. Place the final sponge on top and apply the last of the soak. Coat the entire top and sides in a smooth layer of cream.
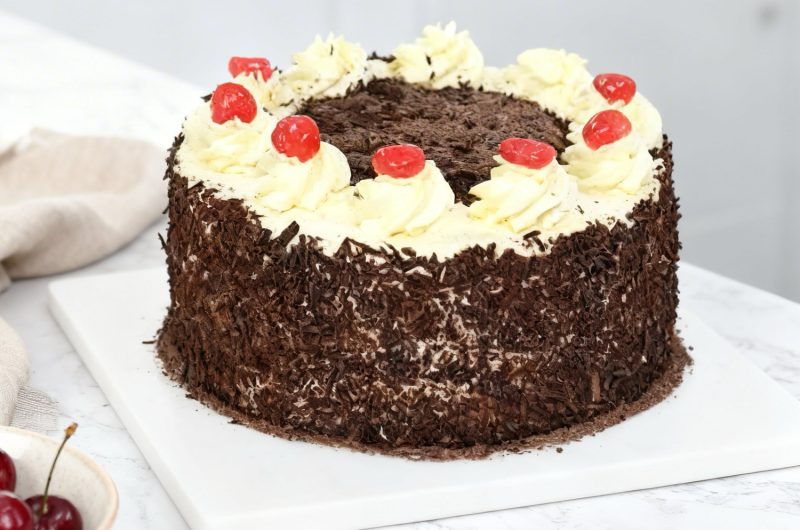
- Press the chocolate shards into the sides of the cake. Pipe decorative stars around the top edge, fill the center with more chocolate, and crown each star with a cherry.
Notes
- The Overnight Rest: Do not slice this cake immediately! It requires at least 4 hours (preferably overnight) in the refrigerator. This allows the syrup to migrate into the sponge and the flavors to unify.