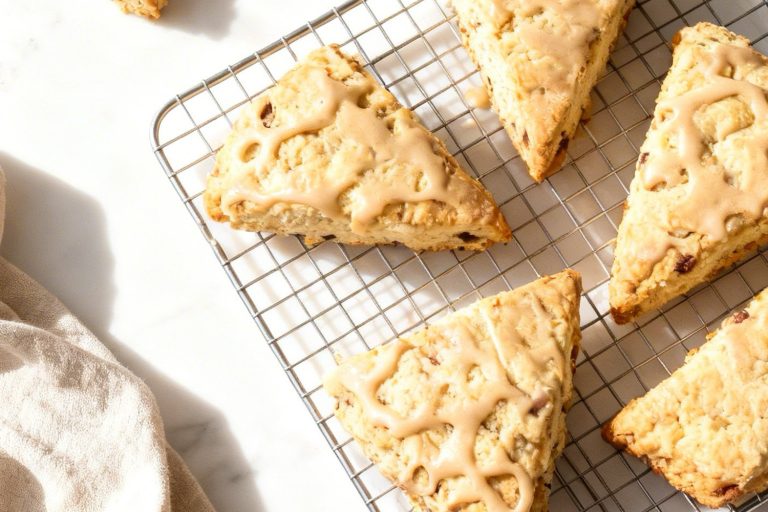
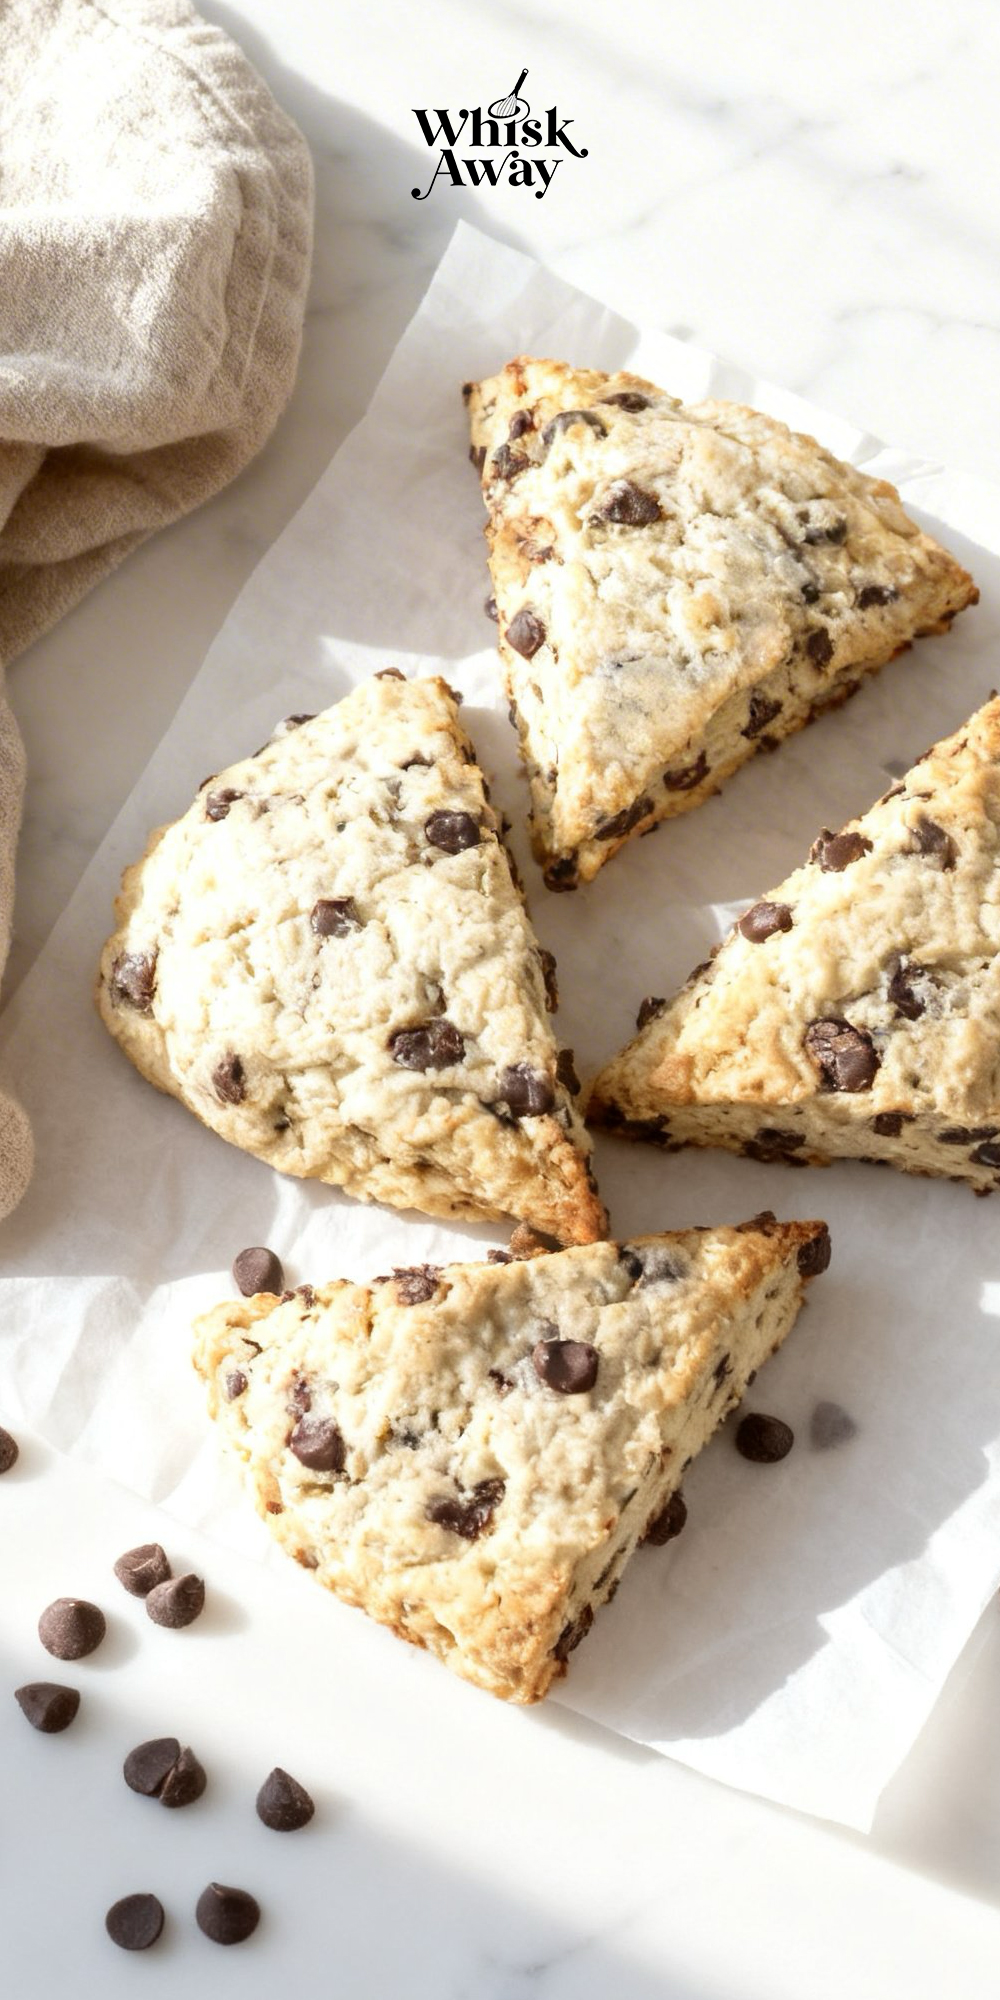
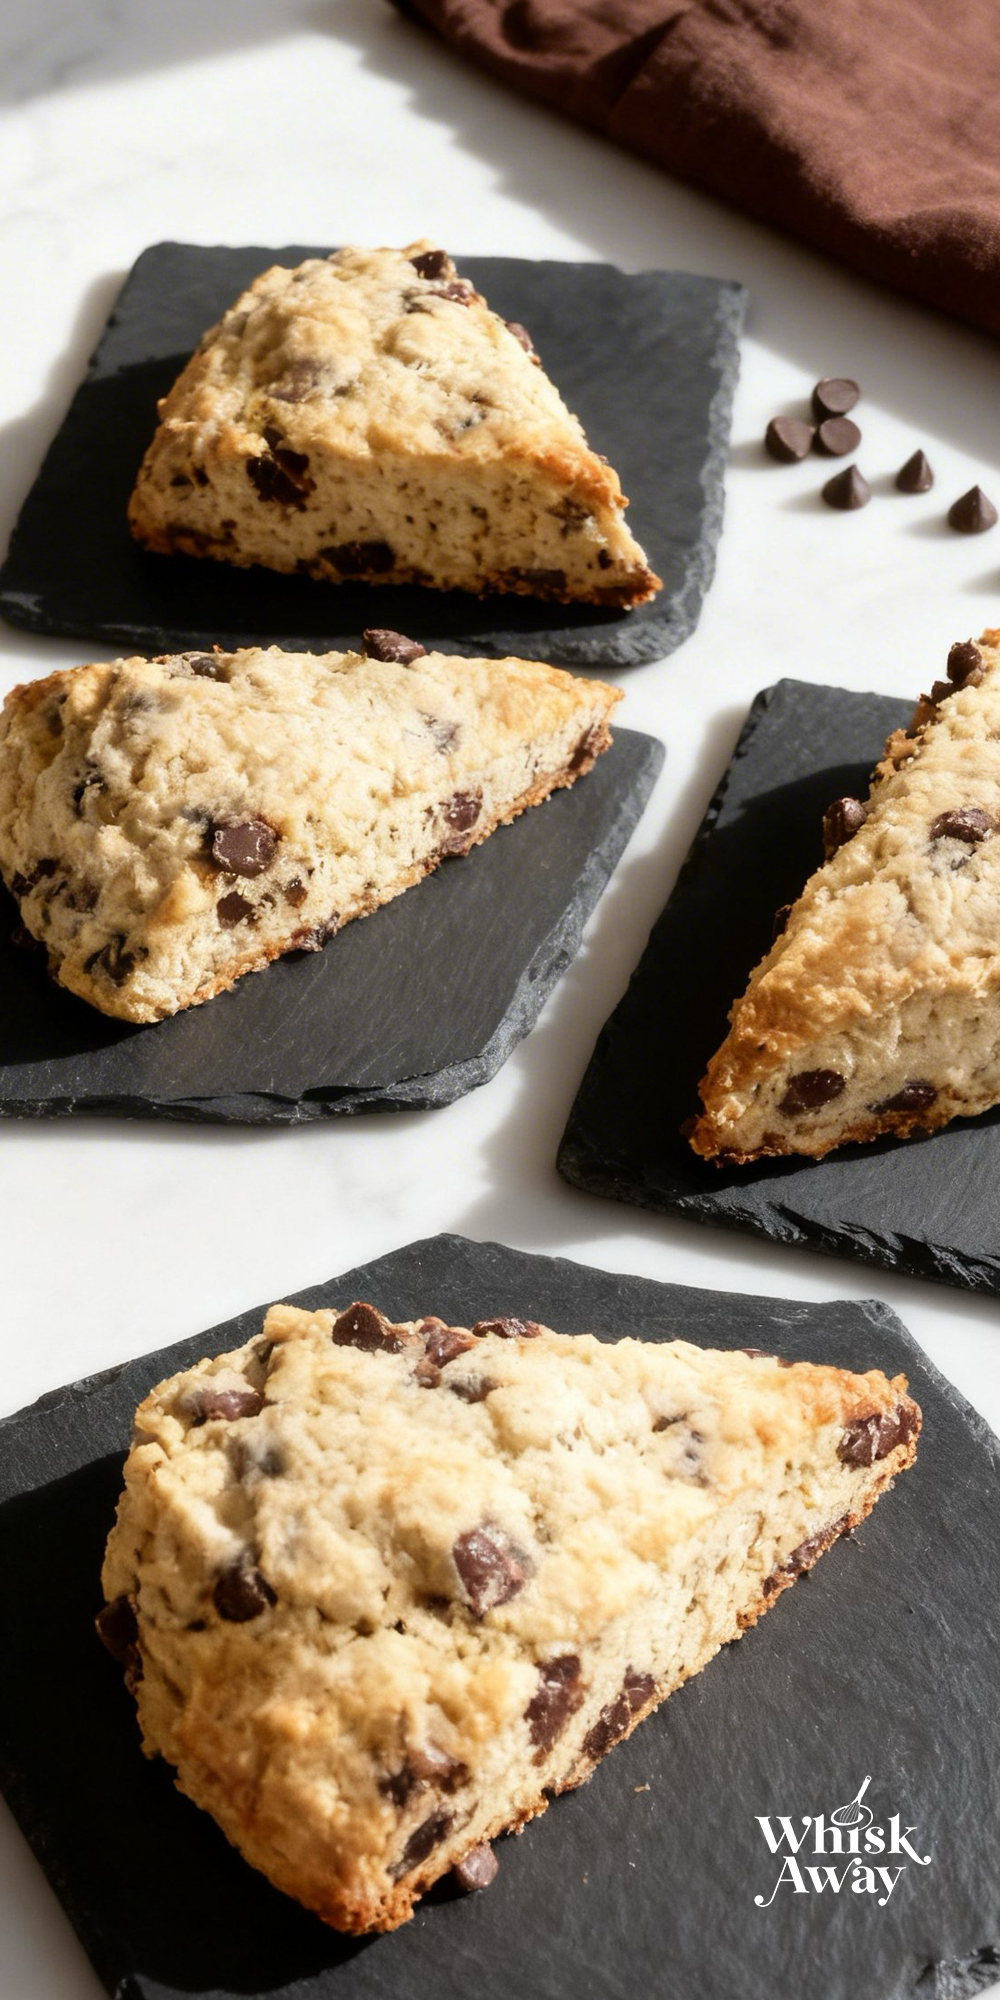
What if your scones doubled as the ultimate chocolatey pick-me-up? These Chocolate chip scones are buttery, tender, and studded with melty chocolate chips that make each bite irresistible.
Baking them at home is simple, yet the result tastes indulgent enough to wow anyone at brunch or tea.
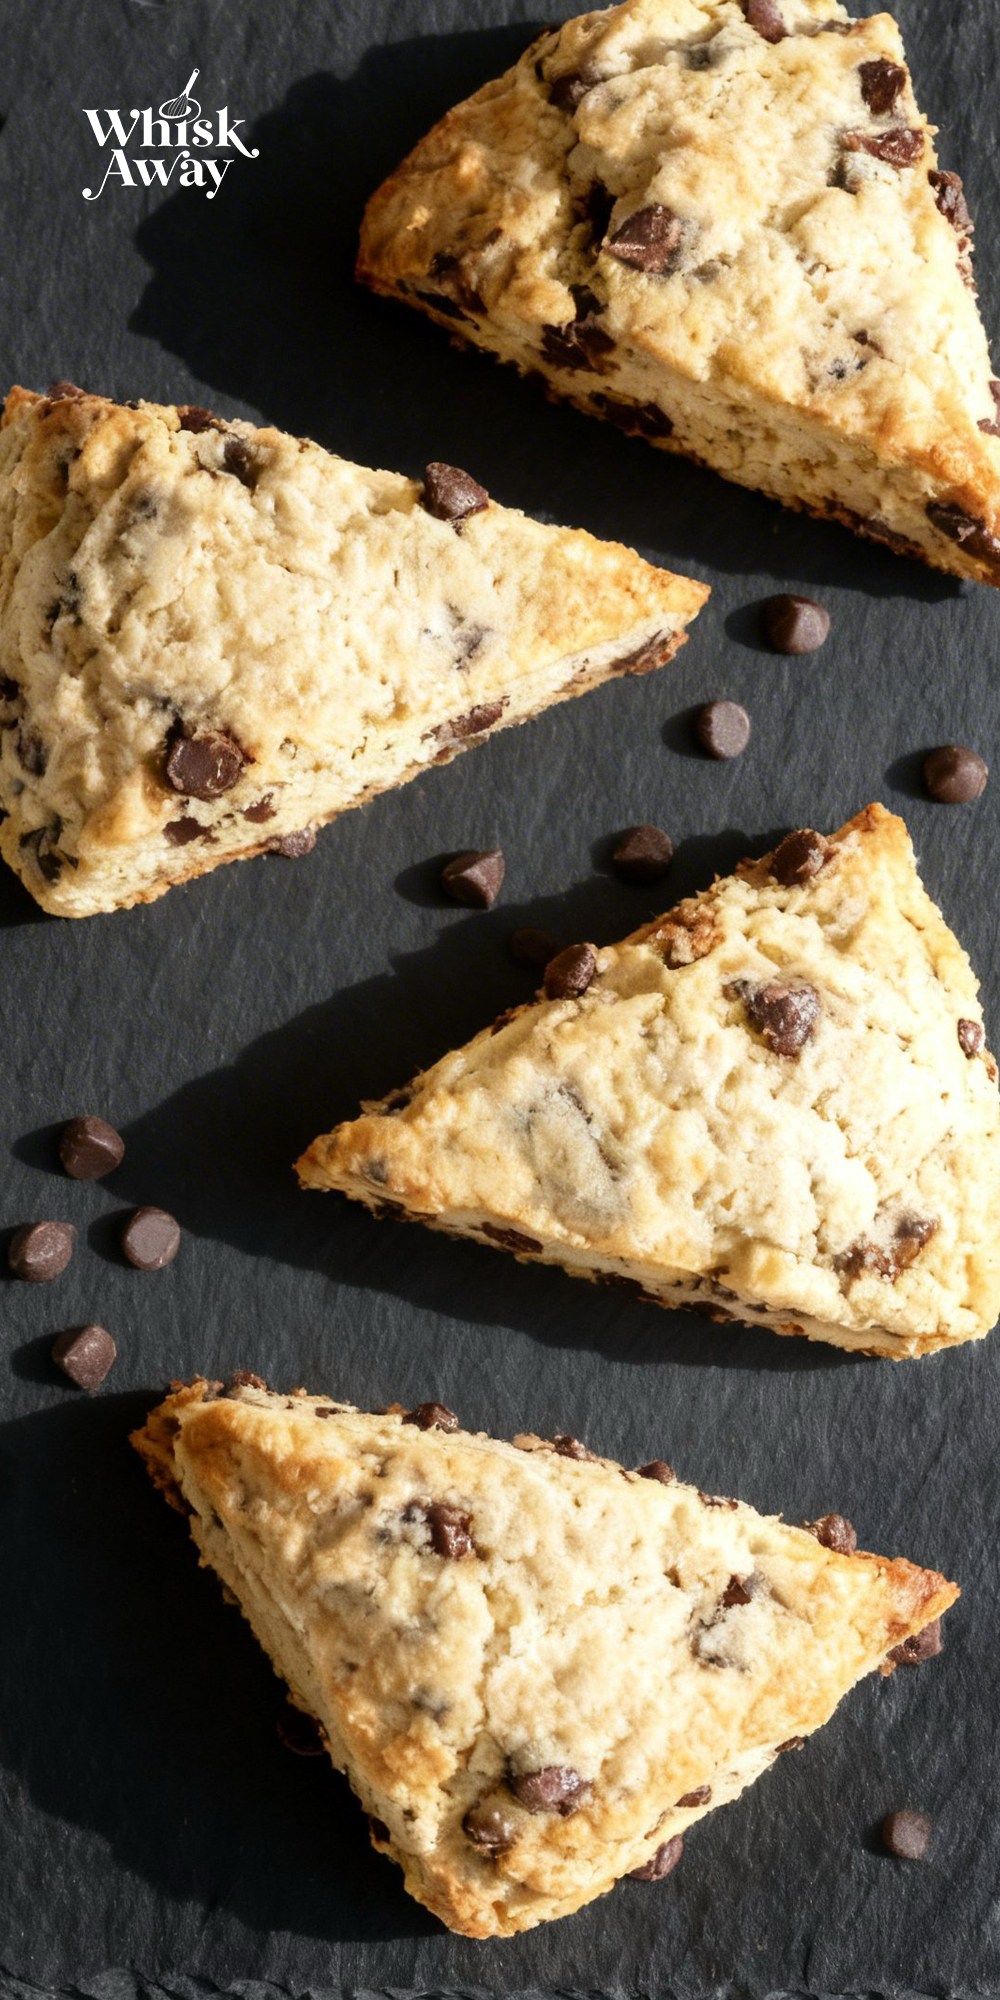
The slightly crisp exterior gives way to a soft, fluffy interior, and the chocolate chips add a playful sweetness that hits just right.
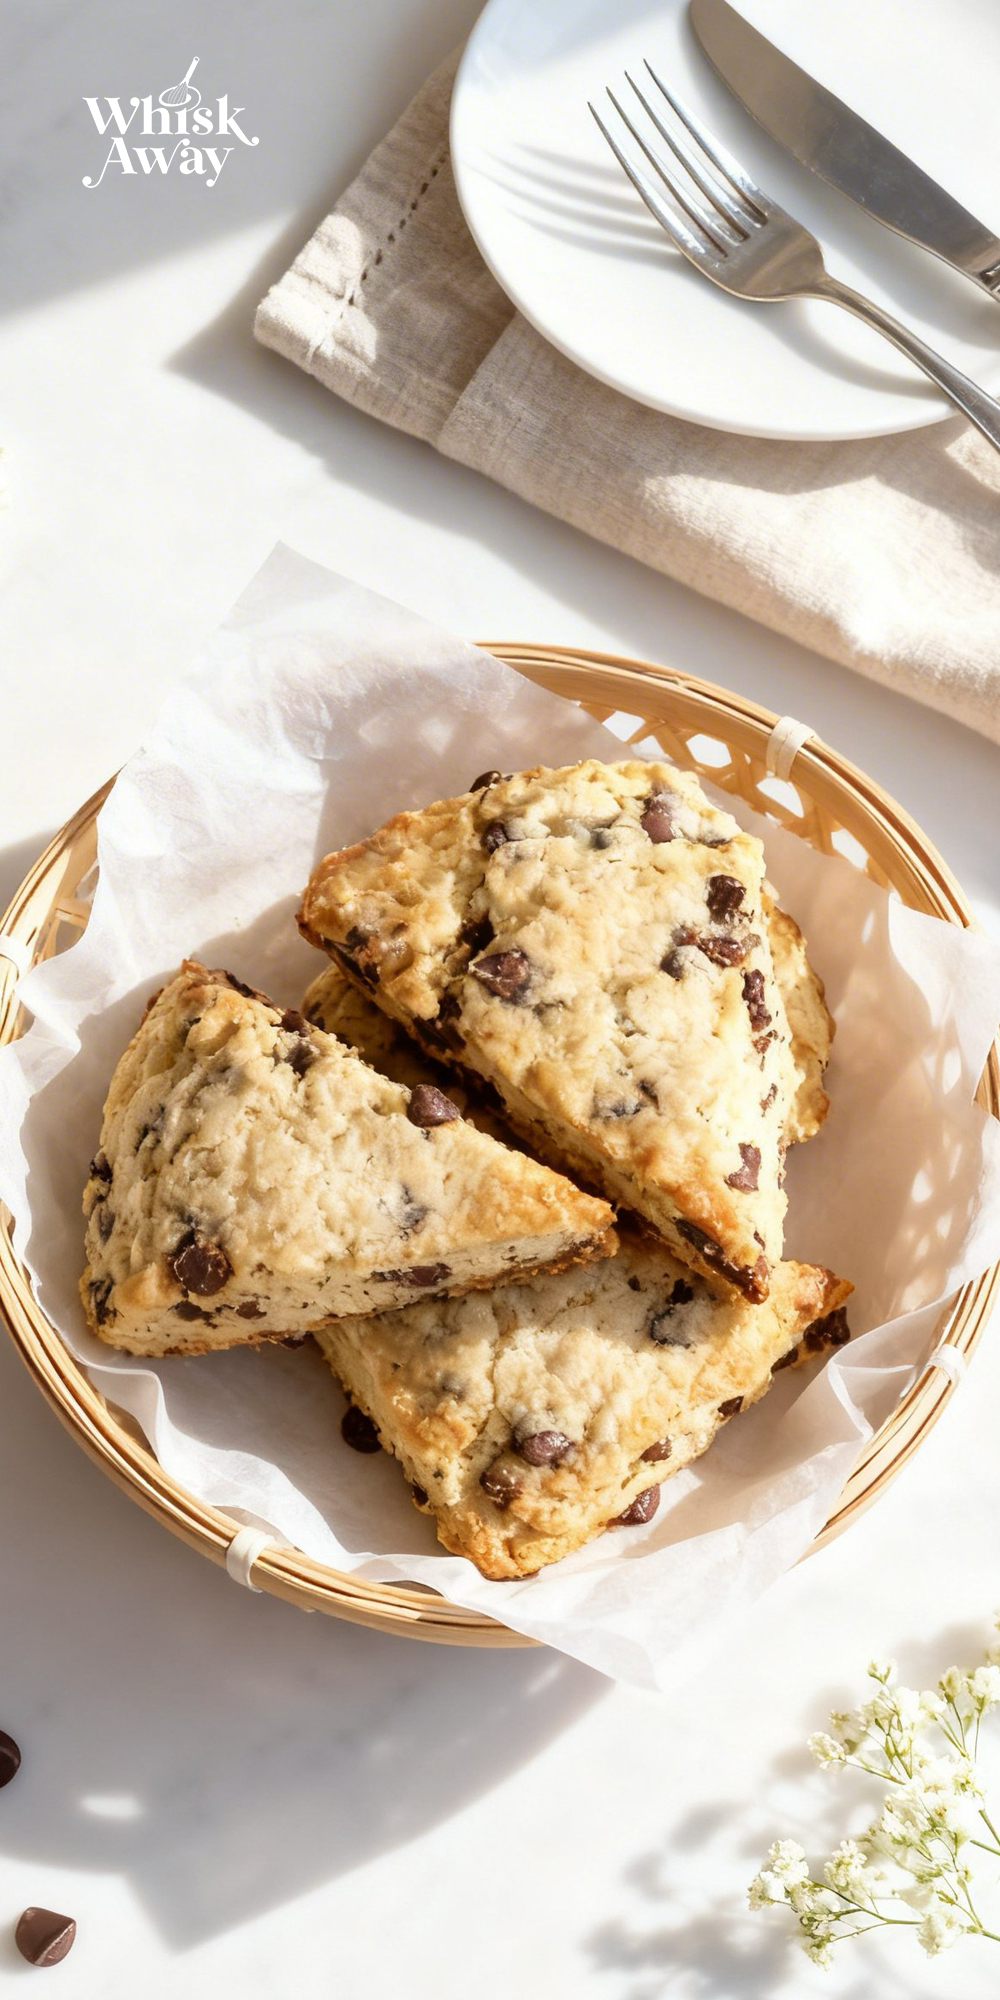
Enjoy your next chocolate-chip scones with coffee, tea, or on their own for a little slice of happiness in every bite.
Why You’ll Love This Recipe
These scones feel comfortably familiar; a classic dough studded with melting chocolate chips that make them irresistible, especially fresh from the oven.
What Makes Them Special
- Pockets of chocolate melt during baking for gooey bites.
- Sweet but not overly sugary, perfect with coffee.
- Great as breakfast or dessert scones, versatile usage.
- Kids and adults alike love the familiar chocolate flavor.
- Drizzle or dust with sugar for extra presentation appeal.
Save This Pin for Later to Your Pinterest Board

🔥 If you enjoy dessert-style bakes, vegan banana bread-style scones and maple pecan scones are great next recipes to try. For a simpler base, classic English plain scones work beautifully.
How to Get Your Chocolate Chip Scones Just Right
Chocolate-chip scones are a delicate balance of buttery pastry and rich, melty pockets of cocoa.
Because chocolate chips add weight and extra sugar to the dough, mastering the rise and the crumb is essential to avoid a heavy, leaden scone.
1. The Secret to the Chocolate Distribution
(a) Before adding the buttermilk, make sure your chocolate chips are well-tossed in the flour-butter mixture.
This flour coating prevents the chips from sinking to the bottom or clumping together, ensuring a perfect ratio of chocolate in every bite.
(b) Since this recipe is simple, the quality of your dark chocolate is the star. Look for chips with at least 60% cocoa content.
They hold their shape better in a 400°F oven and provide a sophisticated bitterness that balances the buttery dough.
2. Mastery of the Grated Butter Technique
(a) For the best results, put your box grater in the freezer for 10 minutes along with the butter.
This prevents the butter from melting against the metal as you grate, keeping those all-important steam-burst shards intact.
(b) When you finish cutting in the butter, the mixture should look like wet sand with some larger, pea-sized clumps.
Don’t aim for a smooth powder; those visible clumps are what create the flaky layers.
3. Common Mistakes to Avoid
The Buttermilk Over-Mix: This is the most common pitfall. The moment you add the buttermilk, the baking soda and powder begin to react.
If you stir too much, you’ll pop all those tiny air bubbles and end up with a scone that is flat and tough.
Mix until the dough is shaggy, not smooth.
The Warm Hand Effect: Your hands are warm! When kneading and shaping the disk, use the lightest touch possible.
If you handle the dough too much, your body heat will melt the butter into the flour before it hits the oven.
Crowding the Tray: Scones need airflow to rise and crisp on the sides.
Leave at least 2 inches of space between each wedge on the baking sheet.
4. Timing & Technique Advice
The Cold Shock (Pro Move): Once you’ve cut your wedges and placed them on the tray, pop the whole tray into the fridge or freezer for 10–15 minutes before baking.
This re-chills the butter, leading to a much more dramatic shatter of flakes once they hit the heat.
The Toothpick Test: Chocolate can be deceiving. When checking for doneness, aim your toothpick for the doughy part of the scone, not a chocolate chip.
If it comes out with wet batter, they need another 2 minutes.
The Milk Wash: Don’t skip the milk brush and sugar sprinkle!
This creates a professional, bakery-style crunch on the top that contrasts beautifully with the soft, melty interior.
Baking Tips for This Recipe
Use chilled chocolate chips: Warm chips can melt into the dough as you mix, leading to greasy spots rather than distinct bites.
Reserve a few chips to press into the tops: This creates visual appeal and ensures every scone has chocolate on top.
Sprinkle coarse sugar on top before baking: Adds crunch and a bit of caramelization without extra sweetness inside.
Don’t overmix once liquid is added: Overworking spreads the chips and toughens the crumb.
Bake on parchment for clean release and even browning: Prevents sticking and encourages a golden bottom.
Variation Tips
The Chocolate Chip Scone is a beloved classic, but its simple, buttery base is the perfect canvas for creative upgrades.
Whether you want to lean into sophisticated flavor pairings or need to adapt the recipe for dietary needs, these variations allow you to customize your bake without losing that signature flaky texture.
1. Zesty Dark Chocolate
The combination of dark chocolate and citrus is a timeless favorite.
- Add the zest of 2 large oranges to the sugar and rub it in with your fingertips before mixing it with the flour.
- Replace the milk wash with a brush of fresh orange juice and a sprinkle of sugar before baking.
The bright, floral citrus oils perfectly cut through the richness of the dark chocolate chips.
2. The Salted Caramel Twist
For those who love a sweet-and-salty flavor profile:
Replace half of the dark chocolate chips with salted caramel chips or chopped toffee bits.
Sprinkle a tiny pinch of flaky sea salt (like Maldon) over the milk wash right before the scones go into the oven.
A decadent, professional-looking scone with a sophisticated crunch.
3. The Double Chocolate Indulgence
If you’re a true chocolate-loving soul, you can try this:
Replace 3 tablespoons of the flour with 3 tablespoons of high-quality Dutch-processed cocoa powder.
The Tip: Add an extra tablespoon of sugar to balance the bitterness of the cocoa. This results in a deep, dark, and intensely chocolatey scone.
4. Texture & Ingredient Alternatives
The Mini-Chip Method: If you want chocolate in every single bite, use mini chocolate chips.
They distribute more evenly through the shaggy dough than standard-sized chips.
Nutty Texture: Fold in ½ cup of toasted chopped hazelnuts or walnuts. The crunch of the nuts provides a lovely contrast to the melty chocolate pockets.
Yogurt Substitution: If you don’t have buttermilk, use ¾ cup of plain Greek yogurt.
The extra thickness makes the dough even more tender and adds a slight tang that pairs brilliantly with dark chocolate.
5. Dietary Adaptations
Gluten-Free:
Use a 1:1 gluten-free flour blend (one that includes xanthan gum).
Since chocolate chips add a lot of structure, gluten-free versions of this scone stay together remarkably well.
Dairy-Free & Vegan:
Use chilled vegan butter sticks and replace the buttermilk with almond or soy milk mixed with 1 teaspoon of apple cider vinegar.
Ensure you use certified dairy-free dark chocolate chips.
Lower Sugar:
Omit the sugar from the dough entirely and rely on the sweetness of the chocolate chips. You can also use sugar-free chocolate chips (sweetened with stevia or erythritol) for a keto-friendly variation.
6. Creative Serving Idea
For a truly indulgent experience, serve these warm with a small bowl of raspberry jam.
The tartness of the berries against the dark chocolate is a world-class pairing that feels like a five-star dessert.
How to Properly Store Your Chocolate Chip Scones
Because chocolate chip Scones contain pockets of solidified chocolate, they require specific handling to ensure the pastry stays flaky while the chocolate remains appetizing.
Whether you’re prepping for a busy week or saving a few for a rainy afternoon, these methods will keep your bakes at peak quality.
1. Room Temperature (Best for Immediate Enjoyment)
Duration: Up to 2 days.
Once the scones have cooled entirely, place them in an airtight container or a zip-top bag.
If you’re storing them in a container, place a small piece of parchment paper between layers.
This prevents the chocolate chips on the surface of one scone from sticking to the bottom of another if the room gets warm.
2. Refrigeration (For Humid Climates)
Duration: Up to 5 days.
In warmer environments, the chocolate and butter can soften too much. The fridge keeps the structure stable.
Crucial Note: Cold air is a scone’s enemy; it dries the crumb out. Ensure they are wrapped tightly in plastic wrap before being placed in a container to lock in the moisture from the buttermilk.
3. Freezing (Long-Term Planning)
Duration: Up to 3 months.
These scones freeze exceptionally well.
To Freeze: Wrap each individual scone in plastic wrap and then place them all in a heavy-duty freezer bag.
To Thaw: Let them sit on the counter for about 1 hour. For the best texture, always follow the reheating instructions below after thawing.
4. How to Reheat for Melty Chocolate Perfection
A room-temperature chocolate-chip scone is good, but a warm one with melty chocolate is an experience.
The Oven (The Gold Standard): Heat your oven to 300°F (150°C). Place scones on a tray and warm for 5–8 minutes. This recrisps the exterior while gently melting the dark chocolate chips inside.
The Air Fryer: Use the Reheat setting or 320°F (160°C) for 2–3 minutes. This is the fastest way to get that “freshly baked” crunch back.
The Microwave: Use a 5–10 second burst. Any longer and the butter in the scone will make the pastry chewy and bready instead of flaky.
5. Storage Mistakes to Avoid
The Sweat Effect: Never put a warm scone into a plastic bag. The steam will cause the chocolate to smudge and the pastry to become soggy and limp.
Wait at least 45 minutes for them to reach room temperature.
Ignoring the Bloom: If you see a white coating on the chocolate chips after storing, don’t worry, this is fat bloom caused by temperature changes.
It doesn’t affect the taste and will disappear completely once the scone is reheated.
Fragrance Absorption: Scones act like sponges for smells. Keep them away from strong-smelling items in your pantry (like coffee beans or spices) or fridge (like cut onions) to keep the vanilla and chocolate flavors pure.
FAQs
Can I use milk chocolate chips instead of dark chocolate?
Yes, but with a slight adjustment. Dark chocolate chips have a higher cocoa butter content and lower sugar, which helps them hold their shape better in a high-heat oven. If you switch to milk chocolate, your scones will be significantly sweeter, and the chips may “pool” more as they melt. Consider reducing the added sugar in the dough by a tablespoon to balance the sweetness.
I don’t have buttermilk—what can I use instead?
You can create a quick “DIY Buttermilk” by adding 1 tablespoon of lemon juice or white vinegar to a scant cup of regular whole milk. Let it sit for 5–10 minutes until it looks slightly curdled. This acidity is crucial because it reacts with the baking soda to create the bubbles needed for a tall, light scone. Plain Greek yogurt or sour cream also works as a 1:1 substitute for a thicker, richer dough.
Why are my scones spreading out rather than rising up?
This is almost always due to the temperature of the butter. If the butter is too warm, it melts instantly in the oven before the dough has a chance to set its structure, causing it to puddle. To fix this, ensure your butter is ice-cold (or frozen) and try popping the shaped wedges into the freezer for 10 minutes immediately before they go into the oven.
How do I keep the chocolate chips from burning?
Since these bake at 400°F, any chocolate chips exposed on the very top can sometimes scorch. To prevent this, try to tuck most of the chips into the dough when shaping the disk. If you like the look of chips on top, press them into the dough after you’ve brushed them with milk; the moisture from the milk helps shield the chocolate from the direct heat for the first few minutes.
What is the best way to serve these for a group?
While they are excellent plain, these scones reach a new level when served warm with a side of lightly salted butter or clotted cream. For a more dessert-like experience, serve them with a bowl of fresh raspberries or a tart raspberry preserves. The acidity of the berries cuts through the richness of the dark chocolate beautifully

Chocolate Chip Scones
10
servings15
minutes20
minutesThese chocolate-chip scones are soft, crumbly, and loaded with chocolate.
Ingredients
2 cups all-purpose flour
1 cup dark chocolate chips
¾ cup buttermilk
½ cup unsalted butter, cold
¼ cup sugar
1 ¼ teaspoon baking powder
1 teaspoon vanilla extract
¼ teaspoon baking soda
¼ tsp salt
Directions
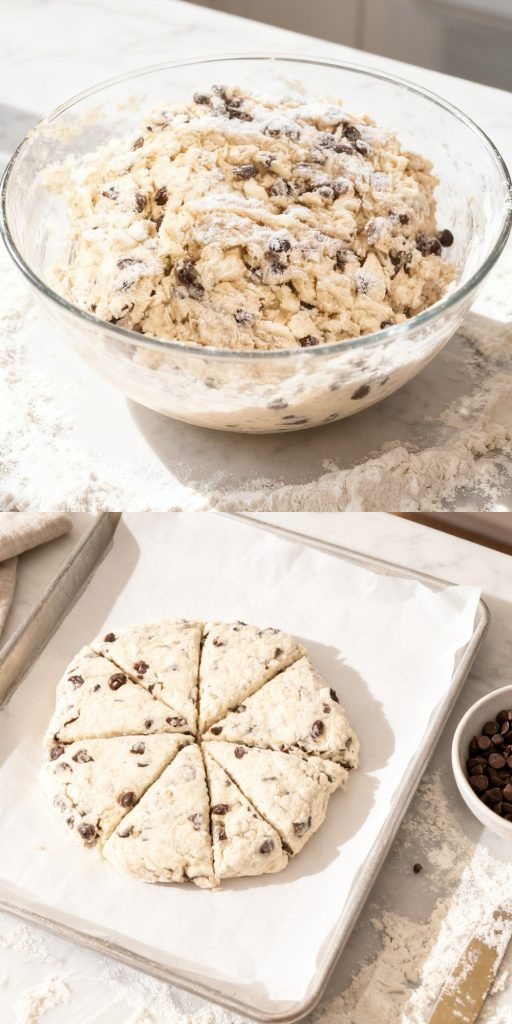
- In a spacious mixing bowl, whisk the flour, sugar, baking powder, baking soda, and salt. Ensuring these are well-combined is the first step to an even rise.
- Use a box grater to shred your cold butter directly into the flour mixture. (If you don't have a grater, simply dice the butter into very small cubes).
- Use a pastry blender or two knives to work the butter into the flour until it resembles coarse, pea-sized crumbs.
- Fold in the dark chocolate chips so they are evenly distributed throughout the dry mix.
- Stir the vanilla extract into the buttermilk.
- Pour the liquid into the dry ingredients and stir until the dough just comes together.
- Stop immediately once the flour is moistened. Over-working the dough at this stage leads to a tough, dense scone rather than a light, airy one.
- Transfer the dough to a lightly floured countertop and give it a very quick, gentle knead.
- Pat the dough into a circle roughly 1½ inches thick.
- Slice the round in half, then cut each half into 4 or 5 triangles (wedges), depending on your preferred size.
- Arrange the wedges on a baking sheet lined with parchment paper.
- Lightly brush the tops of each scone with a bit of milk and add a delicate sprinkle of sugar for a sweet, crunchy crust.
- Slide them into the oven for 20–22 minutes. They are done when the tops are a beautiful golden brown and a toothpick inserted into the center comes out clean.
- Move them to a wire rack to cool slightly before serving.