Could a dessert be both buttery and sweet with just the right hint of maple?
This maple butter tart captures that exact magic, with gooey, rich filling in a crisp tart shell.
Each bite melts in your mouth with buttery sweetness, making it a treat that feels both indulgent and comforting.
Baking a maple butter tart at home is approachable, and it’s a dessert that pairs beautifully with coffee or tea.
Perfect for a cozy afternoon treat or a special dessert for guests, it’s a tart that’s simple, elegant, and addictive.
Why You’ll Love This Recipe
This tart highlights concentrated maple flavor in a buttery filling.
What Makes Them Special
- Real maple syrup provides depth
- Slightly gooey center with crisp edges
- Rich butter flavor throughout
- Compact size makes it portion-friendly
- Distinct caramelized top
Save This Pin for Later to Your Pinterest Board
🔥 If you enjoy rich, buttery fillings with deep sweetness, you’ll also love:
How to Get Your Maple Butter Tart Just Right
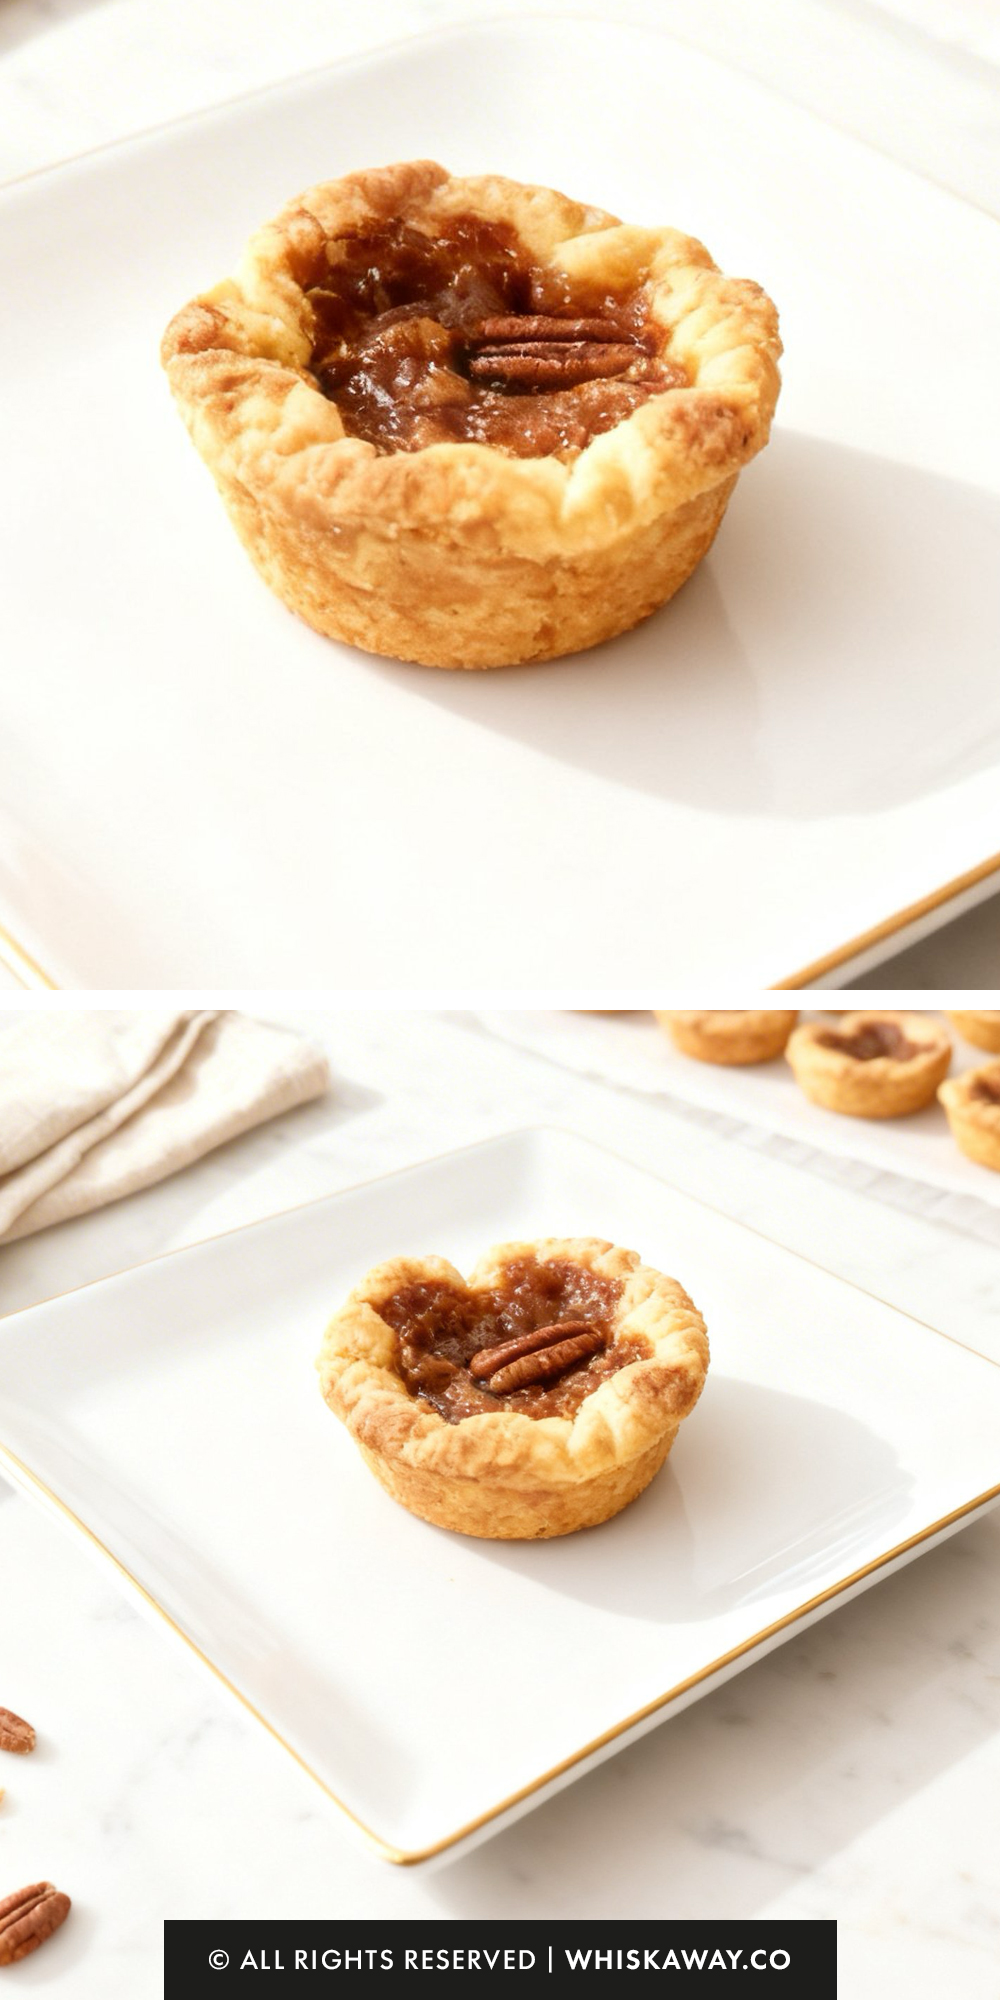
A perfect Maple Butter Tart is a study in texture: a shatteringly crisp, laminated pastry shell holding a center that is gooey and translucent, but not so runny that it escapes.
Achieving that iconic “ooze” factor requires a bit of precision.
1. The Secret to the Crust: Cold is King
Don’t Overwork the Letter Folds: The reason we fold and turn the dough (lamination) is to create physical layers of butter and flour.
If the dough gets too warm and the butter melts into the flour, you’ll lose the flakes.
Work quickly, and if the dough feels sticky or soft, put it back in the fridge for 15 minutes before continuing.
The Log Method: Shaping the dough into logs before slicing ensures that the “layers” you created during folding are oriented correctly.
When you flatten and roll out the discs, those layers stay horizontal, leading to a much flakier base.
Chill the Lined Tin: Once you’ve pressed the dough into the muffin cups, put the whole tin in the fridge or freezer for 10 minutes.
This shocks the pastry when it hits the hot oven, ensuring it holds its shape instead of slouching down the sides.
2. Mastering the Filling
When heating the butter and brown sugar, you aren’t making candy—you just want the sugar crystals to disappear.
If you boil it too long, your filling will turn into hard toffee after it bakes. 30 seconds of bubbling is the sweet spot.
It might seem strange to add apple cider vinegar to a dessert, but it is the Head of Planning for this flavor profile.
It cuts through the cloying sweetness of the maple syrup and prevents the filling from tasting one-dimensional.
Just like with the pastry cream we discussed earlier, add the warm sugar mixture to the cold eggs slowly while whisking.
This prevents the eggs from “shocking” and creating a grainy texture.
3. Common Mistakes to Avoid
Overfilling the Shells: The filling will bubble and expand significantly in the oven.
If you fill them to the brim, they will boil over, sticking to the top of the muffin tin and making them impossible to remove. Three-quarters full is the limit.
Ignoring the Oven Temperature Drop: Starting at 400°F sears the pastry to make it crisp; dropping to 375°F allows the custard center to cook gently without curdling.
If you stay at 400°F the whole time, the tops will burn before the centers are set.
Waiting Too Long to Unmold: This is the most common disaster. If the tarts cool completely in the tin, the escaped sugars will harden like concrete.
You must loosen them with a knife while they are hot and lift them out while they are still warm (around 10 minutes post-bake).
4. Timing & Serving Tips
The Jiggle Test: When you pull the tarts out, the center should still look a bit liquid and wobbly.
It will firm up into that perfect lava consistency as it cools on the rack.
The Foil Tray: Always bake the muffin tin on a foil-lined baking sheet.
Butter tarts are notorious for bubbling over, and cleaning burnt maple sugar off the bottom of your oven is a task nobody wants on their schedule.
Pro-Tip: If you prefer a firme” tart that doesn’t run at all, add one extra egg yolk to the filling.
If you want a runny tart (the traditional style), stick to the two whole eggs and pull them out of the oven 2 minutes early.
Baking Tips for This Recipe
- Use pure maple syrup, not pancake syrup.
- Don’t overfill — filling expands while baking.
- Remove from oven when center is slightly jiggly.
Variation Tips
The Maple Butter Tart is a legendary staple, but its rich, caramelized core is surprisingly versatile.
Whether you want to lean into the traditional runny style or introduce bold new flavors, these tweaks will help you make the recipe your own.
1. The Toasted Espresso Infusion
For a sophisticated, slightly bitter edge that cuts through the intense sweetness:
Whisk 1 tablespoon of instant espresso powder or very finely ground coffee into the warm butter and sugar mixture.
The coffee notes transform the filling into a mocha-caramel hybrid that pairs perfectly with the buttery crust.
2. The Salty Smoke (Bacon & Maple)
For those who love the ultimate savory-sweet combination:
Stir ¼ cup of finely crumbled, crispy bacon into the filling along with the pecans.
The salt and smoke from the bacon act as a foil to the sugar, making the tarts feel like a decadent breakfast-inspired treat.
3. The Citrus Zest Brightness
If you find butter tarts a bit too “heavy,” this is the best way to lighten the profile:
Whisk 1 tablespoon of fresh orange zest into the egg mixture.
The citrus oils provide a bright, fragrant top note that cuts through the buttery pastry and rich syrup.
4. Texture & Topping Alternatives
The Clean & Nut-Free: Simply omit the pecans and currants for a Plain Butter Tart.
This highlights the silky, gooey texture of the filling and makes it suitable for those with nut allergies.
The Chocolate Drizzle: Once the tarts are fully cooled, drizzle the tops with melted dark chocolate (70% cocoa).
The bitterness of the chocolate creates a sophisticated flavor profile when combined with the pecans and caramel.
The Extra-Gooey vs. Firm: For Runny Tarts: Use large eggs and pull them from the oven at the 16-minute mark.
For Firm Tarts: Add 1 tablespoon of all-purpose flour to the sugar/butter mixture before whisking in the eggs. This provides a more custard-like set.
Dietary Adaptations
Gluten-Free:
Replace the pastry flour with a high-quality 1:1 gluten-free flour blend. Since the filling is thickened by the eggs and sugar (not flour), it remains naturally gluten-free.
Dairy-Free:
Use a vegan butter block (specifically a stick, not a tub spread) for the pastry to ensure it stays flaky.
In the filling, swap the butter for refined coconut oil or a vegan butter alternative.
If you run out of maple syrup, liquid honey can be used as a 1:1 replacement. This creates a Honey Butter Tart”with a more floral, herbaceous sweetness.
Creative Serving Idea
Serve these tarts slightly warm with a small dollop of crème fraîche or unsweetened Greek yogurt.
The slight tang of the dairy provides a brilliant counterpoint to the deep, toasted sugar notes.
How to Properly Store Your Maple Butter Tart
The high sugar content in Maple Butter Tarts acts as a natural preservative, making them surprisingly sturdy.
However, because the goal is to maintain a flaky crust and a gooey center, the environment you choose for storage is key.
1. Room Temperature (Best for Texture)
Duration: Up to 5 days.
Once the tarts have reached room temperature, place them in an airtight container.
Storing them at room temp keeps the pastry at its flakiest and prevents the maple filling from becoming too firm or waxy.
2. Refrigeration (For Humid Environments)
Duration: Up to 1 week.
If you prefer a colder, firmer tart or if you live in a very warm climate, store them in the fridge in a sealed container.
Note: Before serving, let them sit on the counter for 15–20 minutes to allow the butter in the pastry and the sugars in the filling to soften for the best flavor.
3. Freezing (Long-Term)
Duration: Up to 1 month.
These tarts freeze beautifully.
To Freeze: Place them in a single layer in a freezer-safe container. If you need to stack them, place a piece of parchment paper between the layers to prevent the sticky tops from clinging to the bottom of the tarts above.
To Thaw: Thaw at room temperature for about an hour before enjoying.
4. How to Reheat for “Just Baked” Results
If you want to recapture that “ooze” from a tart that has been stored or frozen, a quick reheat is highly recommended.
The Oven: Place tarts on a baking sheet and heat in a 300°F (150°C) oven for 5–8 minutes. This will recrisp the base and melt the center.
The Microwave: Only use the microwave if you are in a rush. 10–15 seconds is plenty. Be careful: the sugar in the filling gets extremely hot very quickly and can burn.
5. Storage Mistakes to Avoid
The Sweaty Tart: Never put warm tarts into a container. The residual heat creates steam, which will turn your flaky, laminated pastry into a soggy, limp mess.
They must be completely cool to the touch.
The Air Trap: If your container has too much empty space, the tarts may dry out.
Use a container that fits them snugly or place a piece of plastic wrap directly over the top of the tarts before closing the lid.
Strong Odors: Pastry and butter are magnets for fridge smells.
If storing in the refrigerator, ensure the seal is tight so your tarts don’t end up tasting like last night’s dinner.
FAQs
Why did my filling bubble over and stick to the pan?
This is the most common butter tart challenge! It usually happens if the tarts were overfilled or if the oven was too hot at the start. Ensure you only fill the shells three-quarters full. To save the tarts if they do bubble over, run a thin knife around the edges while they are still hot to break the sugar seal before it hardens into “glue.”
Can I use pancake syrup instead of pure maple syrup?
It is strongly recommended to use 100% pure maple syrup. Pancake syrups are typically made of corn syrup and artificial flavorings; they lack the complex acidity and depth of real maple, which is necessary to balance the heavy butter and brown sugar in the filling.
My pastry is tough instead of flaky. What went wrong?
Tough pastry is usually a sign of overworking the dough or the butter getting too warm. When you do the “press and fold” steps, the butter should remain in visible, cold chunks. If the butter melts into the flour before it hits the oven, you’ll get a crumbly, shortbread-like texture instead of distinct, flaky layers.
Should the filling be runny or firm?
This is a matter of personal preference! Traditionalists love a runny tart where the center flows slightly when bitten. If you prefer this, pull them out when the centers still have a visible jiggle. If you prefer a “firm” tart (more like a custard), bake them for the full 20 minutes and consider adding an extra egg yolk to the mix.
Why did my crust shrink down the sides of the muffin tin?
Shrinkage happens when the gluten in the flour hasn’t had enough time to relax. To prevent this, never skip the chilling steps. Chilling the dough logs and then chilling the lined muffin tin again before filling ensures the dough “sets” in place and stays put during the bake.
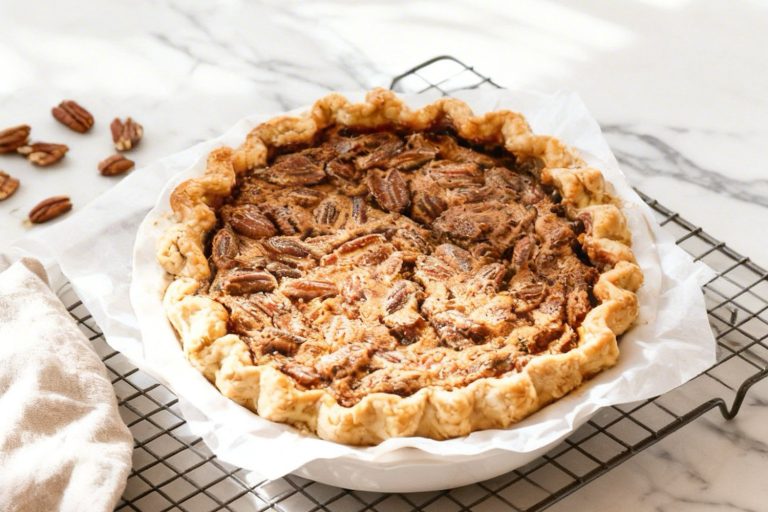
Maple Butter Tart
12
servings30
minutes30
minutes40
minutesThis maple butter tart is sweet, nutty, and perfect for dessert lovers.
Ingredients
- For the Filling
1 cup brown sugar (packed)
1/2 cup unsalted butter
1/2 cup pure maple syrup
1/3 cup pecans or walnuts
1/4 cup dried currants or raisins (optional)
2 large eggs
1 Tablespoon apple cider vinegar
1 teaspoon pure vanilla extract
1/4 teaspoon fine sea salt
- For the Pastry
2 1/4 cups all-purpose flour
1 cup unsalted butter (chilled)
1/3 cup cold water
2 Tablespoons granulated sugar
3/4 teaspoon fine sea salt
Directions
- Prepare the Flaky Pastry
- In a large mixing bowl, stir together the flour, sugar, and salt. Use a paring knife to slice the cold butter into small cubes directly into the flour mixture.
- Work the butter into the flour with your fingertips or a pastry blender until you have irregular, pea-sized bits. Pour in the cold water and let the bowl sit undisturbed for 2 minutes to allow the flour to hydrate.
- Bring the shaggy mass together with your hands, folding it over itself a few times to incorporate any dry flour at the bottom. Move the dough to a floured surface. Use the heel of your hand to press it into a rough rectangle. Fold it in half, rotate it 90 degrees, and press it out again. Repeat this "press, fold, and turn" process 4 to 5 times to create internal layers.
- Split the dough in half and shape each portion into a 6-inch log. Wrap tightly in plastic and refrigerate for at least 30 minutes (or overnight).
- Whisk the Maple Filling
- Combine the brown sugar and butter in a small saucepan over medium-low heat. Stir often until the edges start to bubble. Keep stirring for about 30 seconds until the sugar has fully dissolved into the butter, then remove from heat. Let it cool for 5 minutes.
- In a separate bowl, whisk the eggs, maple syrup, vinegar, vanilla, and salt. While whisking constantly, slowly drizzle the warm butter-sugar mixture into the eggs until the filling is smooth and unified.
- Shape and Assemble
- Preheat your oven to 400°F (200°C). Line a baking sheet with foil and set a 12-cup muffin tin nearby.
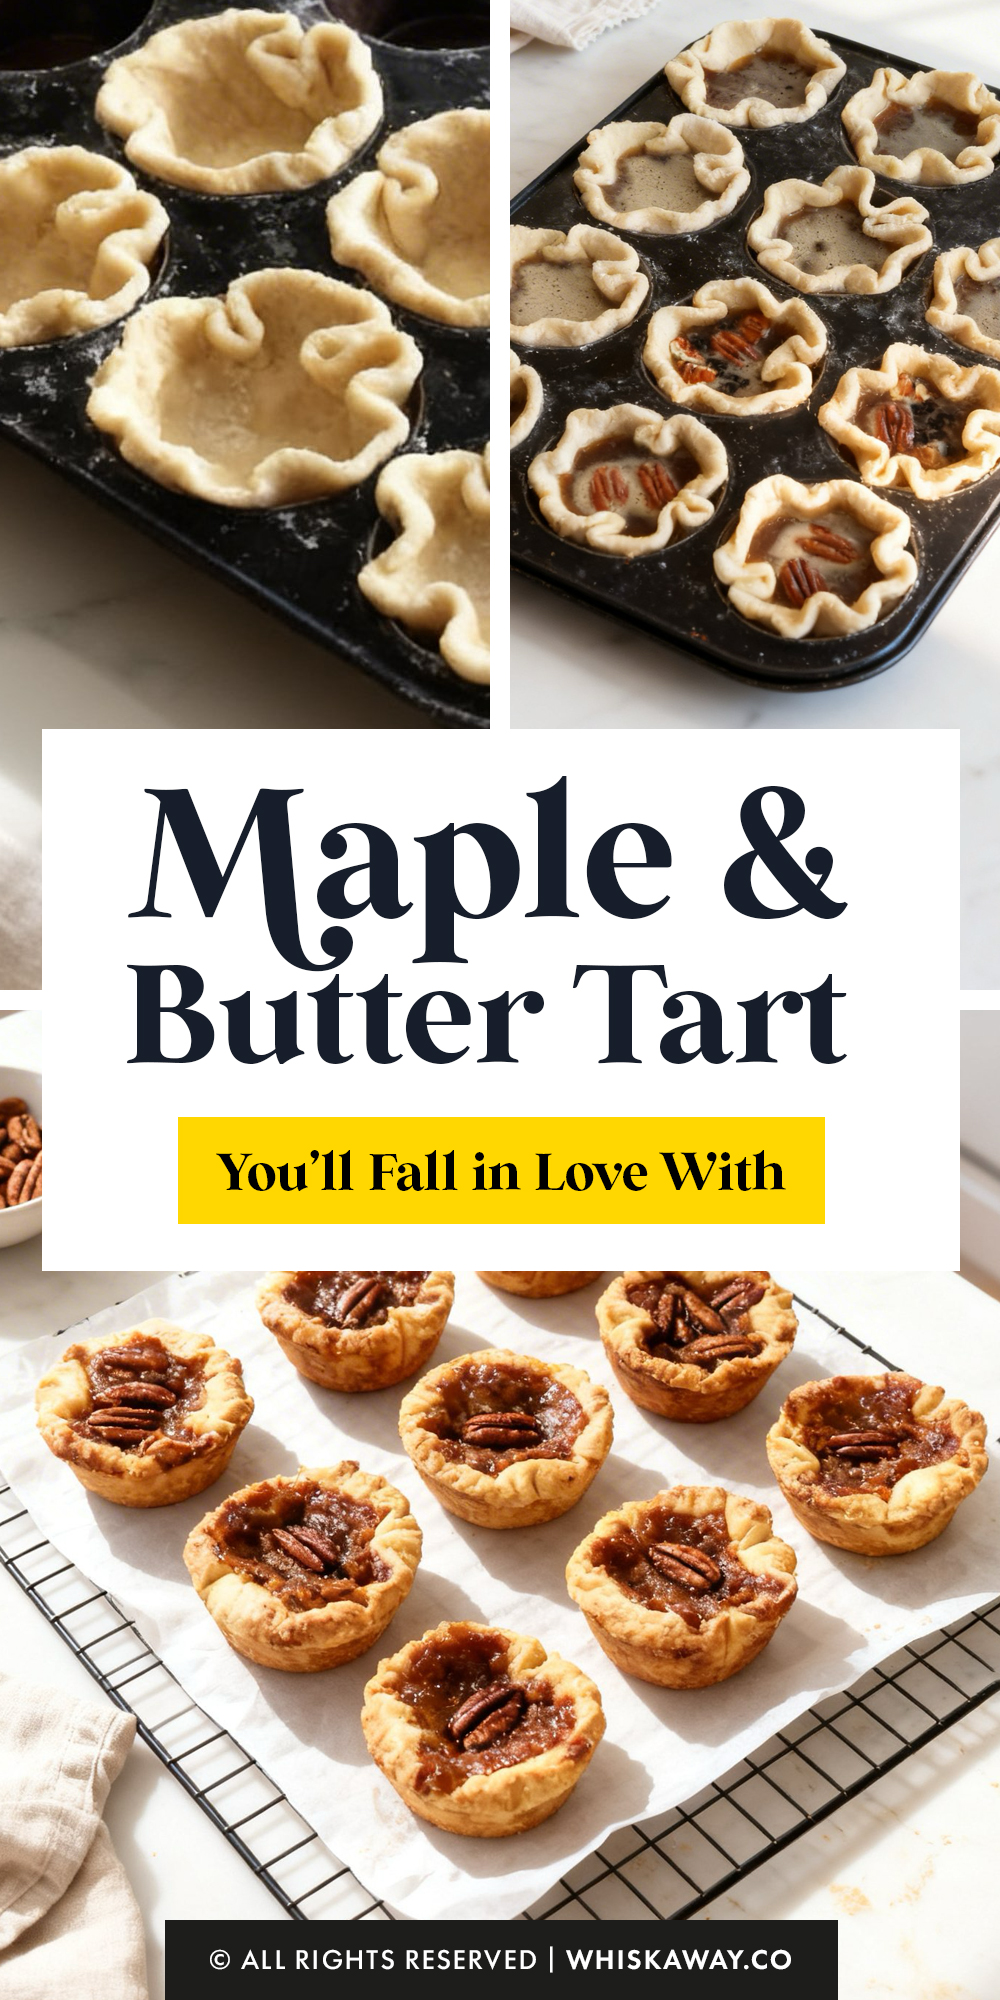
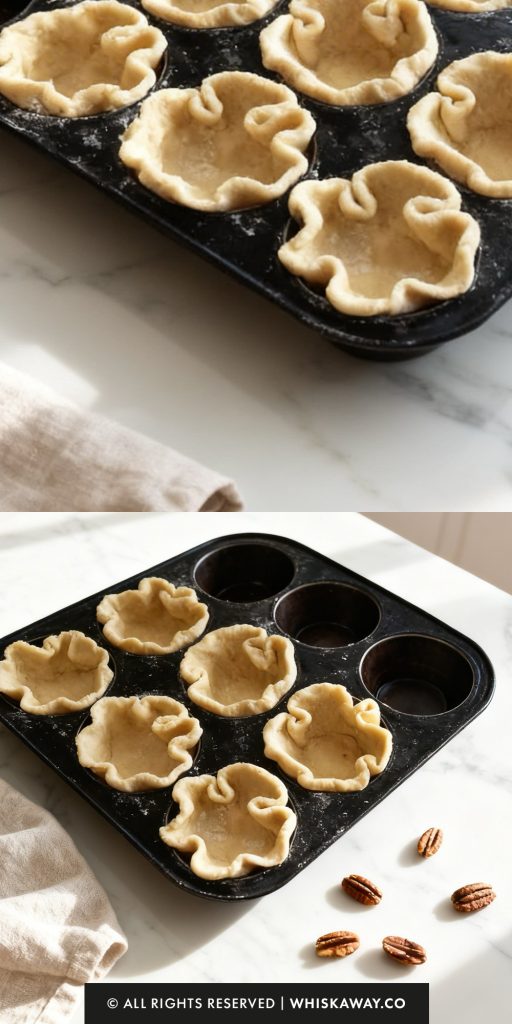
- Take one dough log from the fridge. Slice it into 6 equal discs. Flatten each disc with your palm, then roll it out on a floured surface until it is about 4 to 5 inches wide. Gently press each circle into the bottom and up the sides of the muffin cups. Repeat with the second log, then chill the lined tin for 10–20 minutes.
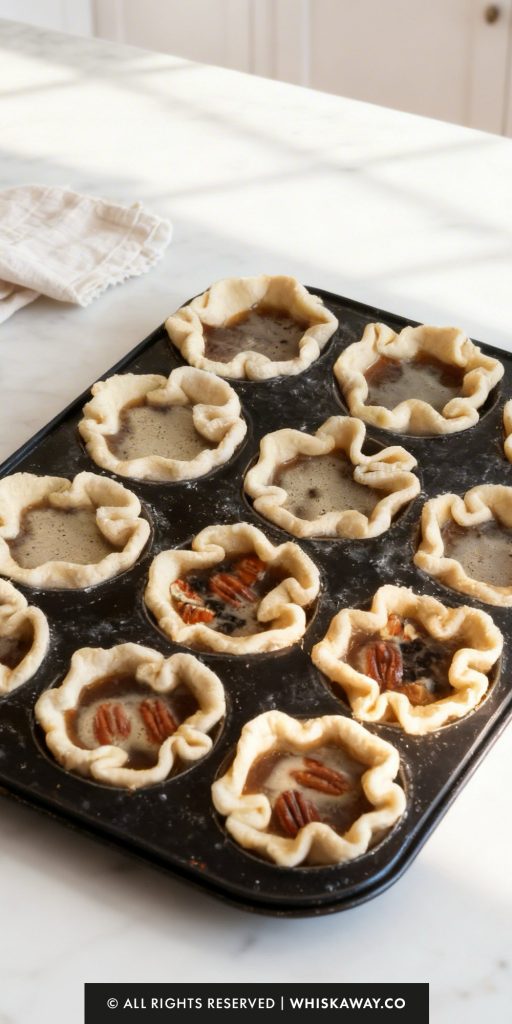
- Divide your maple mixture among the 12 shells, filling them about three-quarters of the way. If you’re using nuts or currants, drop them into the centers now.
- Place the muffin tin on the foil-lined baking sheet. Bake at 400°F for 10 minutes, then lower the temperature to 375°F (190°C) and continue for another 16–20 minutes. You are looking for a deep golden-brown crust and a bubbling center.
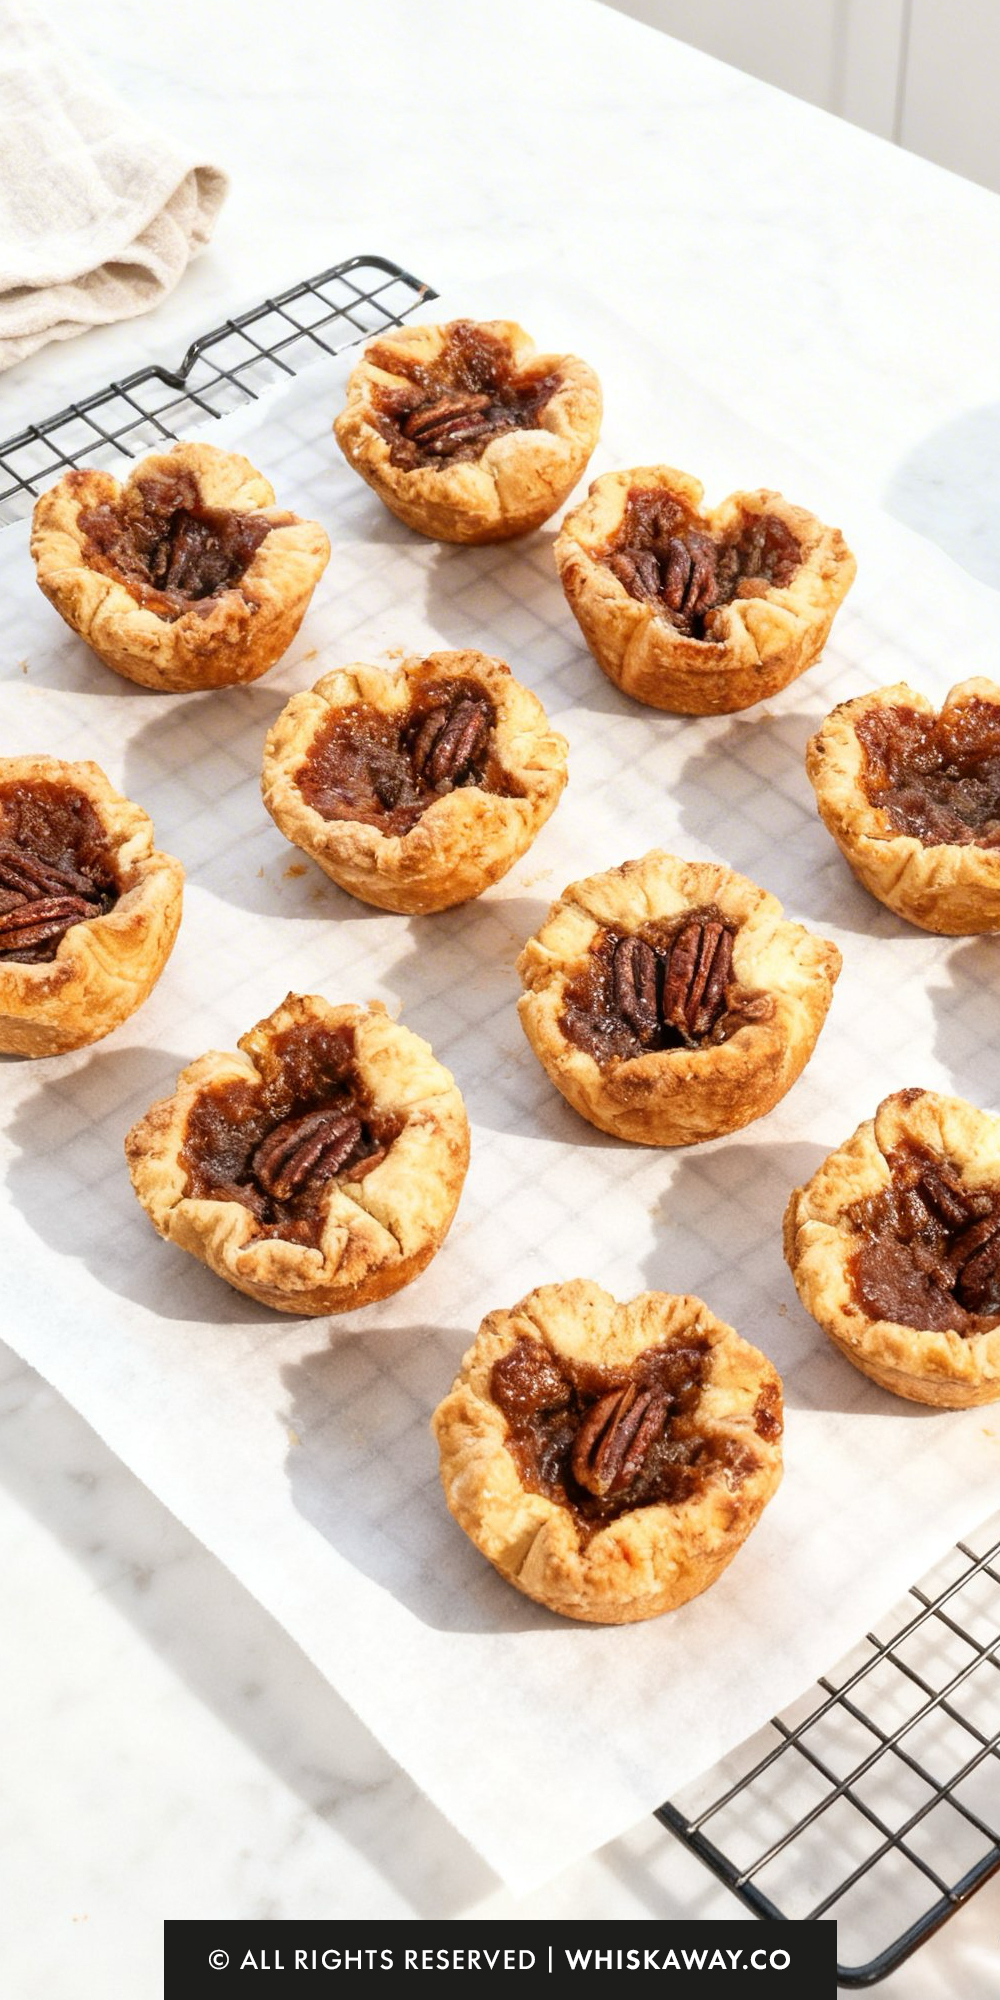
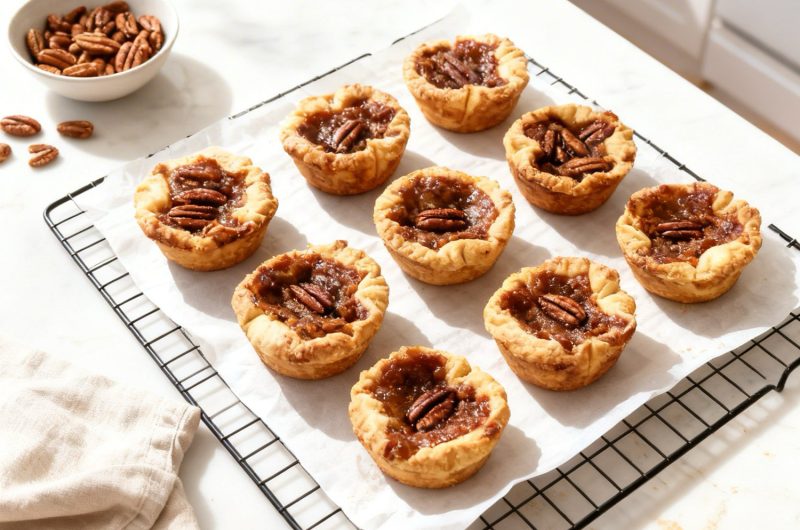
- As soon as they come out of the oven, run a thin knife around the edges of each tart to prevent sticking. Let them rest in the tin for 10 minutes.
- Carefully lift the tarts out and place them on a wire rack to finish cooling. Note: If you wait until they are cold to unmold them, the caramelized sugar may act like glue, making them difficult to remove.
There are no reviews yet. Share your thoughts above!