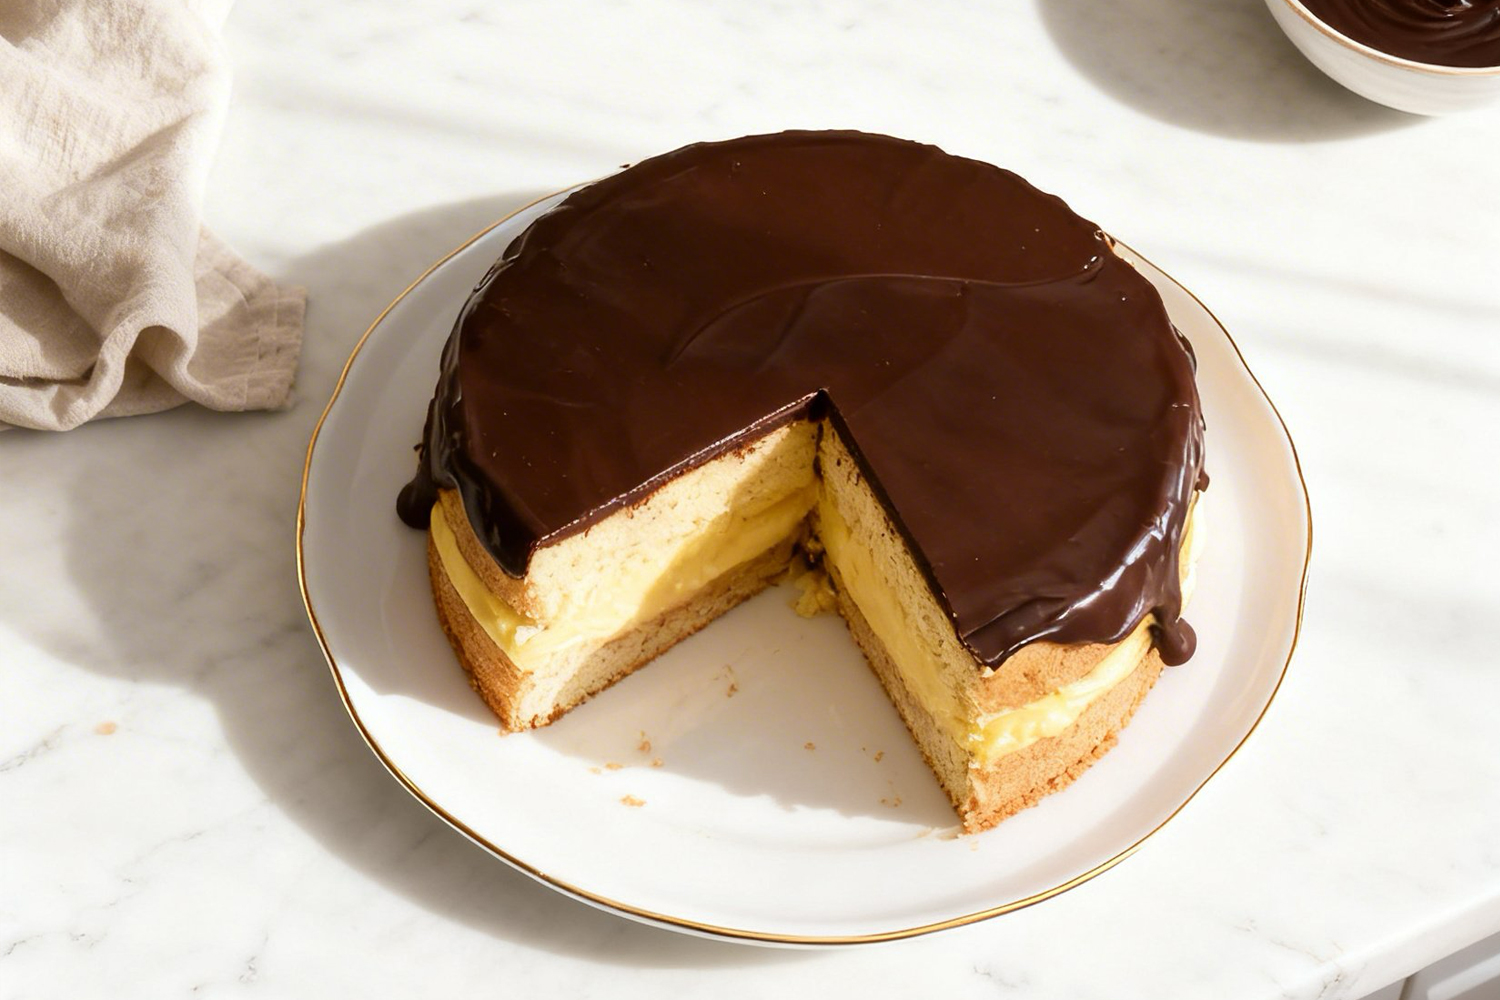
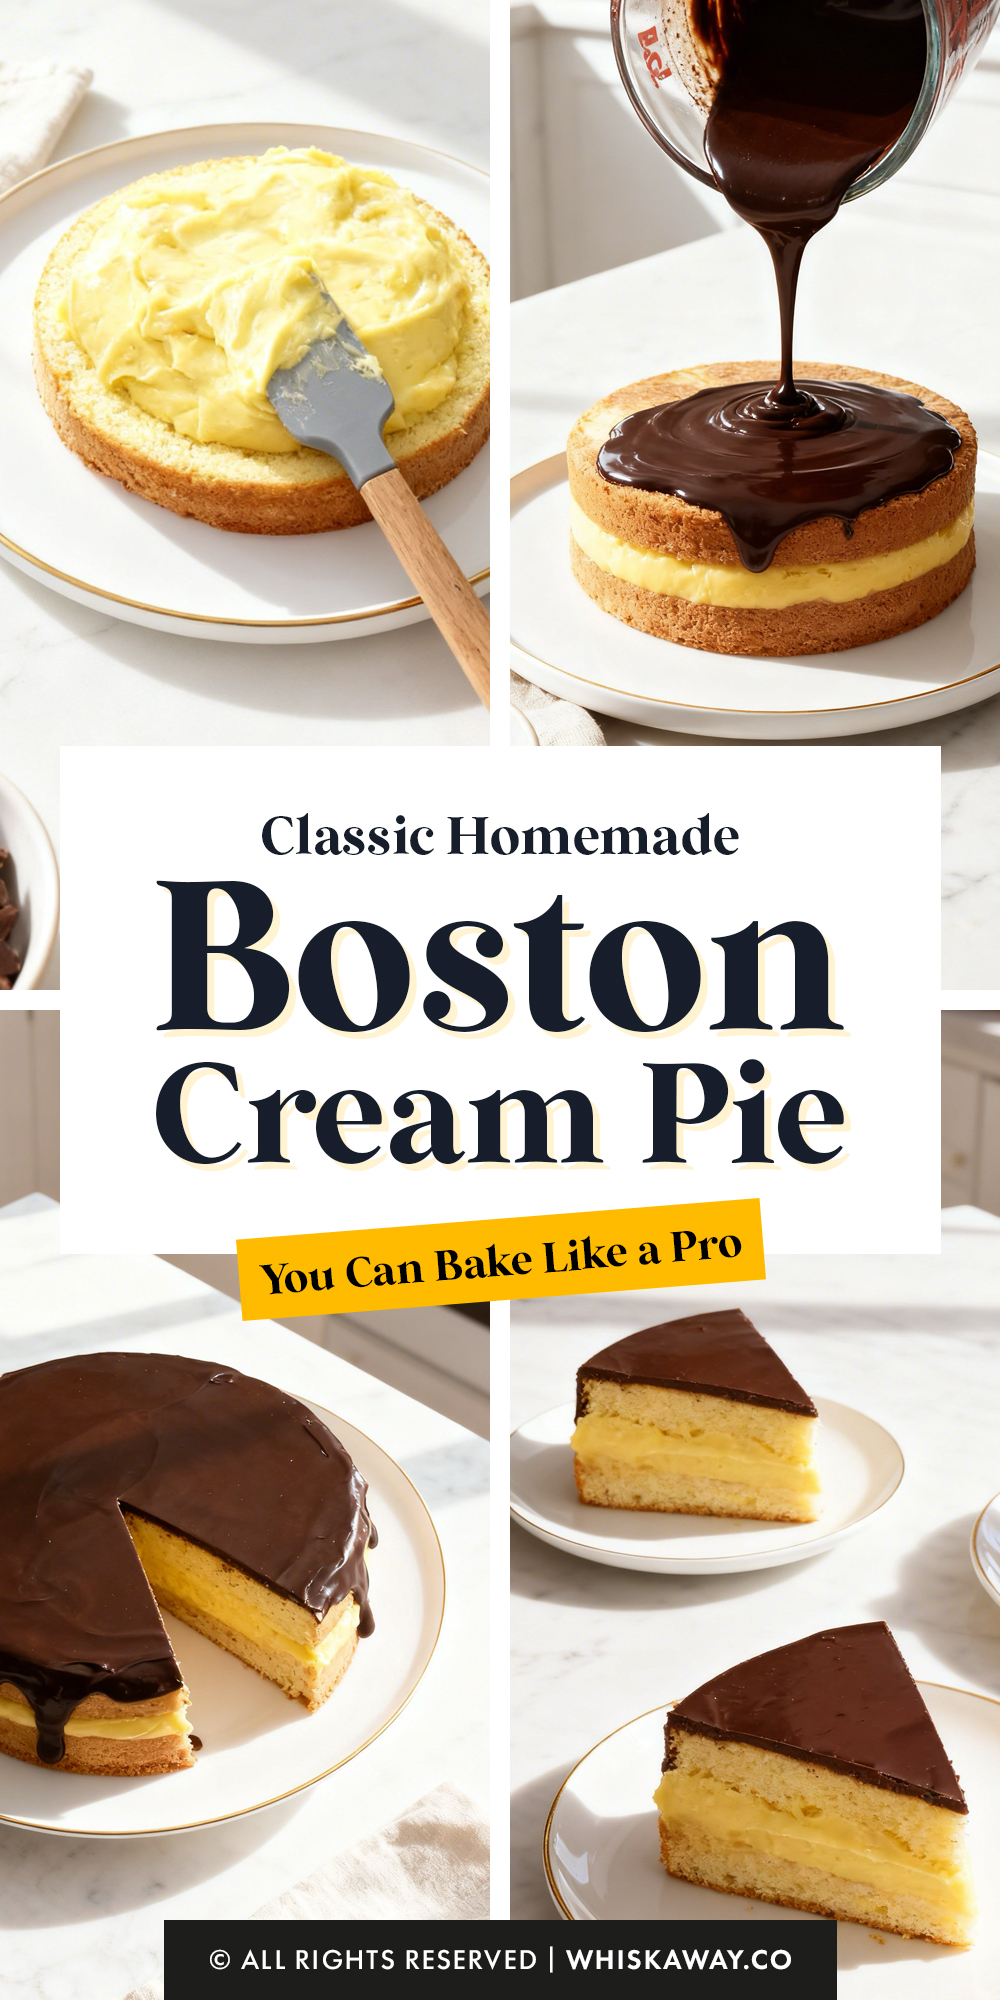
Ever imagined a dessert that tastes like a celebration in every bite? Then this Boston cream pie is for you.
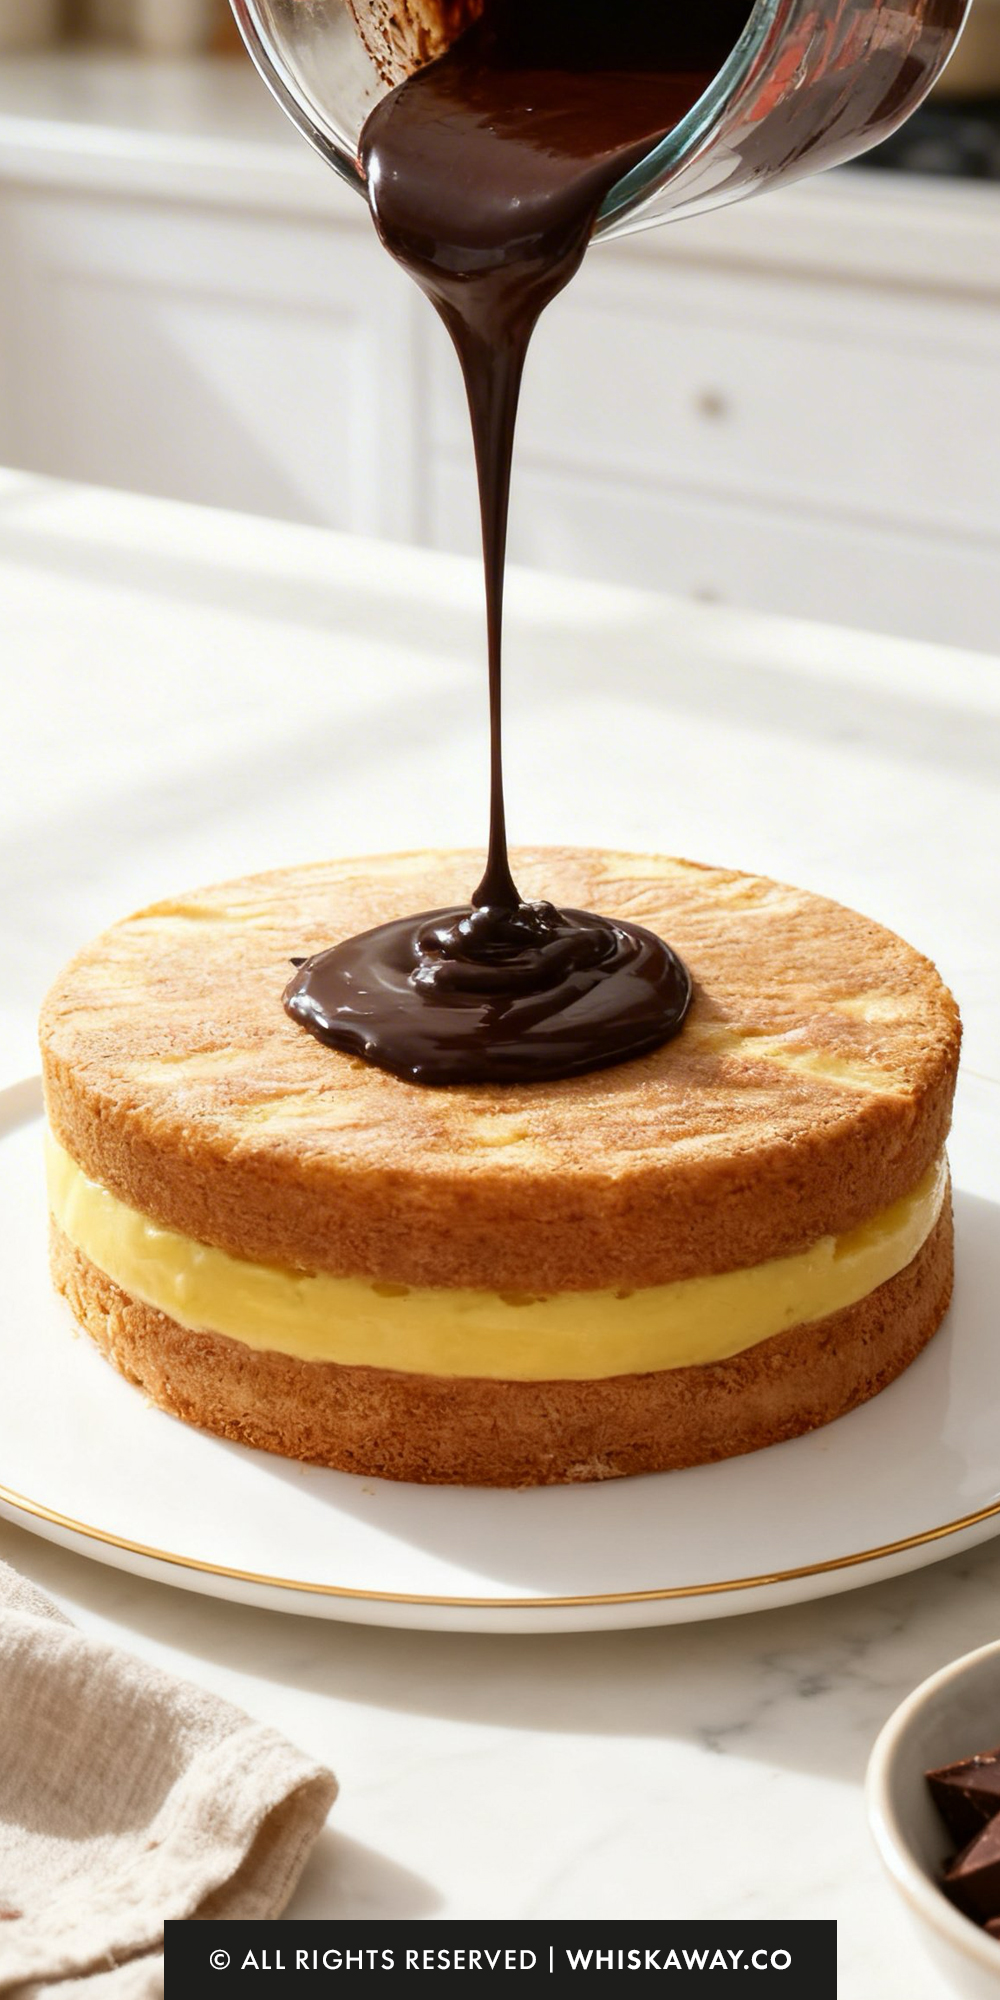
It brings together soft, pillowy cake, smooth pastry cream, and a glossy chocolate topping.
Perfect for birthdays, special dinners, or simply a sweet treat to enjoy with coffee, it’s a dessert that feels both classic and indulgent.
Why You’ll Love This Recipe
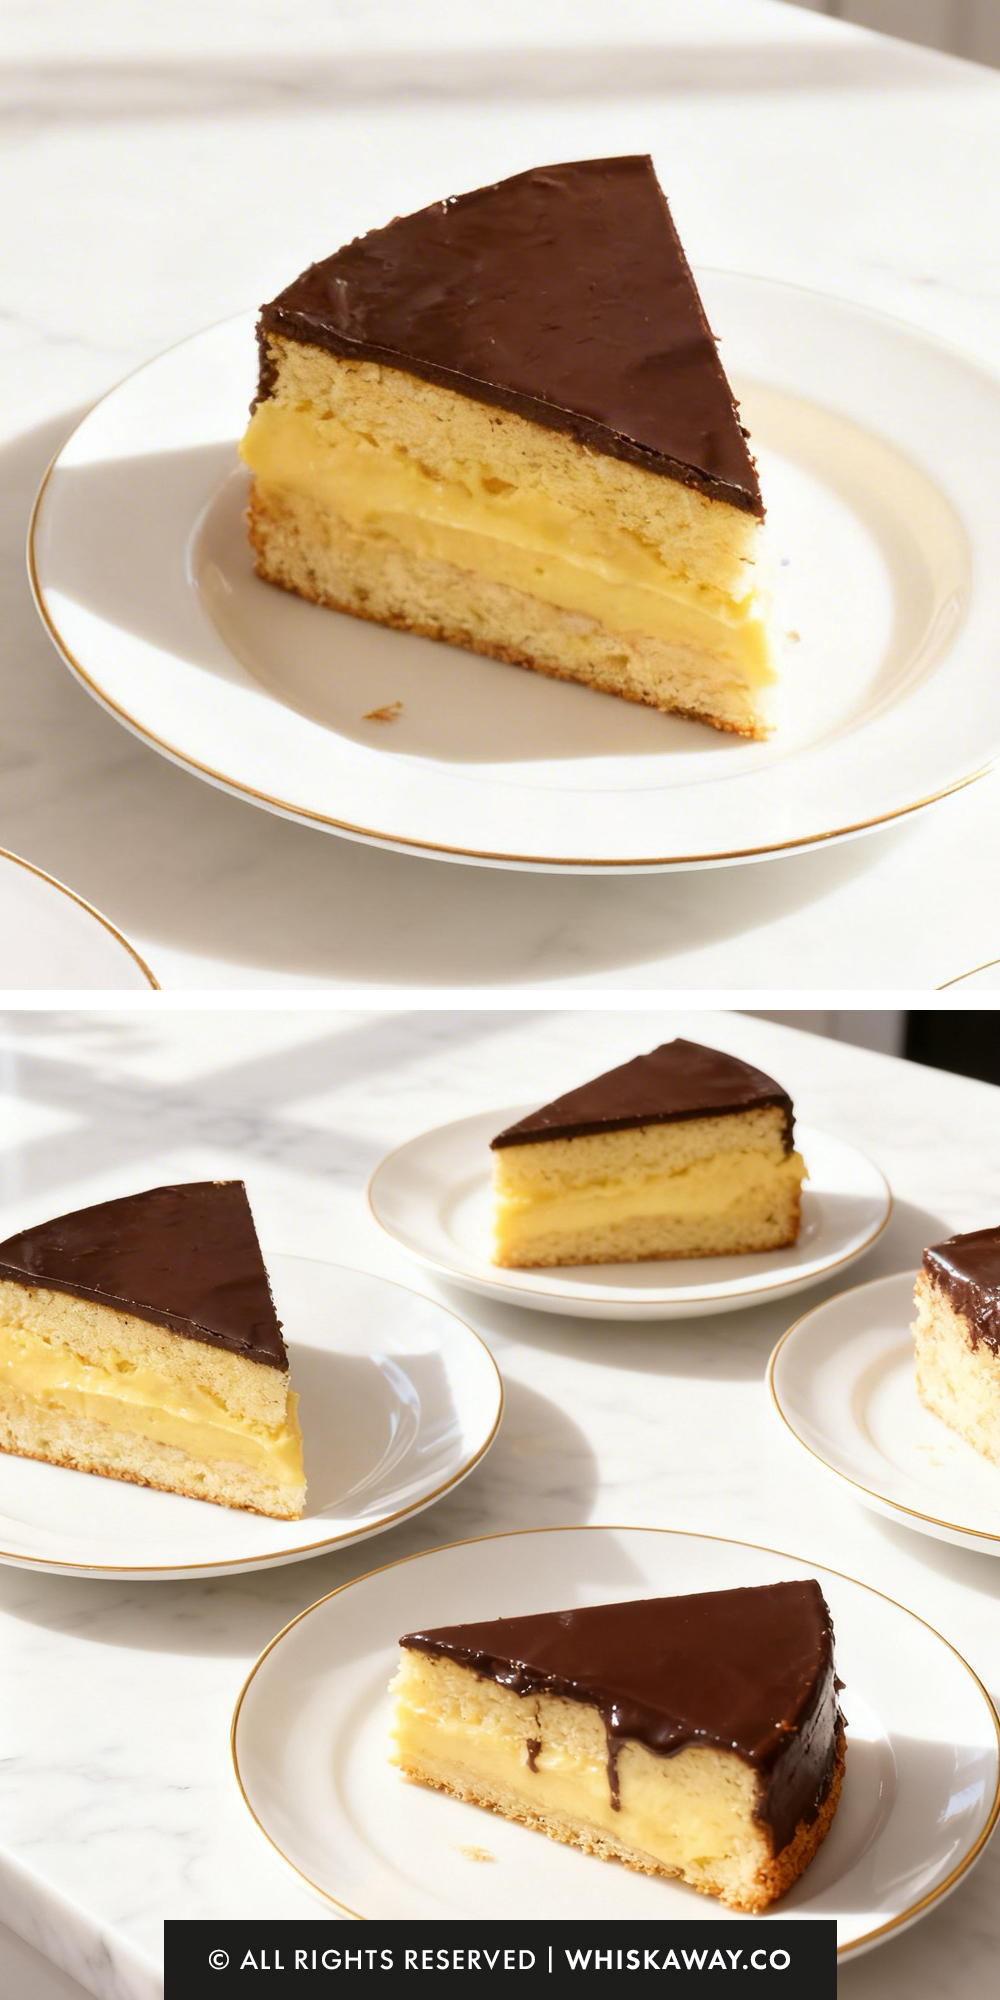
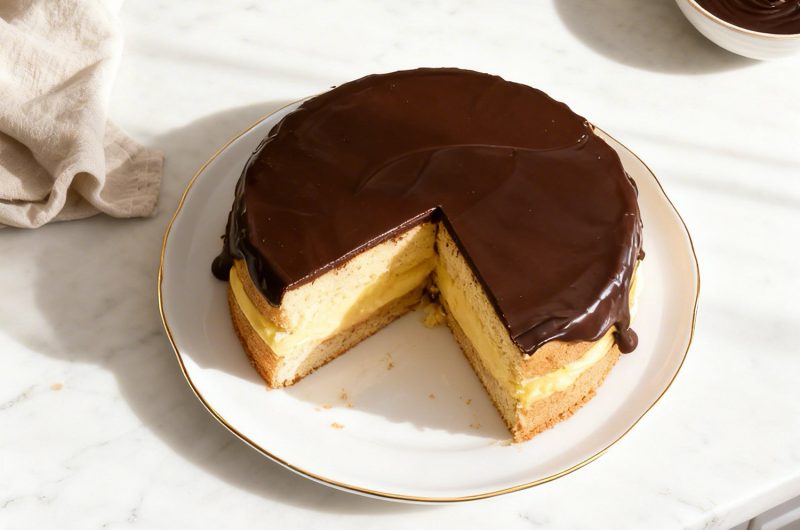
Technically a cake, but structurally layered like a pie, this dessert is about contrast.
What Makes Them Special
- Tender sponge layers absorb custard moisture
- Thick pastry cream center
- Glossy chocolate ganache topping
- Balanced sweetness across layers
- Slices with defined structure
Save This Pin for Later to Your Pinterest Board
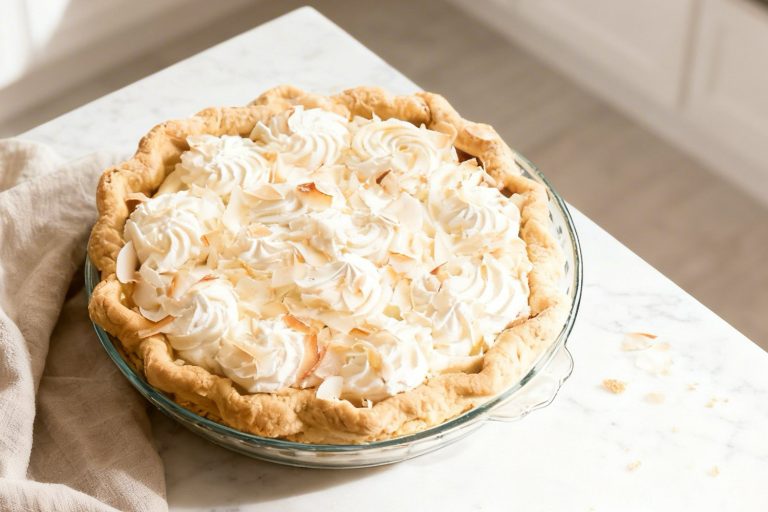
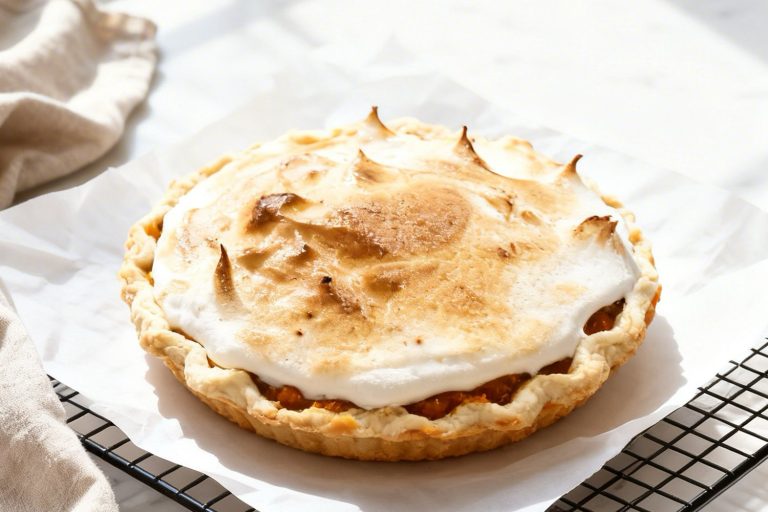
🔥 For custard-filled desserts layered with chocolate, these are perfect next reads:
How to Get Your Boston Cream Pie Just Right
A successful Boston Cream Pie relies on the contrast between a light, airy sponge and a dense, silky custard.
Because this pie is actually a cake, maintaining structural integrity while ensuring the layers remain moist is the ultimate goal.

1. Master the Sponge & Custard
When beating the eggs and sugar for the cake, do not rush.
You must reach the ribbon stage, where the mixture is pale, tripled in volume, and thick enough to hold a shape for a few seconds.
This aeration is what gives the cake its lift since there is very little chemical leavener.
Temper with Care: When making the pastry cream, add the hot milk to the egg yolks a tiny splash at a time.
If you pour it in too fast, you’ll end up with sweet scrambled eggs. Using a whisk constantly during the thickening phase on the stove is the only way to ensure a lump-free, professional custard.
The Boil Rule: Many people pull pastry cream off the heat as soon as it thickens. However, you must let it reach a slow boil and keep whisking for at least one minute.
This “ooks out the starchy taste of the cornstarch and ensures the cream sets firmly enough to support the top layer of cake.
2. Assembly & Texture Tricks
When spreading the pastry cream, resist the urge to go all the way to the edge.
The weight of the top cake layer will naturally push the cream outward.
If you start at the edge, the cream will ooze out the sides, creating a mess when you try to apply the ganache.
Never pour warm ganache over a room-temperature cake. The cake must be thoroughly chilled (at least 2 hours).
This sets the pastry cream so it stays put and allows the ganache to cool and thicken quickly upon contact, creating those beautiful, controlled drips.
3. Common Mistakes to Avoid
Over-Mixing the Flour: Once you add the flour to your fluffy egg mixture, use a low speed or fold by hand.
Over-mixing will deflate the air you worked so hard to incorporate, resulting in a rubbery, dense cake rather than a light sponge.
Ignoring the Skin: If you don’t press the plastic wrap directly onto the surface of the hot pastry cream, a thick, rubbery skin will form.
Once stirred back in, this skin creates permanent lumps that ruin the “silk” texture.
The Hot Ganache Disaster: If your ganache is too thin or too hot when you pour it, it will run straight off the cake and pool on the plate.
It should be the consistency of heavy syrup—thick enough to coat a spoon, before it touches the cake.
4. Timing & Technique Advice
Slice with a Serrated Knife: To get clean layers without crushing the sponge, use a long serrated (bread) knife.
Use a gentle sawing motion and keep the knife perfectly horizontal.
The Overnight Advantage: This cake actually tastes better the next day.
A night in the fridge allows the moisture from the pastry cream to seep slightly into the sponge, creating a unified, melt-in-your-mouth texture.
Room Temperature Serve: While the cake must be stored in the fridge, let it sit on the counter for 15–20 minutes before serving.
This softens the butter in the cake and the fats in the ganache, making the flavors much more pronounced.
Baking Tips for This Recipe
- Level cake layers before assembling.
- Chill before pouring ganache so it sets neatly.
- Let ganache cool slightly before pouring for controlled drip.
Variation Tips
The Boston Cream Pie is a masterclass in balance, but its three distinct components, the sponge, the custard, and the glaze, offer three different opportunities for customization.
You can lean into seasonal flavors or adapt the recipe for specific dietary needs without losing that iconic layered look.
1. The Mocha Dream Variation
For those who prefer a deeper, more roasted flavor profile:
Add 1 tablespoon of instant espresso powder to the hot milk and butter mixture before incorporating it into the batter.
The coffee notes in the cake perfectly complement the bittersweet chocolate ganache on top.
2. The Triple Vanilla Intensity
To make the vanilla the absolute star of the show:
nstead of extract, use the seeds from one whole vanilla bean in the pastry cream. Infuse the pod in the milk while heating, then scrape the seeds into the egg mixture.
The tiny black specks of vanilla bean provide a high-end, “gourmet” look and a much more complex floral aroma.
3. The Fruit-Filled Refresh
Adding a layer of fruit provides a tart contrast to the rich pastry cream.
Spread a thin layer of raspberry preserves or apricot jam on the bottom cake layer before adding the pastry cream.
You can also press fresh sliced strawberries into the cream before placing the top cake layer on.
4. Crust & Texture Alternatives
The Individual Pie Sliders: Bake the batter in a muffin tin to create mini Boston Cream cakes.
Slice the cupcakes in half, fill with a dollop of cream, and dip the tops into the ganache.
The Rum-Soaked Sponge: For a traditional European “torte” feel, lightly brush the cut sides of the cake with a simple syrup spiked with dark rum before assembling.
This ensures the cake stays exceptionally moist.
5. Dietary Adaptations
Gluten-Free:
Use a 1:1 gluten-free baking flour blend (one that includes xanthan gum) for the cake. For the pastry cream, no changes are needed as cornstarch is naturally gluten-free!
Dairy-Free:
Use full-fat oat milk for both the cake and the pastry cream. Replace the butter with a high-quality vegan butter stick and use a dairy-free dark chocolate for the ganache.
Lower Sugar:
You can reduce the sugar in the pastry cream to 1/2 cup without losing the thick set.
For the ganache, use a 70% or 80% dark chocolate to cut down on the sweetness of the glaze.\
Creative Glaze Ideas
White Chocolate & Toasted Almond: Instead of bittersweet chocolate, use white chocolate for the ganache and press toasted almond slivers into the sides of the cake.
The Salted Caramel Drip: Drizzle homemade salted caramel over the chocolate ganache once it has set for a decadent “turtle” inspired finish.
How to Properly Store Your Boston Cream Pie
A Boston Cream Pie is a delicate assembly of a light sponge, a dairy-rich custard, and a sensitive chocolate glaze.
Because of the high egg and milk content in the pastry cream, temperature control is the most important factor in keeping this dessert safe and delicious.
1. Refrigeration (The Only Real Choice)
Duration: 2 to 3 days.
This cake must be refrigerated. The pastry cream is highly perishable and will lose its structural integrity if left out.
Once the chocolate ganache has fully set, cover the cake loosely. The best option is a cake cloche or a large deep bowl inverted over the plate.
If you use plastic wrap, be aware that it may stick to and lift off the beautiful chocolate glaze.
2. Room Temperature (Service Only)
The Limit: No more than 1 hour.
Beyond the safety concerns of the custard, the chocolate ganache will begin to soften and the pastry cream may start to weep or bulge from the sides if the cake gets too warm.
Always return the cake to the fridge immediately after the dessert course.
3. Freezing (Proceed with Caution)
Duration: Up to 1 month.
You can freeze Boston Cream Pie, but it is not ideal.
Cornstarch-based pastry creams can sometimes become “weepy” or slightly grainy upon thawing.
If you must freeze it, do so without the ganache. Wrap the filled cake layers tightly in several layers of plastic wrap and foil.
Thaw slowly in the refrigerator for 24 hours, then apply a fresh batch of ganache before serving.
4. Protecting the Texture
The Anti-Odor Seal: Because both the sponge and the custard are porous, they will easily absorb “fridge smells” (like onions or garlic).
Ensure your storage container is well-sealed or that the cake is kept far away from pungent leftovers.
Condensation Control: If you see small beads of water on the chocolate, it usually means the cake was covered while the ganache was still warm.
Always let the glaze reach room temperature and then chill the cake uncovered for an hour before sealing it for long-term storage.
Storage Mistakes to Avoid
The Microwave Trap: Never attempt to warm up a slice of Boston Cream Pie.
The microwave will instantly melt the pastry cream and the chocolate, turning your elegant cake into a soggy mess.
Slicing Before Storing: If possible, store the cake whole rather than in slices. The sponge cake will stay moist for much longer if the cut sides aren’t exposed to the air.
If you do have leftover slices, press a piece of wax paper or parchment paper directly against the cut “exposed” sides of the cake before putting it in a container.
Freezing a Fully Glazed Cake: Freezing the ganache can cause it to lose its glossy sheen, making it look dull and spotted once thawed.
FAQs
My pastry cream is lumpy. Can I fix it?
Lumps usually happen if the milk was added too quickly or if it wasn’t whisked constantly while thickening. If you catch it early, you can vigorously whisk the hot cream to smooth it out. If that doesn’t work, pass the cream through a fine-mesh sieve while it is still warm to remove the lumps.
Why did the pastry cream soak into my cake layers?
This happens if the cake is still warm when you assemble it, or if the pastry cream wasn’t cooked long enough to reach a full boil. The starch needs that high heat to set. To prevent a soggy cake, ensure both the cake and the cream are completely cold before they touch each other.
Can I use a boxed cake mix instead of making the sponge?
Technically, yes, but a standard yellow cake mix is often much softer and sweeter than a traditional sponge. A true Boston Cream Pie requires a sturdier, airy sponge to support the weight of the pastry cream without compressing. If you use a mix, choose a classic yellow or sponge variety and avoid extra moist versions.
How do I get those perfect chocolate “drips” on the side?
The secret is the temperature of the ganache. If it’s too hot, it will run all the way down to the plate; if it’s too cold, it will sit in a thick clump on top. Let the ganache sit until it’s roughly room temperature and the consistency of heavy syrup. Pour it in the center and nudge it gently toward the edges with a spatula. The weight of the chocolate will create the drips for you.
Boston Cream Pie
10
Slices30
minutes30
minutes1
hourThis boston cream pie recipe is layered with fluffy cake, custard filling, and chocolate glaze.
Ingredients
- For the Cake & Glaze
1 cup (200g) cane sugar
1 cup plus 2 tablespoons (140g) all-purpose flour
½ cup (120mL) whole milk
5 tablespoons (70g) unsalted butter
4 ounces bittersweet chocolate (chopped)
¼ cup (60mL) heavy whipping cream
2 large eggs (room temperature)
2 teaspoons vanilla extract
1¼ teaspoons baking powder
¼ teaspoon kosher salt
- For the Pastry Cream
2 cups (480mL) whole milk
2/3 cup sugar
6 egg yolks (room temperature)
1/4 cup corn starch
1 tablespoon vanilla extract
1 tablespoon (15g) butter
Directions
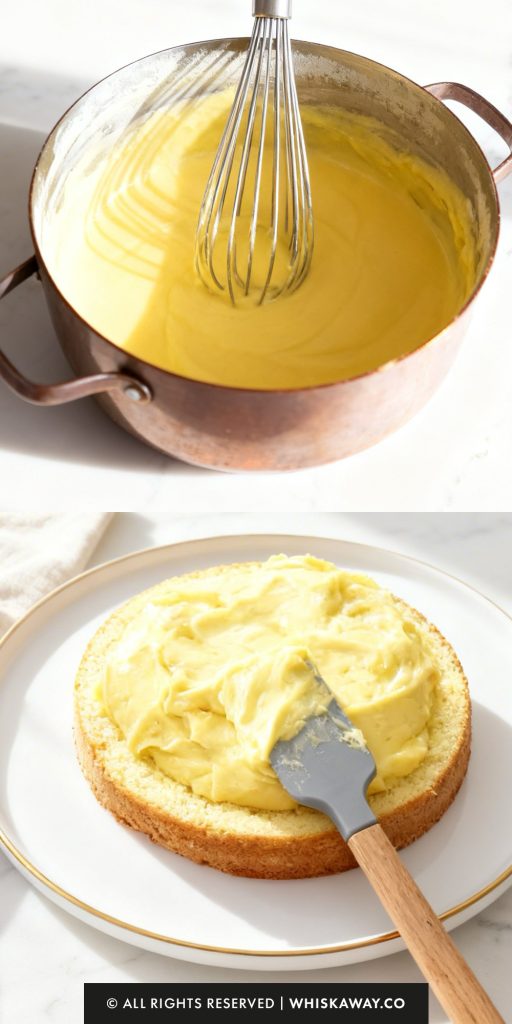
- Craft the Pastry Cream
- In a medium saucepan, bring the milk to a boil over medium heat. As soon as it bubbles, remove it from the heat and set aside.
- In a separate large bowl, whisk your egg yolks and sugar until the mixture becomes pale and thick. Sift in the cornstarch and whisk until completely smooth. Slowly drizzle in about 1/4 cup of the hot milk, whisking constantly to warm the eggs without scrambling them. Once incorporated, whisk in the rest of the milk.
- Strain the mixture back into your saucepan to ensure no lumps. Cook over medium-high heat, whisking without stopping, until it reaches a slow boil and thickens significantly. Continue whisking for 60–120 seconds after it boils.
- Remove from the heat, stir in the butter, and let it cool for a few minutes. Press a piece of plastic wrap directly onto the surface of the cream to prevent a "skin" from forming, then refrigerate until cold.
- Bake the Sponge
- Set your oven to 350°F (175°C). Grease an 8-inch round cake pan and line the bottom with parchment paper for an easy release.
- Whisk the flour, baking powder, and salt together in a small bowl.
- Using a mixer with a whisk attachment, beat the eggs and sugar on medium speed for about 4 minutes. You are looking for a "ribbon stage" where the batter is thick, pale, and leaves a visible trail when you lift the whisk.
- Microwave the milk and butter in 30-second bursts until the butter is melted and the milk is steaming. Stir in the vanilla.
- Turn the mixer to low. Gradually add the flour mixture until just combined. Slowly pour in the hot milk mixture, beating until the batter is uniform and bubbly. Give the bowl a final fold with a spatula to ensure everything is incorporated, then pour into the pan.
- Bake for approximately 33 minutes or until a toothpick comes out clean. Let it rest in the pan for a few minutes before inverting it onto a wire rack to cool entirely.
- Layer and Chill
- Carefully slice the cooled cake horizontally to create two even layers.
- Place the bottom half (cut-side up) on your serving dish. Spread the chilled pastry cream over the center, leaving a 1-inch border around the edge.
- Place the second cake layer on top and press down very gently so the cream moves toward the edges.
- Refrigerate the cake for at least 2 hours (or overnight) to allow the filling to firm up so it doesn't slide when you slice it.
- The Chocolate Finish
- When you are nearly ready to serve, microwave the heavy cream until it is steaming (about 1 minute). Add the chopped chocolate and let it sit undisturbed for 5 minutes.
- Stir the chocolate and cream until perfectly glossy and smooth. Pour the ganache over the top of the chilled cake, letting it spread naturally toward the edges for that iconic "dripped" look.
There are no reviews yet. Share your thoughts above!

Seriously easy to make and so yummy! Thanks Sabine! <3