Ever wondered how to get bakery-style scones right at home? These scones style sweet biscuits are tender, lightly sweet, and perfectly flaky, making them ideal for breakfast, brunch, or a cozy afternoon treat.
Baking these scones is surprisingly simple. Cold butter folded into the dough creates delicate layers that rise beautifully in the oven.
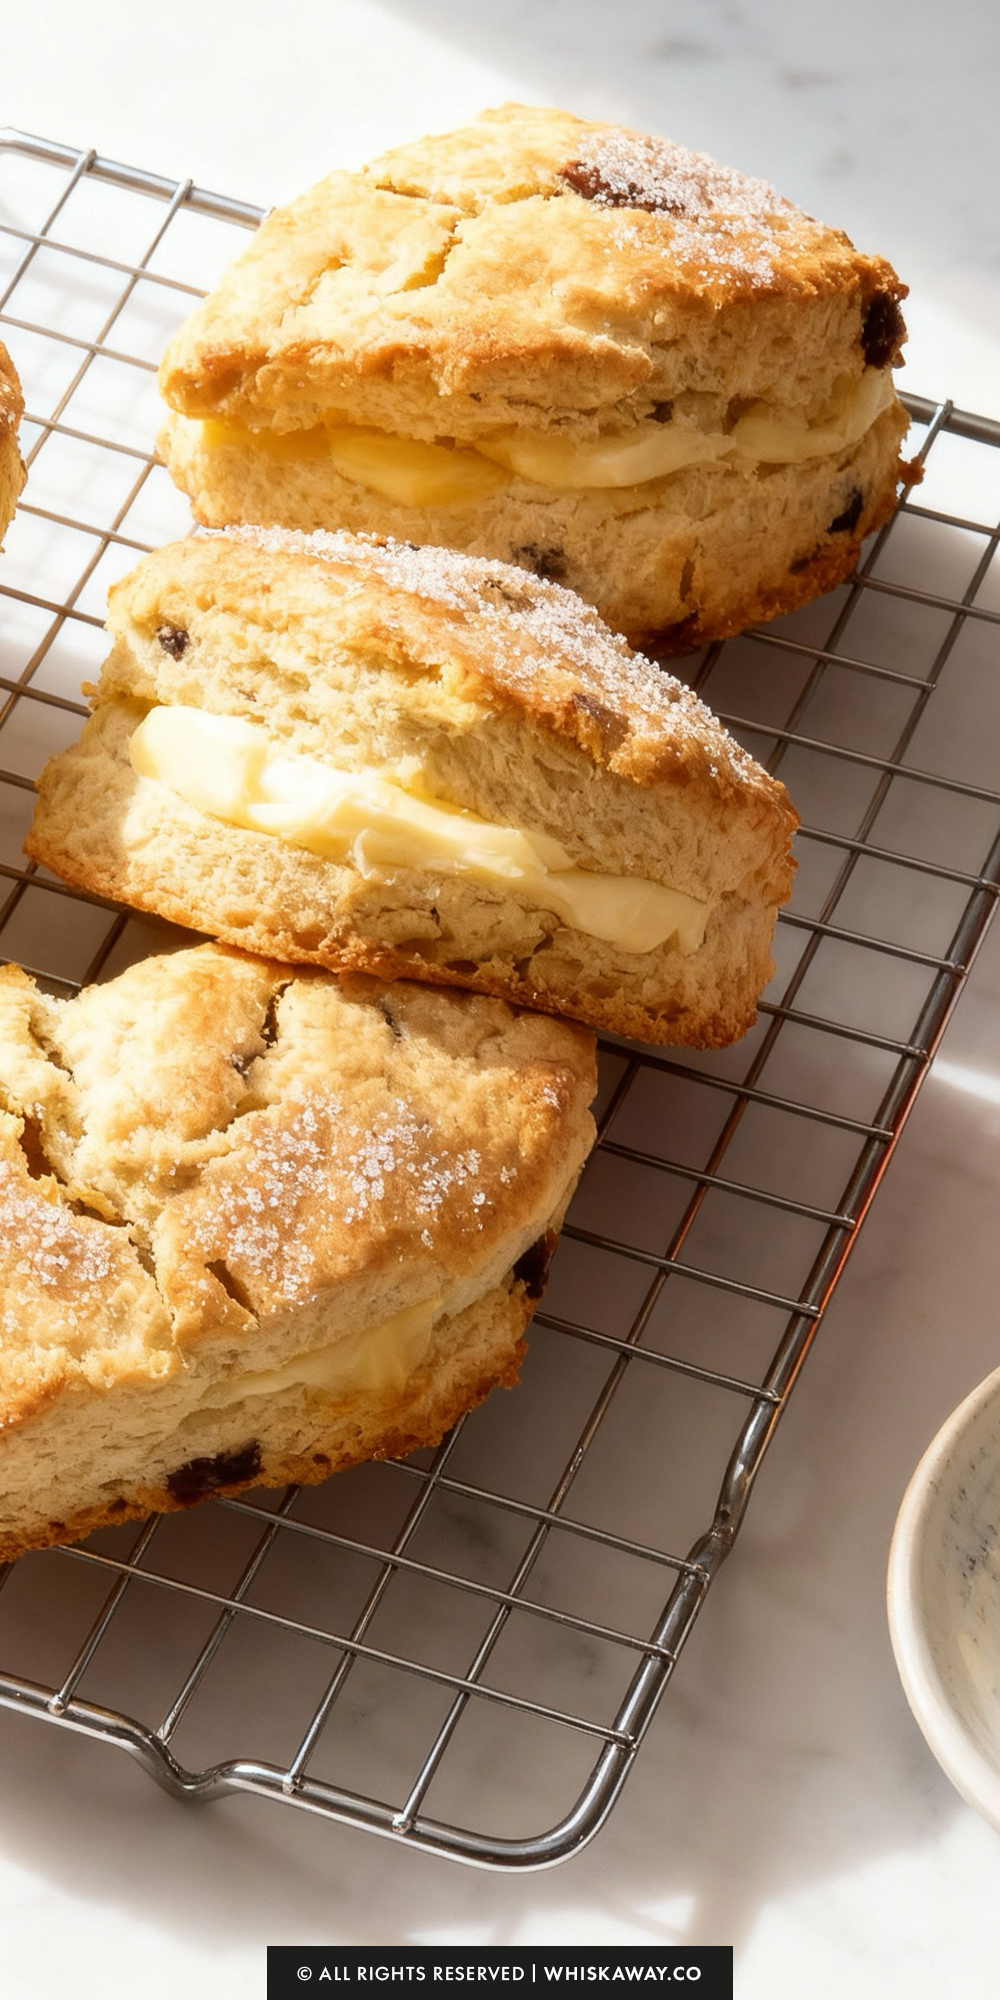
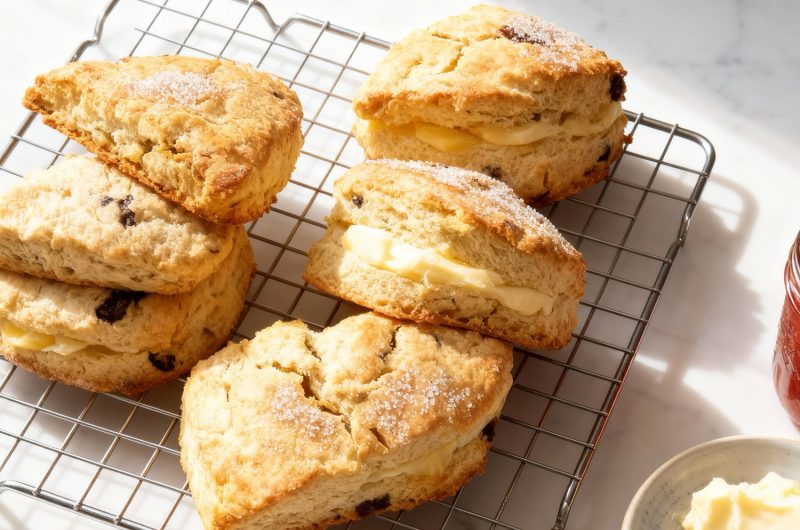
A light sprinkle of sugar on top adds a golden, slightly crisp finish. You can serve them plain, with jam, or a drizzle of glaze for a touch of elegance.
Every bite of scones-style sweet biscuits delivers a tender, buttery texture and a hint of sweetness that’s perfectly balanced.
Whether for a brunch spread or a solo treat with tea, these biscuits feel special while being easy to make.
They’re a versatile addition to any kitchen and guaranteed to impress anyone who tries them.
So, happy baking!
Why You’ll Love This Recipe
Soft, slightly crumbly, and subtly sweet, these biscuits bring a bakery-quality touch to your table without complicated steps.
What Makes Them Special
- Tender, delicate texture
- Light sweetness enhances any spread
- Ideal for tea or brunch
- Easy to enjoy plain or glazed
- Elegant and versatile

🔥 These scones style sweet biscuits are perfect when you want something lightly sweet with a tender, crumbly texture. If you enjoy bakery-style flavors, vanilla bean biscuits are a classic next bake. For something more floral and delicate, try honey lavender biscuits, or turn them into a layered dessert with strawberry shortcake.
Save This Pin To Your Pinterest Board for Later

How to Get Your Scones Style Sweet Biscuits Just Right
Scones-style sweet biscuits are deceptively simple, but a few key techniques make the difference between tender, flaky treats and dense, dry ones.
Follow these expert tips for consistently perfect results.
1. Keep the Butter Cold
Cold butter is crucial for light, tender biscuits with a delicate crumb.
Grate or cut it into small pea-sized pieces and avoid letting it soften before mixing. Warm butter will make the dough heavy and dense.
2. Don’t Overmix the Dough
Hands work best to bring the dough together because they can gently press the butter and flour without overmixing.
If the dough seems too dry, add milk 1 tablespoon at a time until it just holds together.
3. Measure Flour Accurately
Spoon flour into your measuring cup and level it off. Too much flour can make scones dry.
Avoid scooping directly with the cup, which packs the flour and leads to heavy biscuits.
4. Shape and Cut Thoughtfully
Pat dough into even rounds about 1 inch thick. Thin disks will bake too quickly and become dry, while very thick disks may remain undercooked inside.
Cut the rounds into wedges for traditional scones or use a biscuit cutter for a round shape. Don’t twist the cutter when cutting. Instead press straight down to maintain lift.
5. Don’t Skip Resting if Needed
Let the cut scones sit for a few minutes before baking if your kitchen is warm or the butter is soft. This helps maintain their shape and flakiness.
6. Watch the Bake Time
Bake until the bottoms are golden and tops lightly toasted. Start checking around 15 minutes to prevent overbrowning.
Overbaked scones dry out quickly; slightly underbaked scones may need an extra minute or two.
7. Common Mistakes to Avoid
- Warm butter or overmixing: dense, heavy scones.
- Too much liquid: gluey dough that spreads in the oven.
- Not enough spacing: scones can stick together and lose crisp edges.
- Skipping accurate flour measurement: dry, crumbly results.
8. Optional Flavor Boosters
Add a teaspoon of vanilla, a pinch of cinnamon, or citrus zest to the dry ingredients for extra aroma.
Fold in chopped nuts or chocolate chips along with the fruit for a twist on the classic.
Following these tips ensures your scones-style sweet biscuits come out tender, lightly golden, and perfectly flaky every time.
Easy Baking Tips That Have Worked for Me
These biscuits are slightly different from traditional biscuits—they are meant to be tender and lightly crumbly.
Keep the dough thick and avoid rolling it too thin. Chill the dough briefly before baking to prevent the biscuits from spreading too much. When folding the dough, do it very gently so you don’t compress the layers.
Brushing the tops with milk or cream before baking will give them a shiny golden finish. If you want to add chocolate chips or berries, fold them in carefully and sparingly so they don’t weigh down the biscuits.

Variation Tips
These sweet biscuits are versatile, and small tweaks can transform the flavor, texture, or dietary profile without changing the overall method.
Here are some practical ideas to experiment with at home:
1. Fruit & Mix-Ins
Swap the fruit: Use fresh or dried cranberries, chopped apples, cherries, or chopped peaches instead of raisins or blueberries.
Chocolate or nuts: Fold in mini chocolate chips, white chocolate chunks, chopped pecans, or walnuts for extra texture and richness.
Zest & spice: Add a teaspoon of lemon, orange, or lime zest for brightness, or a pinch of cinnamon, nutmeg, or cardamom for warmth.
2. Biscuit Texture Tweaks
Flakier biscuits: Keep the butter in slightly larger chunks and handle the dough gently—don’t overmix.
More tender, cake-like scones: Replace 2–3 tablespoons of flour with almond flour or oat flour for a softer crumb.
Crispier crust: Brush tops with a little milk, cream, or beaten egg before baking and sprinkle with sugar.
3. Flavor Boosters
- Vanilla or almond extract: Add ½–1 teaspoon to the sour cream mixture for a fragrant lift.
- Citrus glaze: Mix powdered sugar with a splash of lemon or orange juice and drizzle over warm scones for a sweet, tangy finish.
4. Dietary-Friendly Adjustments
Gluten-Free: Substitute the all-purpose flour with a 1:1 gluten-free blend. You may need an extra tablespoon of liquid to help the dough bind.
Dairy-Free: Replace butter with plant-based butter or coconut oil and use coconut cream or plant-based yogurt in place of sour cream.
Lower Sugar: Reduce the sugar by ¼–½ cup, especially if using naturally sweet fruit.
5. Serving Variations
- Mini scones: Shape smaller biscuits for bite-sized treats, perfect for brunch or snacks.
- Stuffed scones: Add a spoonful of jam, chocolate, or cream cheese in the center before baking for a surprise filling.
- Savory twist: Omit sugar and fruit, add shredded cheese, herbs, or chopped sun-dried tomatoes for a savory biscuit version.
These variations let you make the recipe your own while keeping the classic scone-style texture and sweet biscuit charm.
How to Properly Store Your Scones Style Sweet Biscuits
Proper storage is key to keeping your scones-style sweet biscuits tender, flavorful, and fresh.
Follow these tips to enjoy them at their best, whether for a few days or longer-term storage.
1. Room Temperature (Best for 1–2 Days)
- Store completely cooled scones in an airtight container or a resealable bag.
- Keep them in a cool, dry place away from direct sunlight.
- Avoid stacking too many on top of each other to prevent squishing.
- Tip: Reheat in a 300°F (150°C) oven for 5–7 minutes to restore warmth and a slight crisp to the edges.
2. Refrigeration (Up to 5 Days)
Wrap scones individually in plastic wrap or foil, then place in a sealed container or zip-top bag.
Refrigeration can slightly firm the texture, so warm briefly in the oven before serving to refresh the soft, tender crumb.
Avoid leaving unwrapped scones in the fridge as they dry out quickly.
3. Freezing (Up to 3 Months)
- Cool scones completely before freezing.
- Wrap each scone tightly in plastic wrap, then place them in a freezer-safe bag or container.
- Label with the date for easy tracking.
To enjoy, thaw at room temperature for 30–60 minutes and warm in a 300°F (150°C) oven for 5–10 minutes for best texture.
Tip: You can also freeze unbaked shaped scones; just bake directly from frozen, adding a few extra minutes to the baking time.
4. Common Storage Mistakes to Avoid
- Storing scones while still warm: this causes condensation and sogginess.
- Storing assembled or topped scones (with glazes, fruits, or cream) for long periods: the toppings will make the biscuits soggy.
- Using containers that aren’t airtight: exposure to air dries out the biscuits and diminishes flavor.
Save This Pin To Your Pinterest Board for Later

FAQs
Can I use frozen fruit instead of fresh?
Yes, but thaw and drain frozen fruit before folding it into the dough to prevent excess moisture, which can make the scones soggy. For berries, gently pat them dry with a paper towel.
Can I substitute the sour cream?
Yes. You can use plain yogurt, buttermilk, or even a dairy-free yogurt alternative. Adjust the consistency slightly with a tablespoon of milk if the dough feels too dry.
How can I make the scones more tender or flaky?
Keep the butter very cold and cut into small chunks.
Handle the dough as little as possible to avoid overworking it.
A slightly dry, shaggy dough is perfect. Avoid adding too much liquid.
How should I store leftover scones?
Room temperature: Airtight container for up to 2 days.
Refrigerator: Wrapped individually for up to 5 days; warm before serving.
Freezer: Wrap individually and store up to 3 months; thaw and reheat in the oven.
Can I make them ahead or freeze unbaked?
Yes. Shape the scones, freeze them on a baking sheet until firm, then transfer to a freezer-safe bag. Bake from frozen, adding a few extra minutes to the baking time. This is great for preparing fresh scones anytime.
Scones Style Sweet Biscuits
18
biscuits10
minutes15
minutesThese scones-style sweet biscuits are lightly sweet, fluffy, and perfect for breakfast or afternoon tea.
Ingredients
4 cups all-purpose flour
1 cup sour cream
1 cup white sugar
1 cup butter, cold or frozen is best
1 cup raisins, blueberries, or other fruit pieces
2 teaspoons baking powder
1 teaspoon baking soda
1 teaspoon salt
1 large egg
Directions
- Preheat the oven to 350°F and lightly grease one oversized baking sheet (or two smaller ones) so they’re ready to go.
- Combine the sour cream and baking soda in a large measuring cup. Give it a quick stir and let it sit until it starts to foam.
- Whisk together the dry ingredients—flour, sugar, baking powder, and salt—in an extra-large mixing bowl.
- Work in the butter: grate the cold butter directly into the bowl, or cut it into the dry mixture using a pastry cutter or two knives until the pieces are about the size of peas.
- Beat the egg and stir it into the bubbly sour cream mixture.
- Bring the dough together: pour the sour cream mixture into the bowl of dry ingredients and gently mix to combine. Use your hands if needed—the dough should feel somewhat dry but workable. Add 1–2 tablespoons of milk only if the mixture refuses to come together.
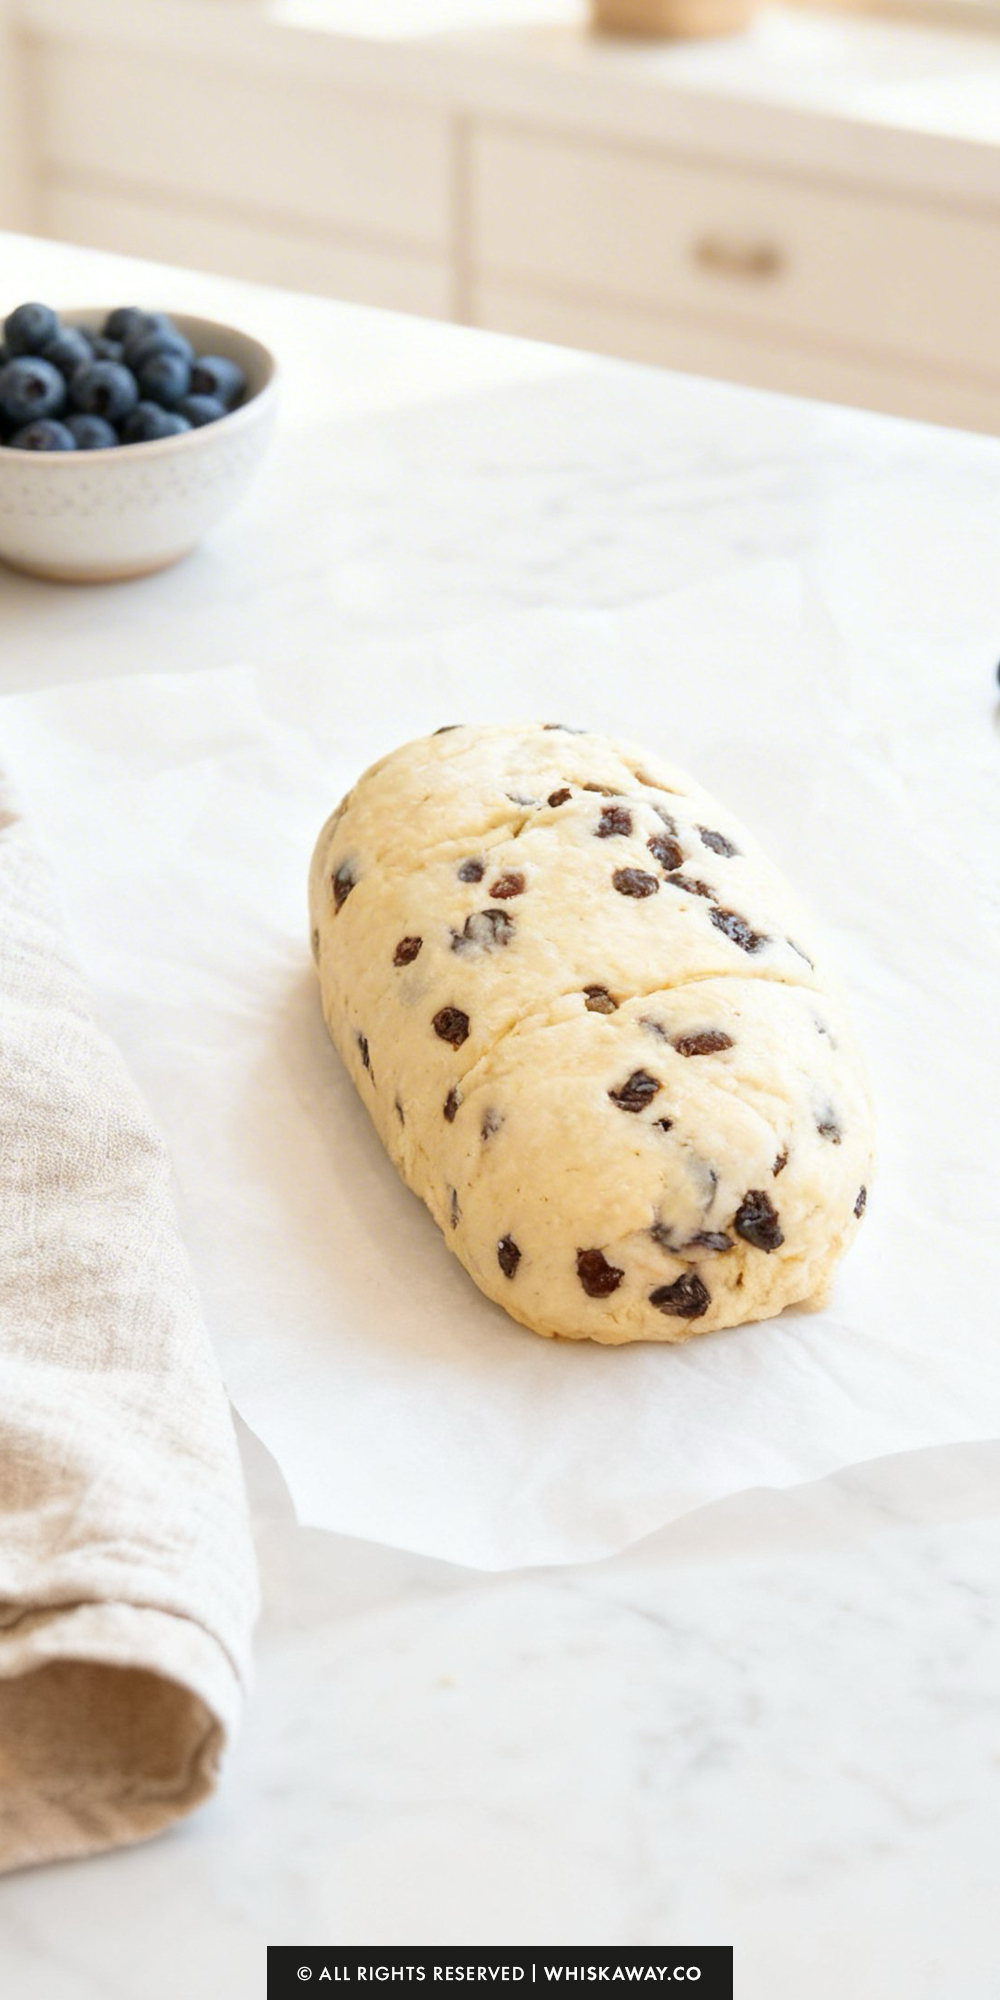
- Fold in the fruit until evenly distributed throughout the dough.
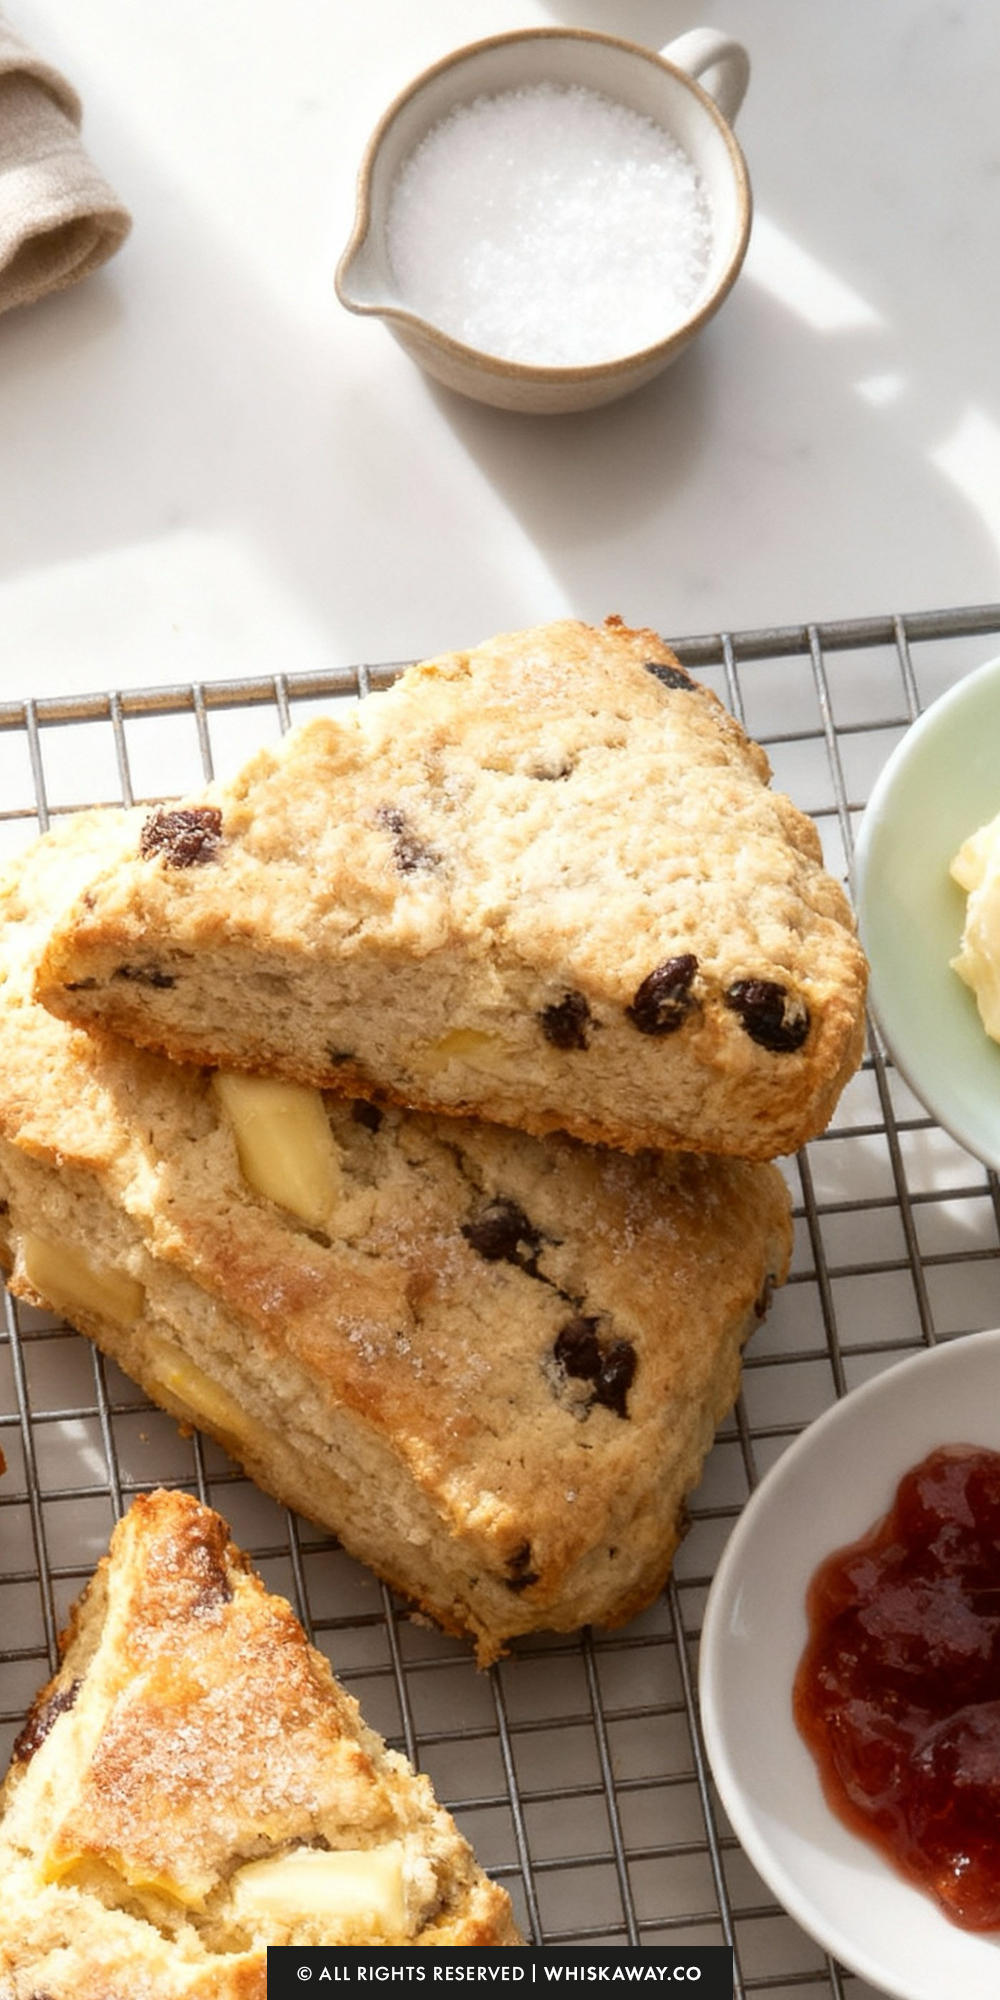
- Shape the dough: divide the dough into three equal portions. Pat each portion into a round disk about 1 inch thick (roughly 6–7 inches across). Slice each disk into 6 wedges.
- Arrange the scones on the prepared baking sheet(s), leaving a bit of space between each piece.
- Bake for 15–20 minutes, or until the bottoms are golden and the tops have a light, toasty color. Keep an eye on them near the end of the baking time.
- Cool the scones: let them rest on the baking sheet for a few minutes before transferring them to a wire rack to cool completely.
- Store in an airtight container at room temperature for up to 5 days, or freeze for up to 3 months.