Let’s be honest: having to choose between a fudgy brownie and a creamy cheesecake is a dilemma nobody needs in their life.
With these Red Velvet Cheesecake Bites, you get to have your cake (well, brownie) and eat it too.
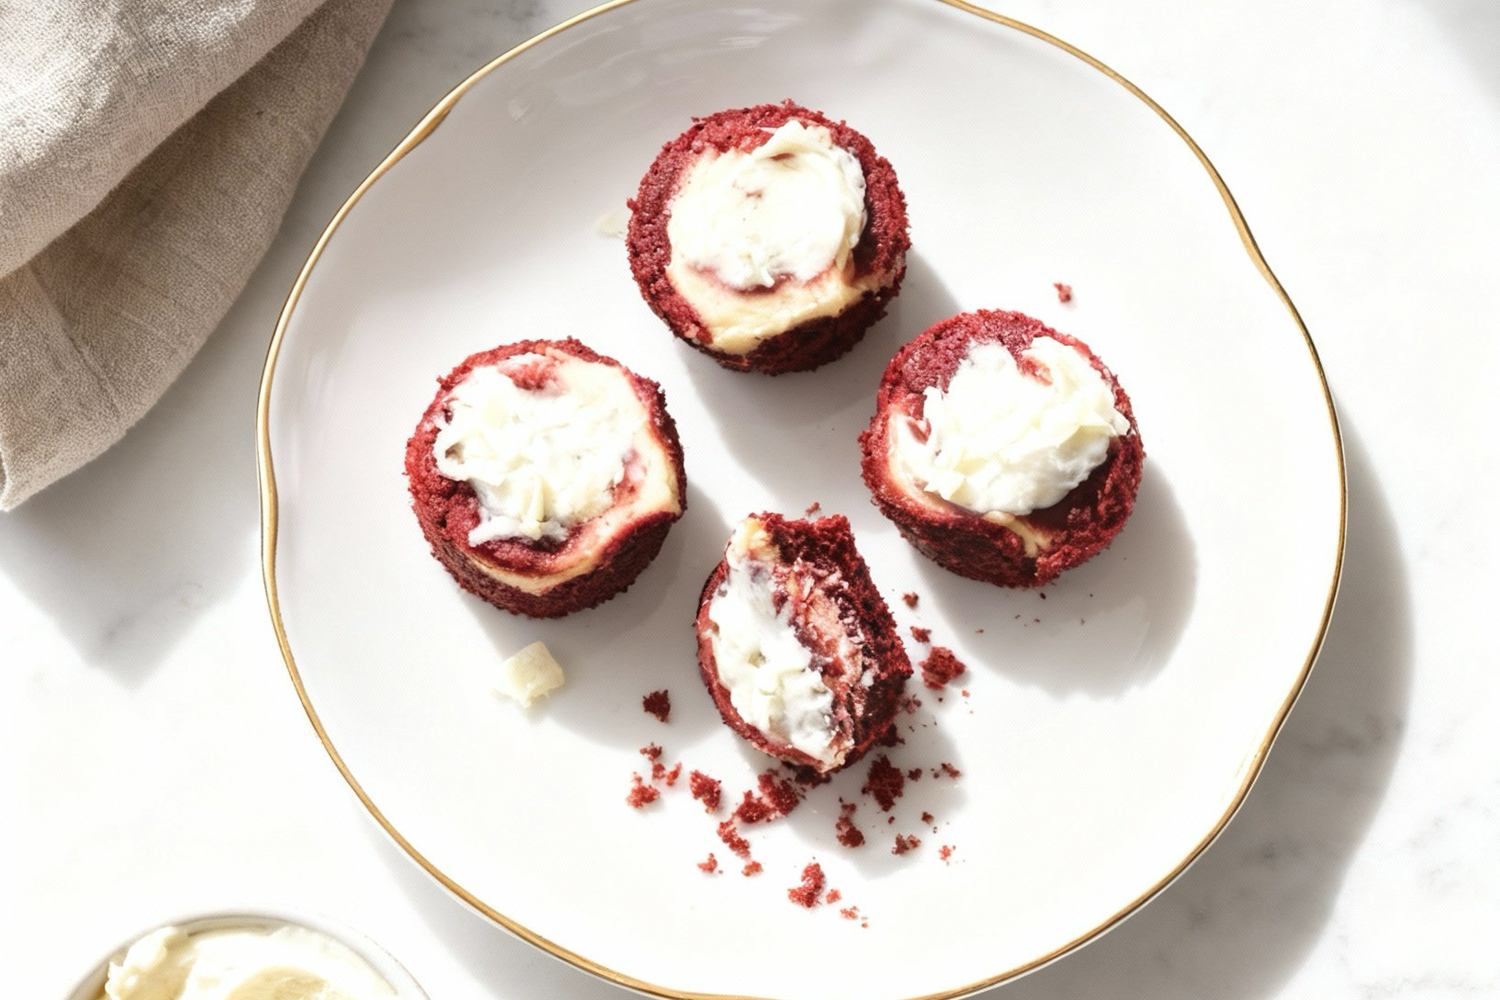
e are talking about the ultimate dessert mashup here, a dense, chewy red velvet foundation that brings that classic cocoa-vanilla flavor, crowned with a layer of smooth, tangy cheesecake.
Warning: because they are “bite-sized,” it is dangerously easy to pop three or four of them before you even realize it.
But hey, they’re mini, so we don’t need to count perfectly, right? Grab your mixer and let’s get these beauties in the oven, you are going to be obsessed!
Why You’ll Love This Recipe
Red velvet cheesecake bites are small, indulgent, and rich, combining creamy cheesecake with classic red velvet flavor.
They’re perfect for portion control, visually appealing, and impressive without requiring complicated techniques.
Key Reasons to Love Them:
- Creamy, smooth cheesecake with soft red velvet cake layer.
- Bite-sized for easy serving and portion control.
- Rich, indulgent flavor that satisfies every sweet craving.
- Beginner-friendly with simple assembly steps.
- Elegant and visually appealing for parties or gifting.

🔥 These red velvet cheesecake bites are perfect if you love red velvet brownies, indulgent red velvet truffles, or creamy strawberry cheesecake bars.
How to Get Your Red Velvet Cheesecake Bites Just Right
These bites are a hybrid of a brownie and a cheesecake, meaning they carry the challenges of both. Here is how to nail the texture so you get a fudgy red velvet base and a creamy, crack-free cheesecake top.
1. Room Temperature is Non-Negotiable
This is the number one rule for smooth cheesecake.
If your cream cheese or egg yolk is cold, they won’t blend properly with the sugar. You will end up with little lumps of white cheese in your batter.
Set the cream cheese and egg yolk out on the counter 1 hour before baking. If you are pressed for time, microwave the unwrapped cream cheese on a plate for 10-second intervals until soft (but not melted).
2. Don’t Skip the Vinegar
You might wonder why vinegar is in a dessert recipe.
The vinegar reacts with the baking soda (or the leavening in the flour) to give red velvet its signature fluffy-yet-dense texture.
It also adds a subtle tang that cuts through the sweetness and preserves the vibrant red color during baking.
Do not leave it out!
3. The “Jiggle” Test (Avoiding Overbaking)
Mini cheesecakes cook very fast. If you bake them until they look solid, they will be dry and chalky by the time they cool.
Pull them out of the oven when the centers still wobble slightly like set gelatin. They will continue to cook and firm up as they sit in the hot tin.
The tops should remain pale; if they start turning golden brown, they are overdone.
4. Mastering the Swirl
It is easy to turn the beautiful marble effect into a muddy pink mess.
Don’t dig the toothpick too deep. Just gently drag the red batter through the surface of the white cheesecake layer in a figure-8 or “S” pattern.
Less is more, 2 or 3 strokes per bite is plenty.
5. Patience During Cooling
These bites are structurally fragile when hot because of the melted butter and soft cheese.
Trying to pop them out of the muffin tin immediately after baking. The bottom layer will likely detach and stay in the liner.
Let them cool in the pan for the full 20 minutes. This allows the butter to resolidify and the cheesecake to set, acting as a glue that holds the layers together.
6. Use a Cookie Scoop
Because mini muffin tins are small, using a spoon can be messy and lead to uneven layers.
Use a small cookie scoop (1 tablespoon size) for the red velvet base. This ensures every bite has the exact same ratio of brownie to cheesecake and bakes evenly.
Easy Baking Tips That Have Worked for Me
Miniature bites of layered red velvet and cheesecake offer a luxurious experience in each portion. Baking allows the layers to set while keeping the cheesecake smooth and soft.
The bright red of the velvet combined with creamy cheesecake makes them visually appealing and inviting. Each bite provides a balance of flavors and textures that is both indulgent and satisfying.
These bites are perfect for beginners, giving a professional-looking dessert without requiring complex techniques.
Variation Tips
These Red Velvet Cheesecake Bites are already a crowd-pleaser, but you can easily customize them to fit different holidays or flavor cravings. Here are a few creative ways to switch things up.
1. Cookies & Cream Velvet
Red velvet and Oreos are a match made in heaven.
The Twist: Crush 3–4 Oreo cookies into coarse crumbs and fold them into the cheesecake filling before layering it onto the red velvet base.
The Look: Sprinkle a little extra cookie dust on top before baking for a speckled, crunchier finish.
2. Blue Velvet (For Different Occasions)
The Swap: Simply swap the 1 tablespoon of red food coloring for Royal Blue gel coloring.
The Occasion: This is perfect for Hanukkah, “Frozen”-themed parties, or baby showers. The flavor remains exactly the same, but the visual impact is completely different.
3. Chocolate Chip Cheesecake
If you want to amp up the chocolate factor:
The Add-In: Stir ¼ cup of mini semi-sweet chocolate chips into the cheesecake batter.
Why Mini? Standard chips are too heavy and will sink to the bottom of the cheesecake layer, messing up the separation between the red and white layers. Mini chips stay suspended perfectly.
4. Raspberry Ripple
Tart berries cut through the richness of the cream cheese.
The Method: Before swirling the reserved red batter on top, place one fresh raspberry (or a small dollop of raspberry jam) into the center of the cheesecake layer. Push it down slightly, then bake as normal. It adds a burst of fruity acidity that balances the sugar.
5. The “Tuxedo” Top
The Garnish: Skip the swirl. Bake the red base and white top as distinct layers. Once cooled and chilled, dip the top half of the bite into melted dark chocolate for a sophisticated “black tie” look.
6. Dietary Adjustments
Gluten-Free
- The Flour: Since this recipe uses a small amount of flour mainly for binding the brownie base, it adapts very well to gluten-free blends.
- Use a 1:1 Gluten-Free All-Purpose Flour (ensure it contains xanthan gum). The texture will be slightly fudgier, which is actually a bonus here!
Nut-Free
This recipe is naturally nut-free! Just ensure your cocoa powder and chocolate shavings are processed in a nut-free facility if serving someone with a severe allergy.
Save for Later to Your Pinterest Board

How to Properly Store Your Red Velvet Cheesecake Bites
Because these Red Velvet Cheesecake Bites contain cream cheese and eggs, they are considered perishable.
Proper storage is essential not just for food safety, but to keep the cheesecake layer creamy and the red velvet base moist.
1. Refrigeration (The Must-Do Method)
The Rule: These must be stored in the fridge.
The Duration: Up to 5 days.
The Method: Place the fully cooled bites in a single layer in an airtight container. If you need to stack them, place a sheet of wax paper or parchment paper between layers to prevent the moist cheesecake tops from sticking to the bottoms of the ones above.
Serving: You can serve them straight from the fridge for a firm texture, or let them sit on the counter for 10 minutes to soften slightly.
2. Room Temperature (Serving Only)
The Limit: 2 hours maximum.
The Reason: Cream cheese is dairy-based and can spoil rapidly if left out. Additionally, as the bites warm up, the cheesecake layer softens, making them harder to handle. If you are serving them at a party, it’s best to put out small batches and keep the rest chilled.
3. Freezing (For Meal Prep)
These freeze beautifully up to 3 months.
- Flash Freeze: Place the bites on a baking sheet in the freezer for 1 hour until solid.
- Wrap: Transfer them to a freezer-safe bag or container. Squeeze out as much air as possible to prevent freezer burn.
- Thawing: Move the desired number of bites to the refrigerator the night before you plan to eat them. Avoid thawing them on the counter, as the sudden temperature change can make the cheesecake “weep” (release water).
4. Packaging Tips
Never put warm cheesecake bites into a sealed container. The steam will get trapped, turn into condensation, and rain back down on the food, causing a soggy, wet crust.
Let them cool in the pan and then on a rack until they are room temperature before sealing.
Cheesecake is high in fat, meaning it absorbs fridge smells easily. Ensure your container is tightly sealed so your dessert doesn’t end up tasting like the onions on the shelf below.
5. Reheating (Don’t Do It!)
These are meant to be eaten cold or at room temperature.
Do not microwave these. Microwaving will cause the cream cheese to melt and separate into oil, and it will rubberize the brownie base.
If you prefer them “warm,” just let them sit at room temperature for 15–20 minutes.
FAQs
Can I make these in a standard-sized muffin tin instead?
Yes, you can. If you use a standard 12-cup muffin tin, this recipe will yield about 6 to 8 larger cheesecakes instead of 24 minis. You will need to increase the baking time to roughly 20–25 minutes. Keep an eye on them and use the “jiggle test” to gauge doneness.
Do I really need to use paper liners?
Yes, it is highly recommended. Cheesecake filling is sticky, and the brownie base is fudgy. If you bake them directly in the metal pan, they are very difficult to remove without breaking the crust or leaving the bottom layer behind. Paper liners make removal effortless and cleanup easy.
Why is there vinegar in the recipe?
Vinegar is a classic ingredient in traditional red velvet cake. It serves two purposes: first, the acidity helps preserve the vibrant red color of the cocoa powder. Second, it adds a subtle “tang” that cuts through the sweetness, giving red velvet its distinct flavor profile. Don’t worry—you won’t taste the vinegar in the final product!
How do I tell when they are done?
Cheesecake is tricky because it doesn’t look “done” when you take it out. The center should still have a slight wobble (like set gelatin) when you gently shake the pan, but the edges should be set. If the tops start to crack or turn golden brown, they are overbaked. They will firm up significantly as they cool.
Can I freeze these for later?
Absolutely. These bites freeze very well. Once they are fully cooled and chilled, place them in a freezer-safe bag or container for up to 3 months. Thaw them in the refrigerator overnight before serving. This makes them an excellent make-ahead dessert for parties or holidays.

Red Velvet Cheesecake Bites
12
servings15
minutes15
minutes1
hourThese bite-sized red velvet cheesecake bites are rich, smooth, and perfect for parties and dessert trays.
Ingredients
- Red Velvet Layer
1 cup sugar
3/4 cup flour
1/2 cup butter, melted
2 eggs
1/4 cup unsweetened cocoa powder
1 tablespoon red food coloring
2 teaspoons vanilla
3/4 teaspoon vinegar
1/8 teaspoon salt
- Cheesecake Layer
8 ounces cream cheese, softened
1/3 cup sugar
1 egg yolk
1/2 teaspoon vanilla
Whipping cream and white chocolate shavings for topping (optional)
Directions
- Start by preheating your oven to 350°F (175°C). Line a 12-cup mini muffin tin with paper liners to ensure the bites pop out easily.
- Mix the Red Velvet Batter
- In a small bowl, lightly whisk the two eggs and set them aside for a moment.
- In a large mixing bowl, stir together the melted butter, sugar, vanilla extract, cocoa powder, salt, red food coloring, and vinegar. Mix until everything is well combined and the color is uniform.
- Stir the whisked eggs into the red mixture. Finally, gently fold in the flour until just combined—be careful not to overmix.
- Spoon the red velvet batter into the prepared muffin cups, filling them about halfway. Crucial: Make sure to save about 3 tablespoons of this batter in the bowl to use for the swirl topping later.
- Make the Cheesecake Filling
- In a separate medium bowl, beat the softened cream cheese and sugar together until creamy.
- Add the egg yolk and vanilla extract. Turn your mixer to high speed and beat for 2–3 minutes. You want the mixture to be completely smooth and slightly fluffy.
- Spoon the cheesecake mixture directly on top of the red velvet base in the muffin cups.
- Swirl and Bake
- Take the reserved red velvet batter and drop a tiny amount (about ½ to 1 teaspoon) onto the center of each cheesecake layer. Use a toothpick to gently swirl the red batter into the white cream cheese to create a marbled effect.
- Place the tin in the oven and bake for 14–16 minutes.
- The cheesecake tops should still jiggle slightly when you shake the pan, and they should not be brown. If they brown, they are overcooked.
- Let the bites cool in the pan for 15–20 minutes. They are very soft when hot and will fall apart if you try to move them too soon.
- Transfer them to the refrigerator (or freezer if you're in a rush) to chill completely. They need to be cold to set properly.
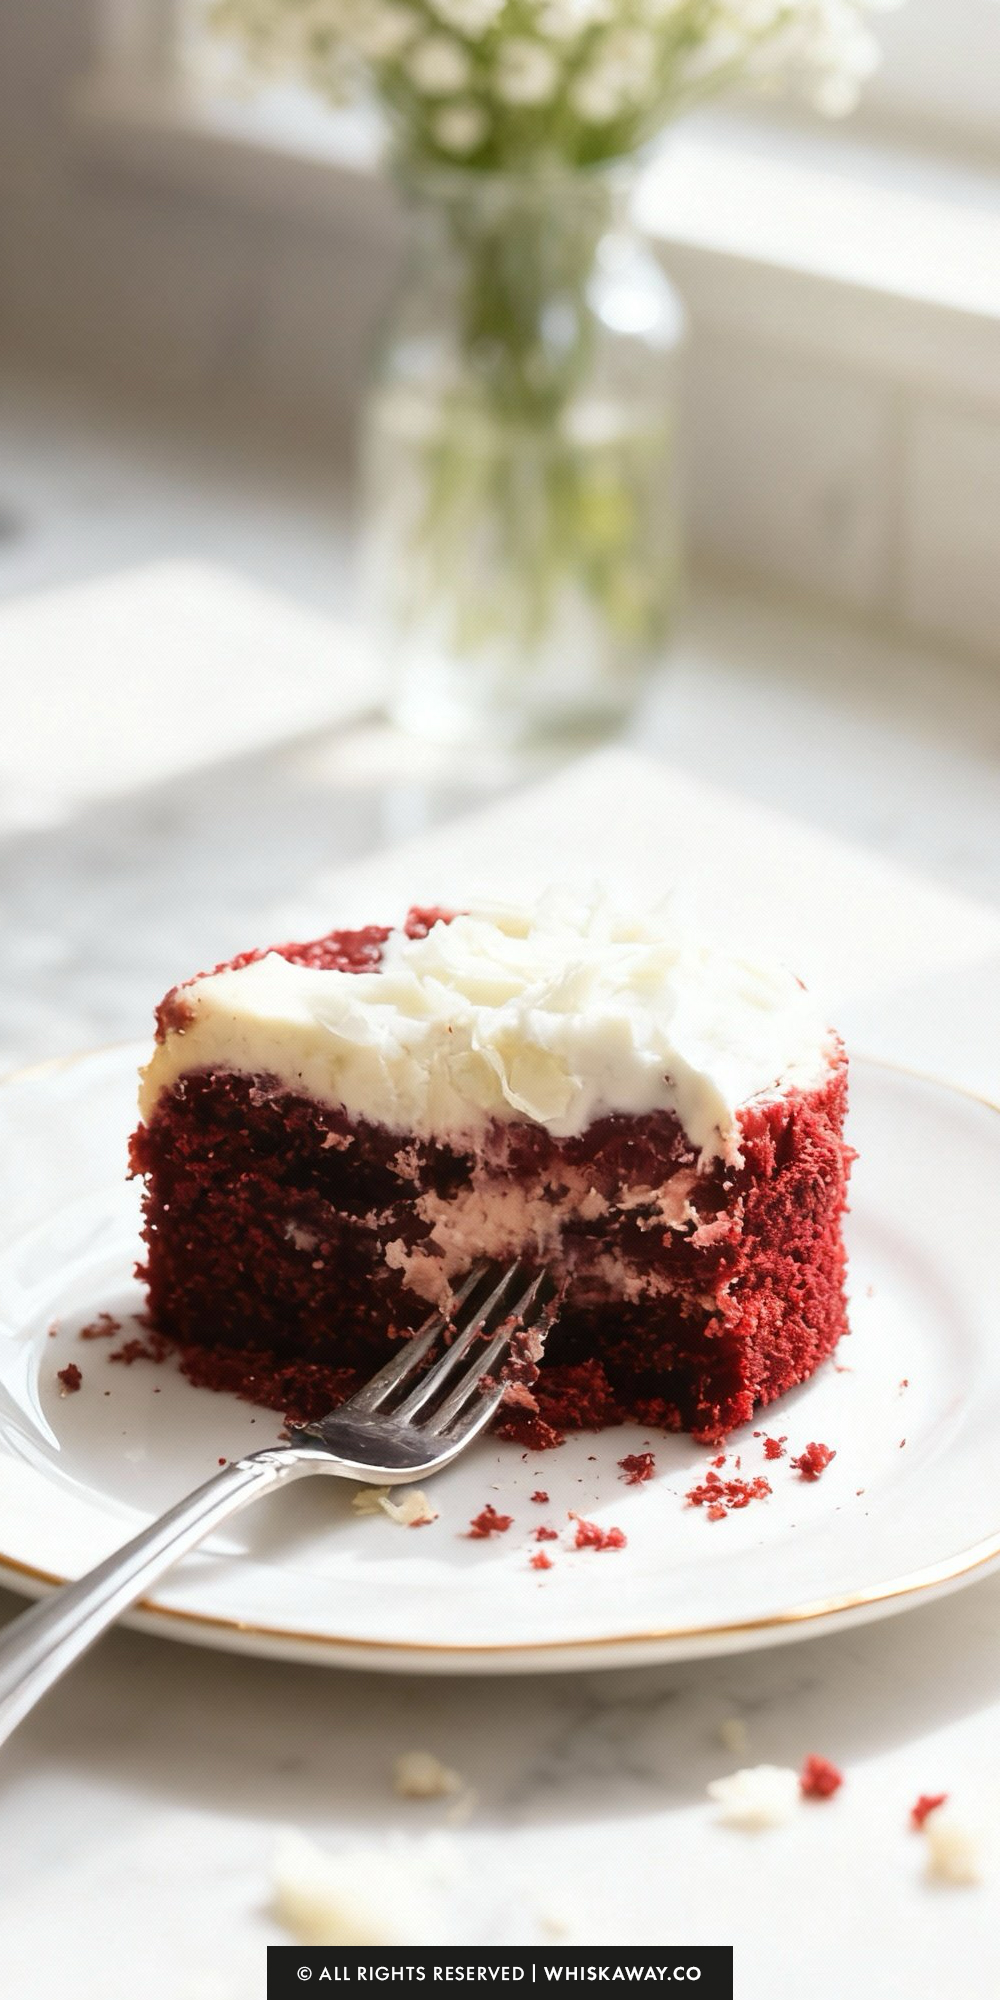
- Keep them stored in an airtight container in the fridge for up to 3 days. Serve cold, optionally topped with a dollop of whipped cream and white chocolate shavings.