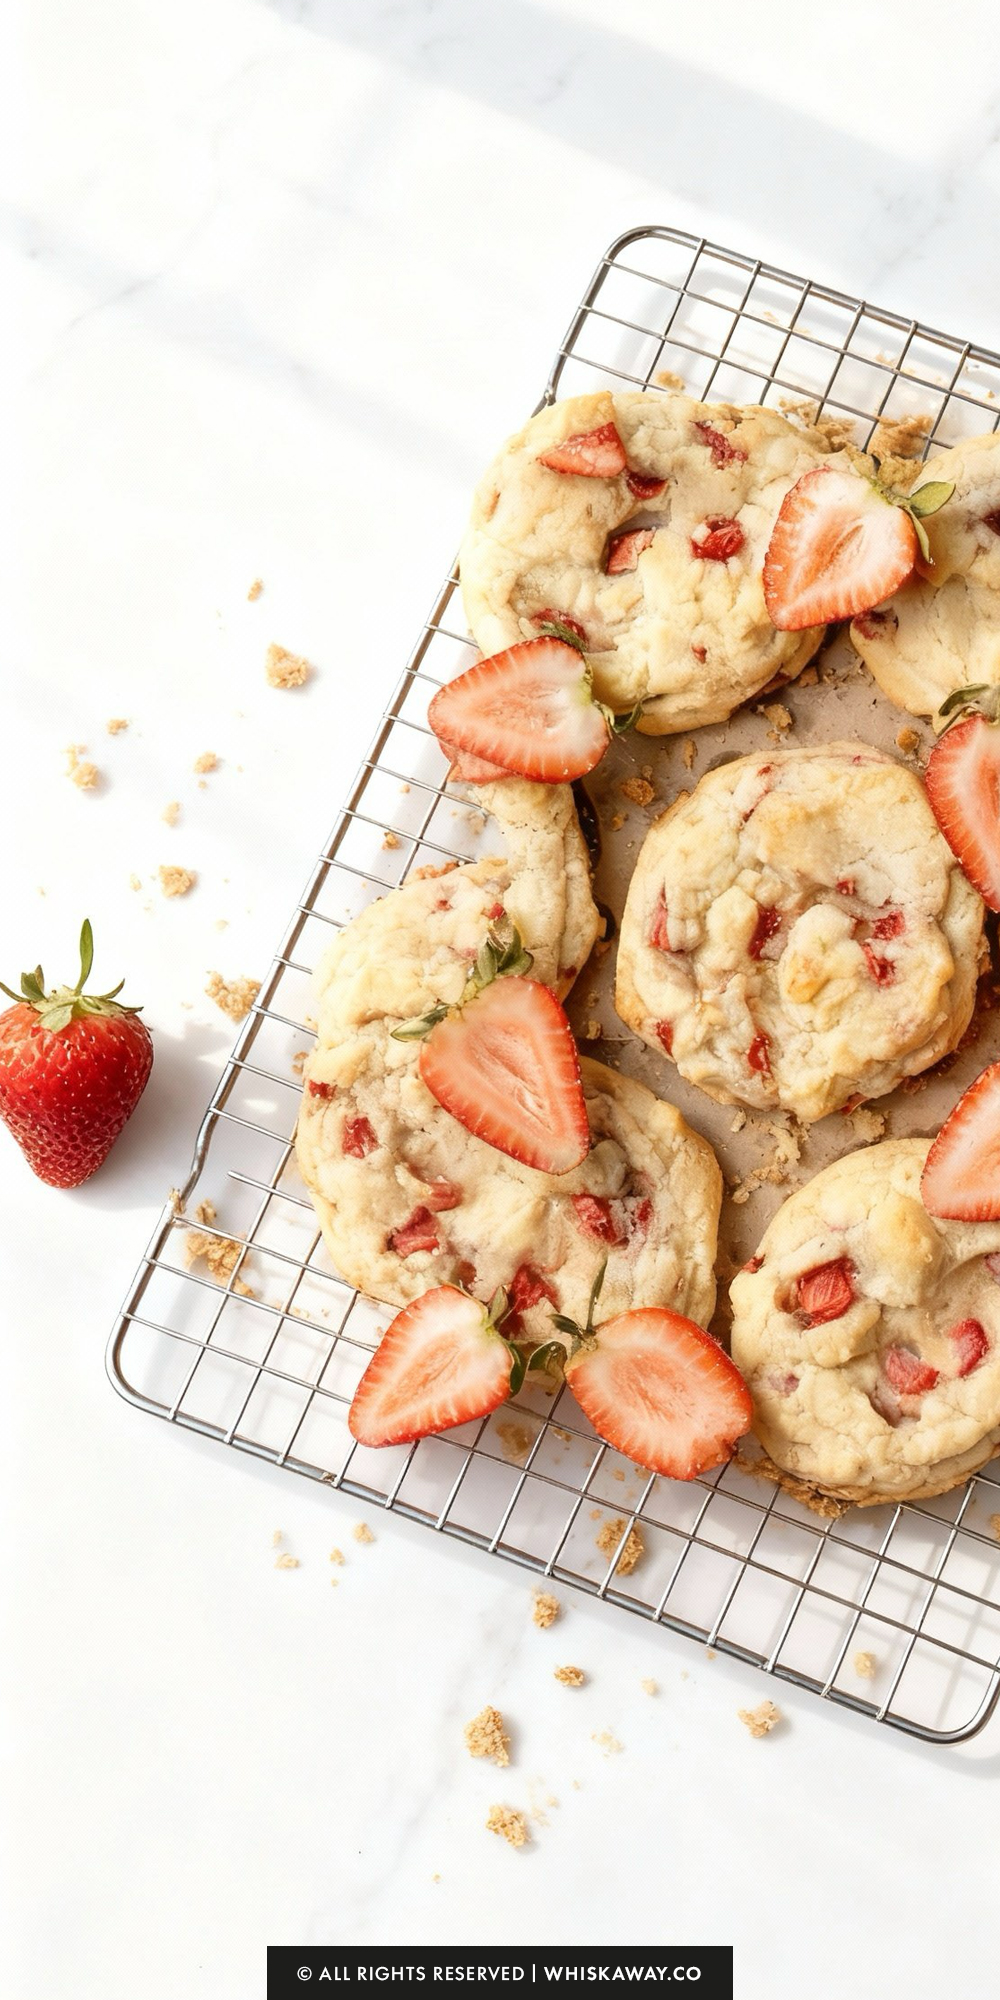
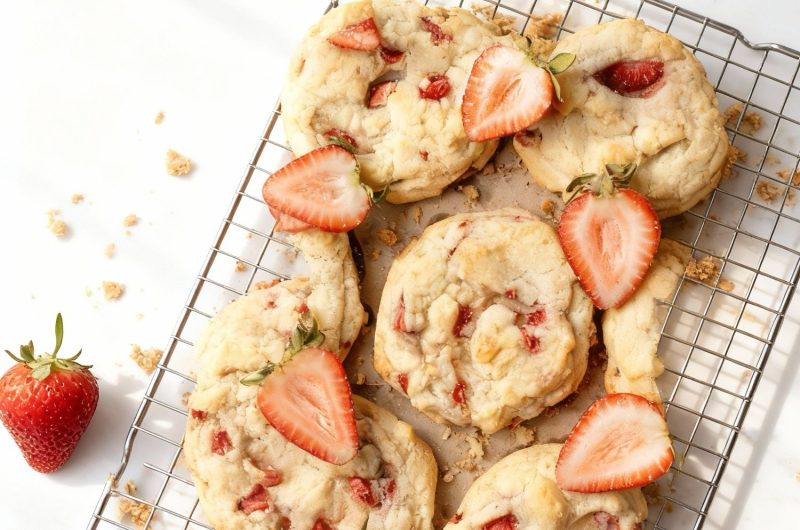
If you are looking for a dessert that achieves absolute legend status in just one bite, these Strawberry Cheesecake Cookies are about to become your new kitchen obsession.
The texture journey here is what really sets these apart. You start with that slightly chewy, fudgy edge that melts into the soft dough, followed by the bright, sweet burst of actual berries.
So, clear some space in your freezer for those cheesecake dollops and let’s get to work!
Happy Baking!
Why You’ll Love This Recipe
Strawberry cheesecake cookies combine soft cookie dough with creamy cheesecake pockets and sweet strawberry bursts.
They’re a portable, indulgent dessert that is both fun to make and satisfying to eat. The contrast between soft cookie and creamy filling makes each bite a delightful experience.
Key Reasons to Love Them:
- Soft, tender cookie dough that complements creamy cheesecake filling.
- Juicy strawberries enhance sweetness and visual appeal.
- Portable and perfect for gifting or snacking.
- Fun, hands-on baking experience suitable for beginners.
- Unique combination of textures and flavors in every bite.
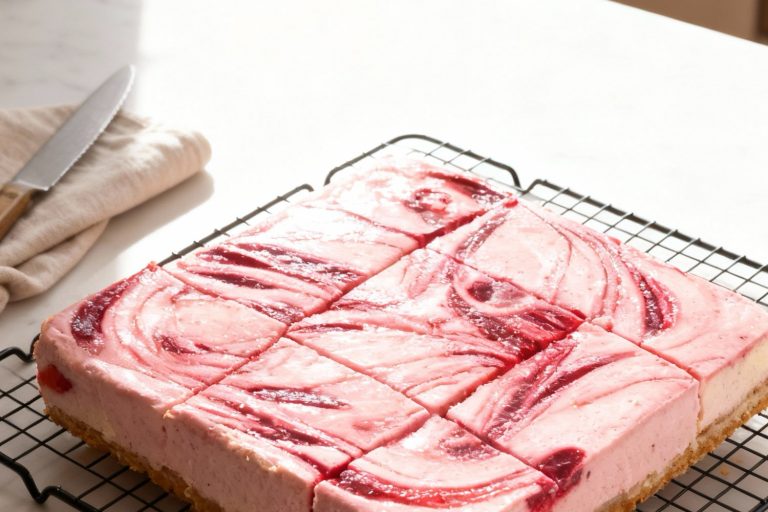
🔥 If cheesecake cookies are your favorite, you’ll also enjoy strawberry cheesecake bars, indulgent strawberry cheesecake truffles, or classic strawberry cheesecake.
How to Get Your Strawberry Cheesecake Cookies Just Right
These cookies are absolute showstoppers, but because you are dealing with fresh fruit and a creamy center, they can be a bit high-maintenance.
To ensure your kitchen doesn’t end up with a sticky mess, follow these expert-level pointers.
1. Moisture Management (The Strawberry Factor)
Fresh strawberries are delicious, but they are essentially little water balloons. Too much moisture will turn your dough into a gummy, unbakeable puddle.
After dicing your strawberries, spread them out on a paper towel and gently pat them dry. This removes excess juice from the surface before they hit the dough.
Never use the mixer for the berries. Fold them in by hand with a spatula until just distributed. If you overwork the dough, the berries will break, bleeding pink juice everywhere and ruining the texture.
2. The “Solid” Rule for Filling
The #1 mistake is trying to stuff the cookies with soft cream cheese.
Your cream cheese dollops must be frozen almost solid. If they are even slightly soft, you won’t be able to pick them up, and they will simply merge into the dough during the “stuffing” phase.
If your kitchen is warm, take out only 2 or 3 frozen centers at a time while you work.
3. The Double-Dough
Seal Since these are stuffed, the way you seal them determines whether the cheesecake stays inside or leaks onto the pan.
Don’t try to wrap one ball of dough around the filling. Instead, think of it like a sandwich.
- Place the frozen filling on one indented ball, then put a slightly flattened second ball on top.
- Pinch the edges together like you’re making a pie crust or a ravioli.
4. The Secret of the Extra Yolk
You’ll notice the recipe calls for one egg plus an extra egg yolk.
The extra yolk adds fat and lecithin without the extra water found in an egg white. This is what gives the cookie that rich, chewy, “fudgy” bite that contrasts so well with the creamy center.
5. Respect the Pre-Bake Chill
Because of the strawberries and the butter, this dough can get very soft very quickly.
Once the cookies are assembled, they must go back into the fridge while the oven preheats. This ensures the butter is cold when it hits the heat, preventing the cookies from spreading into flat “pancakes.”
You want them to be tall and thick!
6. The “Carry-Over” Bake
These cookies are huge and dense. If you wait for the center to look “done” in the oven, you’ve overbaked them.
Take them out when the edges are just barely golden but the center still looks a tiny bit soft or “under-set.” They will continue to cook on the hot baking sheet for 10–15 minutes after you pull them out.
This is the secret to that soft, bakery-style crumb.
Easy Baking Tips That Have Worked for Me
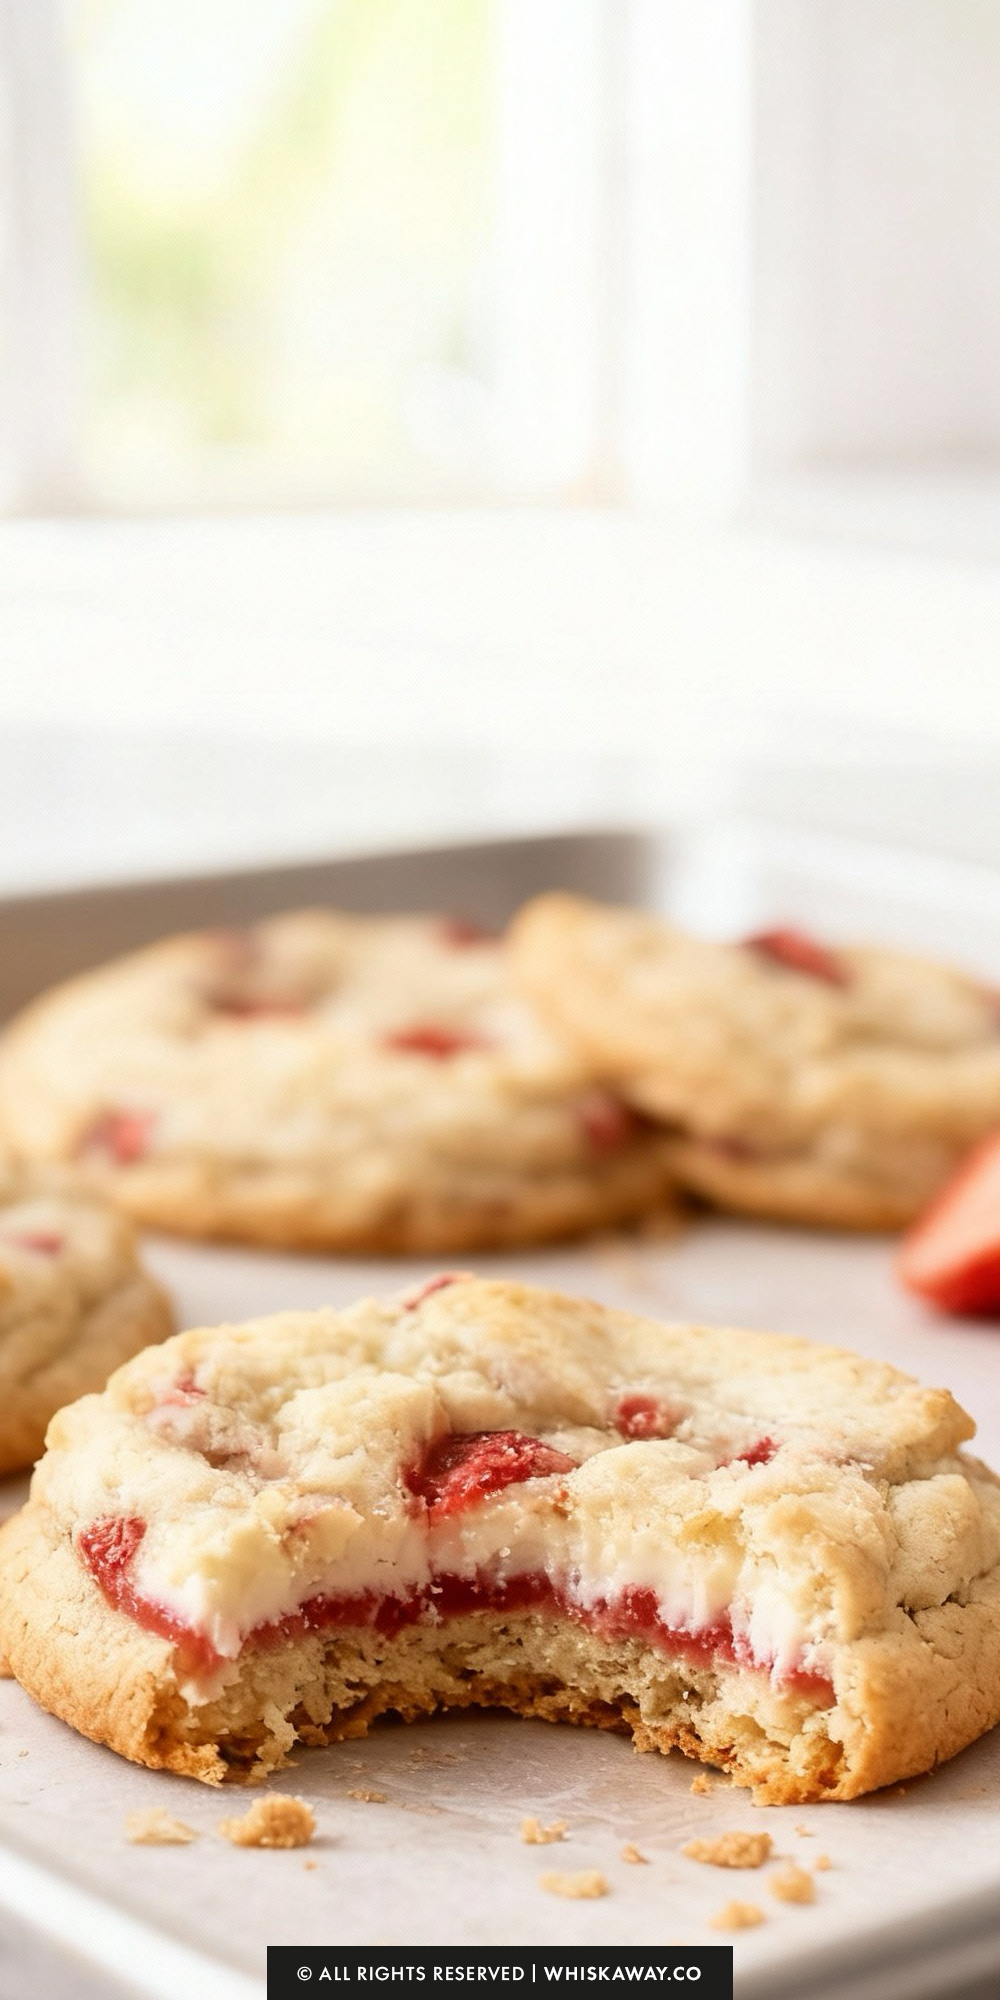
Mixing chunks of cheesecake and fresh strawberries into soft cookie dough creates a unique texture and flavor.
As they bake, the cookies puff slightly while the cheesecake melts and sets, forming pockets of creamy indulgence.
The fruity aroma from the strawberries fills the kitchen, enhancing anticipation. Once cooled, each cookie offers a perfect balance of soft dough and cheesecake richness.
These cookies are both playful and sophisticated, making them enjoyable to prepare and share.
Variation Tips
These Strawberry Cheesecake Cookies are essentially a blank canvas for your favorite dessert flavors.
Since the base is a sturdy, rich dough, you can swap the “accessories” while keeping the same stuffing technique. Here are some creative ways to mix things up.
1. The “True Cheesecake” Texture (Graham Cracker Crunch)
If you miss the traditional crunch of a cheesecake crust, you can bring that texture into the cookie.
Roll the finished balls of cookie dough in crushed graham cracker crumbs before placing them on the baking sheet.
This adds a toasted, honey-flavored crunch to the exterior that makes the “cheesecake” theme even more convincing.
2. White Chocolate Strawberry
This is a classic bakery combination that feels extra indulgent.
The Addition: strawberries.
Be sure to use high-quality white chocolate (containing cocoa butter) so it melts smoothly and doesn’t get “grainy” against the moisture of the berries.
3. Mixed Berry or Raspberry Swap
Replace the strawberries with an equal amount of fresh raspberries or blueberries.
Raspberries are even more fragile than strawberries. If using them, break them into halves or thirds rather than dicing them, and be extremely gentle during the folding process to avoid turning your dough bright purple!
4. Lemon-Zest Brightness
Add the zest of one large lemon to the butter and sugar while creaming.
Add 1 teaspoon of lemon juice to the cream cheese filling. This “Strawberry Lemonade” version is incredibly refreshing and cuts through the richness of the butter and cheese.
5. The “Reverse” Chocolate Cheesecake
Replace ¼ cup of the flour with ¼ cup of high-quality Dutch-process cocoa powder.
You get a deep, dark chocolate cookie with a bright strawberry and white cream cheese center. It’s basically a chocolate-covered strawberry in cookie form.
6. Dietary Adjustments
This recipe works beautifully with a 1-to-1 Gluten-Free Flour Blend (make sure it contains xanthan gum). Because these cookies are naturally dense and chewy, the texture remains very close to the original.
Vegan Options:
- Butter: Use vegan butter sticks (the kind meant for baking, not the tub variety).
- Cream Cheese: Ensure your vegan cream cheese is cold and well-blotted with a paper towel, as some plant-based brands have a higher water content.
- Egg: Replace the egg and yolk with a flax egg (1 tbsp ground flax + 3 tbsp water) or a commercial egg replacer. Note that they may spread a bit more, so chilling the dough is extra important.
- Reduced Sugar: You can swap the white sugar for an erythritol-based sweetener, but keep the brown sugar (or a brown sugar substitute) to maintain that essential chewiness.
Save for Later to Your Pinterest Board

How to Properly Store Your Strawberry Cheesecake Cookies
Because these Strawberry Cheesecake Cookies contain both fresh fruit and a creamy dairy center, they are a bit more delicate than your average chocolate chip cookie.
To prevent the strawberries from making the dough soggy and to keep the cheesecake filling fresh, you’ll want to follow these specific storage rules.
1. Room Temperature (Short-Term Only)
The Duration: 2 hours maximum.
Due to the fresh strawberries and the cream cheese filling, these cookies shouldn’t sit out on the counter all day.
If you’re serving them at a party, they are totally fine for a few hours, but any longer and you risk the fruit fermenting or the dairy spoiling.
2. Refrigeration (The Sweet Spot)
The Duration: 3 to 5 days.
Store the cookies in a single layer inside an airtight container. If you have to stack them, place a piece of parchment paper between the layers.
Pro Tip: Fresh strawberries release moisture over time. To combat “soggy cookie syndrome,” place a folded paper towel at the bottom of the container to absorb any excess humidity.
3. Freezing (Best for Long-Term Cravings)
The Duration: Up to 2 months.
These cookies freeze like a dream! Place them on a tray to “flash freeze” for an hour until the centers are hard, then transfer them to a heavy-duty freezer bag.
Thaw a cookie in the fridge overnight or on the counter for about 30 minutes.
4. Reheating and Refreshing
If you like that “fresh out of the oven” feel, you can warm these up, but be careful!
The Oven Method: Place chilled cookies in a 300°F (150°C) oven for 4–5 minutes. This crisps the edges without melting the cheesecake center into a puddle.
The Microwave: Avoid it! Even 10 seconds in the microwave can make the strawberries mushy and cause the cream cheese to explode out of the sides.
5. Storage Mistakes to Avoid
The Warm Trap: Never put these cookies into a container while they are still warm. The steam will get trapped, the strawberries will weep, and you’ll end up with a sticky, gummy mess.
Because of the high fat content in the cream cheese and butter, these cookies will absorb “fridge smells” very quickly. Always ensure your container has a tight, silicone-sealed lid.
If you see moisture beads on the cookies after a few days in the fridge, it’s just the strawberries doing their thing. They are still safe to eat, but they may be softer than they were on day one!
FAQs
Can I use frozen strawberries instead of fresh ones?
While you can, it’s definitely a “hard mode” substitution. Frozen berries release significantly more moisture as they thaw, which can turn your dough purple and gummy. If you must use them, thaw them completely, dice them, and pat them extremely dry with multiple paper towels before gently folding them in. For the best results and that classic “bakery” look, fresh, firm strawberries are always the winner.
Why did my cheesecake filling leak out while baking?
This usually happens for one of two reasons: either the cream cheese wasn’t frozen solid enough before you stuffed it, or the “dough sandwich” wasn’t sealed properly. To prevent a breakout, ensure you are pinching the edges of the top and bottom dough balls firmly together. Think of it like a ravioli—you want a secure, thick seam all the way around the frozen center.
Why did my cookies spread into flat “pancakes” in the oven?
If your cookies lost their height, your dough was likely too warm. Between the moisture in the berries and the high butter content, this dough is very temperature-sensitive. Make sure you don’t skip the refrigeration step while your oven preheats. If you’ve been handling the dough for a long time (which warms the butter), give the cookies an extra 15 minutes in the fridge before sliding them into the oven.
Can I use whipped or “tub” cream cheese for the filling?
I highly recommend sticking with full-fat brick cream cheese. Tub and whipped versions contain more air and water, which means they won’t hold their shape in the oven and are much harder to freeze into solid dollops. The brick style provides that dense, authentic cheesecake texture that stays put inside the cookie.
Do these need to be served cold or at room temperature?
Because of the cheesecake center, these are actually incredible when slightly chilled. The cream cheese center stays firm and the berries taste fresh. However, if you prefer a softer, more “fudgy” cookie, let them sit at room temperature for about 20 minutes before serving. Just remember to pop any leftovers back in the fridge after two hours!
Strawberry Cheesecake Cookies
12
servings15
minutes15
minutes15
minutesSoft strawberry cheesecake cookies with creamy flavor and bursts of strawberry in every bite.
Ingredients
- For the Cookies
2¾ cups (343 g) all-purpose flour
1 cup (210 g) butter (regular or vegan), softened
¾ cup (150 g) white sugar
½–⅔ cup fresh strawberries, diced small
¼ cup (50 g) brown sugar
1 egg
1 egg yolk
1 tsp vanilla extract
1 tsp baking soda
¼ tsp salt
- For the Cream Cheese Filling
¾ cup (170 g) cream cheese, softened (6 oz)
⅓ cup (40 g) powdered sugar
Directions
- Start by lining a small tray or plate with parchment paper. In a small bowl, beat the softened cream cheese and powdered sugar together until the mixture is silky and completely combined. Spoon out 10 to 12 generous teaspoon-sized dollops onto your prepared tray. Slide this into the freezer for at least one hour; they need to be nearly solid before you can stuff them into the dough.
- Once your filling is almost ready, preheat your oven to 350°F (175°C) and line two large baking sheets with parchment paper. In a medium bowl, whisk together the flour, baking soda, and salt until well blended. Set this aside.
- In the bowl of a stand mixer (or using a handheld mixer), cream the softened butter with the white and brown sugars. Beat on medium-high for 1 to 2 minutes until the mixture looks pale and airy. Mix in the whole egg, the extra egg yolk, and the vanilla extract until smooth.
- Turn your mixer to low and gradually add the flour mixture. Mix only until the dry ingredients are just incorporated—over-mixing at this stage will lead to a tough cookie.
- Gently fold in your finely diced strawberries using a spatula. Use a light hand here; you want to distribute the fruit without crushing the berries, which can cause the juice to bleed and turn the dough soggy.
- Scoop out 12 large balls of dough (about 2 tablespoons each) onto each baking sheet. These are meant to be substantial cookies! Use the back of a teaspoon to press a small "nest" or indentation into the center of half of the dough balls.
- Retrieve your frozen cream cheese dollops from the freezer. Place one frozen center into each of the indented dough balls. Take a second ball of dough and flatten it slightly with your palms, then place it over the cream cheese. Carefully pinch the edges of the two dough pieces together to seal the cheesecake filling inside. Try not to press down too hard on the cream cheese itself. If the dough gets sticky from the strawberries, just keep going—it's part of the process! Wash and dry your hands between cookies if they get too messy.
- Place the stuffed dough balls in the refrigerator to stay cold while the oven finishes preheating. Bake one sheet at a time for 13 to 17 minutes. You’re looking for the edges to turn a light golden brown and the tops to look set.
- Let the cookies rest on the hot baking sheet for 10 to 15 minutes to firm up. Finally, move them to a wire rack to cool completely before serving.